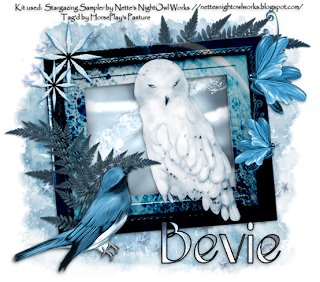
Clicking on the image will allow you to enlarge for bigger view.
Supplies
Font of Choice - I used Epittazio here
Becky Mask 22 here
DSB Flux - Bright Noise
Greg’s Factory Output Vol. II - Pool Shadow
This tutorial was created with Nette’s NightOwl Works’ Sampler portion of the Stargazing collaboration kit. This kit is available for FREE with an $8 purchase at the store, or it may be purchased outright for the same price.
It is available EXCLUSIVELY at Stargazer Scraps. You can visit her blog here.
This tutorial was written assuming you have a working knowledge of PSP.
~♥~ Let’s get started ~♥~
Open up a 700 x 700 blank canvas.
Flood fill white.
Copy and paste Frame 2 as a new layer.
Resize 80%
Free rotate left 5 degrees
Click inside of it with your Magic Wand.
Selections/Modify/Expand by 4.
New Raster layer below the frame.
Copy and paste Paper 18 Into Selection.
Deselect.
Add your embellishments. I used:
Snow Owl: Resize 50%
Blue Birdie: Resize 30%/Mirror
Butterfly 2: Resize 25%/Duplciate/Resize 70%/Mirror
Fern: Resize 30%/Duplicate/Mirror
Fern again (to place behind the frame): Resize 70%
Brilliant Star: Resize 25%/Duplicate/Resize 70%
Star Bling 2: Resize 65%
Highlight your white background.
New Raster layer.
Select All.
Copy and paste Paper 11 Into Selection.
Deselect.
Apply the mask.
Merge Group.
Add your credit.
Add your name.
Foreground: Black
Background: Pattern/Paper 18
Stroke: 2
Type your name.
Convert to Raster layer.
Select All/Float/Defloat
Selections/Modify/Contract by 2.
OK
Apply Greg’s Factory Output Vol. II - Pool Shadow:
Default Settings
Apply DSB Flux - Bright Noise:
Intensity: 32
Mix checked
OK
Deselect.
Resize all layers 80%
I hope you enjoyed this tutorial.
I’d love to see your results and show it off in my gallery.
Email me!
Hugs,
Bev

No comments:
Post a Comment