Supplies
1 tube of choice – I used the artwork of Keith Garvey which can now be
purchased here. You must have a license to use.
Font of choice – I used Inspiration
here
Country Bug Valentine Templates - Template 5 here
Plug Ins Used:
Greg’s Factory Output Vol. II – Pool Shadow
“Romantic Delirium” is a tagger size scrap kit created by Cindy of Cindy’s
Creative Designs and can be purchased from
ButterflyBlush. You can visit her blog here.
Thank you for a beautiful kit, Cindy.
~♥~ Let’s get started ~♥~
Open up the template.
Shift + D.
Close out the original.
Delete the top 4 layers and Splat 1 layer.
Color Pallet:
Foreground: #930409
Highlight Splat 2 layer.
Make your Target Tool active and change the template layer to your
foreground color.
Adjust/Add Remove Noise/Add noise:
Uniform and Monochrome checked
Noise: 52%
OK
Highlight Splat 3 layer.
Repeat the above step.
Highlight Gray Circle layer.
Click anywhere outside of it with your Magic Wand.
Selections/Invert
New Raster layer.
Copy and paste Paper 13 Into Selection.
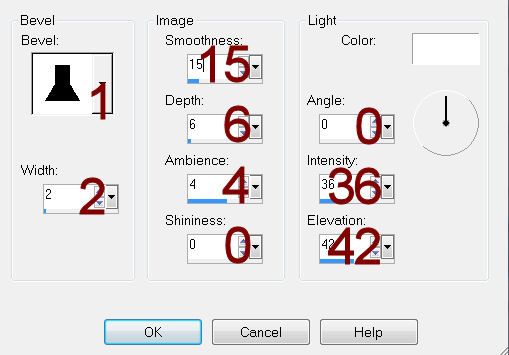
Apply Greg’s Factory Output Vol. II – Pool Shadow:
Use Default settings accept lower the Intensity Bar to 69.
Deselect.
Delete the template layer.
Highlight Gray Circle Frame layer.
Adjust/Add Remove Noise/Add Noise:
Use same settings.
Highlight Side Rectangle Back layer.
Click anywhere outside of it with your Magic Wand.
Copy and paste Paper 6 as a new layer.
Move into a position you like.
Tap the delete key.
Deselect.
Copy and paste Piano Keys as a new layer.
Resize 50%
Mirror
Move into position just over the paper – see my tag for reference.
Highlight the paper layer.
Click anywhere outside of it with your Magic Wand.
Highlight the Piano Keys layer.
Tap the delete key.
Deselect.
Delete the template layer.
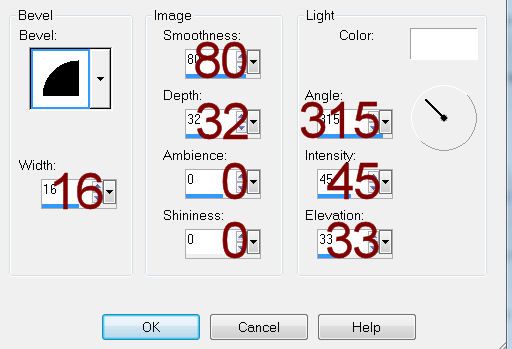
Highlight Side Frame layer - We’re going to round the corner of the
frame just a little.
Click anywhere outside of it with your Magic Wand.
Selections/Modify/Smooth
Smoothing Amount: 25
Anti Alias checked
Ok
Tap the delete key 3x’s.
Deselect.
Apply the same Noise effect.
Repeat the above step with:
Long Rectangle Frame layer
Small Square Frame layer.
Highlight Long Rectangle Back layer.
Click on it with your Magic Wand.
New Raster layer.
Copy and paste Paper 1 Into Selection.
Copy and paste your tube as a new layer.
Selections/Invert
Tap the delete key.
Deselect.
Delete the template layer.
Highlight Small Square layer.
Click on it with your Magic Wand.
New Raster layer.
Copy and paste Paper 1 Into Selection.
Copy and paste your tube as a new layer.
Move into a position you like.
Selections/Invert
Tap the delete key.
Deselect.
Delete the template layer.
Change the Properties of the tube layer to Burn.
Duplicate/Change the Properties to Hard Light and Lower the Opacity to
about 71.
Add your elements. I used:
Heart 4: Resize 20%/Duplicate 2x’s
Cupcake 1: Resize 40%
Lipstick 1: Resize 40%
Stars 1: Resize 30% - You can
erase whatever stars you don’t want
Word Art 1: Resize 35%
Highlight your white background.
New Raster layer.
Select All.
Copy and paste Paper 7 Into Selection.
Deselect.
Apply the mask.
Merge Group.
Resize 80%
Move so that it’s centered behind the circle layer.
Add your credits.
Color Pallet:
Foreground: #930409
Background: #000000
Stroke: 1
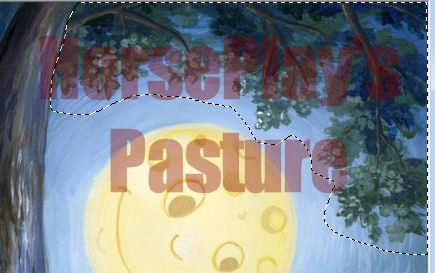
Type your name.
Convert to Raster layer.
Effects/Edge Effects/Enhance More
Resize all layers if you like.