Saturday, January 2, 2010

Make a Wish

Clicking on the image will enlarge to full view.

Supplies
2 tubes of choice - I used the beautiful artwork of Zindy S.D. Nielsen which you can purchase here.
Font of choice - I used Daly Hand (I’m sorry I couldn’t find a link) and Pavane here
Weescotlass mask 4 here
“Snowy Day” is a FTU tagger size scrap kit created by Krissy’s Scraps and can be found on her blog here. Please leave a simple thank you when downloading. It’s a small gesture for hard work given freely.
Thank you Krissy for sharing such a beautiful kit! Your talent is amazing!
This tutorial was written assuming you have a working knowledge of PSP.

~♥~ Let’s get started ~♥~

Open up a 700 X 700 blank canvas.
Flood fill white.

Copy and Paste Frame 1 as a new layer.
Resize 40%
Duplicate and close it out.
Highlight the Original.
Click inside with your Magic Wand.
Selections/Modify/Expand by 6.
New Raster layer below the frame.
Copy and paste a paper of choice Into Selection.
Duplicate and close the duplicated layer out.
DO NOT DESELECT

Copy and paste a tube below the frame.
Resize as needed.
Selections/Invert
Tap the delete key.
Deselect.

Close out your white background.
Merge Visible.
Close the merged layer.
Reopen the duplicated frame layer, paper layer, and background layer.
Use your Magic Wand and click inside the frame.
Selections/Modify/Expand by 6.
Copy and paste your other tube below the frame.
Resize as needed.
Selections/Invert
Tap the delete key.
Deselect.

Close out your white background and Merge Visible.
Reopen all your layers now.
You should have your white background layer and 2 merged layers.
Highlight one of the merged layers.
Free rotate left 5 degrees.
Highlight the other merged layer.
Free rotate right 5 degrees.
Move each into position.
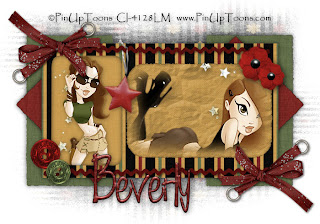
See my tag for reference.

Add your embellishments. I used:
Patterned Bow 1: Resize 50%
Blossom Branch 2: Resize 70%
Winter Scene
Covered Sign 1: Resize 60%
Hummingbirds 1 & 2: Resize each 30%

Use the Daly Hand font (or one of your choice) and
Write on each of the of wood slats of the covered sign.
“Make a Wish”
See my tag for reference.

Add your copyrights.

Add your name.
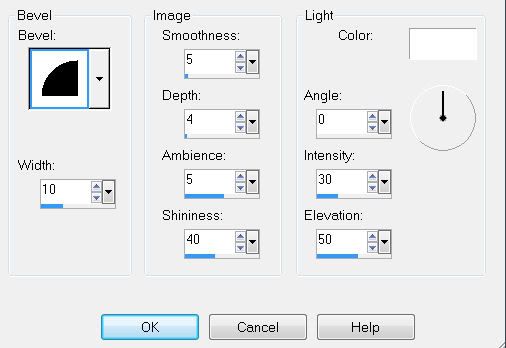
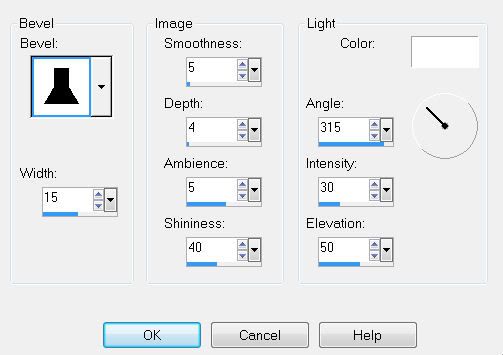
Give it a slight inner bevel:


Apply some noise to your name:
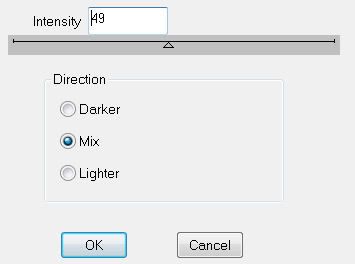
Adjust/Add Remove Noise/Add Noise
Gaussian & Monochrome checked
Noise 22%
OK

Resize all layers 80%.

I hope you enjoyed this tutorial.
I’d love to see your results.
Email me!
Hugs,
Bev

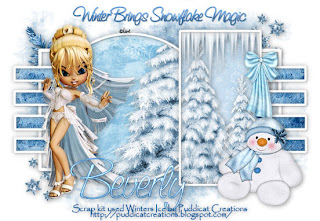
Snowflake Magic

Clicking on the image will enlarge to full view.

Supplies
Font of choice - I used Saginaw here
Weescotlass Mask 297 here
Scrapity Scrap and More Template #6 here
“Winters Ice” is a PTU tagger size scrap kit created by Cindy of Puddicat Creations and can be purchased at Kreative Kreations Korner. You can visit her blog here.
Thank you Cindy for a beautiful kit!

This tutorial was written assuming you have a working knowledge of PSP.

~♥~ Let’s get started ~♥~

Open up the template.
Delete the credit layer.
Image/Canvas Size
650 X 450
OK
Flood fill Raster 1 white.

Highlight Raster 2 Layer.
Select All/Float/Defloat
New Raster Layer.
Copy and paste a paper of choice Into Selection.
Deselect.
Delete the template layer.

Copy and paste Icicles 2 as a new layer below Raster 3 layer.
Resize 35%
Position in the upper left corner.
Duplicate and move to the upper right corner.

Highlight Raster 4 layer.
Select All/Float/Defloat
Copy and paste a paper of choice as a new layer.
Resize 90%
Selections/Invert
Tap the delete key.
Deselect.
Delete the template layer.

Highlight Raster 6 Layer.
Select All/Float/Defloat
New Rater layer.
Copy and paste a paper of choice Into Selection.
DO NOT DESELECT

Copy and paste Winter 1 as a new layer below Copy of Vector 1 layer.
Resize 70%
Position at the right side of the circle.
See my tag for reference.
Selections/Invert
Tap the delete key.
Deselect.
Delete the template layer.

Highlight Raster 7 layer.
Select All/Float/Defloat
Copy and paste a paper of choice Into Selection.
DO NOT DESELECT.

Copy and paste Winter 2 as a new layer.
Resize 50%
Duplicate/Resize 80%
Position both trees within the rectangle.
See my tag for reference.
Merge Down.
Selections/Invert
Tap the delete key.
DO NOT DESELECT

Copy and paste Icicles 1 as a new layer above the merge tree layer.
Resize 25%
Position at the top of the rectangle
Selections/Invert
Tap the delete key.
Deselect.
Delete the template layer.

Add your embellishments. I used:
Winter Ice Cookie 1: Resize 70%
Snowman 2: Resize 40%. Mirror
Bow Ribbon 5: Resize 25%
Element 1: Resize 30%. Free rotate left 30 degrees
Bling Glitters 2: Resize 70%. Duplicate/Mirror/Flip

Type out the words:
“Winter Brings Snowflake Magic”
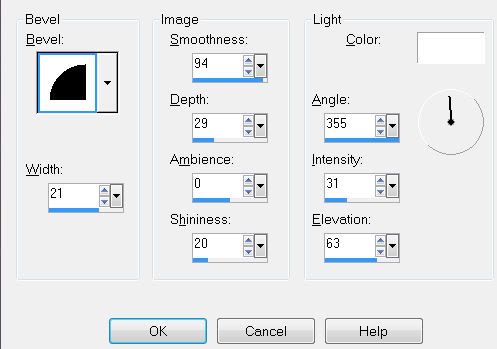
Give it a slight inner bevel:


Position the words at the top center of your tag.

Highlight your white background.
New Raster layer.
Select All.
Copy and paste a paper of choice Into Selection.
Deselect.
Apply the mask.
Merge Group.

Add your copyrights.

Add your name.
Give it the same inner bevel.

Resize all layers 85%.

I hope you enjoyed this tutorial.
I’d love to see your results.
Email me!
Hugs,
Bev

Friday, January 1, 2010

Rock -N- Roll

Clicking on the image will enlarge to full view.

Supplies
1 tube of choice - I used the fabulous artwork of Ted Hammond at CILM
Font of choice - I used Ferro Rosso here
Weescotlass Mask 297 here
Scrapity Scrap and More Template #22 here
DSB Flux - Bright Noise
Gregs Factory Output Vol. II - Pool Shadow
“Rock -N- Roll” is a PTU tagger size scrap kit created by Leaonna of Busy Scrappin’and can be purchased at Creative Scraps. You can visit her blog here.
Thank you Leaonna for a rockin’ kit!

This tutorial was written assuming you have a working knowledge of PSP.

~♥~ Let’s get started ~♥~

Open up the template.
Delete the credit layer.
Image/Canvas Size
650 X 550
OK
Highlight Bottom Thin Slats Layer.
Merge Down.
Now the Bottom and Top Slats should be on the same layer.
Select All/Float/Defloat
New Raster Layer.
Flood fill with a gradient of choice.
Deselect.
Delete the template layer.
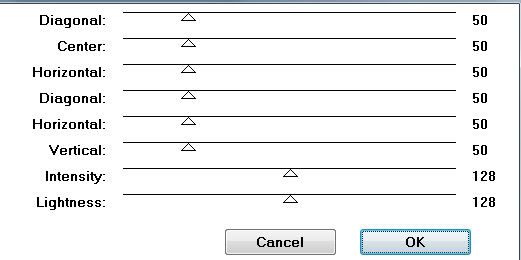
Apply DSB Flux - Bright Noise:


Highlight Circle layer.
Select All/Float/Defloat
New Raster Layer.
Copy and paste a paper of choice Into Selection.
(I used Paper 15)
Deselect.
Delete the template layer.

Highlight Circle Border Layer.
Select All/Float/Defloat
New Rater layer.
Copy and paste a paper of choice Into Selection.
Deselect.
Delete the template layer.

Repeat the above step with the following layers:
Border Middle Square
Border Bottom Square
Border Top Square.

Highlight Top Square layer.
Select All/Float/Defloat
Copy and paste a paper of choice as a new layer.
(I used Paper 15 again)
Move the paper around until you find a part you’d like in the square.
Selections/Invert
Tap the delete key.
Deselect.
Delete the template layer.

Repeat the above step with Middle Square and Bottom Square layers, but move the paper around so that you get a different area in each square.

Copy and paste your tube as a new layer.

Copy and paste Barbwire Border as a new layer.
Free rotate right 80 degrees
Position it under the frame of the bottom square.
Duplicate/Mirror
Position the duplicate in the same manner.
Merge Down.
Erase any that overhangs the frame.
Duplicate/Mirror
Position below the frame of the middle square.

Add your embellishments. I used:
Rockin Butterfly 1: Free rotate right 30 degrees
Pick Black 2
Pick Black 3
Star 4: Duplicate and resize as you like
Bongo Drum: Resize 140%
Music Notes: Duplicate and resize as you like

Highlight your white background.
New Raster layer.
Select All.
Copy and paste a paper of choice Into Selection.
Deselect.
Apply the mask.
Merge Group.

Add your copyrights.
Add your name.
Colors of your choice, but make the stroke 2.
Once you’ve got your name on your tag change it to a Raster layer.
Select All/Float/Defloat
Selections/Modify/Contract by 2
Apply Greg’s Factory Output Vol. II - Pool Shadow:

DO NOT DESELECT
Give it a slight inner bevel.


Deselect.

Resize all layers 85%.

I hope you enjoyed this tutorial.
I’d love to see your results.
Email me!
Hugs,
Bev
A Star is Born


Clicking on the image will enlarge to full view.


Supplies
2 tubes of choice - I used the fabulous artwork of PinUpToons at CILM
Font of choice - I used Fabulous 50’s. I’m sorry I can no longer find a link for this font.
Weescotlass Mask 81 here
Babes Designz Template # 28 here
“A Cold Winter Night” is a PTU full size scrap kit created by Brenda of Cuddlebeez Scrapsand can be purchased at Butterfly Blush Designs.You can visit her blog here.
Thank you Brenda for an amazing kit!


This tutorial was written assuming you have a working knowledge of PSP.


~♥~ Let’s get started ~♥~


Open up the template.
Delete the credit layer, 3 layer, and the lines layer.
Image/Canvas Size
700 X 650
OK


Highlight 1 Layer.
Select All/Float/Defloat
New Raster Layer.
Copy and paste a paper of choice Into Selection.
Deselect.
Delete the template layer.

Highlight 2 layer.
Select All/Float/Defloat
New Raster Layer.
Copy and paste a paper of choice Into Selection
Deselect.
Delete the template layer.


Highlight Inner Frame Layer.
Select All/Float/Defloat
Copy and paste a paper of choice Into Selection.
Copy and paste your tube as a new layer - centered over the Inner Frame paper.
Selection/Invert
Tap the delete key.
Deselect.
Copy and paste Stars as a new layer.
Resize 25% and 40%.
Mirror
Move into position behind your tube.
Erase any that might hang outside of the frame.
Delete the Inner Frame template layer.

Highlight Frame layer.
Select All/Float/Defloat
New Raster layer.
Copy and paste a paper of choice Into Selection.
Deselect.
Delete the template layer.


Highlight 4 layer.
Select All/Float/Defloat
New Raster layer.
Copy and paste a paper of choice Into Selection.
Copy and paste your tube as a new layer. Centering it over the 4 Layer paper.
Selections/Modify/Feather
Number of Pixels:
53
OK
Selections/Invert
Tap your delete key until you have the feathered look you want.
Copy and paste Stars as a new layer behind your tube.
Resize 25% and 60%
Free rotate right 20 degrees.
Again, tap the delete key until you have a feathered look to the stars that you like.
Deselect.
Delete the template layer.


Add your embellishments. I used:
Eyelet Bow 2: Resize 25% and 75%. Duplicate/Mirror/Flip
Ric Rac 3: Resize 25% and 55%. Duplicate/Fip
Hanging Star: Resize 25% and 65%
Button 2: Resize 25% and 60%
Button 1: Resize 25% and 50%
Flower 1: Resize 25% and 40%. Duplicate/Resize 80%


Crop you image.


Highlight your white background.
New Raster layer.
Select All.
Copy and paste a paper of choice Into Selection.
Deselect.
Apply the mask.
Resize 110%
Merge Group.


Add your copyrights.


Add your name.
Give it a slight inner bevel:


Resize all layers 85%.


I hope you enjoyed this tutorial.

I’d love to see your results.

Email me!

Hugs,

Bev
Deep Sincerity

Clicking on the tag will enlarge to full view.

Supplies
1 tube of choice - I used the fabulous artwork of Michael Calandra at My PSP Tubes
Font of choice - I used Oh Lara. It’s a pay font and can be found here.
Weescotlass mask 249 here
Greg’s Factory Output Vol. II - Pool shadow
“Tulip Baroque” is a PTU LIMITED EDITION scrap kit created by Kat of KatNKDA and can be purchased at her store NKArt Shop. You can visit her site here.
Thank you Kat for another amazing kit. Your brilliant talent shines through as usual. I’m honored to have my first tutorial of the year created with one of your kits.

This tutorial was written assuming you have a working knowledge of PSP.

~♥~ Let’s get started ~♥~

Open up a 700 X 700 blank canvas.
Flood fill white.

Copy and Paste Frame 8 as a new layer.
Resize 40%
Free rotate right 45 degrees
Resize 90%
Use your Magic Wand and click inside of it.
New Raster layer below the frame.

Copy and paste Bg 04 Into Selection.
Deselect.
Using your Pick Tool, pull the all the sides out slightly so that there aren’t any gaps between the paper and frame.
Using your Eraser Tool, zoom in on your image and erase all the bits that are overhanging the frame.

Use your Warp Tool to give a slight push on the gray area to close the white gap between the gray and frame.
DO NOT DESELECT.

New Raster layer above Bg 04.
Flood fill with a gradient of choice.
Deselect.
Change the Properties to Overlay.

Copy and paste your tube as a new layer below the frame.

Copy and paste Bow 11 as a new layer.
Resize 25% and 90%

Copy and paste Emb 14 as a new layer.
Resize 25% and 70%

Copy and paste Vine 5 as a new layer.
Resize 60%

Highlight your white background.
New Raster layer.
Flood fill with a gradient of your choice.
Apply the mask.
Resize 110%
Merge Group.

Add your copyrights.
Make sure to include Kat’s credit on your tag also:
“art kit by KatNKDA”

Add your name.
Select All/Float/Defloat
Selections/Modify/Contract by 1
Apply Greg’s Factory Output Vol II - Pool Shadow:


DO NOT DESELECT.

Give it a slight inner bevel:

I hope you enjoyed this tutorial.
I’d love to see your results.
Email me!
Hugs,
Bev


Thursday, December 31, 2009

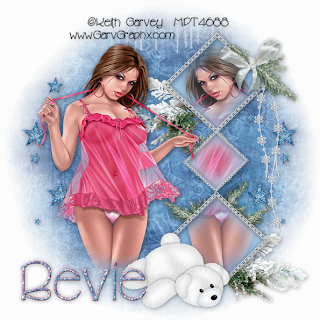
On a Chilly Winter's Night


Supplies
1 tube of choice - I used the awesome artwork of Keith Garvey at My PSP Tubes
Font of choice - I used Cricket here
Monti Circular Mask here
DSB Flux - Bright Noise
Animation Shop
“Blue Christmas” is a PTU tagger size scrap kit created by Lynne of Baby Cakes Scraps and can be purchased at Creative Scraps. You can visit her site here.
Thank you Lynne for a beautiful and wintery kit!

This tutorial was written assuming you have a working knowledge of PSP.


~♥~ Let’s get started ~♥~

Open up a 700 X 700 blank canvas.
Flood fill white.

Copy and Paste Diamond Frame as a new layer.
Resize 55%
Move into position at the right side of the canvas.
See mine for positioning.
Copy and Paste your tube as a new layer.
Move into position at the left side of your canvas.
Duplicate/Mirror.
Move the duplicate below the frame layer and center it within the diamonds.
Now close the duplicate tube layer out for now.
Highlight the Diamond Frame layer.
Use your Magic Wand and click inside of all the diamonds.
Selections/Modify/Expand by 4.
New Raster layer below the closed out duplicate tube.
Flood fill with a gradient of choice.
DO NOT DESELECT.

Open up the duplicate tube layer.
Selections/Modify/Feather
Number of Pixels:
53
OK
Selections/Invert
Tap the delete key until you have the feathered look you want.
Deselect.
Add your embellishments. I used:
Dnagle: Resize 30%
Branch 2: Resize 30%
Branch: Resize 25% and 80% Free rotate right 30 degrees
Bear: Resize 45%

Copy and paste Glitter Stars as a new layer.
Resize 40%
Move into position at the right side of your canvas.
Duplicate/Mirror
Move into position at the left side of your canvas.
Merge Down.
In your layers pallet move the stars layer just above your white canvas.
Duplicate 2 times for a total of 3 star layers.
Rename the layers:
Stars 1, Stars 2, Stars 3

Highlight your white background.
New Raster layer.
Select All.
Copy and paste a paper of choice Into Selection.
Deselect.
Apply the mask.
Merge Group.

Copy and paste Icicles as a new layer.
Duplicate and move it so that you have a long line of icicles across your canvas.
Merge Down.
Move them into position near the top of your circle.
(See mine for reference)
Apply the Mask.
Merge Group.
Add your copyrights.

Add your name.
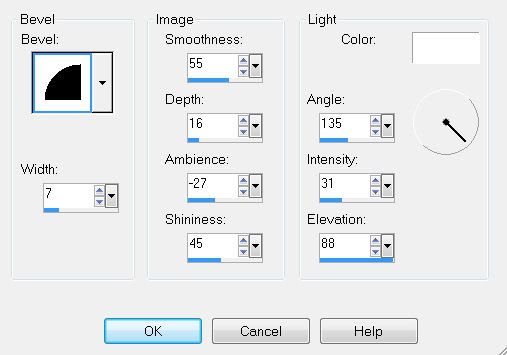
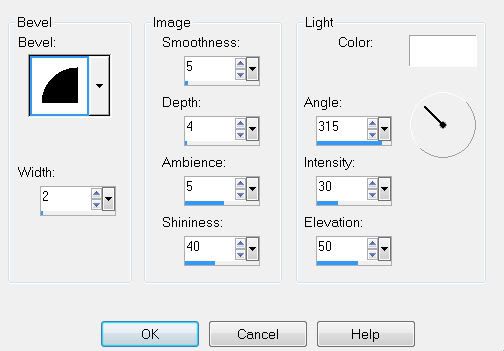
Give it a slight inner bevel:


Highlight Stars 1 layer.
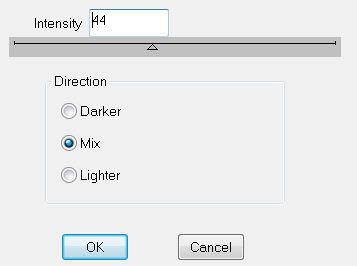
Apply the DSB Flux - Bright Noise:


Highlight Stars 2.
Apply the DSB Flux Bright Noise again accept click on the mix button twice.

Highlight Stars 3.
Apply the DSB Flux Bright Noise again accept click on the mix button 3 times.

Close out Stars 2 and Stars 3 layers.
Copy Merge

~Time to Animate~

Open up Animation Shop.
Copy/Paste/As New Animation.

Go back into PSP.
Close out Stars 1
Open up Stars 2
Copy Merge

Carry Into AS
Edit/Paste/After Current Frame.

Go back into PSP.
Close out Stars 2.
Open up Stars 3.
Copy Merge.

Carry into AS
Edit/Paste/After Current Frame.

View your animation. If you're happy with it then resize:
Animation/Resize Animation
Percentage of Original checked.
Width and Height 85%
OK

Now save your animation.

I hope you enjoyed this tutorial.
I’d love to see your results.
Email me!
Hugs,
Bev
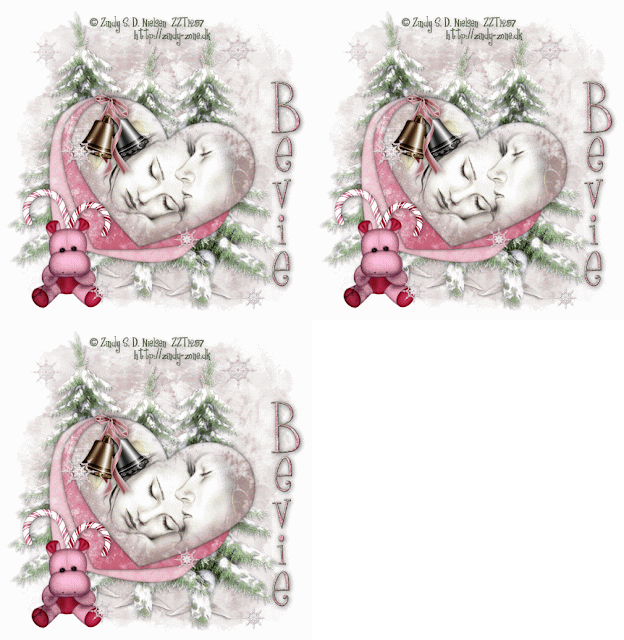
Winter Affair


Supplies
1 tube of choice - I used the beautiful artwork of Zindy S. D. Nielsen here
Font of choice - I used Curly Cue here
Becky Mask 22 here
DSB Flux - Bright Noise
Animation Shop
“Winter Love” is a PTU tagger size scrap kit created by Valerie of Baby V Dezign and can be purchased at TKO Scraps. You can visit her site here.
Thank you Valerie for such an amazing kit!

This tutorial was written assuming you have a working knowledge of PSP.

~♥~ Let’s get started ~♥~

Open up a 700 X 700 blank canvas.
Flood fill white.
Copy and Paste Heartele 1 as a new layer.
Resize 140%

Copy and Paste Heartele 2 as a new layer.
Resize 140%
Copy and Paste Heartele 3 as a new layer.
Resize 140%
Choose which heart you’d like your tube on.
I chose Heartele 2.
Highlighting each of the other heart layers, use your Pick tool and turn each of the hearts just a little to give a fan effect.
(Move the hearts slightly to the left side of your canvas)
Position the hearts so that all the holes line up exactly.

Highlight the heart you chose to have your tube on.
Select All/Float/Defloat
Copy and paste your tube as a new layer.
Move into position over the heart.
Selections/Modify/Feather
Number of Pixels:
53
OK
Selections/Invert
Tap the delete key until you have the feathered affect you want.
Deselect.
Merge Down.

Copy and paste Bells as a new layer.
Resize 70%
Use your Eraser tool and erase the ribbon that’s above the knot.
Move into position over the holes in the hearts.
Copy and paste Pine Tree as a new layer behind all the hearts.
Resize 120%.
Move to the left.
Duplicate/Mirror
Position at the right side
Duplicate/Resize 80%
Position in the middle of the two trees.
Copy and paste Candy Cane 3 as a new layer.
Resize 40%
Free rotate left 25 degrees.

Copy and paste Candy Cane 1 as a new layer.
Resize 40%
Mirror
Free rotate right 25 degrees.
Copy and paste Animal 2 as a new layer.
Resize 40%
Copy and paste snowflakes of your choice.
Resize as you like.

Highlight your white background.
New Raster layer.
Select All.
Copy and paste a paper of choice Into Selection.
Deselect.
Apply the mask.
Merge Group.
Add your copyrights.

Add your name.
Give it a slight inner bevel:

Duplicate it 2 times for a total of 3.
Rename them Name 1, Name 2, and Name 3.

Highlight Name 1.
Apply the DSB Flux-Bright Noise:

Highlight Name 2.
Apply the DSB Flux Bright Noise again accept click on the mix button twice.

Highlight Name 3.
Apply the DSB Flux Bright Noise again accept click on the mix button 3 times.

Close out Name 2 and Name 3 layers.
Copy Merge

~Time to Animate~
Open up Animation Shop.
Copy/Paste/As New Animation.

Go back into PSP.
Close out Name 1
Open up Name 2
Copy Merge

Carry Into AS
Edit/Paste/After Current Frame.

Go back into PSP.
Close out Name 2.
Open up Name 3.
Copy Merge.

Carry into AS
Edit/Paste/After Current Frame.

View your animation. If you like then resize:
Animation/Resize Animation
Percentage of Original checked.
Width and Height 85%
OK
Now save your animation.

I hope you enjoyed this tutorial.
I’d love to see your results.
Email me!
Hugs,
Bev
 

Sunday, December 27, 2009

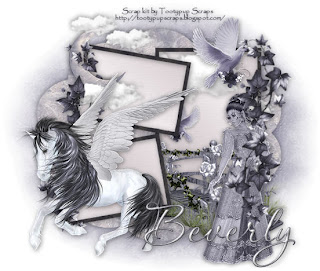
Mystical Dreams


Clicking on the image will enlarge to full view.

Supplies
Font of choice - I used Aquarelle here
Monit Circle Mask here
Essence of Creativity Template # 7 here
“Mystical Dreams” is a PTU tagger size scrap kit created by Susan of Tootypup Scraps and can be purchased at Aussie Scraps Designs. You can visit her blog here.
Thank you Susan for such an amazing kit!


This tutorial was written assuming you have a working knowledge of PSP.


~♥~ Let’s get started ~♥~


Open up the template.
Delete the credit layer.


Highlight Shape Layer.
Select All/Float/Defloat
New Raster Layer.
Copy and paste a paper of choice Into Selection.
Deselect.
Delete the template layer.
Highlight Large Frame layer.
Select All/Float/Defloat
New Raster Layer.
Copy and paste a dark colored paper Into Selection
Selection/Modify/Contract
Number of Pixels: 8
OK
Tap the delete key
Selections/Modify/Expand
Number of Pixels: 2
OK
New Raster layer below the new frame you just made.
Flood fill with a gradient of your choice.
Deselect.
Delete the template layer.

Highlight Small Frames Layer.
Repeat the above step.


Add your embellishments. I used:
Ivy 2: Free rotate left 25 degrees. Move into position over the frames on the left side of your canvas.
Ivy 2 again: Free rotate left 30 degrees. Move into position at the right side of your canvas.
Clouds Moon 1: Resize 30% and 90%. Mirror.
Cloud 1: Resize 25%
Dove 1: Resize 40%. Duplicate as many times as you like and resize to your liking.
Bridge 2: Resize 50%. Mirror.Winged Horse 1: Resize 50%. Mirror.
Poser 1: Resize 50% and 85%. Mirror.

Highlight your white background.
New Raster layer.
Select All.
Copy and paste a paper of choice Into Selection.
Deselect.
Apply the mask.
Merge Group.


Add your copyrights.
If you didn’t use an artist’s tube then please give credit to the scrap kit designer. She’ll appreciate it!

Add your name.
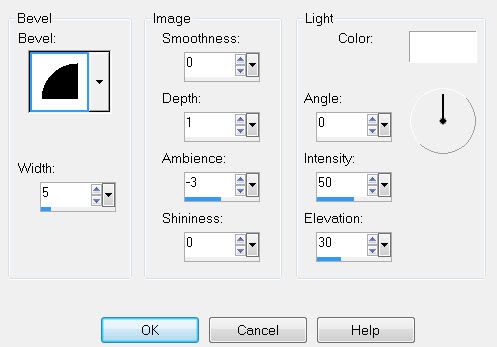
Give it a slight inner bevel:


Resize all layers 85%.


I hope you enjoyed this tutorial.

I’d love to see your results.

Email me!

Hugs,

Bev