Clicking on the image will enlarge to full view.
Supplies
1 tube of choice - I used the beautiful artwork of Karen Middleton here
Font of choice - I used Aquarelle here
Weescotlass Mask 297 here
Designs by Ali Template 176 here
“Girly Girl” is a PTU tagger size scrap kit created by Sue of Wacky Winnie Designz and can be purchased at Lollipops n Gumdrops. You can visit her blog here.
Thank you Sue for a kit packed with such pretties!
This tutorial was written assuming you have a working knowledge of PSP.
~♥~ Let’s get started ~♥~
Open up the template.
Image/Canvas Size
700 x 700
OK
Delete Raster 11, 9, 7, 6, and 5.
Flood fill Raster 1 white.
Image/Canvas Size
700 x 700
OK
Delete Raster 11, 9, 7, 6, and 5.
Flood fill Raster 1 white.
Highlight Raster 2.
Select All/Float/Defloat
New Raster Layer.
Copy and paste a paper of choice Into Selection.
Deselect.
Delete the template layer.
Repeat the above step with Rasters 3, 4, and 8.
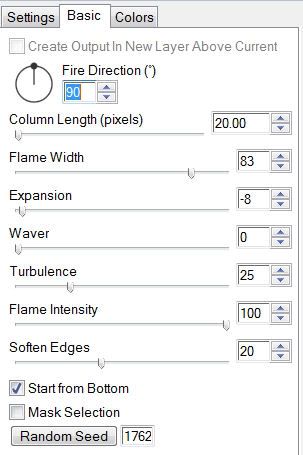
Highlight Raster 10.
Select All/Float/Defloat
New Raster layer.
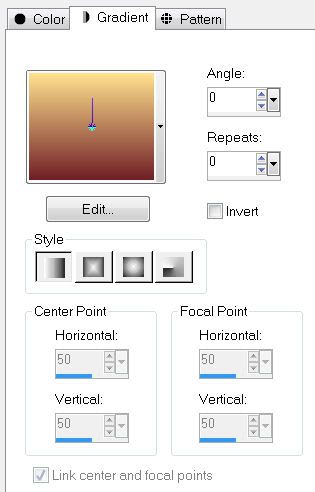
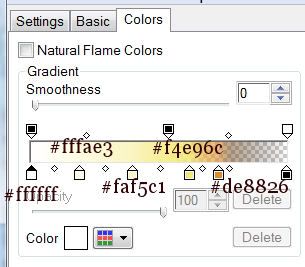
Flood will with a gradient of choice.
Deselect.
Delete the template layer.
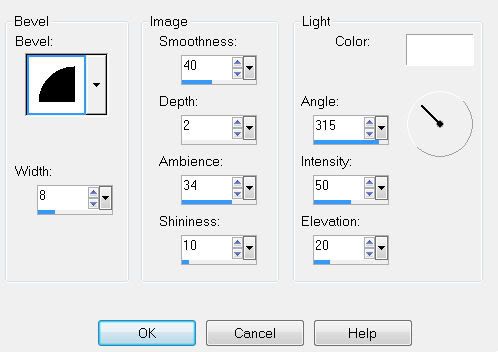
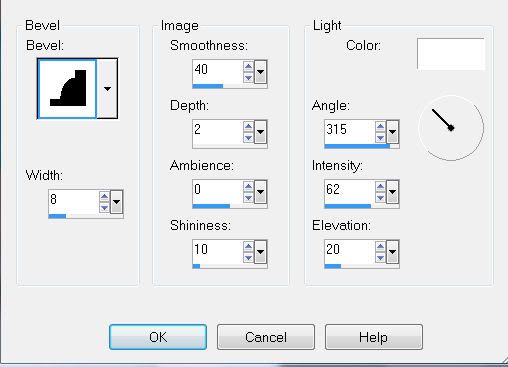
Give the heart an inner bevel:
Select All/Float/Defloat
New Raster layer.
Flood will with a gradient of choice.
Deselect.
Delete the template layer.
Give the heart an inner bevel:
Copy and paste your tube as a new layer.
Add your embellishments. I used:
Bougainville 1 & 2: Resize 60%
Bow 2: Resize 25% Free rotate left 40 degrees
Binder Clip 1: Resize 50% Free rotate right 50 degrees
Bead String 1: Resize 40%
Hippo 2: Resize 35%
Hippo 1: Resize 30%
Butterflies 1 & 2: Resize 25%
Vine 1: Resize 60%. I used my Freehand Selection tool to outline it and gave it a feathered effect.
Highlight your white canvas.
New Raster layer.
Select all.
Copy and paste a paper of choice Into Selection.
Deselect.
Apply the mask.
Merge Group.
Duplicate.
Vine 1: Resize 60%. I used my Freehand Selection tool to outline it and gave it a feathered effect.
Highlight your white canvas.
New Raster layer.
Select all.
Copy and paste a paper of choice Into Selection.
Deselect.
Apply the mask.
Merge Group.
Duplicate.
Add your copyrights.
Add your name.
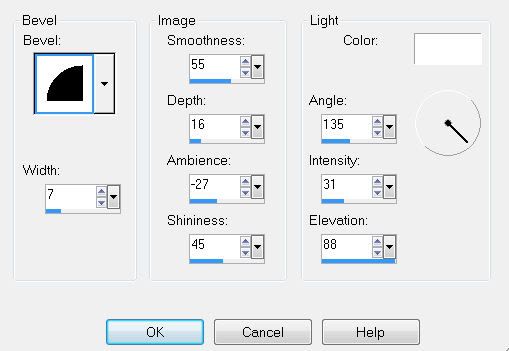
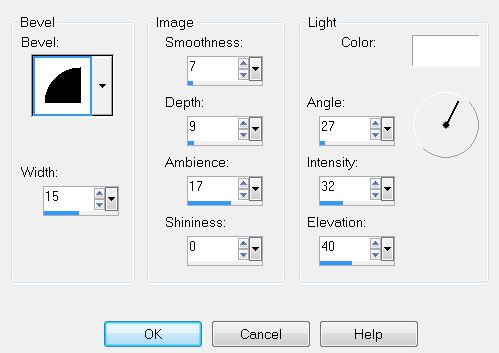
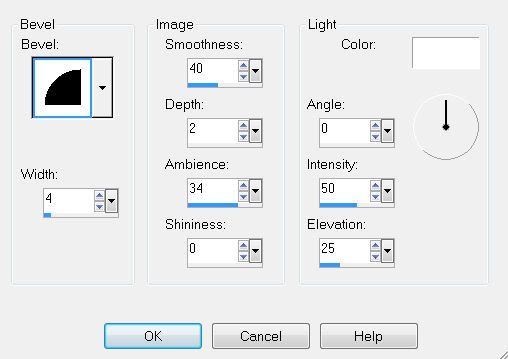
Give it the same inner bevel.
Resize all layers 80%.
I hope you enjoyed this tutorial.
I’d love to see your results.
Email me!
Hugs,
Bev
Bev