Supplies
1 tube of choice – I used the wonderful artwork of Anna Marine which
can be purchased from CDO. You must have a license to
use.
Monti Circular Mask here
Plug Ins used:
VM Instant Art – Spider Web
“Midnight Tricks” is a tagger size scrap kit
created by Freeks Creations and can be purchased from ExquisiteScraps. You can visit her blog here.
Thank you Freek for a really awesome Halloween kit.
Thank you Freek for a really awesome Halloween kit.
This tutorial was written assuming you have a working knowledge of PSP.
~♥~ Let’s get started ~♥~
Open up a 700 x 700 blank canvas.
Flood fill white.
Copy and paste E37 as a new layer.
Resize 25%
Duplicate 2 x’s and move all 3 frames into a vertical position – see my
tag for reference.
Close out your white background.
Merge Visible.
Reopen your white background.
Make your Selection Tool active set on Square.
Be sure the mode Add Shift is checked.
Section off the opening of each frame.
New Raster layer below the frames.
Copy and paste Paper 1 Into Selection.
Copy and paste your tube as a new layer below the frames.
Selections/Invert
Tap the delete key.
Deselect.
Change the Properties of the tube to Soft Light.
Close out your white background.
Merge Visible.
Reopen your white background.
Don’t worry about placement just yet.
New Raster layer.
Make your Selection Tool active set on Rounded Rectangle.
Create a rectangle approximately 325 x 475 pixels.
Copy and paste Paper 8 Into Selection.
Apply VM Instant Art – Spider Web
Rays: 53
Rings: 111
Merging: 85
OK
Deselect.
Move the web paper and the merged layers into position – see my tag for
reference.
Make your Selection Tool active set on Rectangle.
Create a rectangle approximately 75 x 525 pixels.
Copy and paste Paper 4 as a new layer.
Resize 70% and move into a position you like within the dotted lines.
Selections/Invert
Tap the delete key.
Deselect.
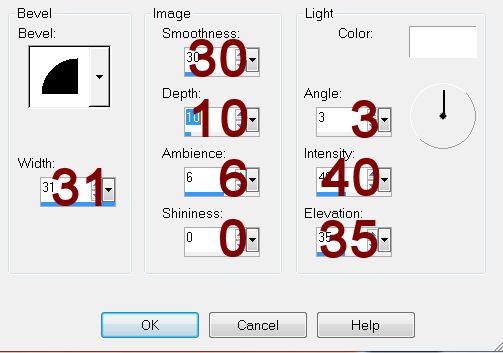
Give it a slight Inner Bevel:
New Raster layer.
Make your Selection Tool active again.
Create a rectangle approximately 60 x 425 pixels.
Flood fill with #0d0d0d
Deselect.
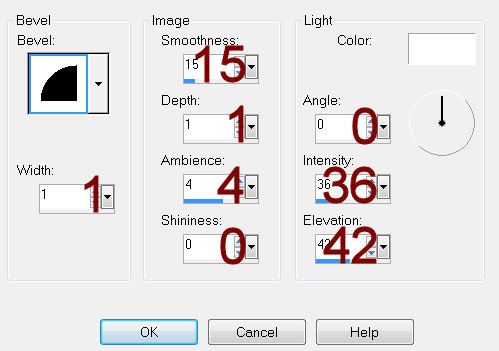
Give it the same Inner Bevel.
Copy and paste your tube as a new layer.
Add your elements. I used:
E35: Resize 30%
E19: Resize 50%/Duplicate
E25: Resize 40%
E29: Resize 205/Duplicate/Resize
70%
Highlight your white background.
New Raster layer.
Select All.
Copy and paste Paper 1 Into Selection.
Deselect.
Resize 90%
Merge Group.
New Raster layer.
Copy and paste E23 Into Selection.
Deselect.
Apply the mask.
Resize 80%
Merge Group.
Change the Properties to Luminance (Legacy)
Add your credits.
Add your name.
Color Pallet:
Foreground: #000000
Background: #3e414a
Stroke: 2.0
Type your name.
Give it a slight Inner Bevel:
Resize all layers 80%.