Saturday, April 2, 2011

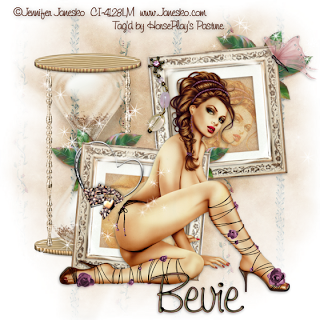
Sands of Time


Supplies

1 tube of choice - I used the artwork of Jennifer Janesko and can now be purchased from CDO. You must have a license to use.
Font of Choice - I used Kayleigh here
Amy and Leah mask 2 here
“Mother‘s Love Roses” is a tagger size scrap kit created by Conchi of Dnscraps and can be purchased from Twilight Scraps. You can visit her blog here.
Thank you so much Conchi for such a beautiful kit!

This tutorial was written assuming you have a working knowledge of PSP.

~♥~ Let’s get started ~♥~

Open up a 700 x 700 blank canvas.
Flood fill white.

Copy and paste LovelyFrame as a new layer.
Resize 40%
Free rotate Right 5 degrees
Duplicate/Mirror
Move both frames into position - see my tag for reference.

Open up Paper 6.
Use your Selection Tool set on rectangle and select a small area that’s between the lines of flowers.
In your color pallet set the foreground to pattern - choose the section of paper you sectioned out.

Highlight the Top frame.
Click inside of it with your Magic Wand.
Selections/Modify/Expand by 6.
New Raster layer below the frame.
Flood fill with the paper selection.
Deselect.

Highlight the bottom frame.
Repeat the above step.

Copy and paste your tube as a new layer.
Duplicate it twice.
Position each duplicated tube layer below each of the frames.
Change the Properties of each to Soft Light.

Highlight the paper beneath the top frame.
Click anywhere outside of it with your Magic Wand.
Highlight the tube layer above the paper.
Tap the delete key.
Deselect.

Highlight he paper beneath the bottom frame.
Repeat the above step.

Add your embellishments. I used:
Hour Glass: Resize 65%
Jewels 2: Resize 25%
Heart Ribbons 2: Resize 25%/Free rotate Right 25 degrees
Leaves: Resize 30%/Duplicate and Mirror as you like
Butterfly 3: Resize 25% and 80%
Stars Hearts 2: Resize 70%

Crop your image.

Highlight your white background.
New Raster layer.
Select All.
Copy and paste Paper 6 Into Selection.
Apply the mask.
Merge Group.
Duplicate

Add your copyrights.

Add your name.
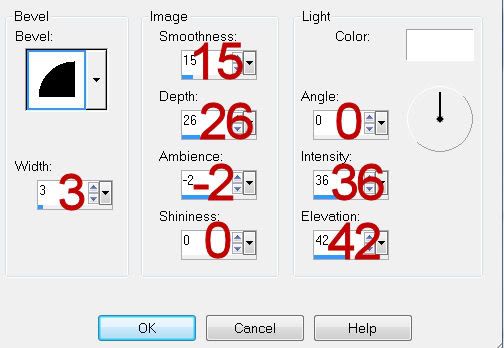
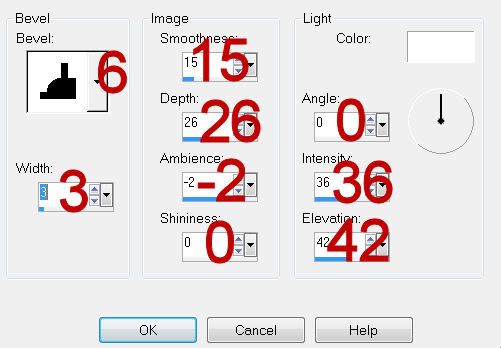
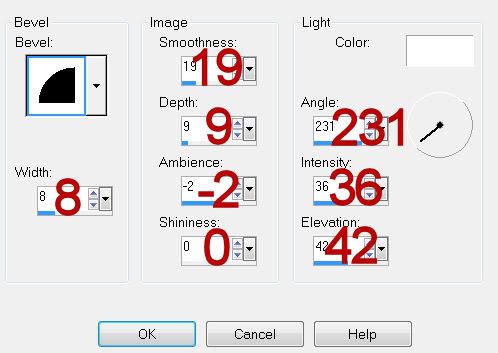
Give it a slight Inner Bevel:
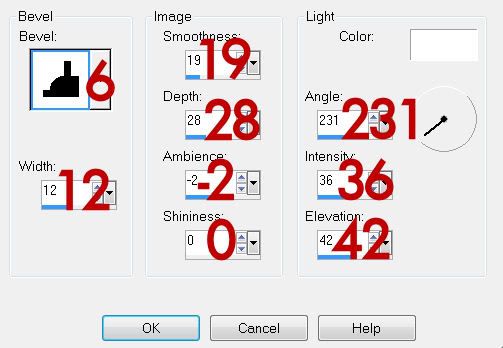

Resize all layers 85%.

I hope you enjoyed this tutorial.
I’d love to see your results and show it off in my gallery.
Email me!
Hugs,
Bev

Friday, April 1, 2011

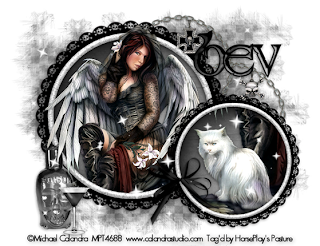
Glitter n Skulls


Supplies

1 tube of choice - I used the artwork of Michael Calandra and can be purchased from MPT. You must have a license to use.
Font of Choice - I used Stonecross here
Weescotlass mask 297 here
“Glitter n Skulls” is a tagger size scrap kit created by Aurelie or Pink Candy Designs and can be purchased from Lollipops n Gumdrops. You can visit her blog here.
Thank you so much Aurelie for such an awesome kit!

This tutorial was written assuming you have a working knowledge of PSP.

~♥~ Let’s get started ~♥~

Open up a 700 x 700 blank canvas.
Flood fill white.

Copy and paste Frame 3 as a new layer.
Resize 70%
Duplicate/Resize 70%
Move both frames into position - see my tag for reference.

Highlight the bigger frame.
Click inside of it with your Magic Wand.
Selections/Modify/Expand by 6.
New Raster layer below the frame.
Copy and paste Paper 2 Into Selection.
Copy and paste your tube below the frame.
Selections/Invert
Tap the delete key.
Deselect.

Highlight the smaller frame.
Click inside of it with your Magic Wand.
Selections/Modify/Expand by 6.
New Raster layer below the frame.
Copy and paste Paper 9 Into Selection.
Copy and paste your tube as a new layer below the frame.
Position a different area of the tube within the frame.
Selections/Invert
Tap the delete key.
Deselect.

Add your embellishments. I used:
Bow 3: Resize 45%
Bottle: Resize 60%
Martini: Resize 35%
Chain 2: Resize 40%/Duplicate
Charm: Resize 30%
Charm 2: Resize 30%
Sparkles

Highlight your white background.
New Raster layer.
Select All.
Copy and paste Paper 11 Into Selection.
Adjust/Blur/Motion Blur:
Angle: 224
Strength: 97
OK
Apply the mask.
Merge Group.

Add your copyrights.

Add your name.
Give it a slight Inner Bevel:


Resize all layers 85%.

I hope you enjoyed this tutorial.
I’d love to see your results and show it off in my gallery.
Email me!
Hugs,
Bev

Thursday, March 31, 2011

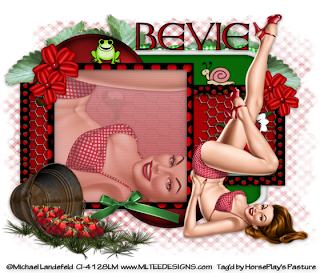
Strawberry Kisses

Supplies

1 tube and 1 Close-up of choice - I used the artwork of Michael Landefelt than can now be purchased at CDO. You must have a license to use.
Font of Choice - I used Anglo Saxon here
Becky Mask 22 here
Greg’s Factory Output Vol. II - Pool Shadow
“Strawberry Kisses” is a FTU scrap kit created by Tezza’s Tagger Scraps and can be downloaded from her blog here. Please leave a thank you when downloading as it’s a small gesture for grand generosity. Thank you so much Tezza for such a fun kit. It’s perfect for this time of year!

This tutorial was written assuming you have a working knowledge of PSP.

~♥~ Let’s get started ~♥~

Open up a 700 x 700 blank canvas.
Flood fill white.

Copy and paste Background 9 as a new layer.
Resize 40%
Click anywhere outside of the paper with your Magic Wand.
Selections/Invert
Selections/Modify/
Contract by 15.
Tap the delete key.
Deselect.
Give it a slight Inner Bevel:


Don’t worry about the position of it right now.
Click inside of it with your Magic Wand.
Selections/Modify/Expand by 6.
New Raster layer below the frame.
Flood fill with a gradient of your choice.
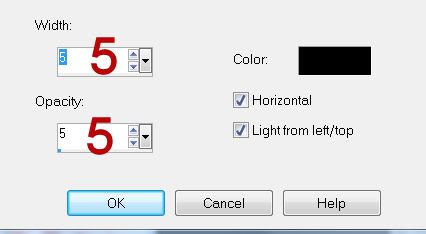
Effect/Texture Effects/Blinds -
Match your settings to mine:


Adjust/Sharpnes/Sharpen
Copy and paste Vinewire element as a new layer just below the frame.
Selections/Invert
Tap the delete key.
Copy and paste your Close Up tube as a new layer below the frame.
Low the Opacity to about 53
Tap the delete key.
Deselect.
Be sure the Close up tube is highlight and click anywhere outside of it with your Magic Wand.
Selections/Invert.
Highlight the Vine Wire layer and tap the delete key.
Deselect.

Close out your white canvas.
Merge Visible.
Reopen your canvas.
Position the merged layer more on the left side of your canvas.

Copy and paste Frame 4 as a new layer.
Resize 80%
Give it the same Inner Bevel.
Duplicate
Move both into position behind the merge layer - see my tag for reference.

Highlight the right frame.
Click inside of it with your Magic Wand.
Selections/Modify/Expand by 6.
New Raster layer below the frame.
Flood fill with #ac0608
Apply the same blinds effect.
Adjust/Sharpness/Sharpen
Copy and paste Vine Wire just below the frame.
Resize 70%
Selections/Invert
Tap the delete key.
Deselect.

Highlight the Left frame.
Repeat the above step.

Copy and paste Button 4 as a new layer.
Resize 70%
Select All/Float/Defloat
Apply Greg’s Factory Output Vol. II - Pool Shadow:
Default Settings.
Duplicate
Move both buttons into position - see my tag for reference.

Copy and paste your tube as a new layer.

Add your embellishments. I used:
Beaded Ribbon 1: Resize 60%
Bow 1: Resize 50%
Spilled Bucket: Resize 60%
Grass 1: Resize 60%
Red Flower: Resize 35%/Duplicate/Resize 80%/Duplciate/Duplicate/Resize 90%
Foliage: Resize 60%/Duplicate
Frog 1: Resize 50%
Snail: Resize 50%

Crop your Image.

Highlight your white background.
New Raster layer.
Select All.
Copy and paste Background 2 Into Selection.
Deselect.
Apply the mask.
Use your Pick Tool to pull the side out a bit and move the bottom up a little if you have to.
Merge Group.

Add your copyrights.

Add your name.
Give it a slight Inner Bevel.

Resize all layers 85%.

I hope you enjoyed this tutorial.
I’d love to see your results and show it off in my gallery.
Email me!
Hugs,
Bev


Bad Romance


Supplies

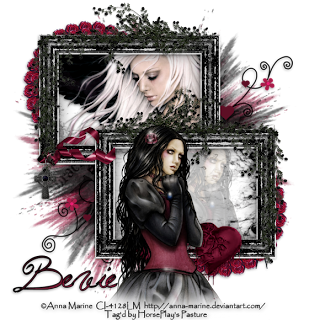
2 tubes of choice - I used the artwork of Anna Marine than can now be purchased at CDO. You must have a license to use.
Font of Choice - I used Jellyka Wetsern Princess here
Weescotlass mask 38 here
“Bad Romance” is a tagger size scrap kit created by Tyger’s Tidbits and can be purchased from Stargazer Scraps. You can visit her blog here.
Thank you so much Tyger for an awesome kit!

This tutorial was written assuming you have a working knowledge of PSP.

~♥~ Let’s get started ~♥~

Open up a 700 x 700 blank canvas.
Flood fill white.

Copy and paste Distressed Frame as a new layer.
Resize 65%
Duplicate
Move both frames into position - see my tag for reference.

Highlight the top frame.
Click inside of it with your Magic Wand.
Selections/Modify/Expand by 6.
New Raster layer below the frame.
Copy and paste Paper 9 Into Selection.
Copy and paste your tube below the frame.
Selections/Invert
Tap the delete key.
Deselect.

Highlight the bottom frame.
Click inside of it with your Magic Wand.
Selections/Modify/Expand by 6.
New Raster layer below the frame.
Copy and paste Paper 9 Into Selection.
Deselect for now.
Copy and paste your tube as a new layer.
Position it in front of the frame.
Duplicate/Move to the right and below the frame.
Highlight the paper layer.
Click anywhere outside of it with your Magic Wand.
Highlight the duplicated tube layer.
Tap the delete key.
Deselect.
Lower the Opacity to about 28.

Add your embellishments. I used:
Black Rose Corner: Duplicate/Mirror
Rose Frame: Resize 40%/Duplicate
Cross Charm: Resize 45%
Bleeding Hearts: Resize 40%
Flourish: Resize 70%

Highlight your white background.
New Raster layer.
Select All.
Copy and paste Paper 7 Into Selection.
New Raster layer.
Copy and paste Paper 1 Into Selection.
Deselect.
Apply the mask to each paper layer (merge group on each layer as well).
Highlight the black mask layer.
Free rotate right 45 degrees and move up just a little.

Add your copyrights.

Add your name.

Resize all layers 85%.

I hope you enjoyed this tutorial.
I’d love to see your results and show it off in my gallery.
Email me!
Hugs,
Bev
Tuesday, March 29, 2011

From Boy to Manhood


Supplies

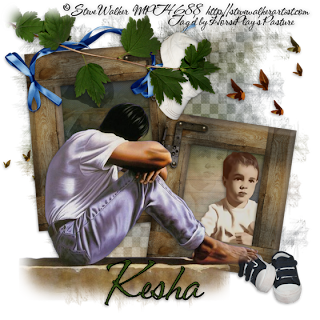
2 tubes of choice - I used the awesome artwork of Steve Walker at MPT
Font of Choice - I used CAC Shishoni Brush here
Weescotlass Mask 297 here
“He‘s all Boy” is a PTU scrap kit in tagger size created by Kesha of KcNScrapz and can be downloaded from her store Lollipops n Gumdrops. You can visit her blog here.
Thank you so much Kesha for a kit that displays all male, big or small!

This tutorial was written assuming you have a working knowledge of PSP.

~♥~ Let’s get started ~♥~

Open up a 700 x 700 blank canvas.
Flood fill white.

Copy and paste Frame 1 as a new layer.
Resize 70%
Click inside of each frame with your Magic Wand.
Selections/Modify/Expand by 6.
New Raster layer below the frame.
Copy and paste Paper 7 Into Selection.
Deselect.

Highlight the frame layer.
Click inside the bottom frame with your Magic Wand.
Selections/Modify/Expand by 6.
Copy and paste one of your tubes below the bottom frame.
Move into position - see my tag for reference.
Selections/Invert
Tap the delete key.
Paste your tube again below the same frame - resize so it’s just a bit larger than the other.
Move into position behind the other tube and offset a bit.
Tap the delete key.
Change the Properties to Soft Light.
Lower the Opacity to about 44.
Deselect.

Copy and paste your other tube as a new layer.
Position in front of the frames.
Paste your tube again.
This time move it below the top frame - see my tag for reference.
Highlight the frame layer.
Click inside the top frame with your Magic Wand.
Selections/Modify/Expand by 6.
Selections/Invert
Highlight the tube frame.
Tap the delete key.
Deselect.
Change the Properties to Soft Light.
Lower the Opacity to about 44.

Add your embellishments. I used:
Leaves: Resize 70%/Mirror
Ribbon: Resize 50%/Flip
Branch: Resize 45%
Hat; Resize 30%/Free rotate Right 80 degrees
Shoes 1: Resize 30%

Highlight your white background.
New Raster layer.
Select All.
Copy and paste Paper 7 Into Selection.
Deselect.
Apply the mask.
Merge Group.

Add your copyrights.

Add your name.
Give it a slight Inner Bevel:


Resize all layers 85%.

I hope you enjoyed this tutorial.
I’d love to see your results and show it off in my gallery.
Email me!
Hugs,
Bev
Monday, March 28, 2011

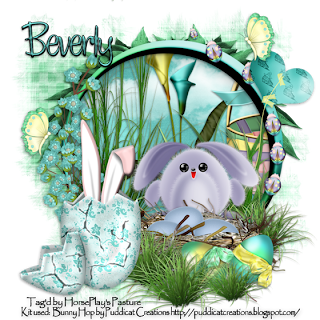
Bunny Hop


Supplies

Font of Choice - I used Chicken Basket
Weescotlass Mask 297 here
“Bunny Hope” is a FTU scrap kit created by Cindy of Puddicat Creations and can be downloaded from her blog here. Please leave a thank you when downloading as it’s a small gesture for hard work given freely.
Thank you Cindy for an incredibly precious Easter kit!

This tutorial was written assuming you have a working knowledge of PSP.

~♥~ Let’s get started ~♥~

Open up a 700 x 700 blank canvas.
Flood fill white.

Copy and paste Frame 2 as a new layer.
Resize 90%
Click inside of it with your Magic Wand - be sure to click inside the little areas on the left side of the frame.
Selections/Modify/Expand by 6.
New Raster layer below the frame.
Copy and paste Paper 19 Into Selection.
Deselect for now.

We’re going to add the embellishments that go below the frame. Don’t worry about what sticks out from the sides of the frames. We’ll clean the mess up later.
Grass 1
Grass 2
Basket 1: Resize 70%
Flowers 4
Cloud 1

Highlight the paper layer.
Click anywhere outside of it with your Magic Wand.
Highlight each element layer and tap the delete key.
Deselect.

Add your other embellishments. I used:
Bunny 4: Resize 80%
Lady Bug 2: Resize 25% and 60%/Use your Pick Tool to turn this way and that.
Bunny 1: Resize 70%
Bird Nest: Resize 70%
Egg 1: Resize 30%/Free rotate Right 35 degrees
Egg 5: Resize 30%/Free rotate Left 45 degrees
Butterfly 1: Resize 30%
Grass 3: Resize 50%/Duplicate and resize as you like
Leaves 3: Duplicat3

Highlight your white background.
New Raster layer.
Select All.
Copy and paste Paper 10 Into Selection.
Deselect.
Apply the mask.
Merge Group.

Add your copyrights.

Add your name.
Give it a slight Inner Bevel:


Resize all layers 85%.

I hope you enjoyed this tutorial.
I’d love to see your results and show it off in my gallery.
Email me!
Hugs,
Bev
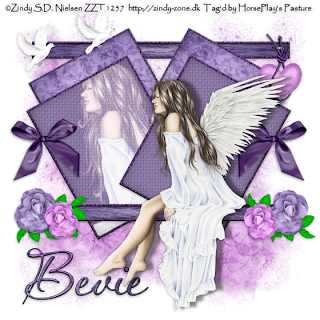
True Love


Supplies

1 tube of choice - I used the artwork of Zindy S.D. Nielsen here. You must have a license to use.
Font of Choice - I used Aquarelle here
Gem Mask 161 here
Queenie Template 1 here
“Lavender Love” this is a full size scrap kit created by Pixie of KissedbyPix Designs. It’s free with a $5 purchase from her store TKO Scraps. What a deal! You can visit her blog here.
Thank you Pixie for not only a gorgeous kit but also for your extreme generosity! You know you rock chickadee!

This tutorial was written assuming you have a working knowledge of PSP.

~♥~ Let’s get started ~♥~

Open up the template.
Shift + D.
Close out the original.
Resize all layers 85%
Delete the top 2 layers.
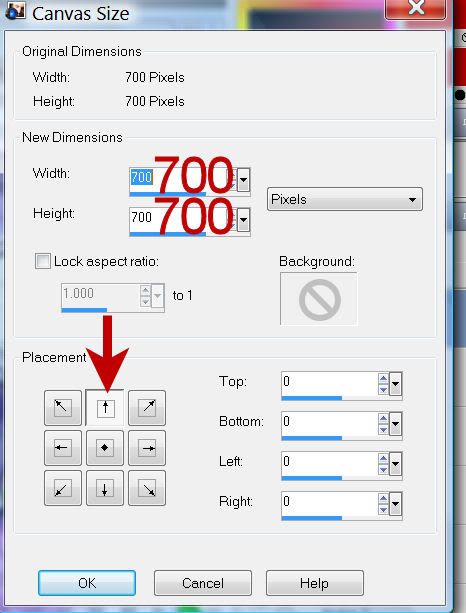
Image/Canvas size -
Match your settings to mine:


Bring Raster 5 layer to the top.

Bring Copy of Raster 3 layer to the top.

Highlight Raster 3 layer.
Select All/Float/Defloat
New Raster layer.
Copy and paste Textured Paper 4 Into Selection.
Deselect.
Delete the template layer.
Give it a slight Inner Bevel:


Adjust/Add Remove Noise/Add Noise:
Uniform & Monochrome checked.
Noise: 43%
OK

Repeat the above step with:
Raster 2 layer, Copy of Raster 2 layer (both of them), Copy(2) of Raster 2 layer, and Copy of Raster 3 layer.

Highlight Raster 4 layer.
Click on it with your Magic Wand.
New Raster layer.
Copy and paste Floral Grunge 2 Paper Into Selection.
Deselect.
Delete the template layer.

Repeat the above step with Raster 5 layer.

Highlight Raster 6 layer.
Click on it with your Magic Wand.
New Raster layer.
Copy and paste Floral Grunge 4 Paper Into Selection.
Deselect.
Delete the template layer.

Repeat the above step with Raster 8 layer.

Highlight Raster 7 layer.
Click on it with your Magic Wand.
New Raster layer.
Copy and paste Textured Paper 2 Into Selection.
Deselect.
Delete the template layer.

Repeat the above step with Raster 9 layer.

Copy and paste your tube as a new layer.
Position it in front of the right frames.
Duplicate/Resize much larger.
Move to the left on your canvas. In your layer’s pallet position over the left frame.
Once it’s in position, highlight the paper beneath it and click anywhere outside of it with your Magic Wand.
Highlight the duplicated tube layer.
Tap the delete key.
Deselect.
Change the Properties to Screen.
Give your original tube a drop shadow.
Give it another drop shadow but exaggerated and on it’s own layer.

Add your embellishments. I used:
Heart Twine 1: Resize 25% and 40%
Dove 4: Resize 25% and 25%
Bow 4: Resize 25% and 70%
Fabric Flower 1: Resize 25% and 30%
Fabric Flower 4: Resize 25% and 25%
Rosebud 3: Resize 25% and 25%/Position behind the flowers/Duplicate/Flip

Highlight your white background.
New Raster layer.
Select All.
Copy and paste Floral Grunge 3 Paper Into Selection.
Deselect.
Apply the mask.
Merge Group.

Add your copyrights.

Add your name.
Give it the same Inner Bevel.

Resize all layers 85%.

I hope you enjoyed this tutorial.
I’d love to see your results and show it off in my gallery.
Email me!
Hugs,
Bev
Sunday, March 27, 2011

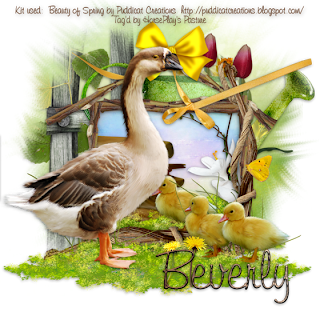
The Beauty of Spring


Clicking on the image will allow you to enlarge for bigger view.

Supplies

Font of Choice - I used Kayleigh here
Weescotlass Mask 241 here
“Beauty of Spring” is a PTU scrap kit created by Cindy of Puddicat Creations and can be purchased from Aussie Scrap Designs. You can visit her blog here.
Thank you Cindy for a really gorgeous Spring kit!

This tutorial was written assuming you have a working knowledge of PSP.

~♥~ Let’s get started ~♥~

Open up a 700 x 700 blank canvas.
Flood fill white.

Copy and paste Frame 2 as a new layer.
Click inside of it with your Magic Wand - be sure to click inside the little areas on the right side of the frame.
Selections/Modify/Expand by 4.
New Raster layer below the frame.
Copy and paste Paper 9 Into Selection.
Duplicate
Change the Properties to Multiply.
Deselect for now.

We’re going to add the embellishments that go below the frame. Don’t worry about what sticks out from the sides of the frames. We’ll clean the mess up later.
Log 1: Resize 80%
Grass 1: Duplicate/Keep one layer in front of the log, the other layer behind the log.
Nature 3
Flowers 6: Resize 50%
Baby Ducks 2: Resize 50%

Highlight the paper layer.
Click anywhere outside of it with your Magic Wand.
Highlight each element layer and tap the delete key.
Deselect.

Add your other embellishments. I used:
Fence 2
Leaves 5: Resize 70%
Watering Can 1
Flowers 3: Resize 70%
Flowers 4
Ribbon 2: Resize 80%/Flip
Bow 3; Resize 40% and 80%/Free rotate Right 5 degrees
Grass 3: Resize 50%
Goose 1: Resize 90%
Baby Ducks 1: Resize 50%
Butterflies 1: Resize 25% and 60%
Grass 1: Use your Pick Tool and pull the sides in so they’re not off the canvas.
Nature 1 & 2: Resize 25%

Merge Visible the Vine and Fence.
Apply the Mask.
Merge Group.

Highlight your white background.
New Raster layer.
Select All.
Copy and paste Paper 12 Into Selection.
Deselect.
Apply the mask.
Move it up a little on your canvas.
Merge Group.

Add your copyrights.

Add your name.
Give it a slight Inner Bevel:


Resize all layers 85%.

I hope you enjoyed this tutorial.
I’d love to see your results and show it off in my gallery.
Email me!
Hugs,
Bev