Supplies Needed
1 tube of choice – I
used the gorgeous artwork of Cris DeLara which can be purchased from UpYour Art. You must have a license to use.
“Sandy Toes & Salty Kisses” is a tagger
size scrap kit created by me, Bev of HorsePlay’s Pasture Designs and can be purchased
from either of my stores - Scraps From the Heart or Heartbeatz Creations. You can visit my designing blog here.
This tutorial was
written assuming you have working knowledge of PSP.
~♥~ Let’s get started ~♥~
Open up a 700 x 700 blank canvas.
Flood fill white.
Copy and paste EL 32 as a new layer.
Resize 50%
Click inside of it with your Magic
Wand.
New Raster layer below the frame.
Copy and paste Paper 10 Into
Selection.
Deselect.
Close out your white background.
Merge Visible.
Reopen your white background.
Don’t worry about placement yet.
Copy and paste EL 33 as a new layer.
Make your Pick Tool active and pull
the side in so that the width of the frame measures approximately 275 pixels.
Duplicate/Resize 80%
Move both frames and the merged
layer into their exact positions – see my tag for reference.
Open up Paper 12.
Mirror
Copy and Paste as a new layer just
below the larger rectangle frame.
Resize 65%
Move it into a position that looks
good beneath both of the frames.
Highlight the large frame.
Click inside of it with your Magic
Wand.
Selections/Modify/Expand by 4.
Highlight the paper layer.
Right click on the layer in your
layers pallet/Promote Section to Layer.
Deselect.
In your layers pallet move the full
paper layer just below the smaller rectangle frame.
Highlight the frame layer.
Click inside of it with your Magic
Wand.
Selections/Modify/Expand by 4.
Selections/Invert
Highlight the paper layer.
Tap the delete key.
Deselect.
Copy and paste your tube as a new
layer.
See my tag for placement.
Add your elements. I used:
EL 2: Resize 70%
EL 4: Resize 25%
EL 54: Resize 70%/Mirror/Duplicate
EL 14: Resize 60%/Free rotate Left 100 degrees
EL 55: Resize 50%
EL 13: Place behind the round frame
EL 5: Duplicate
EL 48: Resize 50%/Mirror
EL 12: Resize 30%/Duplicate
EL 11: Resize 50%/Use your Pick Tool to flatten a
little/Duplicate 2x’s
Highlight your white background
layer.
New Raster layer.
Select All.
Copy and paste Paper 11 Into
Selection.
Deselect.
Apply the Mask.
Merge Group.
Add your copyrights.
Add your name.
Color Pallet:
Foreground: #000000
Background: #469ab6
Stroke: 1.0
Type your name.
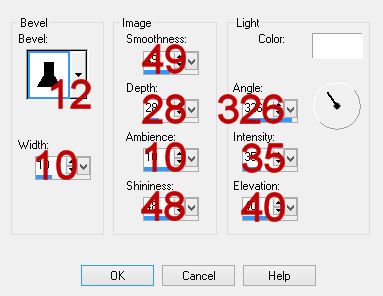
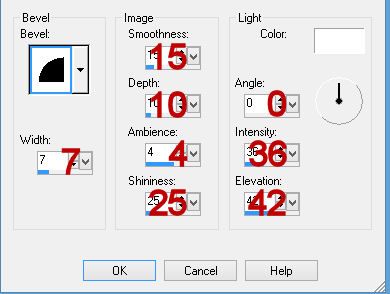
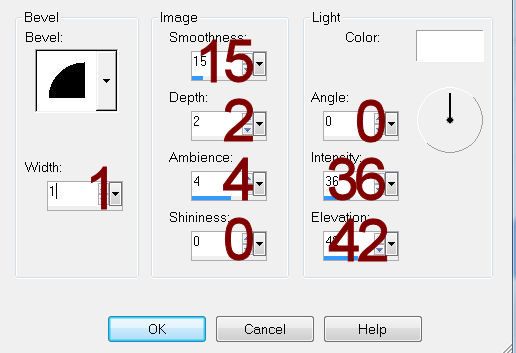
Give it a slight Inner Bevel:

Resize all layers 80%.
I’d love to see your results.
Hugs,
Bev