Supplies
1 tube of choice - I used a fantastic poser created by Ella of Designs by Norella and can be purchased at any of her stores here.
Font of choice - I used Great Victorian Swashed here
Vix Mask 451 here
Dangerously Delicious template here - SATC Exclusive templates and can be found under Tuesday, November 19, 2013
It's in the file marked "Template Exlcusive May 11".
Plug Ins used:
Brush Strokes - Crosshatch
Animation Shop
"Autumn Steampunk" is a tagger size scrap kit created by Nette's NightOwl Works and can be purchased from TKO Scraps. You can visit her blog here.
This tutorial assumes you have a working knowledge of PSP.
~♥~ Let's get started ~♥~
Open up the template.
Shift + D.
Close out the original.
Delete the top 3 layers, White fower, Purple Flower, Joy, Everything, Wording White, and Wordart d/s
Color Pallet:
Foreground: #ffffff
Background: #af4802
Highlight Spray layer.
Make your Color Replacer Tool active and double right click on the spray layer.
It should have changed to the background color in your color pallet.
Effects/Edge Effects/Enhance
Highlight White Square layer.
Click on it with your Magic Wand.
New Raster layer.
Copy and paste Paper 7 Into Selection.
Deselect.
Delete the template layer.
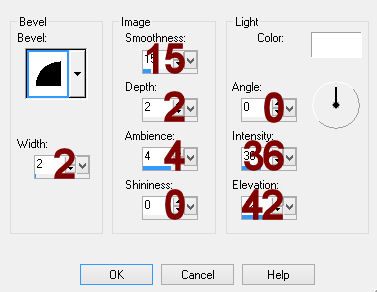
Give it a slight Inner Bevel:
Highlight Purple Rectangle layer.
Click on it with your Magic Wand.
New Raster layer.
Copy and paste Paper 9 Into Selection.
Apply Brush Strokes - Crosshatch:
Stroke Length: 27
Sharpness: 4
Strength: 2
OK
Deselect.
Delete the template layer.
Give it the same slight Inner Bevel.
Highlight Yellow Square layer.
Click on it with your Magic Wand.
New Raster layer.
Copy and paste Paper 4 Into Selection.
Deselect.
Delete the template layer.
Give it the same slight Inner Bevel.
Highlight Blue Strip layer.
Click on it with your Magic Wand.
New Raster layer.
Copy and paste Paper 3 Into Selection.
Duplicate
Effects/Texture Effects/Mosaic Antique -
Use Default Settings.
Deselect.
Merge Down.
Delete the template layer.
Give it the same slight Inner Bevel.
Highlight Purple Circle layer.
Click on it with your Magic Wand.
New Raster layer.
Copy and paste Paper 12 Into Selection.
Deselect.
Delete the template layer.
Highlight Blue Circle layer.
Click on it with your Magic Wand.
New Raster layer.
Copy and paste Paper 11 Into Selection.
Apply Brush Strokes - Crosshatch:
Stroke Length: 36
Sharpness: 4
Strength: 2
OK
Deselect.
Delete the template layer.
Highlight Yellow Ring layer.
Click on it with your Magic Wand.
New Raster layer.
Copy and paste Paper 4 Into Selection.
Adjust/Add Remove Noise/Add Noise:
Gaussian and Monochrome checked
Noise: 61%
OK
Deselect.
Delete the template layer.
Highlight White Strip layer.
Click on it with your Magic Wand.
New Raster layer.
Copy and paste Paper 4 Into Selection.
Apply Brush Strokes - Crosshatch:
Stroke Length: 27
Sharpness: 20
Strength: 2
OK
Deselect.
Delete the template layer.
Give it the same slight Inner Bevel.
Open up Paper 10.
Use your Selection Tool set on Square and section out the center.
Copy
Highlight Yellow Strip layer.
Click on it with your Magic Wand.
New Raster layer.
Paste Paper 10 Into Selection.
Apply Brush Strokes - Crosshatch:
Stroke Length: 36
Sharpness: 13
Strength: 2
OK
Copy and paste your tube as a new layer over the paper layer. If you're using the same poser as I did, Resize 15%
Selections/Invert
Tap the delete key.
Deselect.
Delete the template layer.
Give the paper the same slight Inner Bevel.
Highlight Purple Strip layer.
Click on it with your Magic Wand.
New Raster layer.
Copy and paste Paper 9 Into Selection.
Apply Brush Strokes - Crosshatch:
Stroke Length: 27
Sharpness: 4
Strength: 2
OK
Deselect.
Delete the template layer.
Give it the same slight Inner Bevel.
Copy and paste your tube as a new layer.
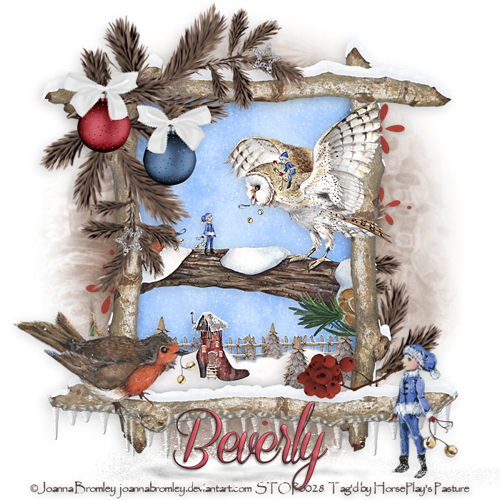
Move into position to the right of all the strips - see my tag for reference.
If you used the same poser as I did, resize 15%.
Copy and paste spcogborder as a new layer.
Resize 70% and 95%
Free rotate Left 30 degrees
Move into position - see my tag for reference - and rename this "Original Cog Border"
Give it a drop shadow on its own layer.
We'll come back to this element later to get it ready for animation.
Add the elements. I used:
spleafcluster: Resize 40%/Duplicate/Mirror/Flip
spgearcluster: Resize 30%
spivy: Resize 40%/Duplicate/Mirror
spposie: Resize 15%/Dupicate
spbundlecluster: Resize 50%/Free rotate Left 30 degrees
Highlight your blank canvas.
New Raster layer.
Select All.
Copy and paste Paper 4 Into Selection.
Deselect.
Apply the mask.
Merge Group.
Add your credits.
Add your name:
Foreground and Background: #371b0f
Stroke 2.0
Type your name.
Give it a drop shadow.
Open up element spcogborder again.
Shit + D.
Close out the original.
Resize 70% and 95%
Use your Freehand Selection Tool set on Freehand or Point to Point (whichever you feel more comfortable using) and section off the top Left great:

Once you have it sectioned off -
Edit/Cut
Edit/Paste as new layer.
Deselect.
Section off the bottom left cog in the same way.
Edit/Cut
Deselect.
Copy the cog border now that the 2 cogs are cut off of it.
Make your working canvas active and highlight "Origianl Cog Border" layer.
Paste as a new layer and move into exact position over the Original Cog border.
Delete the Origial Cog Border layer.
Make the cog border element active again.
Close out the cog border layer.
Highlight the layer with just the single cog.
Copy.
Open up Animation Shop.
Edit/Paste/As New Animation.
Back in PSP.
(still on the single cog layer) Free rotate the cog 20 degrees.
Adjust/Sharpeness/UnSharp Mask -
Radius: 1
Strength: 10
Clipping 4
OK
Copy
Carry Into AS
Edit/Paste/Efter Current Frame.
Back in PSP.
Free rotate the cog again 20 degrees.
Adjust/Sharpness/UnSharp Mask -
Use Same settings.
OK
Copy
Carry Into AS
Edit/Paste/After Current Frame.
Ctrl + A (to highlight all frames)
Edit/Copy
Edit/Paste/As New Animation.
Edit/Flip
Edit/Reverse Frames
Back in PSP.
Starting at the very top of your layers pallet, close out all the frame until you get to the cog border. From the cog border and
down those layers remain open.
Copy Merge.
Carry into AS.
Edit/Paste/As New Animation.
Press Ctrl + L 2 times.
You should now have 3 identical frames in a strip.
Press Ctrl + A (to highlight all frames).
Click on the Propogate Paste icon at the top (it looks like 3 folders with the corners bent)
Highlight one of the cog strips you made.
Ctrl + A (to highlight all of them)
Edit/Copy
Make your tag animation strip active.
Ctrl + E.
Match your cog up to the space where you cut it out of.
Once it's in position click your mouse.
Highlight the other cog strip.
Ctrl + A.
Edit/Copy
Make your tag animation strip active.
Ctrl + E.
Match it up in the other area where you cut the cog out.
Back in PSP.
Starting at the very bottom of your layers pallet, click on every single eye of every single layer.
All the layers that were closed will open and all the open layers will close.
Copy Merge.
Back in AS.
Make your tag animation strip active.
Ctrl + A.
Ctrl + E.
Position the rest of your tag into postiion and click the mouse.
View your animation.
If you're happy then resize:
Animation/Resize Animation:
Pixel Size: Width - 500
OK
Save your animation.
I hope you enjoyed this tutorial as much as I did creating it for you.
I'd really love to see your results.
Email me!
Hugs,
Bev