Supplies
Note:
This tutorial was written specifically for this tube. The majority of the elements in the tag are on separate layers when you purchase the tube. The purchase of this tube is well worth it‘s cost giving you a big bang for your buck.
1 tube of choice - I used the awesome artwork of Alena Lazareva and can be purchased from
Up Your Art. You must have a license to use.
Font of choice - I used Pieces of Eight
here
My Mask 28
here
Crazy Cakes Scraps Sexpianage template
here. It’s the 5th template down under October 16, 2010.
Animation Shop
Plug Ins:
Brush Strokes - Sprayed Strokes
DSB Flux - Bright Noise
Eyecandy 5: Nature - Smoke
“Mysterious Halloween” is a tagger size scrap kit created by Cindy of Puddicat Creations and can purchased from
Butterfly Blush Designs. You can visit her blog
here.
Thank you Cindy for a spectacular Halloween kit.
This tutorial was written assuming you have a working knowledge of PSP.
~♥~ Let’s get started ~♥~
Open up the template.
Shift + D.
Close out the original.
Resize all layers 80%
Image/Canvas Size:
700 x 600
OK
New Raster layer.
Send to bottom.
Flood fill white.
Delete the following layers:
Copyright, Word Art, 1, 6, and 7.
Highlight 8.
Click on it with your Magic Wand.
New Raster layer.
Copy and paste Paper 18 Into Selection.
Apply Brush Strokes - Sprayed Strokes:
Stroke Length: 12
Spray Radius: 19
Stroke Direction: Right Diag
OK
Deselect.
Delete the template layer.
Highlight 5.
Click anywhere outside of it with your Magic Wand.
Copy and paste Paper 10 as a new layer.
Resize 60%
Move into position over the template layer.
Tap the delete key.
Deselect.
Delete the template layer.
Highlight 4.
Click anywhere outside of it with your Magic Wand.
Selections/Invert
New Raster layer.
Copy and paste Paper 13 Into Selection.
Adjust/Add Remove Noise/Add Noise:
Gaussian and Monochrome checked
Noise: 35%
OK
Deselect.
Delete the template layer.
Highlight Raster 4 layer.
Select All/Float/Defloat
New Raster layer.
Paste Paper 13 Into Selection.
Give it the same Noise effect.
Deselect.
Delete the template layer.
Highlight 3.
Click on it with your Magic Wand.
New Raster layer.
Copy and paste Paper 11 Into Selection.
Copy and paste the tube as a new layer - I used the 4th from the bottom tube - Tube (b) AL0031 Old Witch
Change the Properties to Soft light and position it over the circle - see my tag for reference.
Selections/Invert
Tap the delete key.
Deselect.
Delete the template layer.
Highlight 2.
Click on it with your Magic Wand.
New Raster layer.
Copy and paste Paper 14 Into Selection.
Copy and paste the shelves (Tube (e) AL0031 Old Witch) from the tube layers as a new layer.
Position it over the circle paper.
Selections/Invert
Tap the delete key.
Use your Freehand Selection Tool to section out the cat on layer Tube (c) AL0031 Old Witch of your tube.
Copy
Make your working canvas active and paste as a new layer.
Move into position - see my tag for reference.
Duplicate the cat layer.
Keep one cat layer below the round frame.
Move the other cat layer above the frame.
Highlight the round paper layer.
Click anywhere outside of it with your Magic Wand.
Highlight the cat below the frame.
Tap the delete key.
Highlight the cat above the frame.
Use your Eraser Tool and erase what overhangs the circle.
Deselect.
Delete the template layer.
Copy and paste your tube as a new layer.
Resize 70%
To get the feathered effect make your Freehand Selection Tool active set on Freehand. Make a circle around your tube making sure the dotted line touches the area you want feathered.
Selections/Modify/Inside Outside Feather:
Both checked
Feather amount: 33%
OK
Selections/Invert
Tap the delete key until you have the effect you want.
Deselect.
Add your embellishments. I used:
From the tube I sectioned out the leaves that’s on the same layer as the cat.
From the kit:
Branch 2: Resize 75%
Branch: Resize 50%
Bird 3: Resize 25% and 50%/Mirror
Highlight your white canvas.
New Raster layer.
Select All.
Copy and paste Paper 7 Into Selection.
Deselect.
Apply the mask.
Merge Group.
Duplicate
Use your Target Tool and change the color to #6fac30.
Add your copyrights.
Add your name.
Color Pallet:
Foreground: #1e0f05
Background: Pattern/Paper 9
Stroke: .80
Type your name.
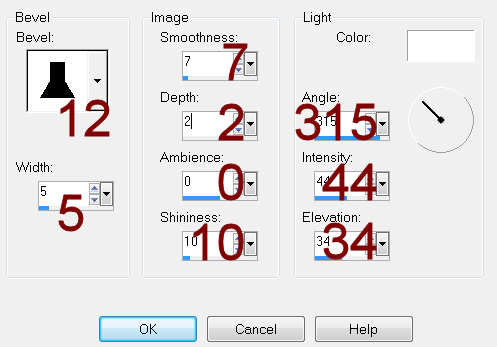
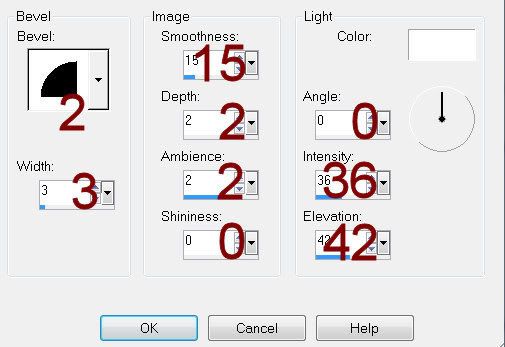
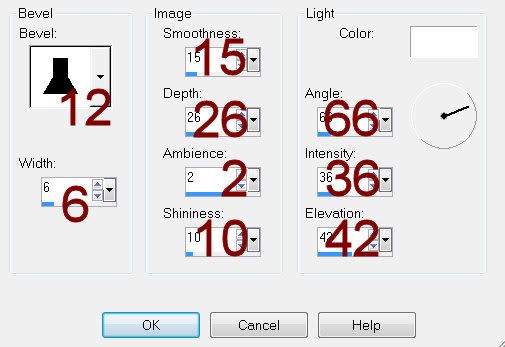
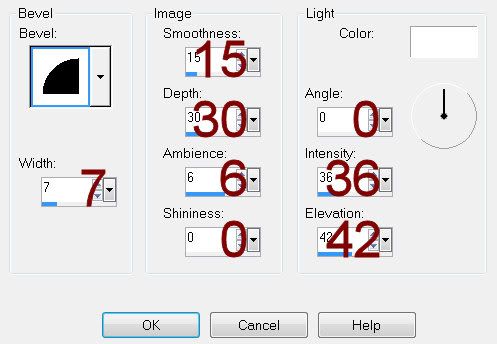
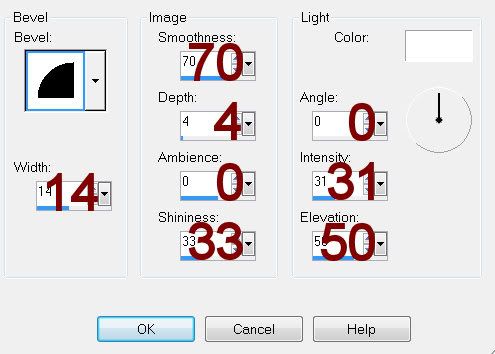
Give it a slight Inner Bevel:
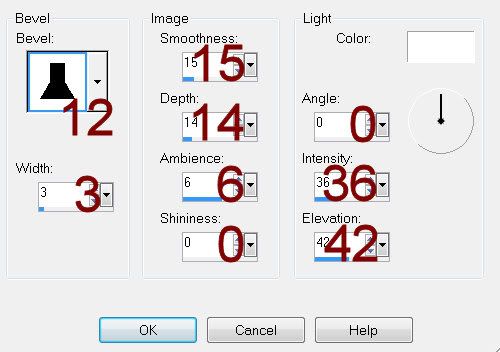
If you don’t want to animate your tag you can save.
To animate:
Highlight the tube layer.
Make your Selection Tool active set on Eclipse.
Use it to outline all the bubbles in the cauldron.
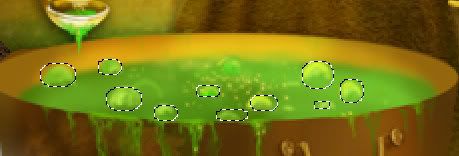
Once you have that done, Right Click on the tube in your layers pallet./Promote Section to layer/Rename Bubble 1.
Highlight the tube again/Right Click/Promote Section to layer/Rename Bubble 2.
Highlight the tube once again/Right Click Promote Section to layer/Rename Bubble 3.
Highlight Bubble 1 layer.
Apply DSB Flux - Bright Noise:
Intensity: 35
Mix checked
OK
Highlight Bubble 2 layer.
Apply the same Bright Noise effect accept hit the mix button twice.
Highlight Bubble 3 layer.
Apply the same Bright Noise effect accept hit the mix button 3 times.
Deselect.
Close out Bubble 2 and Bubble 3 layers.
Leave Bubble 1 layer open.
Highlight the tube layer.
Duplicate twice for a total of 3 tube layers.
Rename each Smoke 1, Smoke 2, and Smoke 3.
Highlight Smoke 1 layer.
Use your Freehand Selection Tool set on Freehand and section out an area you want the smoke to go - it doesn’t have to be exact!
Apply Eyecandy 5: Nature - Smoke:
Settings Tab:
Small, Bubbling Cauldron
Basic Tab:
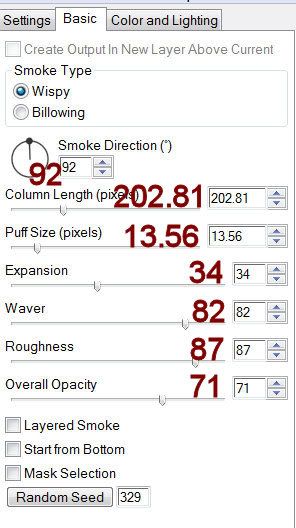
Color and Lighting Tab:
Default Settings
OK
Highlight Smoke 2 layer.
Apply the same smoke effect accept hit the random seed button once.
OK
Highlight Smoke 3 layer.
Apply the same smoke effect accept hit the random seed button once.
OK
Deselect.
Close out Smoke 2 and Smoke 3 layers.
Keep open Smoke 1 layer.
Copy Merge.
Time to Animate:
Open up Animation Shop.
Edit/Paste as New Animation.
Back in PSP.
Close out Bubble 1 and Smoke 1 layer.
Open up Bubble 2 and Smoke 2 layer.
Copy Merge
Carry into AS.
Edit/Paste/After Current Frame.
Back in PSP.
Close out Bubble 2and Smoke 2 layer.
Open up Bubble 3 and Smoke 3 layer.
Copy Merge
Carry into AS.
Edit/Paste/After Current Frame.
Ctrl + A to highlight all frame.
Animation/Frame Properties:
Change the Display time to 25.
Animation/Resize Animation:
Percentage of Original checked.
Width x Height: 80
OK
View your animation.
If you’re happy with it then save.
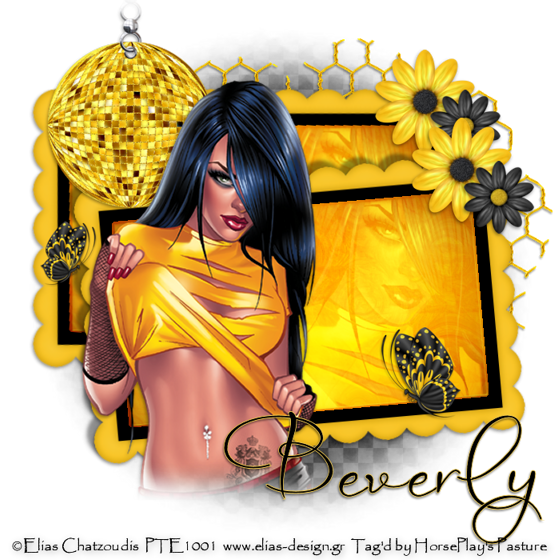
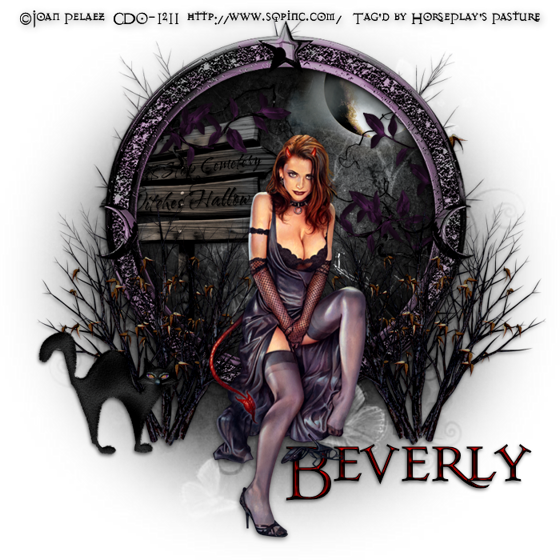
I hope you enjoyed this tutorial.
I’d love to see your results.
Email me!
Hugs,
Bev