Supplies Needed
1 tube of choice – I
used the beautiful artwork of Sandi Baker which can be purchased from MyTubed Art.
You must have a license to use.
“Spicy Southwest” is a full size scrap kit created
by Kathi of Kissed by Cari and can be purchased from TKOScraps.
You can visit her designing blog here.
Thank you Kathi for an
awesome kit!
This tutorial was
written assuming you have working knowledge of PSP.
~♥~ Let’s get started ~♥~
Open up a 700 x 700 blank canvas.
Flood fill white.
New Raster layer.
Make your Selection Tool active set
in Circle.
Create a circle approximately 550
pixels.
Copy and paste Blanket Paper 5 (from
Papers 3 folder) Into Selection.
Center it on your canvas.
Click anywhere outside of it with
your Magic Wand.
Selections/Invert
Adjust/Add Remove Noise/Add Noise:
Random and Monochrome checked
Noise: 37%
OK
Selections/Modify/Contract by 8
New Raster layer.
Copy and paste Grain Paper 3 (from
Papers 2 folder) Into Selection.
Copy and paste your tube as a new
layer.
Move into position – see my tag for
reference.
Selections/Invert
Tap the delete key.
Paste your tube again below the tube
layer.
Resize larger.
Change the Properties to Luminance
Legacy.
Lower the Opacity to about 53.
Move it into position – see my tag
for reference.
Tap the delete key.
Deselect.
Add your elements. I used:
From the Elements 1 folder:
Frame 1: Resize 38%/Free rotate Left 55 degrees/Duplicate
Concho Belt 2: Resize 15%/Duplicate 2x’s
Puffy Cactuslade: Resize 15%/Duplicate
Design 2: Resize 5% and 70%/Duplicate 2x’s
From Elements 3 folder:
Frames 6 & 7: Resize 25%
Highlight your white canvas.
New Raster layer.
Select All.
Copy and paste Grain Paper 4 Into
Selection.
Deselect.
Apply the Mask.
Resize 115%
Merge Group.
Add your copyrights.
Add your name.
Color Pallet:
Foreground: #1f1b19
Background: #750401
Stroke: 1.0
Type your name.
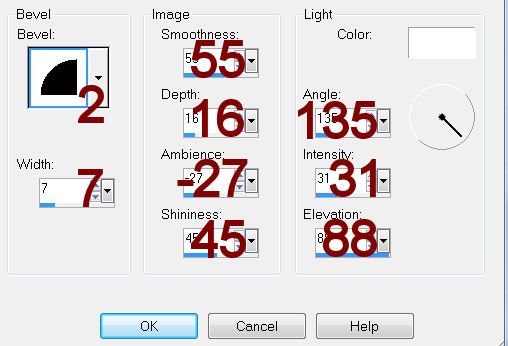
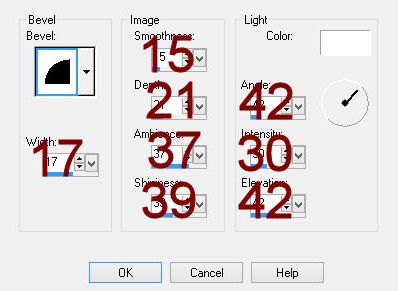
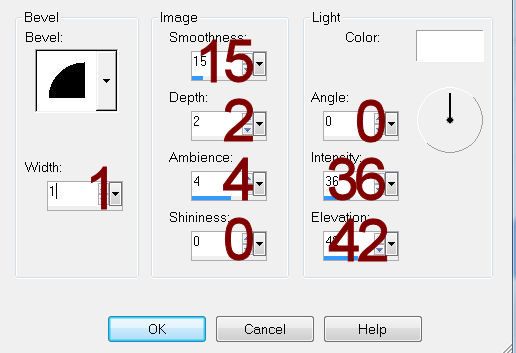
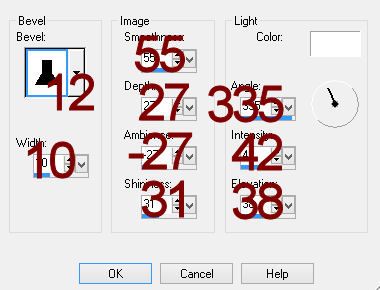
Give it a slight Inner Bevel:
Resize all layers 80%.
I’d love to see your results.
Hugs,
Bev