Saturday, January 31, 2009

Spring is in the Air

Photobucket
Supplies Needed

4 Tubes of choice –I'm using the artwork of PinUpToons
which you can purchase here
Font of choice - I'm using Baby Kruffy here
I used Vix Mask 100 here
"New Beginning" PTU taggers kit by Baby Cakes can be found on her blog here and can also be found at Cotton Candy Kreations.


This tutorial was written assuming you have working knowledge of PSP.

~♥~ Let’s get started ~♥~

Open a 600 X 600 transparent canvas. Flood fill white.

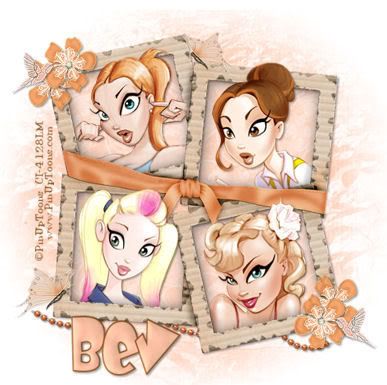
Copy and paste Frame as a new layer. Resize 60% Using your magic wand, click inside the frames. Selections/Modify/Expand by 4.

Copy and Paste a paper of choice as a new layer beneath the Frame. Resize 60%. Selection/Invert. Hit the delete key.

Copy and paste your tubes as a new layer above the paper layer into each frame. Hit the delete key.

New Raster Layer. Effects/3D Effects/Cutout:
Vertical and Horizontal: 5
Opacity: 35
Blur: 25
Color Black
Fill interior with color unchecked.

Repeat accept change the Vertical and Horizontal number to -5. Merge down. Deselect.

Close out your white canvas. Merge Visible. Open your white canvas back up and highlight the merged layer.

Copy and paste Pretty Blossom as a new layer. Resize 30% and move to top left corner of frame. Duplicate. Move slightly to the side. See my tag for reference. Merge blossoms together. Duplicate/Mirror/Flip.

Copy and paste the Hummingbird as a new layer. Resize 40% and position so it appears to be flying near the flower. Duplicate/Mirror. Position near the other set of flowers.

Copy and paste a butterfly of choice. Resize to a size you like and position on your canvas where you choose.

Copy and paste Peach Beads as a new layer. Resize 25%. Move toward the bottom of your frame. In your layers pallet move beneath the merge frame layer. Use your Pick Tool to turn slightly to the right.

Add your all your copyrights.

Add your name.
Foreground: 935926
Background set to pattern: Use Paper of Choice
The bevel I used for my name is:
Bevel: 2
Width: 20
Smoothness: 17
Depth: 3
Ambience: 0
Shininess: 14
Color: white
Angle: 248
Intensity: 28
Elevation: 63

Hope you enjoyed this tutorial.
I would love to see your results.
Email me.

Hugs,
Bev

Wednesday, January 28, 2009

Queen of Hearts

Photobucket
Supplies Needed

1 Tube of choice –I'm using the artwork of Ismael Rac
which you can purchase here
Font of choice - I'm using Valentine here
WSL_84 here
"Lovable" FTU taggers kit by Ella of CMDesignz which you can download here.
This Freebie kit is adorable!


This tutorial was written assuming you have knowledge of PSP.

~♥~ Let’s get started ~♥~

Open a 700 X 700 transparent canvas. Flood fill white.

Copy and paste Frame 3 as a new layer. Using your magic wand, click inside the frame. Selections/Modify/Expand by 4.

Copy and Paste a paper of choice as a new layer beneath the Frame. Selection/Invert. Hit the delete key.

New Raster Layer. Effects/3D Effects/Cutout. Use these settings:
Horizontal and Vertical: 5
Opacity: 35
Blur: 25
Shadow Color: Black
Fill Interior with Color unchecked.

Repeat above step accept change the horizontal and vertical to -5.
Deselect. Close out white canvas. Merge visible. Open the white canvas back up. Resize the heart 50%. Duplicate twice for a total of 3 and move into position. See my tag for reference.

Copy and paste Fleur as a new layer. Arrange so that it looks to be hanging over the hearts.

Copy and paste Love Coeur as a new layer. Selections/Float/Defloat. Flood fill with black. Deselect. Resize 30% and position it inside a heart of your choice.

Copy and paste the balloon as a new layer. Position so that it looks like it’s floating behind the hearts. See my tag for reference. Duplicate and move it slightly lower than the other.

Copy and paste Boite as a new layer. Position at the bottom of the hearts.

Copy and paste doodle couer as a new layer. Move behind all the hearts.

Copy and paste your tube as new layer. Position where you choose.

Highlight your white canvas. New Raster Layer. Select all. Paste a paper of choice into selection. Deselect. Apply the mask. Merge Group.

Add your copyrights.

Add your name.

Crop your image.

I hope you enjoyed this tutorial.
I would love to see your results.
Email me.

Hugs,
Bev
Secret Affair

Photobucket
Supplies Needed

1 Tube of choice –I'm using the artwork of Barbara Jensen
which you can purchase here
Font of choice - I'm using Adorable here
Mask of Choice. I used Becky Mask 23
Brush of choice - (a short written paragraph)
"Memories Add On" FTU taggers kit by RebelChick of which can be found on her blog, Whispers of a Memory.
This Freebie kit shows so much of Rebel’s talent that won’t disappoint!!


This tutorial was written assuming you have knowledge of PSP.

~♥~ Let’s get started ~♥~

Open a 650 X 600 transparent canvas. Flood fill white.

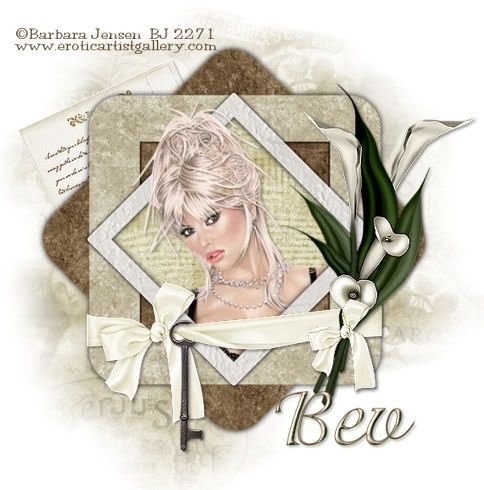
Copy and paste Frame as a new layer. Resize 85% Using your magic wand, click inside the frame. Selections/Modify/Expand by 4.

Copy and Paste a paper of choice as a new layer beneath the Frame. Resize 50%. Selection/Invert. Hit the delete key.

Copy and paste your tube as a new layer above the paper layer. Hit the delete key. Deselect.

Close out your white canvas. Merge Visible. Open your white canvas back up and highlight the Frame canvas.

Copy and paste the Bow as a new layer. Resize 55% and move toward the bottom of the frame. See my tag for reference.

Copy and paste the key as a new layer. Resize 40%. Move near the knot in the bow. Use your eraser tool and erase part of the key so that it appears the ribbon was slipped through the key.

Copy and paste as a new layer the Postcard. New Raster Layer. Use a brush of your choice (preferably words) on the left side. Merge down. Resize 40%. Free rotate 25 degrees left. Move into place behind the upper left portion of the frame. See my tag for reference.

Copy and paste Calla 1 as a new layer. Resize 60%. Move to the right side of the frame.

Copy and Paste the bow as a new layer. Resize 30% and move into position so that it appears to be holding the Calla Lilies together.

Highlight your white canvas. New Raster Layer. Select All. Copy and paste into selection a paper of choice. Deselect. Apply Becky Mask 23. Merge group.

Add all your copyrights.

Add your name.

I hope you enjoyed this tutorial.
I would love to see your results.
Email me.

Hugs,
Bev

Tuesday, January 27, 2009

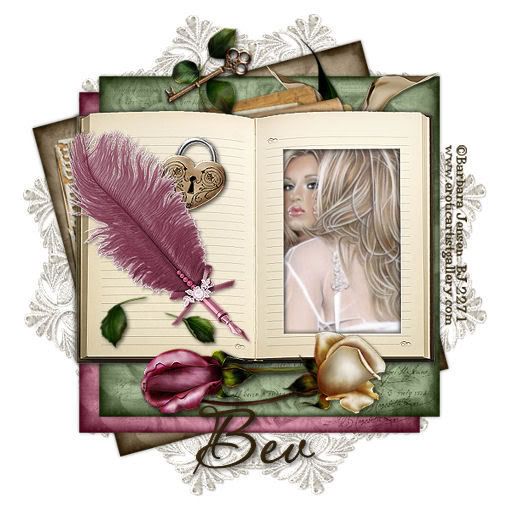
Reflective Memories

Photobucket
Supplies Needed

1 image of choice – I'm using the artwork of Barbara Jensen
which you can purchase here
Font of choice - I'm using Aquarelle here
"Memories" PTU taggers kit by RebelChick which can be found at Cotton Candy Kreations and her blog as well, Whisper of a Memory.
This kit is stunning with all its vintage charm. Thank you so much RebelChick!!

This tutorial was written assuming you have knowledge of PSP.

~♥~ Let’s get started ~♥~

Open a 600 X 600 transparent canvas. Flood fill white.

Copy and paste Lace 2 as a new layer.

Copy and paste a paper of choice as a new layer. Resize 50%. Free rotate 20 degrees left.

Copy and paste another paper of choice as a new layer. Resize 50%.

Copy and paste a third paper as a new layer. Resize 50%. See my tag for reference to move them into position.

Copy and paste Book Frame as a new image. Resize 60%. Use your magic wand and click inside the book frame. Selections/Modify/Expand by 2.

Copy and paste your image as a new layer beneath the book frame. Selections/Invert. Hit the delete button.

Copy and paste a feather pen of choice as a new layer. Resize 50%. Move toward the bottom left corner of the book frame. See my tag as reference.

Copy and paste the heart lock as a new layer beneath the feather pen. Resize 30%. Free rotate right 10 degrees.

Copy and paste Rose Leaf 3 as a new layer. Resize 40%. Position near the feather pen.

Copy and paste Rose Leaf 2 as a new layer. Mirror. Resize 30%. Position near the ribbon on the feather pen. Move the layer beneath the feather pen in your layers pallet.

Copy and paste the key as a new layer. Resize 40%. Free rotate 45 degrees to the right. Position over the book frame.

Copy and paste Rose Leaf 1 as a new layer beneath the key layer. Resize 20% and move into position. Again, see my tag as reference.

Copy and paste a Calla Lilly as a new layer beneath the book frame. Resize 50%. Move into position.

Copy and paste Journal 1 as a new layer beneath the book frame. Resize 50%. Free Rotate 20% left. Move into position. See my tag as reference.

Copy and paste Rose 2 as a new layer. Resize 45%. Free rotate 90 degrees left. Position beneath the book frame.

Copy and paste Rose 1 as a new layer. Resize 45%. Free rotate 120 degrees right. Position beneath the book frame.

Add all your copyrights.

Add your name.

I hope you enjoyed this tutorial.
I would love to see your results.
Email me.

Hugs,
Bev
Sunday, January 25, 2009

Pastel Innocence

Photobucket
Supplies Needed

2 Tubes of choice – (one close-up) - I'm using the artwork of Barbara Jensen
which you can purchase here
Font of choice - I'm using Saginaw here
Mask of Choice
Filters Unlimited 2.0 - optional
"My Kuuipo" is and Add on kit by Alane’s Designs which can be found on her blog Inspired to Dream Scraps.
This kit is so adorable and was lots of fun to use!
Thank you so much, Alane!!

This tutorial was written assuming you have knowledge of PSP.

~♥~ Let’s get started ~♥~
Open a 600 X 650 transparent canvas. Flood fill white

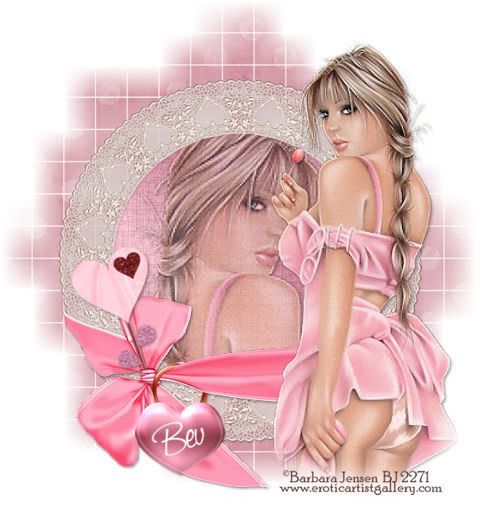
Copy and paste Lace Frame 1 as a new layer. Duplicate 3 times. Close out your white canvas and merge visible. Use your Magic Wand and click inside the lace frame. Selection/Modify/Expand by 2. New Layer beneath the Lace Frame. Flood fill with a gradient made from a light and dark color taken from your tube. Keep selected.

Effect/Plugs-Ins/Filters Unlimited 2.0
Choose Paper Textures and then Papyrus
Use default settings and apply.

Copy and paste your close-up tube as a new layer. If you don’t have a close up then resize your tube to a desired size. Move the Opacity down to 63.

Copy and paste as a new layer Ribbon Bow 1. Resize 25% and again 65%. Image/Mirror. Move into position. Use your eraser tool and erase any that overhangs the lace frame.

Copy and paste a lock of your choice. Resize 25% and 45%. Move into position. See my tag for reference. Erase the part of the lock so that it appears to be hanging on the ribbon.

Copy and paste as a new layer a Heart flower of choice. Resize 25% twice. Free rotate 20 degrees to the left and move into position so that it looks to be stuck in the bow. See my tag for reference.

Copy and paste your tube as a new layer beside the Lace Frame.
Highlight your white canvas. New Raster Layer. Select All and paste paper of choice into it. Deselect. Apply your mask. Merge group.

Add your copyrights.

Add your name.

I hope you enjoyed this tutorial.
I would love to see your results.
Email me.

Hugs,
Bev