
Supplies
1 tube of choice - I used the artwork of Very Many and can be purchased from
Pics For Design. You will have to create your own license to use.
Font of choice - I used Decibel
hereWeescotlass Mask 220
here“Tracey” is a tagger size scrap kit created by Aurelie of Pink Candy Designs and can be purchased from
Lollipops n Gumdrops. You can visit her blog
here.
Thank you Aurelie for a totally amazing Emo kit!
This tutorial was written assuming you have a working knowledge of PSP.
~♥~ Let’s get started ~♥~
Open up a 700 x 700 blank canvas.
Flood fill white.
Copy and paste Film Strip as a new layer.
Resize 75%
Free rotate Left 90 degrees.
(You will need to use the Pick Tool on this element in just a bit)
Copy and paste Chain 2 as a new layer.
Resize 90%
Duplicate
Resize 80%
Copy and paste Frame 2 as a new layer.
Resize 60%
Free rotate Left 10 degrees
In your layers pallet (from top to bottom) the elements should be:
Film Strip
Square Frame
Largest Circle Chain
Smaller Circle Chain
Move the elements into their exact positions - see my tag for reference.
For the Film Strip - make the Pick Tool active and push the top down just a little so that the top and bottom of the strip is just a tad larger than the sides of the circle chain.
Highlight the Smallest Circle Chain.
Click inside of it with your Magic Wand.
Selections/Modify/Expand by 2.
New Raster layer below the chain.
Copy and paste Paper 6 Into Selection.
Deselect.
Highlight the Largest Circle Chain.
Click inside of it with you Magic Wand.
Selections/Modify/Expand by 2
New Raster layer below the chain.
Copy and paste Paper 8 Into Selection.
Deselect.
Highlight the black square frame.
Click inside of with your Magic Wand.
Selections/Modify/Expand by 4.
New Raster layer.
Copy and paste Paper 10 Into Selection.
Copy and paste your tube as a new layer below the frame.
Selections/Invert
Tap the delete key.
Deselect.
Change the Properties to Overlay.
Highlight the Film Strip layer.
Click inside of each square with your Magic Wand.
Selections/Modify/Expand by 4.
Copy and paste Paper 10 as a new layer.
Resize 50%
Move into position below the strip.
Selections/Invert
Tap the delete key.
Copy and paste your tube as a new layer below the film strip layer.
Move into position.
Tao the delete key.
Deselect.
Change the Properties to Overlay.
Copy and paste your tube as a new layer.
Add your embellishments. I used:
Wire
Ribbon & Bow: Resize 35%/Mirror
Chain: Resize 50%/Free rotate Left 90 degrees
Star: Resize 25%/Duplicate/Mirror/Resize 70%
Star 2: Resize 25% and 80%/Duplicate/Mirror
Heart: Resize 60%
Bottle: Resize 60%
Bear: Resize 60%/Mirror
Butterfly 2: Resize 30%/Duplicate/Mirror
Highlight your white canvas.
New Raster layer.
Select All.
Copy and paste Paper 10 Into Selection.
Deselect.
Apply the mask.
Merge Group.
Move to center it behind your tag if needed.
Crop your image.
Add your copyrights.
Add your name.
Color Pallet:
Foreground: Black
Background: Pattern/Paper 10
Stroke: 1
Type your name.
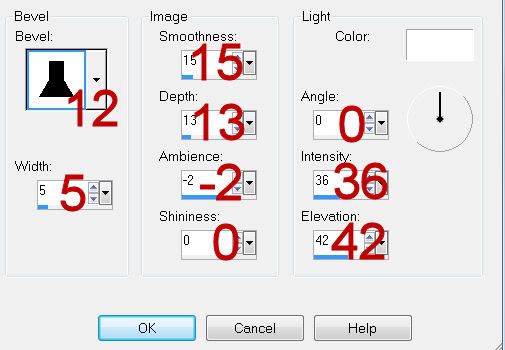
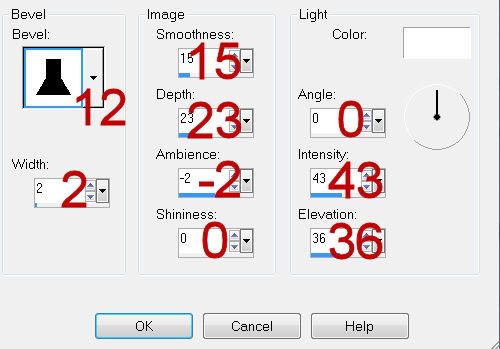
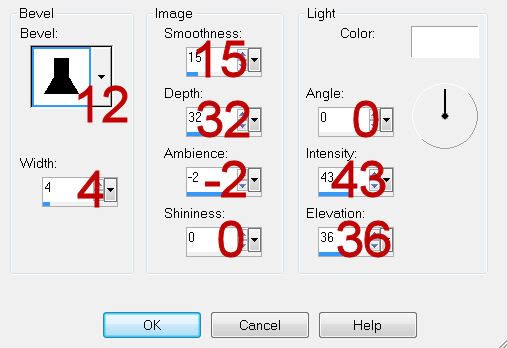
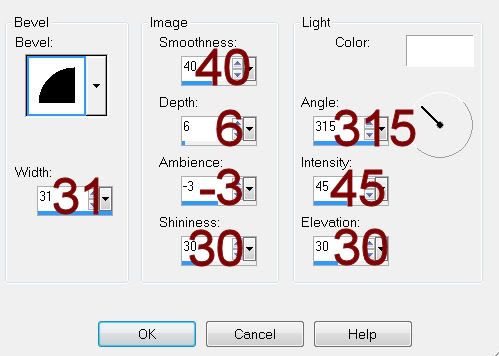
Give it a slight Inner Bevel:
Resize all layers 80%.
I hope you enjoyed this tutorial.
I’d love to see your results and show it off in my gallery.
Email me!
Hugs,
Bev


