Saturday, July 23, 2011

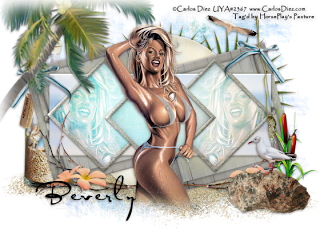
Beach Paradise


Supplies

1 tube of choice - I used the artwork of Carlos Diez and can be purchased from Up Your Art. You must have a license to use.

Font of choice - I used Al Sandra here

Weescotlass Mask 267 here

Divine Intentionz Template 409 here

Plug Ins:
Eyecandy 3.1 - glow
DSB Flux - Bright Noise

“Beach Paradise” is a full size scrap kit (also available in tagger size) created by Wilma of Wilma4Ever and can be purchased from her store Wilma4Ever. You can visit her blog here.
Thank you Wilma for such a beautiful summer kit!

This tutorial was written assuming you have a working knowledge of PSP.

~♥~ Let’s get started ~♥~

Open up the template.
Shift + D.
Close out the original.
Delete the credit layer.
Resize all layers 85%
Image/Canvas Size
700 x 500
OK
Highlight and open Raster 1 layer.
Flood fill white.

Highlight Circle layer.
Click on it with your Magic Wand.
New Raster layer.
Copy and paste Paper 8 Into Selection.
Deselect.
Delete the template layer.
Apply Eyecandy 3.1 - Glow:
Width: 5
Opacity: 100
Opacity Dropoff: Fat
Color: White
OK

Copy and paste Paper 12 as a new layer.
Resize 25% and 40%
Free rotate Left 15 degrees.
Copy
Close the paper layer out.

Highlight Square Left layer.
Click on it with your Magic Wand.
New Raster layer.
Paste Into Selection.
Deselect.
Delete the template layer.
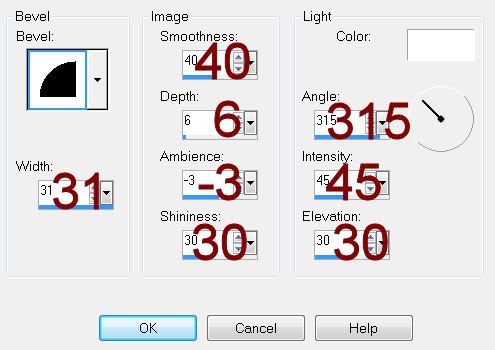
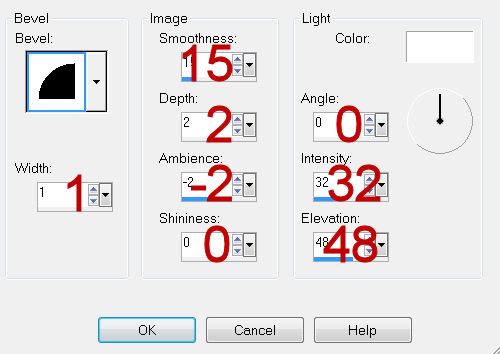
Give it a slight Inner Bevel:

Reopen the paper you resized.
Mirror/Flip/Copy
Delete the paper layer as you won’t be needing it any more.

Highlight Square Right layer.
Click on it with your Magic Wand.
New Raster layer.
Paste Into Selection.
Deselect.
Delete the template layer.
Give it the same slight Inner Bevel.

Highlight Rectangle layer.
Click on it with your Magic Wand.
New Raster layer.
Copy and paste Paper 7 Into Selection.
Deselect.
Delete the template layer.
Give it the same slight Inner Bevel.

Highlight Frame Back layer.
Click on both diamonds with your Magic Wand.
New Raster layer.
Copy and paste Paper 3 Into Selection.
Deselect.
Delete the template layer.

Highlight Frame 2 Back layer.
Repeat the above step.

Highlight Frame layer.
Click on it with your Magic Wand.
New Raster layer.
Copy and paste Paper 11 Into Selection.
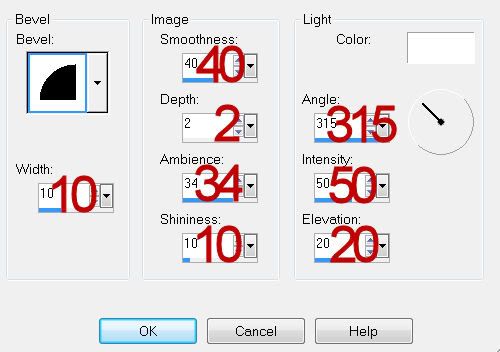
Give it a slight Inner Bevel:

Deselect.
Delete the template layer.
Apply DSB Flux - Bright Noise:
Intensity: 26
Mix checked
OK

Highlight Frame 2 layer.
Repeat the above step.

Copy and paste your tube below the left frame.
Move it into the position you want.
Duplicate/Mirror
Highlight the paper layer below the tubes.
Use your Magic Wand and click anywhere outside of it.
Highlight each of the tube layers and tap the delete key.
Deselect.
Change the Properties of both tube layers to Overlay.

Copy and paste your tube as a new layer.
Center it over the middle frame.

Add your embellishments. I used:
El 41: Resize 25% and 25%/Duplciate/Mirror
El 60: Resize 25% and 50%
El 77: Resize 25% and 40%/Mirror
El 50: Resize 25% and 50%/Free rotate Right 20 degrees/Duplicate
El 82: Resize 25% and 40%
El 80: Resize 25% and 35%/Duplicate/Mirror
El 81: Duplicate
El 3: Resize 25% and 40%
El 30: Resize 25% and 40%
El 16: Resize 25% and 50%

Copy and paste El 51
Resize 25%
Be sure it’s at the top of your layers pallet.
Move it into position.
Highlight your white canvas.
Select All.
Selections/Modify/Inside Outside Feather
Both checked
Feather amount: 43
OK
Highlight the palm tree layer.
Tap the delete key until you have a nice feathered effect.
Deselect.

Highlight your white canvas.
New Raster layer.
Select All.
Copy and paste Paper 2 Into Selection.
Deselect.
Apply the mask.
Merge Group.
Duplicate
Change the Properties to Multiply.

Add your copyrights.

Add your name.

Resize all layers 80%.

I hope you enjoyed this tutorial.
I’d love to see your results and show it off in my gallery.
Email me!
Hugs,
Bev

Midnight Escape


Supplies

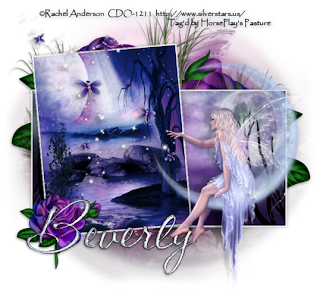
1 tube of choice - I used the artwork of Rachel Anderson and can be purchased from CDO. You must have a license to use.

Font of choice - I used CAC Shishoni Brush here

Mask here. I’ve had it for many years and never knew who it belonged to. Please email me if you know who created it so I can give proper credit.

Plug Ins:
Eyecandy 3.1 - glow
DSB Flux - Bright Noise

“Midnight Escape” is a tagger size scrap kit created by Jen of Jen’s Sweet Tempations and can be purchased from Lollipops n Gumdrops. You can visit her blog here.
Thank you Jen for a magical midnight kit!

This tutorial was written assuming you have a working knowledge of PSP.

~♥~ Let’s get started ~♥~

Open up a 700 x 700 blank canvas.
Flood fill white.

Make your Selection Tool active set on Rectangle and make a rectangle approximately 300 x 375 Pixels.
New Raster layer.
Copy and paste Paper 7 Into Selection.
Deselect.
Apply Eyecandy 3.1 - Glow:
Width: 5
Opacity: 100
Opacity Dropoff: Fat
Color: White
OK
Free rotate Left 5 degrees

Make your Selection Tool active again and make a rectangle approximately 525 x 375 pixels.
Copy and paste Paper 11 as a new layer.
Resize 70%
Position within the marching rectangle ants.
Selections/Invert
Tap the delete key.
Deselect.
Apply the same glow effect.

Move both rectangle into position -
See my tag for reference.

Copy and paste your tube as a new layer.

Copy and paste Décor 3 as a new layer.
Resize 120%
Position it behind both rectangles so that just the grass stick up - erase the part of the element that you don’t want sticking out from behind and duplicating the element as many times as you like.
See my tag for reference.

Add your embellishments. I used:
Bfly 2
Wing: Resize 60%/Mirror
Flower 1: Place behind the rectangles/Duplicate/Mirror
Flower 1 again: Resize 40%

Crop your image.

Highlight your white canvas.
New Raster layer.
Select All.
Copy and paste Paper 12 Into Selection.
Deselect.
Apply the mask.
Merge Group.

Add your copyrights.

Add your name.
Color Pallet:
Foreground: Black
Background: Pattern/Set to Paper 7/Scale 100
Stroke: 1

Type your name.
Convert to Raster layer.
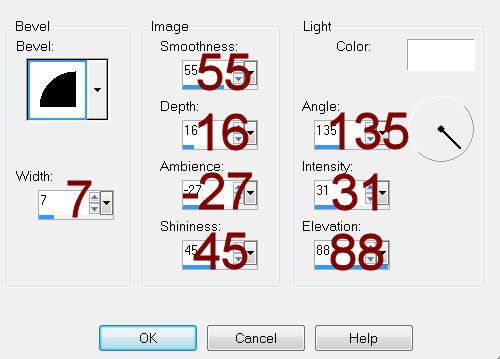
Give it a slight Inner Bevel:


Deselect.

Apply DSB Flux - Bright Noise:
Intensity: 34%
Mix checked
OK

Resize all layers 80%.

I hope you enjoyed this tutorial.
I’d love to see your results and show it off in my gallery.
Email me!
Hugs,
Bev

Friday, July 22, 2011

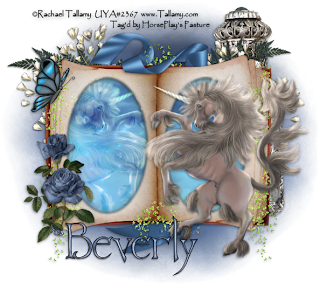
Come Midnight


Supplies

1 tube of choice - I used the beautiful artwork of Rachel Tallamy and can be purchased from Up Your Art. You must have a license to use.

Font of choice - I used Wretched here

Monti Circular Mask here

“Come Midnight” is a tagger size scrap kit created by Kathi of Kissed by Cari and can be purchased from TKO Scraps. You can visit her blog here.
Thank you so much Kathi for an absolutely stunning kit!

This tutorial was written assuming you have a working knowledge of PSP.

~♥~ Let’s get started ~♥~

Open up a 700 x 700 blank canvas.
Flood fill white.

Copy and paste Frame as a new layer.
Click inside of each oval with your Magic Wand.
Selections/Modify/Expand by 4.
New Raster layer below the frame.
Copy and paste Paper 20 Into Selection.
Deselect.

Copy and paste your tube as a new layer.
Move it into position in front of the right side of the frame.
Duplicate/Mirror
Move the duplicated tube layer below the left side of the frame in your layer’s pallet.
Highlight the paper layer.
Click anywhere outside of it with your Magic Wand.
Highlight the duplicated tube layer.
Tap the delete key.
Deselect.
Change the Properties to Overlay.

Add your embellishments. I used:
Flower 3: Resize 50%
Ribbon 5
Bottle
Baby’s Breath: Duplicate/Mirror/Erase the bottom stem of both
Fern: Resize 80%/Position behind the left side of the frame/Duplicate/Mirror/Resize 70%
Flutter 5: Resize 25%

Highlight your white canvas.
New Raster layer.
Select All.
Copy and paste Paper 19 Into Selection.
Deselect.
Apply the mask.
Use your Pick Tool and push the top and bottom inward just a little.
Merge Group.
Crop your image - be careful not to crop any of the mask.

Add your copyrights.

Add your name.
Color Pallet:
Foreground: Black
Background: Pattern/Set to Paper 19/Scale 100
Stroke: 1

Type your name.
Convert to Raster layer.
Select All/Float/Defloat
Selections/Modify/Contract by 1
Give it a slight Inner Bevel:


Deselect.

Resize all layers 80%.

I hope you enjoyed this tutorial.
I’d love to see your results and show it off in my gallery.
Email me!
Hugs,
Bev

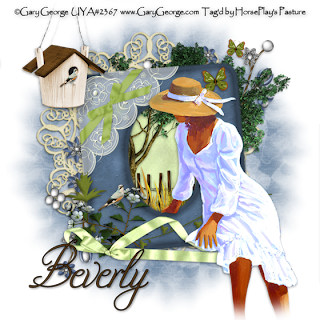
To Grandmother's House


Supplies

1 tube of choice - I used the beautiful artwork of Gary George and can be purchased from Up Your Art. You must have a license to use.

Font of choice - I used Nadine Script here

Weescotlass Mask 138 here

“To Grandmother‘s House” is a tagger size scrap kit created by me, HorsePlay’s Pasture Designs and can be purchased from any of my stores Lollipops n Gumdrops, TKO Scraps, Butterfly Blush Designs, or Inspirations of Scrap Friends. You can visit my designing blog here.

This tutorial was written assuming you have a working knowledge of PSP.

~♥~ Let’s get started ~♥~

Open up a 700 x 700 blank canvas.
Flood fill white.

Copy and paste 47 as a new layer.
Resize 65%
Free rotate Left 5 degrees.
Click inside of it with your Magic Wand.
Selections/Modify/Expand by 4.
New Raster layer below the frame.
Copy and paste Paper 6 Into Selection.
Copy and paste 42 below the frame.
Resize 40%
Move into position
Selections/Invert
Tap the delete key.
Copy and paste 41 as a new layer just below the frame.
Resize 70%
Move into position.
Tap the delete key.
Copy and paste 17 just below the frame.
Move into position.
Tap the delete key.
Deselect.

Copy and paste your tube as a new layer.

Add your embellishments. I used:
24: Resize 75%
25
41: Resize 60%
12: Resize 40%/Mirror
53
58: Resize 30%
7: Resize 75% and 85%/Mirror/Free rotate Left 145 degrees
18: Resize 25% and 60%/Free rotate Left 5 degrees/Duplicate/Mirror/Resize 70%
10: Resize 10%/Position in front of the birdhouse.
10 again: Resize 15%/Positon on the flowers branch.

Highlight your white canvas.
New Raster layer.
Select All.
Copy and paste Paper 10 Into Selection.
Deselect.
Apply the mask.
Resize 120%
Merge Group.

Add your copyrights.

Add your name.

Resize all layers 80%.

I hope you enjoyed this tutorial.
I’d love to see your results and show it off in my gallery.
Email me!
Hugs,
Bev

Wednesday, July 20, 2011

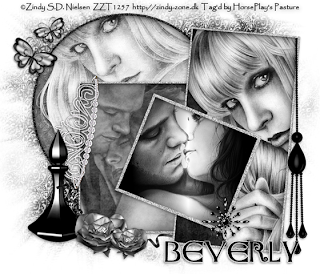
Pewter Dreams


Supplies

3 tubes of choice - I used the beautiful artwork of Zindy S.D. Nielsen which can be purchased from her store here. You must have a license to use.

Font of choice - I used Anglo-Saxon here

Weescotlass Mask 249 here

Scraps of Enchantment Template 125 here

Eyecandy 3.1 - Glow

“Pewter Dreams” is a tagger size scrap kit created by Pixie of KissedByPix and can be purchased from her store TKO Scraps. You can visit her blog here.
Thank you Pixie for another stunning kit!

This tutorial was written assuming you have a working knowledge of PSP.

~♥~ Let’s get started ~♥~

Open up the template.
Shift + D.
Close out the original.
Delete the top 4 layers.
Resize all layers 85%
Image/Canvas Size:
700 x 600
Highlight Raster 1 layer and flood fill white.

Highlight Circle Background layer.
Click on it with your Magic Wand.
New Raster layer.
Copy and paste Paper 4 Into Selection.
Copy and paste your tube as a new layer.
Move into position.
Selections/Invert
Tap the delete key.
Deselect.
Delete the template layer.
Change the Properties to Hard Light.

Highlight Circle Frame layer.
Adjust/Add Remove Noise/Add Noise:
Random and Monochrome checked
Noise: 48%
OK

Highlight Rectangle Background.
Click on it with your Magic Wand.
New Raster layer.
Copy and paste Paper 2 Into Selection.
Copy and paste a different tube as a new layer.
Move into position.
Selections/Invert
Tap the delete key.
Deselect.
Delete the template layer.
Change the Properties to Screen.

Highlight Large Rectangle Background layer.
Click on it with your Magic Wand.
New Raster layer.
Copy and paste Paper 2 Into Selection.
Copy and paste the same tube as you used in the circle as a new layer.
Move into position.
Selections/Invert
Tap the delete key.
Deselect.
Delete the template layer.
Change the Properties to Hard Light.

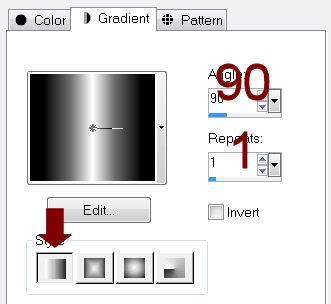
Color Pallet:
Foreground: Black
Background: White
Set your Gradient settings to match mine:


Highlight Square Background.
Click on it with your Magic Wand.
New Raster layer.
Flood fill with the gradient.
Copy and paste a different tube as a new layer.
Move into position.
Selections/Invert
Tap the delete key.
Deselect.
Delete the template layer.
Change the Properties to Hard Light.

Highlight Square Frame.
Apply the same noise effect.

Add your embellishments. I used:
Butterfly 1: Resize 25% and 70%/Duplicate/Mirror/Resize 70%
Dangle 2
Pearl Flake 2; Resize 25%
Perfume 4: Resize 60%
Tiara: Resize 40%/Free rotate Left 80%/Adjust/Sharpness/Sharpen
Flower 1: Resize 30%/Duplicate/Mirror/Resize 70%
Curly 2: Resize 40%/Flip

Highlight your white canvas.
New Raster layer.
Select All.
Copy and paste Paper 6 Into Selection.
Deselect.
Apply the mask.
Resize 120%
Merge Group.

Add your copyrights.

Add your name.
Apply Eyecandy 3.1 - Glow:
Width: 3
Opacity: 100
Opacity Drop off: Fat
Color: white
OK

Resize all layers 80%.

I hope you enjoyed this tutorial.
I’d love to see your results and show it off in my gallery.
Email me!
Hugs,
Bev

Monday, July 18, 2011

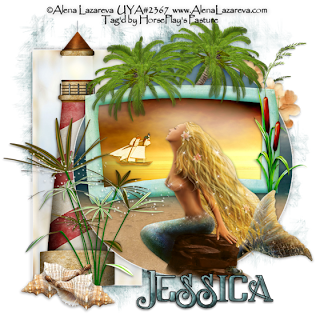
Catch a Wave


Supplies

1 tube of choice - I used the beautiful artwork of Alena Lazareva and can be purchased from Up Your Art. You must have a license to use.

Font of choice - I used Sucker Font here

Weescotlass Mask 297 here

Eyecandy 3.1 - Glow

“Catch A Wave” is a tagger size scrap kit created by Jessica of Gothic Inspirations and can be purchased from Stargazer Scraps. You can visit her blog here.
Thank you Jessica for another wonderful summer themed kit!

This tutorial was written assuming you have a working knowledge of PSP.

~♥~ Let’s get started ~♥~

Open up a 700 x 700 blank canvas.
Flood fill white.

Make your Selection Tool active set to Circle.
Make a circle approximately 475 pixels.
New Raster layer.
Copy and paste Paper 1 Into Selection.
Deselect.
Apply Eyecandy 3.1 - Glow:
Width: 3
Opacity: 100
Opacity Drop off: Fat
Color: white
OK

Don’t worry about placement yet.

Make your Selection Tool active again set on Rectangle.
Make a rectangle approximately 250 x 525 pixels.
New Rater layer.
Copy and paste Paper 9 Into Selection.
Deselect.
Apply Eyecandy 3.1 - Glow:
Use same settings

Copy and paste Frame 1 as a new layer.
Resize 60%

Move all layers into position - see my tag for reference.

Highlight the frame layer.
Click inside of it with your Magic Wand.
Selections/Modify/Expand by 4.
New Raster layer below the frame.
Copy and paste Paper 5 Into Selection.
Deselect.

Copy and paste Ship as a new layer.
Resize 25% and 70%
Position over the paper.
Change the Properties to Hard Light.

Copy and paste your tube as a new layer.

Add your embellishments. I used:
Cattails: Resize 40%
Lighthouse: Resize 80%
Flowers: Erase the long stem if it stick out at the bottom of the circle
Sea Grass: Resize 40%
Palm Tree I: Resize 50%/Duplicate/Mirror
Greenery: Resize 60%
Shell I: Resize 30%/Duplicate/Mirror

Highlight your white canvas.
New Raster layer.
Select All.
Copy and paste Paper 2 Into Selection.
Deselect.
Apply the mask.
Merge Group.

Add your copyrights.

Add your name.
Color Pallet:
Foreground: Black
Background: Pattern/Paper 2
Stroke: 1
Type your name.
Convert to Raster layer.
Select All/Float/Defloat
Selections/Modify/Contract by 1
Give it a slight Inner Bevel:


Deselect.

Resize all layers 80%.

I hope you enjoyed this tutorial.
I’d love to see your results and show it off in my gallery.
Email me!
Hugs,
Bev

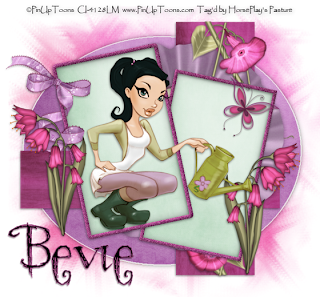
Spring Magic


Supplies

1 tube of choice - I used the artwork of PinUpToons that can now be purchased from CDO. You must have a license to use.

Font of choice - I used Majestrick here

Weescotlass Mask 249 here

Creative by Nature Template 110 here

Eyecandy 3.1 - Glow

“Spring Magic” is a tagger size scrap kit created by Vella of Wench Designs can be purchased from Stargazer Scraps. You can visit her blog here.
Thank you Vella for such a sweet kit!

This tutorial was written assuming you have a working knowledge of PSP.

~♥~ Let’s get started ~♥~

Open up the template.
Shift + D.
Close out the original.
Delete the top 4 layers.
Image/Canvas Size:
700 X 650
OK
New Raster layer.
Send to bottom and flood fill white.

Highlight 10 layer.
Click on it with your Magic Wand.
New Raster layer.
Copy and paste Paper 12 Into Selections.
Deselect.
Delete the template layer.
Apply Eyecandy 3.1 - Glow:
Width: 3
Opacity: 100
Opacity Drop Off: Fat
Color: White
OK

Highlight 9 layer.
Click on it with your Magic Wand.
New Raster layer.
Copy and paste Paper 11 Into Selection.
Deselect.
Delete the template layer.

Highlight 8 layer.
Repeat the above step.

Highlight 7 layer.
Click on it with your Magic Wand.
New Raster layer.
Copy and paste Frame 2 Into Selection.
Deselect.
Delete the template layer.
Use your Magic Wand and click inside the frame.
Selections/Modify/Expand by 4.
New Raster layer below the frame.
Copy and paste Paper 16 Into Selection.
Deselect.

Highlight 6 layer.
Click on it with your Magic Wand.
New Raster layer.
Copy and paste Paper 15 Into Selection.
Deselect.
Delete the template layer.

Highlight 4 layer.
Repeat the above step.

Highlight 5 layer.
Click on it with your Magic Wand.
New Raster layer.
Copy and paste Paper 1 Into Selection.
Deselect.
Delete the template layer.
Give it a slight Inner Bevel:


Adjust/Add Remove Noise/Add Noise:
Gaussian and Monochrome checked
Noise: 28%
OK

Highlight 3 layer.
Repeat the above steps.

Add your embellishments. I used:
Vine 3: Resize 85%/Use your Pick Tool to pull the top and sides down so they’re flush with the rectangle edges.
Flower 18: Resize 50%/Duplicate/Mirror
Bow 8: Resize 50%/Flip
Butterfly 1: Resize 25%

Copy and paste your tube as a new layer.

Highlight your white canvas.
New Raster layer.
Select All.
Copy and paste Paper 14 Into Selection.
Deselect.
Apply the mask.
Resize 120%
Merge Group.

Add your copyrights.

Add your name.
Color Pallet:
Foreground: Pattern/Paper 11
Background: Black
Type your name.
Give it a drop shadow.

Resize all layers 80%.

I hope you enjoyed this tutorial.
I’d love to see your results and show it off in my gallery.
Email me!
Hugs,
Bev

Sunday, July 17, 2011

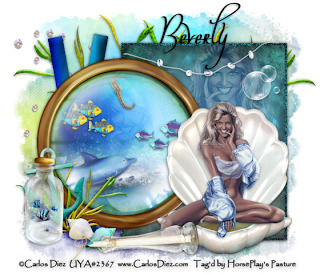
Sea Secrets


Supplies

1 tube of choice - I used the gorgeous artwork of Carlos Diez which can be purchased from Up Your Art. You must have a license to use.

Font of choice - I used Oh Lara - a pay font

Becky Mask 22 here

Creative by Nature Template 39 here

“Sea Secrets” is a tagger size scrap kit created by Conchi of Dnscraps can be purchased from Aussie Scrap Designs. You can visit her blog here.
Thank you Conchi for such an amazing summer themed kit!!

This tutorial was written assuming you have a working knowledge of PSP.

~♥~ Let’s get started ~♥~

Open up the template.
Shift + D.
Close out the original.
Delete the top 4 layers and Raster 6 layer.
Image/Canvas Size:
700 X 600
OK
Open up Raster 1 layer and flood fill white.

Highlight Raster 2 layer.
Click anywhere outside of it with your Magic Wand.
Selections/Invert
New Raster layer.
Copy and paste Paper 8 Into Selections.
Adjust/Add Remove Noise/Add Noise:
Gaussian and Monochrome checked
Noise: 58%
OK
Deselect.
Delete the template layer.

Highlight Raster 5 layer.
Click on it with your Magic Wand.
New Raster layer.
Copy and paste Paper 13 Into Selection.
Deselect.
Delete the template layer.
Give it a slight Inner Bevel:


Highlight Copy of Vector 1 layer.
Click on it with your Magic Wand.
New Raster layer.
Flip Paper 13/Copy
Make your working canvas active.
Paste Into Selection.
Deselect.
Delete the template layer.
Give it the same slight Inner Bevel.

Highlight Copy of Vector 1 layer (the big pink square layer).
Click on it with your Magic Wand.
New Raster layer.
Copy and paste Paper 5 Into Selection.
Copy and paste your tube as a new layer above the paper.
Move into position.
Selections/Invert
Tap the delete key.
Deselect.
Change the Properties to Soft Light.

Highlight Raster 3 layer.
Click anywhere outside of it with your Magic Wand.
Selections/Invert
New Raster layer.
Copy and paste Paper 4 Into Selection.
Copy and paste Seasecrettimon2 Into Selection.
Close this layer out for now.
Deselect.
Delete the template layer.

Add the following embellishments just above the paper layer:
Seahorse: Resize 25% and 50%
Fish 4: Resize 25% and 60%
Fish 4 again: Resize 25% and 50%/Duplicate/Resize 60%
Fish 3: Resize 25% and 60%/Duplicate/Resize 60%/Duplicate
Delphin: Resize 30%

Copy and paste your tube as a new layer just above the round circle paper layer.
Click anywhere outside of the paper layer with your Magic Wand.
Highlight the tube layer.
Tap the delete key.
Deselect.
Change the Properties to Soft Light.
Lower the Opacity to around 35 or so.

Reopen Seasecrettimon2 layer.
To give it a drop shadow (and any other drop shadows you don’t want the shadow to show through the element) do the following:
Give the element a drop shadow on it’s own layer.
Highlight the element layer.
Click anywhere outside of the embellishment with your Magic Wand.
Selections/Invert
Selections/Modify/Contract by 1
Highlight the drop shadow layer.
Tap the delete key.
Deselect.

Copy and paste Seasecretshelbed as a new layer.
Resize 60%
Move into position.

Copy and paste your tube as a new layer.

Add your embellishments. I used:
Anchor: Resize 30%/Free rotate Left 10 degrees
String 3: Resize 55%/Free rotate Left 10 degrees
Bubbles: Resize 25% and 50%
Algae: Resize 70%/Position just above your white canvas/Duplicate/Mirror
Algae again: Resize 40%
Pearls 2: Erase whatever pearls you don’t want
Bottle 2: Resize 30%
Conch & Conch 2: Resize 25% and 50%
Bottle 4: Resize 40%

Highlight your white canvas.
New Raster layer.
Select All.
Copy and paste Paper 2 Into Selection.
Deselect.
Apply the mask.
Merge Group.
Duplicate

Add your copyrights.

Add your name.

Resize all layers 80%.

I hope you enjoyed this tutorial.
I’d love to see your results and show it off in my gallery.
Email me!
Hugs,
Bev
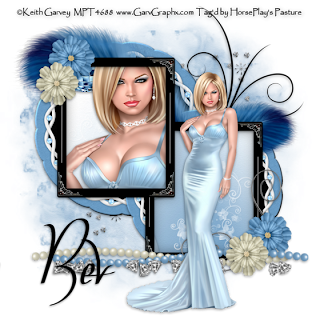
Independant Woman


Supplies

1 tube of choice - I used the artwork of Keith Garvey which can now be purchased from PSP Tubes Emporium. You must have a license to use.

Font of choice - I used Oh Lara - a pay font

Gem’s Mask 21 here

“Independent Woman” is a FTU tagger size scrap kit created by me and can be found on my blog here. Please leave a thank you when downloading as it’s always much appreciated.

This tutorial was written assuming you have a working knowledge of PSP.

~♥~ Let’s get started ~♥~

Open up a 700 x 700 blank canvas.
Flood fill white.

Copy and paste 30 as a new layer.
Resize 85%
Click inside of each frame with your Magic Wand.
Selections/Modify/Expand by 4.
New Raster layer below the frame.
Copy and paste Paper 3 Into Selection.
Copy and paste your tube as a new layer.
Position it below the top frame.
Selections/Invert
Tap the delete key.
Copy and paste 29 as a new layer
Position behind the tube layer.
Tap the delete key.
Move into position.
Deselect.

Copy and paste 32 as a new layer.
Resize 80%
Click inside of it with your Magic Wand.
New Raster layer.
Copy and paste Paper 14 Into Selection.
Deselect.
Highlight the frame layer.
Merge Down.
Duplicate
Move both frames into position - see my tag for reference.
Resize the round frame you position at the right side 90%.

Copy and paste your tube as a new layer.

Add your embellishments. I used:
19: 25% and 90%/Duplicate
22: Resize 25%/Duplicate
34: Resize 70%/Free rotate Left 25 degrees
40: Resize 50%
14
14 again: Resize 70%/Mirror
35: Resize 60%
2: Resize 80%
1: Resize 80%/Mirror
25: Resize 25% and 70%/Duplicate as many times as you like rotating them this way and that.

Highlight your white canvas.
New Raster layer.
Select All.
Copy and paste Paper 6 Into Selection.
Deselect.
Apply the mask.
Merge Group.

Add your copyrights.

Add your name.

Resize all layers 80%.

I hope you enjoyed this tutorial.
I’d love to see your results and show it off in my gallery.
Email me!
Hugs,
Bev