Friday, April 18, 2014

Sea Blue


Supplies Needed

1 tube of choice – I used the beautiful artwork of Greg Andrews and can be purchased from UpYour Art.  You must have a license to use.

Font of choice – Dragonfly here

Designs by Vayvs Mask 111 here

Millie’s Template 133 here

 “Mari Mar” is a tagger size scrap kit created Cari of Black Widow Creationz  and can be purchased from HeartbeatzCreationz.  You can visit her blog here.  Thank you Cari for a fabulous summer kit! 
  
This tutorial was written assuming you have working knowledge of PSP. 

~~ Let’s get started ~~

Open up the template.
Shift + D.
Close out the original.
Open up the background layer.
Delete the top 3 layers and #2 layer.

Quick Note:
I changed the color of a few elements/papers to match the blue in the tube better.  The color I used was #2751a2 and will let you know in the tutorial what I have recolored.

Highlght #1 layer.
Click on it with your Magic Wand.
New Raster layer.
Copy and paste Paper 3 Into Selection.
Duplicate/Change the Properties to Overlay.
Deselect.
Delete the template layer.

Highlght #3 layer.
Click on it with your Magic Wand.
New Raster layer.
Copy and paste Paper 1 Into Selection.
Deselect.
Delete the template layer.
Give it a slight Inner Bevel:

Color Pallet:
Foreground: #000000
Background: #46678d

Highlight #4 layer.
Make your Color Replacer Tool active.
Double right click your mouse on the dotted line.
It should turn to a shade of blue.

Highlight #5 layer.
Click on it with your Magic Wand.
New Raster layer.
Copy and paste Paper 6 Into Selection.
Adjust/Add Remove Noise/Add Noise:
Gaussian and Monochrome checked
Noise: 58%
OK
Deselect.
Delete the template layer.
I recolored this paper layer.

Repeat the above step with:
#7, #9, and #11 layers

Copy and paste Paper 3 as a new layer over #6 layer.
Highlight #6 layer.
Click on it with your Magic Wand.
In your layers pallet highlight the paper layer and right click your mouse.
Choose “Promote Section to Layer” from the menu.
Deselect.
Do Not delete the template layer.

Move Paper 3 above #8 layer.
Repeat the above step.

Repeat the above step with #8, #10, and #12 layers.

Once you have done that you can then delete Paper 3 as you will no longer be using it.

To each square paper layer:
Duplicate the paper.
Change the Properties to Overlay.

Copy and paste your tube as a new layer.
Position it in front of the squares – see my tag for reference.
Duplicate the tube layer and move it up slight.
Move it below the original tube layer in your layers pallet and position it exactly as you’d like it to be within the small squares.  You can even change the Opacity of the tube to get a better idea of where you want this tube.  Once you have the tube in exact position you’re going to promote it just as you did the paper:
In your layers pallet move the tube layer just above the papers that belong to #6 layer.
Highlight #6 layer and click on it with your Magic Wand.
Highlight the tube layer that’s just above the paper layer and right click your mouse.
Choose “Promote Section to Layer”
Change the Opacity of the Promoted layer to Burn and lower the Opacity to about 69.
Deselect.
Delete the template layer.

Repeat the above step with the remaining 3 squares.

Add your elements.  I used:
El13:  Resize 75%
El10: Use Pick Tool to flatten/Duplicate as many times as you like
El2:  Resize 85%
El 9:  I recolored this element
El1: Duplicate 2x’s/Resize one of them 60% and mirror it
El 12:  Resize 30%/Duplicate/Resize 70%/Flip
El 12 again:  Resize 25%
El 17:  Resize 15%
El 24:  Resize 60%
El 14:  Resize 20%/Free rotate Right 8 degrees/Duplicate/Mirror
El 11
El 3

Highlight your white background.
New Raster layer.
Select All.
Copy and paste Paper 4 Into Selection.
Deselect.
Apply the mask.
Merge Group.
I changed the color of this mask layer.

Add your copyrights.

Add your name.
Color Pallet:
Foreground:  # 2751a2
Background: # #60843a
Set the foreground to Gradient:
Choose Style: Linear
Angle: 328
Repeats: 0
Invert checked
OK
Set your Background color to gradient:
Use same settings.

Type your name.
Apply a slight slight Inner Bevel:

Select All/Float/Defloat
Selections/Modify/Expand by 1.
New Raster layer below your name.
Flood fill with #000000
Deselect.
Highlight your name layer above in your layers pallet.
Merge Down.

Resize all layers 85%.
   
I’d love to see your results.
Email me!
Hugs,
Bev

Thursday, April 17, 2014

Deployment


Supplies Needed

1 tube of choice – I used the amazing artwork of Rachael Tallamy which can be purchased from UpYour Art.  You must have a license to use.

Font of choice – I used Meditation here

Becky mask 22 here

“Deployment” is a tagger size scrap kit created by me, Bev, HorsePlay’s Pasture Designs.  It can be purchased from any of my stores here. 
  
This tutorial was written assuming you have working knowledge of PSP. 

~~ Let’s get started ~~

Open up a 700 x 700 blank canvas.
Flood fill white.

Copy and paste EL20 as a new layer.
Resize 130% and 120%
Free rotate Left 90 degrees.
Make your Freehand Selection Tool active set on Point to Point.
Trace around the glass keeping marching ants just slightly larger than the glass.
New Raster layer below the element.
Copy and paste Paper 9 Into Selection.
New Raster layer.
Copy and paste Paper 2 Into Selection.  Change the Properties to Multiply.
Copy and paste the following elements below the element layer – don’t worry about what overhangs.  We’ll clean that up in a bit:
Your Tube: Resize as you like/Change the Properties to Burn/Lower the Opacity to 46.
El27:  Resize 35%
El 28: Change the Properties to Burn.
Highlight the paper layer.
Click anywhere outside of it with your Magic Wand.
Highlight each element layer and tap the delete key.
Deselect.

Copy and paste El19 as a new layer.
Resize 50%
Duplicate
Move both elements into position – see my tag for reference.
To each round frame:
Click inside of it with your Magic Wand.
Selections/Modify/Expand by 4.
New Raster layer below the frame.
Copy and paste Paper 10 Into Selection.
Deselect.

To the top right frame:
Copy and paste your tube just below the frame.
Change the Properties to Burn and lower the Opacity to 81.
Highlight the paper layer just below the tube layer.
Click anywhere outside of it with your Magic Wand.
Highlight the tube layer.
Tap the delete key.
Deselect.

Copy and paste El 18 as a new layer.
Resize 55%
Click inside of it with your Magic Wand.
Selections/Modify/Expand by 4.
New Raster layer below the frame.
Copy and paste Paper 12 Into Selection.
Deselect.
Merge Visible the frame and paper.

Move the merged layer just above your white background layer in your layers pallet and move into position on the right side of the glass element – see my tag for reference.
Duplicate the merged layer.
Mirror/Flip

Copy and paste El17 as a new layer.
Resize 50%
Click inside of it with your Magic Wand.
Selections/Modify/Expand by 4.
New Raster layer below the frame.
Copy and paste Paper 9 Into Selection.
Deselect.
Make your Target Tool active and recolor the paper #c19153.
Merge Visible the frame and paper.

Move the merged layer just above the other merged layer in your layers pallet and move into position on the right side of the glass element – see my tag for reference.
Duplicate the merged layer.
Mirror/Flip

Copy and paste your tube as a new layer.

Add your elements.  I used:
El 38:  Resize 60%
El 31:  Resize 80%
El 49:  Resize 60%
El 48:  Resize 55%
El 28:  Use your Pick Tool to flatten out a little
El 34: Duplicate/Resize 70%

Highlight your white background.
New Raster layer.
Select All.
Copy and paste Paper 11 Into Selection.
Deselect.
Apply the mask.
Resize 105%
Tap the “K” key on your keyboard to activate the Pick Tool and push the bottom of the mask up slightly.
Merge Group.

Add your copyrights.

Add your name.
Color Pallet:
Foreground: #2f2211 
Background: #887a6c
Stroke: 1.0
Type your name.
Give it a slight Inner Bevel:

Resize all layers 85%.
   
I’d love to see your results.
Email me!
Hugs,
Bev

Monday, April 14, 2014

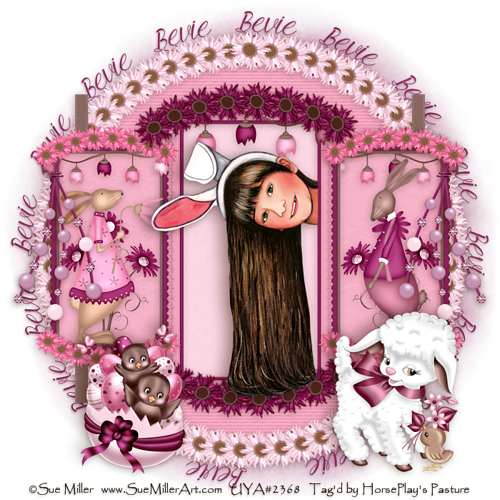
Checking on Peter


Supplies Needed

1 tube of choice – I used the wonderful artwork of Sue Miller which can be purchased from UpYour Art.  You must have a license to use.

Font of choice – I used Young and Beautiful here

Monti Circular Mask here

Plug Ins used:
Mura’s Meister – Copies
  
“Fluffy Bunny” is a FTU scrap kit created by Leanne of Icy Blue Mystic Designs and can be downloaded from her blog here.  Be sure to leave a thank you for work given freely. 

~~ Let’s get started ~~

Copy and paste Element 23 as a new layer.
Resize 10%
Apply Mura’s Meister – Copies:
Choose Encircle.
Change the top 3 numbers:
Number: 50
Shift X: 80
Shift Y: 80
OK

Click inside the ring of flowers with your Magic Wand.
Selections/Modify/Expand by 4.
New Raster layer below the ring.
Copy and paste Paper 13 Into Selection.
Deselect.

Copy and paste Frame 3 as a new layer.
Resize 60%
Click inside of it with your Magic Wand.
Selections/Modify/Expand by 4.
New Raster layer below the frame.
Copy and paste Paper 7 Into Selection.
Copy and paste your tube as a new layer.
Selections/Invert
Tap the delete key.
Deselect.

Copy and paste Frame 2 as a new layer.
Resize 45%
Position at the left side of the center frame – see my tag for reference.
Duplicate
Mirror
To each of these frames:
Click inside of it with your Magic Wand.
Selections/Modify/Expand by 4.
New Raster layer below the frame.
Copy and paste Paper 2 Into Selection.
Deselect.

Copy and paste Element 24 as a new layer.
Resize 10%
Apply Mura’s Meister – Copies:
Choose Cards
Use Default Settings.
OK
Free rotate Left 3 degrees.
Duplicate/Flip
Move both layers into position – see my tag for reference.

Copy and paste Element 27 as a new layer.
Resize 10%
Apply the same Mura’s Meister – Copies:
Choose Cards
Use Default Settings.
OK
Free rotate Left 3 degrees.
Resize 65%
Move into position above the left frame – see my tag for reference.
Duplicate/Mirror
Duplicate and flip each flower arch and move into position at the bottom of the frames.

Add your elements.  I used:
Element 55:  Resize 45%/Duplicate/Resize 70%/Duplicate
Element 61:  Resize 35%/Duplicate
Element 44:  Resize 35%
Element 43:  Resize 35%
Element 9:  Resize 35%/Duplicate/Mirror
Element 13:  Resize 40%
Element 11:  Resize 40%

Highlight your white background.
New Raster layer.
Select All.
Copy and paste Paper 8 Into Selection.
Deselect.
Apply the mask.
Merge Group.

Add your copyrights.

Add your name -

Color Pallet:
Foreground: #000000
Background: Null

Make your Elipse Tool active set on Circle.
Create a circle that’s just slightly larger than the circle of light pink daisies.

Color Pallet:
Foreground: Null
Background: #8b235b

Make your Text Tool active and run the mouse along the center line of the circle.  When you see a Rocking A click your mouse.
A text box will appear.
Type your name and hit the space bar 3 times.
Highlight your name and the 3 spaces.
Right Click and choose Copy.
Click your mouse after the 3 spaces and press Ctrl + V to paste your name again.
Continue to press Ctrl + V until your name is around the entire circle.
Once you have your name repeated all the way around the circle…
Click on the + sign in your layer’s pallet.
Close out the New Ellipse layer by clicking on the eye.
Highlight Vector 1 layer.
Right Click and choose “Convert to Raster Layer”
Move the name layer just above the mask layer in your layer's pallet.

Resize all layers 85%.
   
I’d love to see your results.
Email me!
Hugs,
Bev