Supplies
1 tube of choice – I used the artwork of Ellie Milk and can be
purchased from Pics for Design. You must
generate a license to use.
“American Honey” is a tagger size scrap kit created by me, Bev of HorsePlay’s
Pasture Designs and can be purchased from either of my stores, Lollipops n Gumdrops or Butterfly Blush. You can visit my designing blog
here.
~♥~ Let’s get started ~♥~
Open up a 700 x 700 blank canvas.
Flood fill white.
New Raster layer.
Select All.
Copy and paste Paper 14 Into Selection.
Deselect.
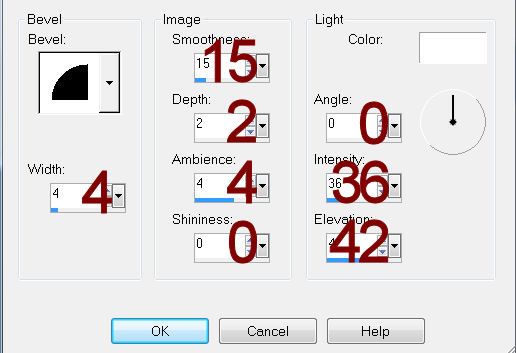
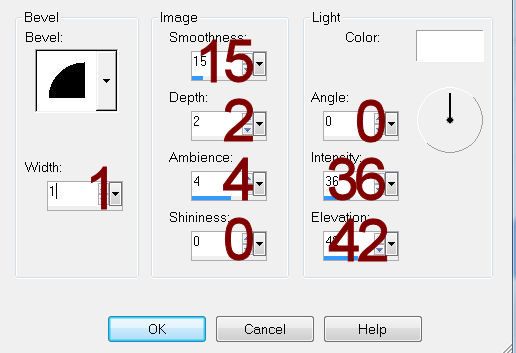
Apply the mask.
Merge Group.
Duplicate/Change the Properties to Multiply.
Lower to Opacity down to about 40
Copy and paste Element 53 as a new layer.
Resize 140%
Tap the “k” key to make your Pick Tool active.
Pull the top up to make it a little bit taller - see my tag for
reference.
Copy and paste your tube as a new layer.
If you’re using the same tube as I did, resize 40%
Move into position – see my tag for reference.
Copy and paste Element 5 as a new layer.
Resize 80%
Move into position – see my tag for reference.
Copy and paste Element 50 as a new layer behind the fence.
Duplicate and Mirror as many times as you like to create a grassy
looking field.
Add your elements. I used:
62: Resize 60/Duplicate/Mirror/Duplicate/Resize
80%/Mirror
64
6: Resize 25% and
70%/Duplicate/Mirror
9: Resize 45%
10: Resize 40%
74: Duplicate/Merge Down/Resize
70%
3: Resize 25%
65: Resize
20%/Duplicate/Mirror/Free rotate Right 30 degrees
Open up Element 50.
Use your Selection Tool set on Rectangle and section off about 1/3 of
the right side of the element.
Copy
Make your working canvas active and paste as a new layer.
Duplicate
Move both of these bits of grass layers into position in front of the
elements on both ends of the fence.
Add your credits.
Add your name.
Resize all layers 80%.