Saturday, February 7, 2009

Shy Girl

Photobucket
Supplies Needed

1 tube of choice – I'm using the artwork of Keith Garvey
which you can purchase here
Font of choice - I'm using Candy Store BV here
Weescotlass Mask 249 here
DSB Flux – Bright Noise (Optional)
Animation Shop (optional)
"A Beautiful Heart" PTU taggers kit by Southern Scraps which can be found here.
I found this kit to be so adorable.
Thank you so much, Cindy!

This tutorial was written assuming you have working knowledge of PSP.

~♥~ Let’s get started ~♥~

Open a 600 X 600 transparent canvas. Flood fill white.

Copy and paste Frame 9 as a new layer. Resize 80%. Use your selection tool and outline the inner space of the frame.

Copy and paste a paper of choice. Selections/Invert. Hit the delete key.

Copy and paste your tube as a new layer. Move into position. Hit the delete key. Deselect.

Copy and paste Element 1 as a new layer. Move toward the bottom left corner of your frame. See my tag for reference.

Copy and paste Element 2 as a new layer. Move into position. See my tag for reference.

Copy and paste flowers of choice, resizing and positioning to your liking. (I resized mine 25%)

Copy and paste Element 14 (heart button) as a new layer. Resize 35%. Free rotate 25 degrees right. Position at the top right corner of your frame.

Copy and paste flowers of choice, resizing and positioning to your liking. (I resized mine between 25% and 30%)

Copy and paste a Tag of choice as a new layer below the heart button. Resize 50% and move to the right side of your frame.

Copy and paste Element 17 as a new layer just above your white canvas. Free rotate 25 degrees left. Duplicate 2 times for a total of 3 heart layers. Rename Heart 1, 2, and 3. Highlight Heart 1 and apply the DSB Flux/Bright Noise:
Intensity 22
Mix
Ok

Close out Heart 1 and open up Heart 2. Apply the same settings accept hit the Mix button twice. Do this again for Heart 3 layer, accept hit the Mix button 3 times. Close out Heart layers 2 and 3.

Highlight your white canvas. New Raster Layer. Select all. Paste a paper of choice into selection. Deselect. Apply the mask. Merge Group.

Add all your copyrights.

Add your name. If you want to animate your name the same as the heart then repeat the same steps you did with the Heart layers. When you’re done, leave Name layer 1 open.

Copy merge and carry into Animation Shop. Edit/Paste as new animation.

Go back into PSP. Close out Heart Layer 1 and open up Heart Layer 2. If animating your name also then close out Name Layer 1 and open up Name Layer 2. Copy Merge. Carry into AS. Edit/Paste/After Current Frame.

Go back into PSP. Close out Heart Layer 2 (and Name Layer 2). Open up Heart Layer 3 (and Name Layer 3). Copy Merge. Carry into AS. Edit/Paste/After Current Frame.

If you’re happy with the animation then save your tag and you’re done!

I hope you enjoyed this tutorial.
I’d love to see your results.
Email me!

Hugs,
Bev

Wednesday, February 4, 2009

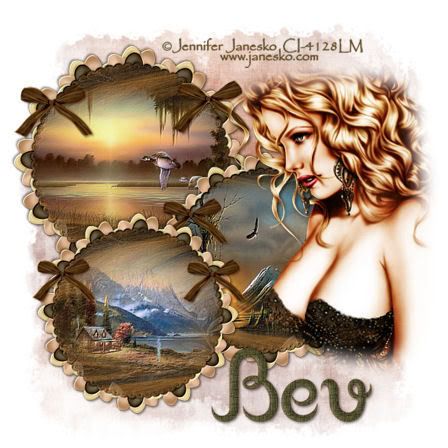
Waiting

Photobucket
Supplies Needed

1 tube of choice – I'm using the artwork of Jennifer Janesko
which you can purchase here
Font of choice - I'm using Auqarelle here
Weescotlass Mask 254 here
"Jubilee" PTU taggers kit by CharmeDiva Scrapz which can be found at Paradise 4 Scrappers. Visit her blog here.
Thank you Melissa for this incredible scrap kit!! I adore it:)

This tutorial was written assuming you have working knowledge of PSP.

~♥~ Let’s get started ~♥~

Open a 600 X 600 transparent canvas. Flood fill white.

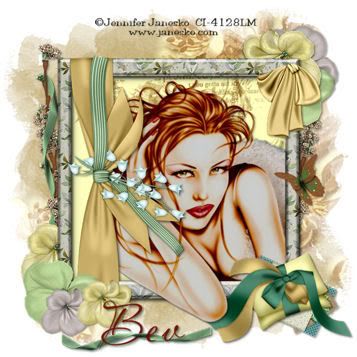
Copy and paste Frame 3 as a new layer. Resize 75%. Use your Selection Tool and outline the frame. Invert.

Copy and paste a paper of choice as a new layer beneath the frame. Resize 75%. Hit the delete key.

Copy and paste your tube as a new layer. Hit the delete key. Deselect.

Copy and paste Sloppy Bow as a new layer. Resize 25% and again 80%. Move into position at the top right corner of your frame.

Copy and paste a butterfly of choice. Mirror. Resize 20% and again 80%. Move into position at the right side of your frame.

Copy and paste flowers of your choice (resize your choice) to arrange at the bottom left and top right corner of your frame.

Copy and paste Cushion Bow as a new layer. Resize 20% and again 80%. Move into position at the bottom right corner of your frame.

Copy and paste Cherry Blossom of your choice. Free rotate 10 degrees right. Resize 70% and move behind the left side of the frame a little. Duplicate/Mirror.

Copy and paste a ribbon of choice as a new layer. Resize 20% and again 40%. Rotate so that it is perpendicular to your Cherry Blossom. Use your eraser tool to make it appear the ribbon is entwined through the cherry blossom.

Highlight your white canvas layer. New Raster layer. Select All. Copy and paste a paper of choice Into Selection. Apply the mask. Merge visible.

Add your copyrights.

Add your name. Again, copy and paste a ribbon of choice and resize to your liking. Using your eraser tool, give the effect the ribbon is entwined through your name.

I hope you enjoyed this tutorial.
I would love to see your results.
Email me.

Hugs,Bev

Tuesday, February 3, 2009

Bubble Gum Kisses

Photobucket
Supplies Needed

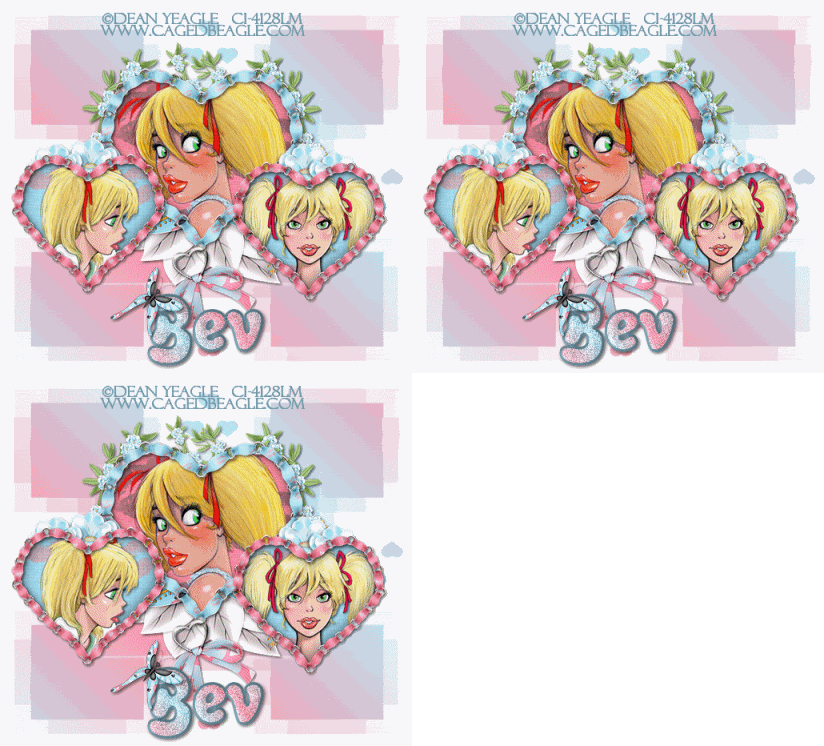
3 tubes of choice – I'm using the artwork of Dean Yeagle
which you can purchase here
Font of choice - I'm using BubbleSoft here
Vix Valentine Mask 17 here
DSB Flux – Bright Noise (Optional)
Animation Shop (optional)
"Paradise" PTU taggers kit by Southern Scrapz which can be found here.
This is an incredibly cute kit!

This tutorial was written assuming you have working knowledge of PSP.

~♥~ Let’s get started ~♥~

Open a 700 X 600 transparent canvas. Flood fill white.

Copy and paste Element 71 (Blue Heart) as a new layer. Resize 50%. Use your Magic Wand and click inside the heart. Selections/Modify/Expand by 2.

Copy and paste Paper 7 as a new layer beneath the heart. Resize 50%. Invert and hit the delete key.

Copy and paste your tube as a new layer above the paper layer. Hit the delete key. Deselect. Close out your white canvas. Merge visible.

Copy and paste Element 72 (Pink Heart) as a new layer. Resize 40% and move to the left hand side of your canvas. Duplicate/Mirror. Use your magic wand in the heart on the left hand side. Selections/Modify/Expand by 2.

Copy and paste Paper 4 as a new layer beneath the heart. Resize 40%. Invert and hit the delete key.

Copy and paste your tube as a new layer above the paper layer. Hit the delete key. Deselect. Close out your white canvas and the blue heart merged layer. Merge visible.

Repeat the above and do the other pink heart.

Copy and paste Element 50 (Silver heart with a bow) as a new layer. Resize 40% and move to the bottom of the blue heart. Use your eraser tool and erase a small bit of the silver heart to make it appear as if it’s hanging from the blue heart.

Copy and paste Element 19 as a new layer behind the blue heart. The white leaves should be seen sticking out at the bottom of the heart.

Add any elements you wish.

Make a gradient that will match your tag. Click on your white canvas. New Raster Layer. Flood fill the new raster layer with your gradient. Apply the mask. Merge Group.

Add your copyrights.

Add your name.
I used a solid color for the foreground with a stroke width of 3.
Background I used the same gradient I used for the mask layer.
I then gave mine a slight inner bevel.
Bevel: 2
Width: 20
Smoothness: 17
Depth: 3
Ambience: 0
Shininess: 14
Color: white
Angle: 248
Intensity: 28
Elevation: 63

Select All/Float/Defloat
Modify/Contract by 3
Duplicate twice to give you 3 layers of your name.
Rename each layer: Name 1, 2, and 3.
Highlight Name 1 and apply DSB Flux Bright Noise
Intensity 35
Mix
Ok

Close out Name 1. Highlight Name 2. Apply DSB Flux Bright Noise again accept hit the mix button twice.

Close out Name 2. Highlight Name 3. Apply DSB Flux Bright Noise again accept hit the mix button three times. Close that layer out.

Reopen Name 1 again. Crop your image. Edit/Copy Merge. Bring it into Animation Shop. Edit/Paste as New Animation.

Go back into PSP. Close out Name 1. Open up Name 2. Edit/Copy Merge. Bring into AS. Edit/Paste after current frame.

Go back into PSP. Close out Name 2. Open up Name 3. Edit/Copy Merg. Bring into AS. Edit/Paste after current frame.

If you’re happy with your tag, save, and you’re done!

I hope you enjoyed this tutorial.
I would love to see your results.
Email me!

Hugs,
Bev

Valentine Blush


Photobucket

Supplies Needed

1 tube of choice – I'm using the artwork of Jennifer Janesko
which you can purchase here
Font of choice - I'm using Boomerang here
Mask of Choice
Weescotlass Creations Mask 84 here
Xenofex 2 - Constellation
"Fall Into Love" PTU taggers kit by Tammy's Scraps which can be found at Cotton Candy Kreations.
This kit is amazing and filled with rich elements!

This tutorial was written assuming you have working knowledge of PSP.

~♥~ Let’s get started ~♥~

Open a 600 X 600 transparent canvas. Flood fill white.

Copy and paste Frame 1 as a new layer. Resize 80%. Use your magic wand inside of it. Selections/Modify/Expand by 4.

Copy and paste a paper of choice below the frame. Resize 50%. Select/Invert. Hit the delete key.
Copy and paste your tube as a new layer. Move into position and then hit the delete key.

Highlight the Frame layer. Make new Raster Layer. Effects/3D Effects/Cutout. Use these settings:
Vertical & Horizontal: 10
Opacity: 35
Blur: 25
Shadow color: black
Fill Interior with color unchecked

Make new Raster layer and repeat the cutout accept change the Vertical and Horizontal to -10. Deselect.

Close out your white canvas and Merge Visible. Open your canvas back up and highlight your merged layer.

Copy and paste Flower 3 as a new layer. Resize 25%. Position near bottom of frame. See my tag for reference.

Copy and paste Flower 1 as a new layer. Resize 25%. Position next to the other flower.

Copy and paste Flower 2 as a new layer. Resize 25%. Position next to the other flower.

Duplicate Flower 3 and move to the other side of all the flowers. See my tag for reference.

Copy and paste Flower 6 as a new layer. Move behind the merged frame and position so that a bit of the flower sticks out near the other flowers. See my tag for reference. Duplicate/Mirror. Merge Down.

Copy and paste Branch with Flower as a new layer . Resize 50%. Mirror. Free Rotate 30 degrees left and position on the left side of your frame. Arrange in your layer pallet so that it’s beneath the flowers that are above the frame.

Copy and paste a Feather. Resize 30%. Mirror. Free Rotate 30 degrees right. Position so that it sticks out of the flowers on the right side. See my tag for reference.

Copy and paste a Butterfly as a new layer. Resize 35%. Position near the bottom left corner of your canvas. Duplicate and position in the upper right corner of your canvas.

Ellipse Tool. Circle.
Foreground Black.
Background Null
Draw a circle that’s slightly larger than your circle frame.
Objects/Align/Center in Canvas
If the circle is too large or too small then resize.

Click on your font tool and move your mouse at the top of the circle until you see an A with a bit of a circle beneath it (almost like a rocking A). Once you have that then click your mouse. Type in whatever words/saying you want. Click Ok.

In your layer pallet click on the tiny + sign. It should expand and create 2 layers beneath it. Close out the circle layer. It should disappear from your canvas. Then right click on the Vector layer and convert to Raster Layer.

Highlight your white canvas. Make new Raster Layer. Select All. Copy and paste a paper of your choice Into Selection. Deselect. Apply Mask WSL_84. Merge Group.

Make new Raster Layer. Select All. Copy and paste a paper of choice Into Selection. Deselect. Apply 20-20 Mask.

Add your Copyrights.

Add your name.

If you don’t want to animate then save your tag. If you do want to animate then continue…we’re almost done!

Duplicate the 20-20 mask layer twice to make a total of 3 layers. Rename Mask 1, Mask 2, and Mask 3. Highlight Mask one and apply Xenofex/Constellation with these settings:
Star Size: 2
Star Variation: 3
Edge Star Density: 4
Overall Star Denisty: 0
Overdrive: 100
Twinkle Amount: 37
Twinkle Rotation: 37
Keep Original Image
Random Seed: 1000
Click Ok

Highlight Mask 2 and apply the same accept click on the random seed button once and then Ok. Repeat for Mask 3.

Close out Mask 2 and 3. Open Mask 1. Copy Merged and carry into Animation Shop. Edit/Paste as New Animation.

Close out Mask 1 and open Mask 2. Copy Merge. Go back into AS. Edit/Paste/After Current Frame.

Close out Mask 2 and open up Mask 3. Copy Merge. Go back into AS. Edit/Paste/After Current Frame.

View your animated tag. If you’re happy with hit then save.

I hope you enjoyed this tutorial.
Would love to see your results.
Email me.

Hugs,
Bev

Rendezvous

Photobucket
Supplies Needed

1 tube of choice – I'm using the artwork of Jennifer Janesko
which you can purchase here
3 Images of Choice
Mask of Choice – I used Becky Mask 22.
Mura’s Meister – Copies
Filter’s Unlimited 2.0 (optional)
FM Tiles Tools – blend Emboss (optional)
Font of choice - I'm using Franklin Cascaes here
"Old and New" PTU scrap kit by Designs by Ali which can be found at Paradise 4 Scrappers. Please visit Ali’s blog here.


This tutorial was written assuming you have working knowledge of PSP.

~♥~ Let’s get started ~♥~

Open a 700 X 700 transparent canvas. Flood fill white.

Copy and paste Template of choice. Give it an inner bevel:
Bevel: 2
Width: 20
Smoothness: 17
Depth: 3
Ambience: 0
Shininess: 14
Color: white
Angle: 248
Intensity: 28
Elevation: 63

Give it a drop shadow. Duplicate 2 times to have a total of 3 beveled templates. Rename Template 1, 2, and 3. Close out 2 and 3.

Copy and paste a Flower of choice. Resize 40%. Drop Shadow.
Effects/Plugs-Ins/Mura’s Meister/Copies
Choose Encircle. Default settings. Ok. Drop Shadow.
Duplicate 2 times. Rename all flower layers as Flower 1, 2, and 3.
Close out Flower 2 and 3. Move Flower 1 beneath Template 1. Resize Template 90%. Again 95%.

Select All/Float/Defloat. Selections/Modify/Contract by 6. Invert.
Copy and paste your first image as a new layer. Hit the delete key. Deselect.

Copy and paste a bow of choice as a new layer. Move into place. Duplicate/Mirror. Merge visible Template 1, Flower 1, the image, and bows. Close out that layer.

Repeat all of the above for the other 2 templates.

Resize the 1st merged template 70%.
Resize the 2nd merged template 65%.
Resize the 3rd merged template 60%.
Move into position.

To each template apply the FM Tile Tool plug-in
Blend Emboss with default settings.

Copy and paste your tube as a new layer.

Highlight white canvas. New Raster Layer.
Choose 2 colors from your images and make a gradient of your choice. Flood fill the new layer. Apply your mask. Merge Group.

Effect/Plug-Ins/Filters Unlimited 2.
Choose a Paper Texture of your choice.
I used Papyrus – default settings.

Add all Copyrights.

Add your name. Give it the same Inner Bevel you used on the templates. Use the same paper texture you used on the mask.

I hope you enjoyed this tutorial.
I’d love to see your results.
Email me!

Hugs,
Bev
Sunday, February 1, 2009

Oh So Sweet

Photobucket
Supplies Needed

1 tube of choice – I'm using the artwork of Keith Garvey
which you can purchase here
Font of choice - I'm using Kinkee here
Mask of Choice - I used Becky Mask 23
DSB Flux - Bright Noise (optional)
"A Choca Love" PTU taggers kit by Southern Scrapz which can be found here.
Thank you Cindy for such a “Sweet” kit! Love it!!

This tutorial was written assuming you have working knowledge of PSP.

~♥~ Let’s get started ~♥~

Open a 600 X 600 transparent canvas. Flood fill white.

Copy and paste Frame 2 as a new layer. Use your Selection Tool set to rectangle and outline the frame.

Copy and paste a paper of choice below the frame. Selections/Invert. Hit the delete key.

Copy and paste your tube as a new layer. Deselect.

Copy and paste Heart 4 as a new layer. Resize 50%. Free rotate 25 degrees left. Move into position near the bottom left corner of the frame.

Copy and paste Flower 5 as a new layer. Resize 30%. Move into position near bottom left corner of the frame.

Copy and paste Flower 4 as a new layer. Resize 30% and again 90%. Move into position near the other flower.

Copy paste Box Candy as a new layer. Resize 40%. Free Rotate 30 degrees right. Move into position near the bottom right corner of the frame.

Copy and paste Flower 3 as a new layer. Resize 30% and again 90%. Move into position near the top left corner of the frame.

Copy and paste Flower 2 as a new layer. Resize 25%. Position behind the top left corner of the frame. See my tag for reference. Duplicate. In your layers pallet, move the duplicated flower in front of the frame. Resize 90% and move into position near Flower 3. See my tag for reference.

Copy and paste Beads 2 as a new layer. Resize 40% and move to the top right corner of the frame.

Copy and paste Heart Bow 2 as a new layer. Resize 40% and move to the top right corner of the frame.

Copy and paste Hearts 1 as a new layer and position behind the frame. See my tag as reference.

Highlight your white canvas. New Raster Layer. Select All. Copy and paste a paper of choice Into Selection. Deselect. Apply your mask. Merge Group. If you’re using Becky Mask 23 then duplicate 3 times. Merge visible mask layers only.

Add your copy rights.

Add your name.
I used
Foreground: 401e06
Background: Set to pattern - Paper 9
I added a slight bevel and DSB Flux Bright Noise to my name set at 20/Mix.

I hope you enjoyed this tutorial.
I would love to see your results.
Email me!

Hugs,
Bev