Supplies
1 tube of choice - I used the fabulous artwork of Irene Shpak here
Font of choice - I used Tabatha here.
Becky Mask 9 here
Eyecandy 5: Nature - Fire - Optional
Greg’s Factory Output Vol. II - Pool Shadow - Optional
Animation Shop
“Choco Love” is a tagger size scrap kit created by Cindy of Puddicat Creations and can be purchased at Aussie Scrap Designs. You can visit Cindy’s blog here.
Thank you Cindy for an amazing kit!
This tutorial was written assuming you have a working knowledge of PSP.
~♥~ Let’s get started ~♥~
Open up a 700 X 700 blank canvas.
Flood fill white.
Copy and Paste Frame 4 as a new layer.
Resize 80%
Use your Magic Wand and click inside of it.
Selections/Modify/Expand by 2.
New Rater layer below the frame.
Copy and paste a paper of choice.
DO NOT DESELECT.
Copy and paste your tube below the frame.
Selections/Invert
Tap the delete key.
DO NOT DESELECT.
Copy and paste Sparkles 2 as a new layer behind your tube.
Tap the delete key.
DO NOT DESELECT.
Copy and paste Bear 2 as a new layer below the frame.
Resize 50%
Move into position.
Tap the delete key.
Deselect.
Add your embellishments. I used:
Flower 4: Resize 50%
Flower 2: Resize 50% and 80%
Pearl: Resize 85%
Butterflies of your choice: Resize 25% and more.
Candle 4: Resize 40%
Candle 3: Resize 35%
Bubble 1
Chocolates 2: Resize 25%
Highlight your white background.
New Raster layer.
Seletct All.
Copy and paste a paper of your choice.
Deselect.
Apply the mask.
Merge Group.
Add your copyrights.
Add your name.
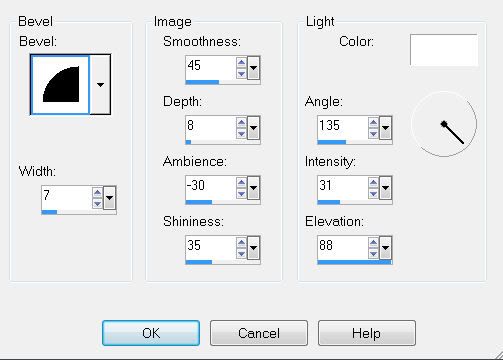
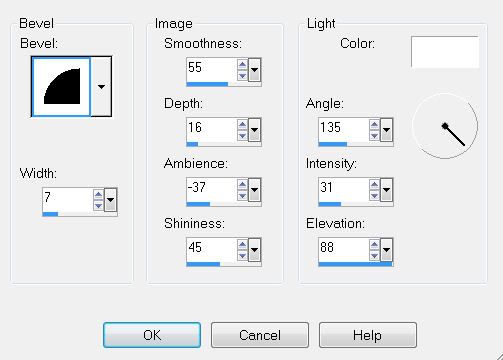
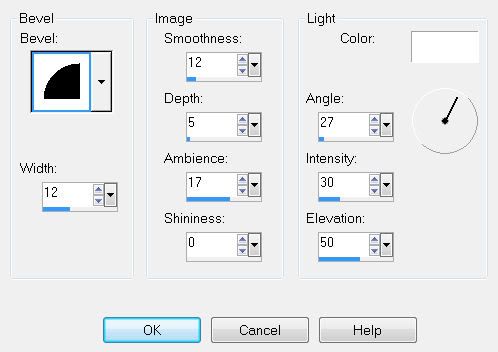
Give it a slight inner bevel: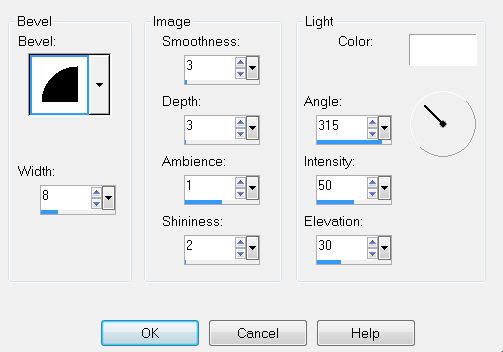
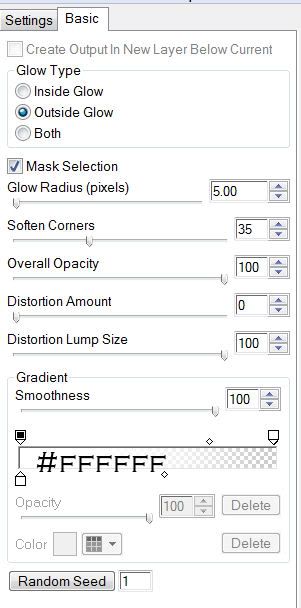
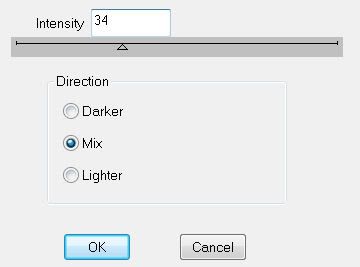
Apply Pool Shadow: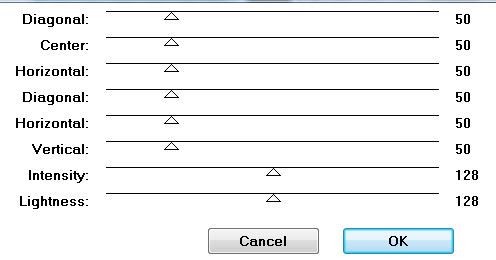
Now we’re going to get things ready to animate.
Merge Visible the two candle layers.
Duplicate twice for a total of 3 candle layers.
Rename them Candle 1, 2, and 3.
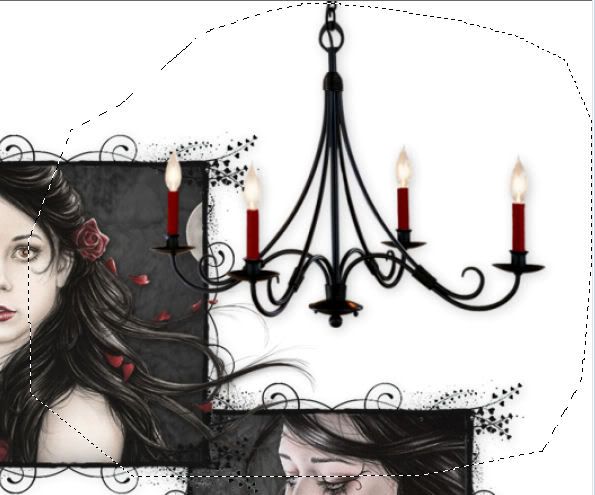
Highlight candle 1.
Using your Freehand Selection Tool, draw out the shape of a flame over to the top of each wick.
Highlight Candle 1.
Apply Eyecandy 5: Nature - Fire with these settings:
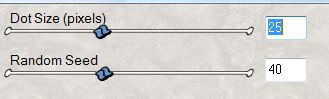
Settings Tab:
Basic Tab: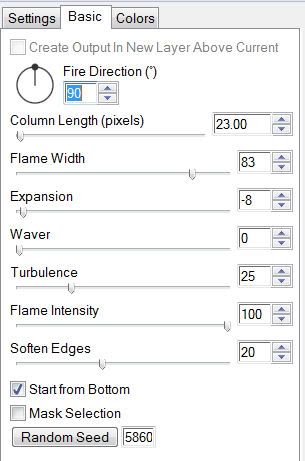
Colors Tab: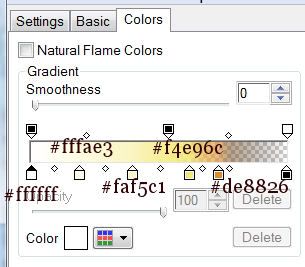
Highlight Candle 2 layer:
Apply Eyecandy 5: Nature Fire again accept hit the Random Seed Button once.
Highlight Candle 3 layer:
Repeat the above step.
Close out Candle 2 & 3 layers.
Merge Visible.
~Time to Animate~
Open up Animation Shop.
Edit/Paste/As new Animation.
Back in PSP.
Close out Candle 1 layer.
Open up Candle 2 layer.
Copy Merge.
Carry into AS.
Edit/Paste/After Current Frame.
Back in PSP.
Close out Candle 2 layer.
Open up Candle 3 layer.
Copy Merge.
Carry into AS.
Edit/Paste/After Current Frame.
Ctl + A to highlight all the frames.
Animation/Frame Properties
Change the display time number to 25.
Animation/Resize Animation
Percentage of Original checked.
80
OK
View your animation.
If you’re happy then save.
I hope you enjoyed this tutorial.
I’d love to see your results.
Email me!
Hugs,
Bev