Saturday, January 17, 2009

A Touch of Heaven


Supplies Needed

Tube of choice - I'm using the artwork of Jennifer Janesko
which you can purchase here
Font of choice - I'm using Olivia here
Mask of choice - I used Becky Mask 23
DSB Flux
Xenofex 2 Constellation
Animation Shop
"A Lil Bit of Heaven" PTU scrap kit by Monica’s Sweet Addiction which can be found here on her blog. You can also find FTU download links also.
Thank you so much for this beautiful kit, Monica. You certainly did incorporate that touch of heaven in it! Absolutely love it!!

This tutorial was written assuming you have knowledge of PSP.

~♥~ Let’s get started ~♥~

Open a 600 X 600 transparent canvas. Flood fill white.

Copy Element 42 (blue frame) as a new layer. Use your magic wand and click inside the frame. Selection/Modify/Expand by 4. Make a new raster layer beneath the frame layer. Select all. Copy Paper 1 into Selection.

Copy and paste your tube as a new layer.

Copy and paste Element 16 as a new layer. Resize 68% and position at the bottom of the frame.

Close out your white canvas, merge visible. Open your white canvas.
Copy and Paste Elements 1 & 2 (blue and white flowers) as new layer. Resize 20%. Line them along the side of the frame. See my tag for reference.

Copy and paste Elements 13 & 14 (blue and white feathers) as a new layers. Resize them 20%. Position them amongst the flowers. See my tag for reference.

Copy and Paste Element 17 (blue heart) as a new layer. Image/free rotate/20 degrees right. Tuck that in amongst the flowers. See my tag for reference.

Close out your white canvas and your frame tube layer. Merge visible all flower layers, feathers, heart, and the feather tube at the bottom of your frame that says magic. Duplicate 2 times for a total of 3. Rename Flowers and Feathers 1, Flowers and Feathers 2, Flowers and Feathers 3. Highlight Flowers and Feathers 1 layer and use your Freehand Selection tool and outline the feathers, heart, and just around the little blue stars in the double feather at the bottom of your frame. Go to Effects/Plug-In/DSB Flux/Bright Noise
Intensity 35
Mix
Ok

Highlight Flowers and Feathers 2. Apply the same plug-in accept hit the mix button twice. Highlight Flowers and Feathers 3, repeat hitting the mix button 3 times. Deselect. Make sure the 2nd and 3rd layers are closed out.

Copy and Paste Element 5 (white butterfly) as a new layer and position on the right side of your frame. Duplicate this layer twice for a total of 3 layers. Rename the layers Butterfly 1, Butterfly 2, Butterfly 3. Highlight Butterfly 1 layer. Effects/Plug-Ins/Xenofex 2/Constellation and apply the following setting:
Star Size 2
Size Variation 3
Edge Star Density 4
Overall Star Density 0
Overdrive 100
Twinkle Amount 37
Twinkle Rotation 37
Random Seed 1000
Ok

Highlight Butterfly 2 and apply the same plug-in accept hit the random seed button once, click ok. Highlight Butterfly 3, repeat the same plug-in accept hit the random seed button once, click ok. Make sure the 2nd and 3rd layers are closed out.

Highlight bottom white canvas layer. Create new raster layer. Select All. Copy and paste into selection Paper 15. Deselect. Apply your mask.

Copy and Paste Element 11 as new layer (blue doodle). This layer should be between your mask layer and your merged framed layer. Image resize 50% and position to your liking.

Add all your copyrights.

Add your name.

Onto the animation – we’re almost done!

Copy Merge. Open up Animation Shop. Edit/Paste as new animation.

Go back into PSP. Close out Flowers and Feathers 1 and open up Flowers and Feathers 2. Close out Butterfly 1 and open up Butterfly 2. Copy merge.

Go into AS. Edit/Paste after Current Frame.

Go back into PSP. Close out Flowers and Feathers 2 and open up Flowers and Feathers 3. Close out Buttterfly 2 and open up Butterfly 3. Copy merge.

Go into AS. Edit/Paste after Current Frame.

Save and now our tag is done!

I hope you enjoyed this tutorial.
Feel free to Email me your results!

Hugs,
Bev

Beauty in Numbers


Supplies Needed

5 Tubes of choice - I'm using the artwork of Keith Garvey
which you can purchase hereFont of choice - I'm using Burton’s Nightmare here
Toadies – Ommadawn
Xero - Porcelain
"Aged" PTU taggers kit by Cinnamon Scraps which can be found here. Please visit her blog here for the freebies.

This tutorial was written assuming you have knowledge of PSP.

~♥~ Let’s get started ~♥~

Open a 750 X 600 transparent canvas. Flood fill white.

Copy Frame 6 as a new layer. Use the Freehand Tool to outline around all the frames.
Copy a paper of choice as a new layer beneath the frame layer. Select/invert. Hit the delete key. Keep selected.

Add your 4 tubes, each as a new layer beneath the frame layer and hitting the delete key after positioning them. Deselect. Use the eraser tool to erase any parts of tubes that may be overlapping other tubes. Close out the white canvas layer and merge visible.

Copy and Paste flowers of choice, resizing, and positioning them as you like.

Copy and paste Aged Keys as a new layer. Resize 50% and position.

Copy and paste Doodle of choice beneath the merged frame layer. Resize 80%. Position. Layer/duplicate. Image/mirror. Use your eraser tool to erase the part of the doodle that overlaps in the middle above the frame.

Close out your white canvas. Merge visible. Duplicate. Highlight the merged layer. Adjust/Blur/Gaussian Blur. Radius 20.

Effects/PlugIns/Toadies/Ommadawn.Default Settings.

Highlight Copy of Merged Layer and Apply Xero/Porcelain as follows:
Softness – 50
Strength – 128
Brightness – 128
Red, Green, & blue Channels all 0
Ok

Apply your tube and center/position in front of the frame.

Add your copyrights.

Add your name.
Crop your image and your tag is done!

I hope you enjoyed this tutorial.
Would love to see your results.
Email me:)

Hugs,
Bev

Thursday, January 15, 2009

Image and Attitude


Supplies Needed

Tube of choice - I'm using the artwork of Keith Garvey which you can purchase here
Font of choice - I'm using Bibliotheque which you can get here
Mask of Choice – I’m using WSL Mask 119 which you can get here
Scrap kit of choice. Once again I’m using "Oh So Pink" a PTU kit by Monica’s Sweet Addiction and you can download it from here. Monica, this kit is fabulous!! Thank you once again!

This tutorial was written assuming you have working knowledge of PSP.

~♥~ Let’s get started ~♥~

Open up a canvas 600 x 600. Flood fill white.

Copy and paste Cluster Frame as a new layer. Resize 70%. Free rotate left 90 degrees. Move to the left side of your canvas. Use your magic wand and click inside the frame. Section/Modify/Expand by 4. Select/Invert.

Copy and paste Paper 16 as a new layer beneath the frame layer. Colorize to match your tube. Hit the delete key.

Copy and paste your tube as a new layer to the right of the frame. Duplicate, image/mirror. Move that layer beneath the frame layer. You may need to move the duplicated image to the right a little. Use your judgement – see my tag for reference. Once happy where it is highlight the frame layer. Use your magic wand and click inside the frame. Select/Modify/Expand by 4. Highlight the tube layer and hit the delete key. Select none. Lower the opacity to about 63.

Copy and Paste a ribbon of choice as a new layer. Colorize to match your color theme. Resize 50%. Move into position.

Copy and paste any of the flowers as a new layer. Again, colorize if need be. Resize 20% (or whatever you choose). Move into position where you like.

Copy and paste an Envelope of your choice. Colorize if you like. Resize 30% and again 85%. Free rotate left 15 degrees.

Copy and paste a butterfly of your choice. Resize 25%, again 80%. Move into position.

Copy and paste Love Heart Frame as a new layer just above your plain white canvas layer. Resize 80%.

Highlight your plain white canvas. Add new raster layer. Select all. Paste paper 18 into selection. Select none. Duplicate the layer. Colorize each paper layer to match your tag, but make one a dark color, the other a lighter color – keeping the lighter color on top of the darker. Apply your mask to both layers making sure your merge group. On the lighter color layer lower the opacity to 30.

Add your copyrights.

Add your name and crop your image.
I hope you enjoyed this tutorial.
Would really enjoy seeing what you came up with.
Email me.

Hugs,Bev

Janesko Pinked Out


Supplies Needed

4 Tubes of choice - one of them lying down works best. I'm using the artwork of Jennifer Janesko which you can purchase from CILM here
Font of choice - I'm using Aquarelle
Mask of Choice – I’m using WSL Mask 249 which you can get here
White Twink - optional - here is a site that might be helpful
Scrap kit of choice, I am using "Oh So Pink" a PTU kit by Monica’s Sweet Addiction and you can download it from here. You can view more of her gorgeous work as well. Thank you so much for this fabulous kit, Monica!

This tutorial was written assuming you have working knowledge of PSP.

~♥~ Let’s get started ~♥~

Open up a canvas 600 x 600. Flood fill white.

Copy Frame 3 as a new layer. Resize 60%. Use your magic wand and click inside the frames. Section/Modify/Expand by 4. Select/Invert. Hit the delete key. Deselect.

Copy and paste your tube as a new layer below the frame layer. Be sure to rotate your tube so that it’s square in the frame you want to place it in. Use your magic wand and click inside the frame. Select/Modify/Expand by 4. Select/Invert. Hit the delete key. Select none. Repeat until you have a tube in each frame. Merge visible the frame, tubes, and paper background.

Copy and paste Pink Blossoms as a new layer. Resize 45%. Image/Free Rotate 90% left. Duplicate. Image/mirror. Position behind the frame. See my tag for reference.

Copy and paste Pink Heart as a new layer. Resize 55%. Free rotate 15% to the right. Move behind the blossoms.

Copy and paste Flower 1 as a new layer. Resize 15%. Duplicate two times for a total of 3. Move into place (see my tag for reference). Duplicate each flower, image/mirror.

Copy and paste Butterfly 5 as a new layer. Resize 15%. Please near top of heart.

Copy and Paste your tube that lays down as a new layer in front of the frame.

Close out your white canvas layer and merge visible.

Highlight your white canvas. Make new raster layer. Select all. Copy paper 14 and Paste into Selection. Deselect. Apply Mask. Use your pick tool to push the top and bottom of mask inward. See my tag for reference.

Add your copyrights.

Add your name. Crop your image.

You can now take it into Animation Shop and add twinks to it if you like.

To do that open up the twinks you choose to use in AS. Go back to PSP and copy merge your image. Paste into AS as a new image and duplicate the same number of frames as your twinks. by pressing Ctl + l. Press Ctl + A. All frames should now be highlighted.

Now make your twinks active. Edit/Copy. Make your tag your working image again and press Ctl + E and place your twink where you want it with your mouse. To place the twinks more than once on the image all you have to do is press Ctl + E again.

I hope you enjoyed this tutorial.
Email me with what you came up with!

Hugs,
Bev

Love Is...


Supplies Needed
Tube of choice - I'm using the artwork of Keith Garvey which you can purchase here
Font of choice - I'm using MaSexy
Mask of Choice – I’m using WSL Mask 84 here
Template 23 by AquaRebel which you can download here
Scrap kit of choice, I am using "Oh So Red…E" a PTU kit by Monica’s Sweet Addiction and you can download it from her blog here where you can view more of her gorgeous work as well. Thank you so much for this awesome kit, Monica! Love it, girl!
DSB Flux - Bright Noise
Alien Skin Xenofex 2 - Constellation
Eyecandy 5 Texture - Marble
This tutorial was written assuming you have working knowledge of PSP.
~♥~ Let’s get started ~♥~
Open up the template. Duplicate and close out the original. Delete the credit layer and then resize the canvas to 600 x 600. Flood fill the bottom layer to make the canvas completely white again.
Highlight the bottom white layer. Add new layer, select all. Copy paper 18 and paste into selection. Deselect. Apply the mask. Merge group.
Highlight Raster 7. Select all/Float/Defloat. Open Paper 4/image flip. Copy and paste into selection. Deselect.
Highlight Raster 5. Select all/Float/Defloat. Copy paper 7 and paste into selection. Deselect. Highlight Copy of Raster 5 and repeat.
Highlight Raster 1. Effects/Plugsins/Eyecandy 5 Textures/Marble.
Use these settings:
Basic: Veiny
Bedrock color: 000000
Vein Color: c00000
Feature size: 115.20
Vein Thickness: 30
Coverage: 40
Roughness: 70
Grain: 15
Random Seed: (you can choose)
Hit ok.
Go to Effects/Edge Effects/Enhance
Repeat this step with the Copy of Raster 1.
Highlight Raster 2.
Repeat the above steps accept switch the bedrock and vein colors in Eyecandy 5 Textures/Marble. Don’t forget to apply effects/edge effects/enhance.
Highlight Raster 4. Select all/Float/Defloat. Copy and paste Paper 11 as a new layer. Resize 60%. Select/invert. Hit the delete key. Delete Raster 4.
Copy and Paste Feathered Heart. Resize 25%. Adjust/sharpness/sharpen. Effect/edge effect/enhance. Duplicate this layer 2 more times for a total of 3 layers. Rename each of the layers (Feathered Heart 1, Feathered Heart 2, Feathered Heart 3) Highlight Feathered Heart 1 and apply Xenofex 2 Constellation:
Star Size: 2.00
Star Variation: 3
Edge Star Density: 4
Overall Star Denisty 0
Overdrive: 100
Twinkle Amount: 37
Twinkle Rotation: 46
Random Seed 1000
Press ok.
Close the layer out and open Feathered Heart 2. Apply the constellation again accept be sure to press the random seed button then okay. Repeat with Feathered Heart 3. Keep open Feathered Heart layer 1, close the other 2.
Copy and Paste Flowers 1 and 2, resizing both 25%. Duplicate Flower 1 and arrange the flowers in the bottom left corner of the frame. See my rag for reference. Merge visible the 3 flowers for a form cluster. Duplicate/mirror/flip. Merge visible the two layers of cluster flowers. Duplicate twice for a total of 3 layers. Rename them Flowers 1, Flowers 2, Flowers 3. Use your Freehand Selection Tool and outline leaves of your choice. Once you’re satisfied be sure you’re on Flowers 1 layer. Effects/Plugins/DSB Flux/Bright Noise and apply as follows:
Intensity 35
Mix
Ok.
Highlight Flowers 2 layer and apply the same plugin accept click on the Mix button twice. Highlight Flowers 3 layer. This time click the mix button three times. Close flower layers 2 & 3, keep the first open.
Copy and Paste butterflies of your choice. Resize by 20% and move into position of your liking.
Add any word art you choose. I found drop shadowing with red instead of black made a nice touch.
Add all your credit.
Add your name. Again, I found drop shadowing with red made a nice touch. But that’s me…lol
Resize your tag if you like (being sure to resize all layers)
Onto the animation – almost done!
Copy merged. Open up Animation Shop.Go to Edit/Paste as New Animation
Go back into PSP. Close out Flowers Layer 1 and open up Flower Layer 2. Close out Feathered Heart 1 and open up Feathered Heart 2. Copy merged.
Go back into animation shop. Go to Edit/Paste/After Current Frame.
Go back in PSP. Close out Flower Layer 2 and open up Flower Layer 3. Close out Feathered Heart 2 and open up Feathered Heart 3. Copy merged.
Go back into animation shop. Go to Edit/Paste/After Current Frame. Click the little icon at the top to view your animated tag in motion. (If you don’t know where it is, move your mouse very slowly across all the icons, it’ll say View Animation). If you’re satisfied then save your tag.
I hope you enjoyed this tutorial.
I’d really enjoy seeing what you come up with so Email me!
Hugs,
Bev

It's a Spring Thing


Supplies NeededTube of choice - I'm using the artwork of Dean Yeagle which you can purchase here
Font of choice - I'm using Zebra Reg
Mask of Choice – I used Becky Mask 23
Scrap kit of choice, I am using "Bee-autiful Garden" a PTU kit by RebelChick and you can download it from here http://www.cinnamondreamz.com/ where you can view more of her gorgeous work as well. I do admire all the talent she puts into her kits!

This tutorial was written assuming you have working knowledge of PSP.
~♥~ Let’s get started ~♥~
Open a 600 X 600 transparent canvas. Flood fill white.
Add a new layer. Select All. Copy paper 13. Paste into Selection. Deselect. Apply your mask of choice. Merge group. If you’re using Becky Mask 23 then add another layer, select all. Copy and paste into selection Paper 15. Merge group, image/mirror.
Copy and paste Frame 3 as a new layer. Resize 80%.Use your magic wand and click inside the frame.Select/Modify/Expand by 4
Copy and paste Paper 7 as a new layer below the frame layer. Select/Invert hit the delete key. Deselect.
Copy and paste a tube of your choice, resizing if necessary. Move into position.
Copy and Paste Bow 3. Resize 40% and move into position. (see my tag for reference)
Copy and paste flowers of choice, resizing as necessary (I found 30% worked for me) and move them into position.
Copy and paste Bird 2. Resize 25%.Place to your liking on your canvas.
Copy and Paste one of the butterflies. Resize 30%.Place to your liking.
Add all your credits.
Add your name. If you want to make it fun, copy and paste a butterfly or bee, resizing, and place so it appears to be flying around your name.
I hope you enjoyed this tutorial.Feel free to Email me your results.
Would love to see!
Hugs,
Bev

Wednesday, January 14, 2009

Daisy Days


Supplies Needed

Tube of choice - I'm using the artwork of Dean Yeagle
which you can purchase from CILM here
Font of choice - I'm using Bonheur Royale
Mask of your choice
Scrap kit of choice, I am using "Pushing Daisies" by Rebel Chick and you can download the beautiful scrap kit from her blog here where you can view more of her gorgeous work and other scrap collections as well.
Thanks Reb! You know I admire your awesome talent!

This tutorial was written assuming you have knowledge of PSP.

~♥~ Let’s get started ~♥~
Open a 550 X 500 transparent canvas. Flood fill white.
Add a new layer. Select All. Copy paper 16. Paste into Selection. Deselect.
Apply your mask of choice. Merge group.

Copy and paste Frame 1 as a new layer. Resize 50%.
Use your magic wand and click inside each frame.
Select/Modify/Expand by 4

Copy and paste Paper 17 as a new layer. Select/Invert hit the delete key. Keep selected.

Copy and paste a tube of your choice into one of the frames. Hit the delete key. Repeat with another tube in the other frame. Select none. Drop shadow the frame. Merge visible the frame, tubes, and background for the frames. Move the merged frame layer up a bit on the canvas.

Copy and paste a tube of your choice, resizing if necessary. Position it just below the frame.

Copy and paste Fence 6 as a new layer. Resize 50% and move to the bottom right of your canvas. Layer/duplicate, image/mirror. Move the duplicated layer to try to make a good blend with the other fence layer. Once satisfied use your eraser tool and erase all that overlaps. Merge down. Add drop shadow. Resize 85%.

Copy and paste Grass 3 as a new layer. Image/resize 40%. Layer/duplicate, Image/mirror. Move it beside the other grass blades. Merge down, drop shadow, duplicate layer, image/mirror.

Copy and paste grass 3 again as a new layer. Image/resize 25%. Move to middle of the fence. Layer/duplicate, image/mirror. Copy and paste grass 2 as a new layer. Resize 20% and place in the middle.

Copy and paste flowers 9 and 10, resizing and arrange amongst the grass. See my tag for reference.

Copy and pate Bird 3 as a new layer. Resize 25%.
Perch the little guy atop of the frame J

Copy and paste Bow 5 as a new layer on the frame. Resize 35%.
Layer/duplicate, image/mirror.

Add word art of your choice or copy mine using Bonheur Royale font in a complimentary color for your tag. Add a slight drop shadow. Move to top left of your canvas above the frame.

Add all your credits.

Add your name and your tag is done.

I hope you enjoyed this tutorial.
Feel free to Email me your results. Would love to see what you came up with.
Hugs,
Bev

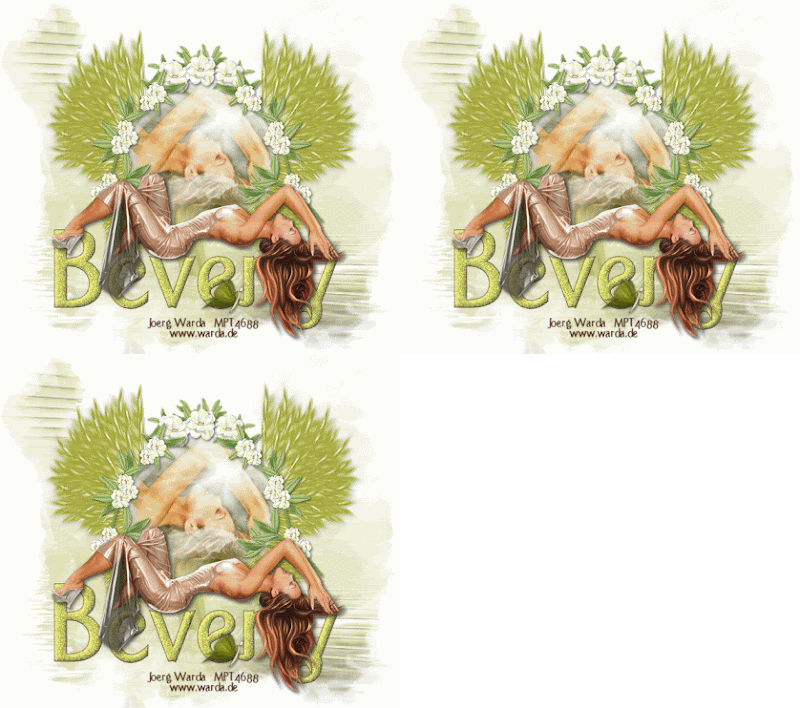
On the Wings of Love


Supplies Needed:

Tube of choice - I'm using the artwork of Joerg Warda which you can purchase here
Font of choice - I'm using Port Credit Bold
Mask #9 by Yarrow here
DSB Flux (optional)
Wings-N-Blings a PTU scrap kit by RebelChick and you can purchase her beautiful scrap kit at Cotten Candy Kreations It's available in both full and tag size. You can pick up the FTU add-on kit and view more of her beautiful work and other scrap collections on her blog as well.
Thanks Reb! You know I just love your awesome work!


~♥~ Let’s get started ~♥~

Open a 600 X 600 transparent canvas. Flood fill white.

Add a new layer. Select All.

Copy paper 22. Paste into Selection. Deselect.

Apply the mask. Merge group. Duplicate. Merge down.

Copy Winged Frame 4. Resize 75%. Use the magic wand, value 0, tolerance 0, and click in the center of the circle. Select/Modify/Expand by 10.

Copy paper 9. Paste as a new layer. Resize 60%. Move the paper so that the sunray is near the top right area of the circle. Select/Invert. Hit the delete key.

Copy and paste your tube as a new layer below the winged frame layer. Resize to your liking. Hit the delete key. Deselect. Change the property to Overlay.

Copy Flower Vine 3 and paste as a new layer. Move into place (see mine for placement). Layer duplicate. Image/mirror.

Copy and paste Flower Vine 1 as a new layer. Resize 25%. Duplicate layer 2x for a total of 3. Move flowers into place (see mine for placement).

Copy and paste Flower Vine 3 again. In the layer pallet move below the other flower layers. Free rotate 65% left. Position so the leaves peek out from behind the flowers. Erase everything that you don’t want from this layer.

Add all your credit information.

Time to add your name:

Foreground: 3c251a
Background: a9aa43

Type out your name. Use your pick tool to stretch it so that your tube can lay atop of it as you like.

Add a bevel:
Bevel - 2
Width - 3
Smoothness – 35
Depth – 2
Ambience – 8
Shininess – 10
Color – White
Angel – 315
Intensity – 75
Elevation 20

Effects/Plugins/DSB Flux/ Bright Noise
Intensity 35, Lighter

Copy and Paste your tube atop of your name.

Crop your image, save your taggie, and you’re done!

I hope you enjoyed my tut!
Feel free to Email me what you came up with.
I would enjoy seeing your creation.
Hugs,
Bev