Saturday, August 29, 2009

Eternal Doom

Clicking on the image will enlarge to full view.

Supplies

1 tube of choice - I’m using the artwork of Michael Calandra which you can purchase here
Font of Choice - Haunt here
Weescotlass Mask 297 here
My template #8 here
“Eternal Darkness” is a PTU tagger size scrap kit created by Michelle of Candy Kisses Designz and can be purchased at her store Paradise4Scrappers.
Thank you Michelle for such a horror filled kit!
Eek!

This tutorial was written assuming you have a working knowledge of PSP.

~♥~ Let’s get started ~♥~

Open up the template.
Delete my copyright layer.

Highlight Rectangle Back.
Select All/Float/Defloat.
New Raster Layer.
Copy and paste a paper of choice Into Selection.
Deselect.
Delete the template layer.

Merge Visible the Center, Right, and Left Rectangles.
Select All/Float/Defloat.
New Raster Layer.
Copy and paste a paper of choice Into Selection.
Delete the template layer.
DO NOT DESELECT YET.

Copy and paste the Moon as a new layer.
Move to the upper right corner of the merged rectangles.
Selections/Invert
Tap the delete key.

Copy and paste Pentagram Deco as a new layer.
Resize 80%.
Center over the rectangles.
Turn the opacity down to 57 percent.
Tap the delete key.

Copy and paste the fog as a new layer.
Tap the delete key.

Copy and paste Sparkling Stars as a new layer.
Resize 50%
Move to the top of the rectangles.
Tap the delete key.
Deselect.

Add your embellishments. I used:
Cross: Resize 60%
Skull: Resize 30%
Skeleton hand: Resize 20% and 85%
Rose 1: Resize 40% Free rotate left 70 degrees
Black Rose: Resize 25% and 80%
Feather: Resize 50%
Butterfly 1: Resize 40%
Butterfly 2: Resize 50%

Copy and paste your tube as a new layer.

Highlight the white canvas.
New Raster Layer.
Select All.
Coy and paste a paper of choice Into Selection.
Deselect.
Apply the mask.
Merge Group.

Add your copyrights.

Add your name.
For effect I pasted a bit of fog over mine.

I hope you enjoyed this tutorial.
I’d love to see your results and show it off in my Show Arena.
Email me!
Hugs,
Bev


Friday, August 28, 2009

Pretty as a Picture

Clicking on the image will enlarge to full view.

Supplies
1 tube of choice - I’m using the artwork of PinUpToons which you can purchase here
Font of Choice - Toon Time here
Weescotlass Mask 133 here
DSB Flux Bright Noise (optional)
“Pretty as a Picture” is a PTU tagger size scrap kit created by Sandra of Ravenz Tuts N Tagz and can be purchased at Aussie Scrap Designs.
Thank you Sandra for a fabulous kit!

This tutorial was written assuming you have a working knowledge of PSP.

~♥~ Let’s get started ~♥~

Open up a 700 X 700 transparent image.
Flood fill white.

Copy and paste Frame 9 as a new layer.
Resize 40%
Free rotate left 5 degrees.
Use your Magic Wand and click inside the frame.
Copy and paste a paper of choice below the frame.
Selections/Invert
Tap the delete button.
Deselect.

Copy and paste your tube as a new layer to the right of the frame.
Duplicate/Mirror.
Move the duplicated mirror below the frame layer.
Use your eraser tool and erase any that sticks out from the frame.
Turn the opacity down to 65%.

Add your embellishments. I used:
Bee 2: Mirror/Resize 50%
Flowers 1 & 2: Resize 70%
Flamingo 1: Resize 50%
Clip 2: Resize 35%. Free rotate right 80 degrees
Butterflies 1, 2, & 3: Resize 70%
Bow 1
I duplicated Bow 1 - resized 80% and colorized.

Highlight your white canvas.
New Raster Layer
Copy and paste a paper of choice Into Selection.
Deselect.
Apply the mask.
Merge Group.

Add your copyrights.

Add your name.
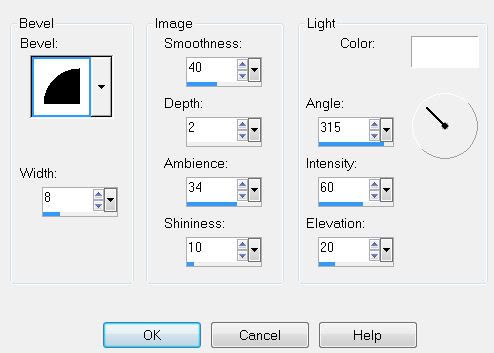
I gave mine a slight inner bevel:


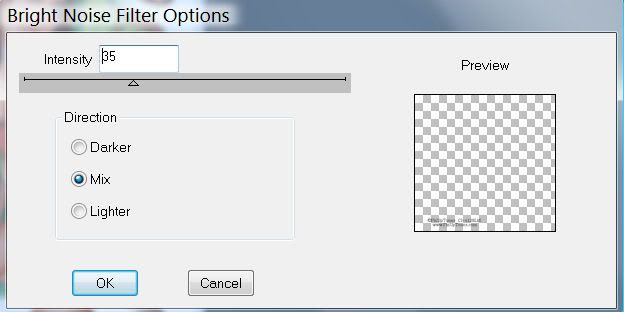
And applied DSB Flux Bright Noise


Resize all layers 85%

I hope you enjoyed this tutorial.
I’d love to see your results and show it off in my Show Arena.
Email me!
Hugs,
Bev

Wednesday, August 26, 2009

Autumn Bounty

Clicking on the image will enlarge to full view.

Supplies
Font of Choice - I’m using Circus here
Weesctolass Mask 209 here
“Harvest” is a PTU full size scrap kit created by KatNKDA.
It can be purchased from her store NK Art Shop.
You can visit Kat’s blog here.
Kat, your talent is amazing!! Thank you!
 
This tutorial was written assuming you have a working knowledge of PSP.

~♥~ Let’s get started ~♥~

Open up a 700 X 700 transparent image.
Flood fill white.

Copy and paste Element 22 as a new layer.
Resize 25% and 70%
Free rotate left 5 degrees
Duplicate/Mirror
Move both frames into position.

Click inside one of the frames with your Magic Wand.
Selections/Invert/Expand by 6
New Raster layer below the frame.
Copy and paste a paper of choice Into Selection.
Deselect.

Repeat the above step with the other frame.

Copy and paste Element 5 as a new layer.
Resize 25% and 70%
Position behind one of the frames.
Duplicate/Mirror
Resize 60%

Copy and paste Element 3 as a new layer.
Resize 25%

Copy and paste Element 2 as a new layer.
Resize 25% and 45%
Duplicate/Mirror and position them next to each other.
Merge down.

Place the corn over the top of the barrel.
Lower the Opacity until you can see the barrel quite well.
With the corn layer highlighted, use your Free Hand Selection Tool and outline the top of the barrel and circle around the corn portion you don’t want to see.
Tap the delete key.
Turn the Opacity back up to 100.

Copy and paste Element 7 as a new layer.
Resize: 25% & 40%
Free rotate left 45%
Position in the bottom left corner of the bottom frame.

Copy and paste Element 1 as a new layer.
Resize: 25% and 60%
Mirror.

Copy and paste Element 4 as a new layer.
Resize: 30%
Mirror
Duplicate/Resize 70%

Element 26:
Copy and paste different leaves as new layers, resizing as you like.

Highlight your white canvas.
New Raster layer.
Copy and paste a paper of choice Into Selection.
Deselect.
Apply the mask.
Merge Group.

To add your name:
Foreground: Black
Background: Null
Line Style: Solid
Width set on 1
Using your Ellipse Tool create a large circle on your pallet.
You’ll be writing your name on the outside of it, so position it wherever you want your name.
Move your curse along the circle until you see a Rocking A.
Click your mouse.
A Text box will appear.
Type your name.
Apply.
In your Layers pallet Click on the + sign beside your writing
Click on the eye beside the New Elipse layer
Highlight the Vector Layer
Right click
Convert to Raster Layer.

If you used a tube then add your copyright.
If you only used the kit, please be kind and give credit to the designer.

Resize all layers 85%

I hope you enjoyed this tutorial.
I’d love to see your results and show it off in my Show Arena.
Email me!
Hugs,
Bev

Playing Outside the Rain

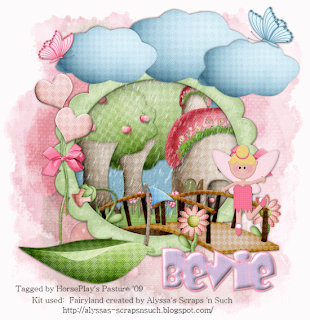
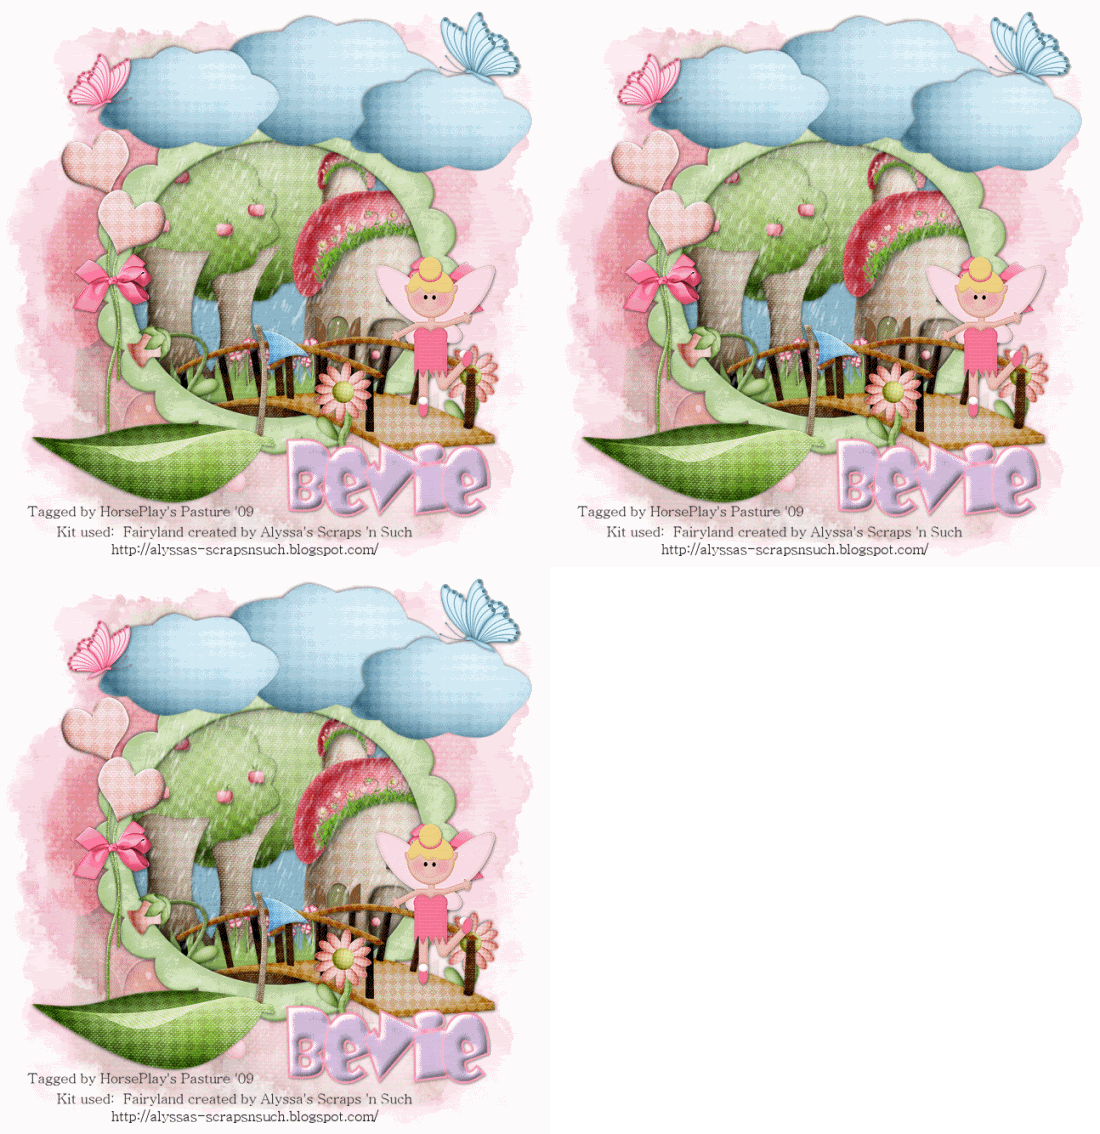
Clicking on the above image will enlarge to full view.
The image below shows the animation.


Supplies
Font of Choice - Baby Kruffy here
Becky Mask 22 here
VanDerLee Snowflakes
Animation Shop
“Fairland” is a PTU Full size scrap kit created by Alyssa of Alyssa’s Scraps ‘n Such and can be purchased at Paradise4Scrappers.
Thank you Alyssa for such an adorable kit!

This tutorial was written assuming you have a working knowledge of PSP.

~♥~ Let’s get started ~♥~

Open up a 700 X 700 transparent image.
Flood fill white.

We’ll create the layer for the mask first.
New Raster Layer.
Select All.
Copy and paste a paper of choice Into Selection.
Deselect.
Copy and paste House 5 as a new layer.
Resize 80%
Lower the opacity to about 42 or so.
Merge down.
Apply the mask.
Merge Group.

Copy and paste Frame 2 as a new layer.
Resize 50%
Use your Magic Wand and click inside of it.
Selections/Modify/Expand by 4

Copy and paste Paper 4 below the frame.
Selections/Invert
Tap the delete key.

Copy and paste the Bridge as a new layer above the frame.
Position it exactly where you want it.
Duplicate and move that one below the frame.
Tap the delete button.
Highlight the Original bridge layer.
Use your Eraser Tool and erase the portion of the bridge you don’t want sticking outside of the frame.

Arrange the following elements below the frame - tapping the delete button on each element after it’s moved into position:
Tree 2: Resize 40%
Tree 1: Resize 50%
House 5: Resize 40%
Grass 2: Resize 40%
Flower Bunch 1: Resize 25%

Move this next set of elements into position outside of the frame:
Cloud: Resize 40% Duplicate/Resize 80%/Duplciate
Flower 2: Resize 20%
Flower 3: Resize 20%
Fairy Boat: Resize 50%
Fairy 1: Resize 20%
Heart: Resize 50%/Duplciate/Mirror
Bow 3: Resize 30%
Butterfly 4: Resize 20%
Butterfly 3: Resize 20% and 80%
Merge Visible your 3 Cloud layers.

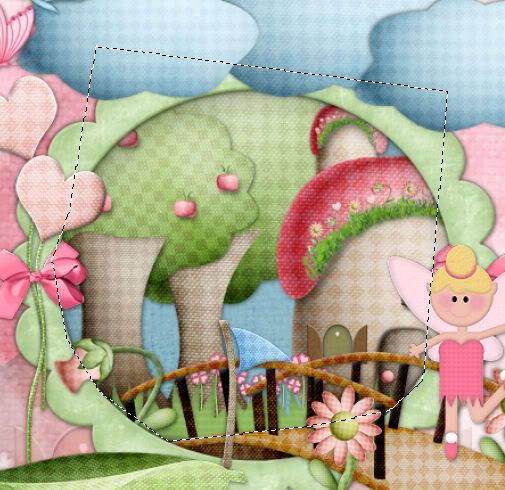
Using your Free Hand Selection Tool, box out an area you want the rain in.


New Raster layer below the Clouds.
Duplicate twice for a total of 3 layers.
Rename them Rain 1, 2. And 3.

Highlight Rain 1.
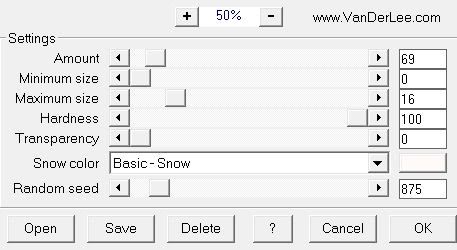
Apply the VanderLee Plug In with these settings:


Adjust/Blur/Gaussian Blur
Radius: 10


Repeat the above 2 steps with Rain 2 & 3 layers accept for each layer move the Random Seed button.

Select None.
Close out Rain 2 3.

Add your copyrights if you used a tag. If you didn’t use a tag and it’s all scrap, please be considerate and place credit to the designer on your tag.

Add your name.

Resize all layers 85%

Time to animate:

Copy Merge and carry into Animation Shop
Edit/Paste/As new Animation


Go back into PSP.
Close out Rain 1.
Open up Rain 2.

Copy Merge and carry into Animation Shop.
Edit/Paste/After current frame.

Go back into PSP.
Close out Rain 2.
Open up Rain 3.

Copy Merge and carry into Animation Shop.
Edit/Paste/After current frame.

View your animation.
If you’re happy then save and show off your awesome work!!

I hope you enjoyed this tutorial.
I’d love to see your results and show it off in my Show Arena.
Email me!
Hugs,
Bev

Beware!

Clicking on the above image will enlarge to full view.
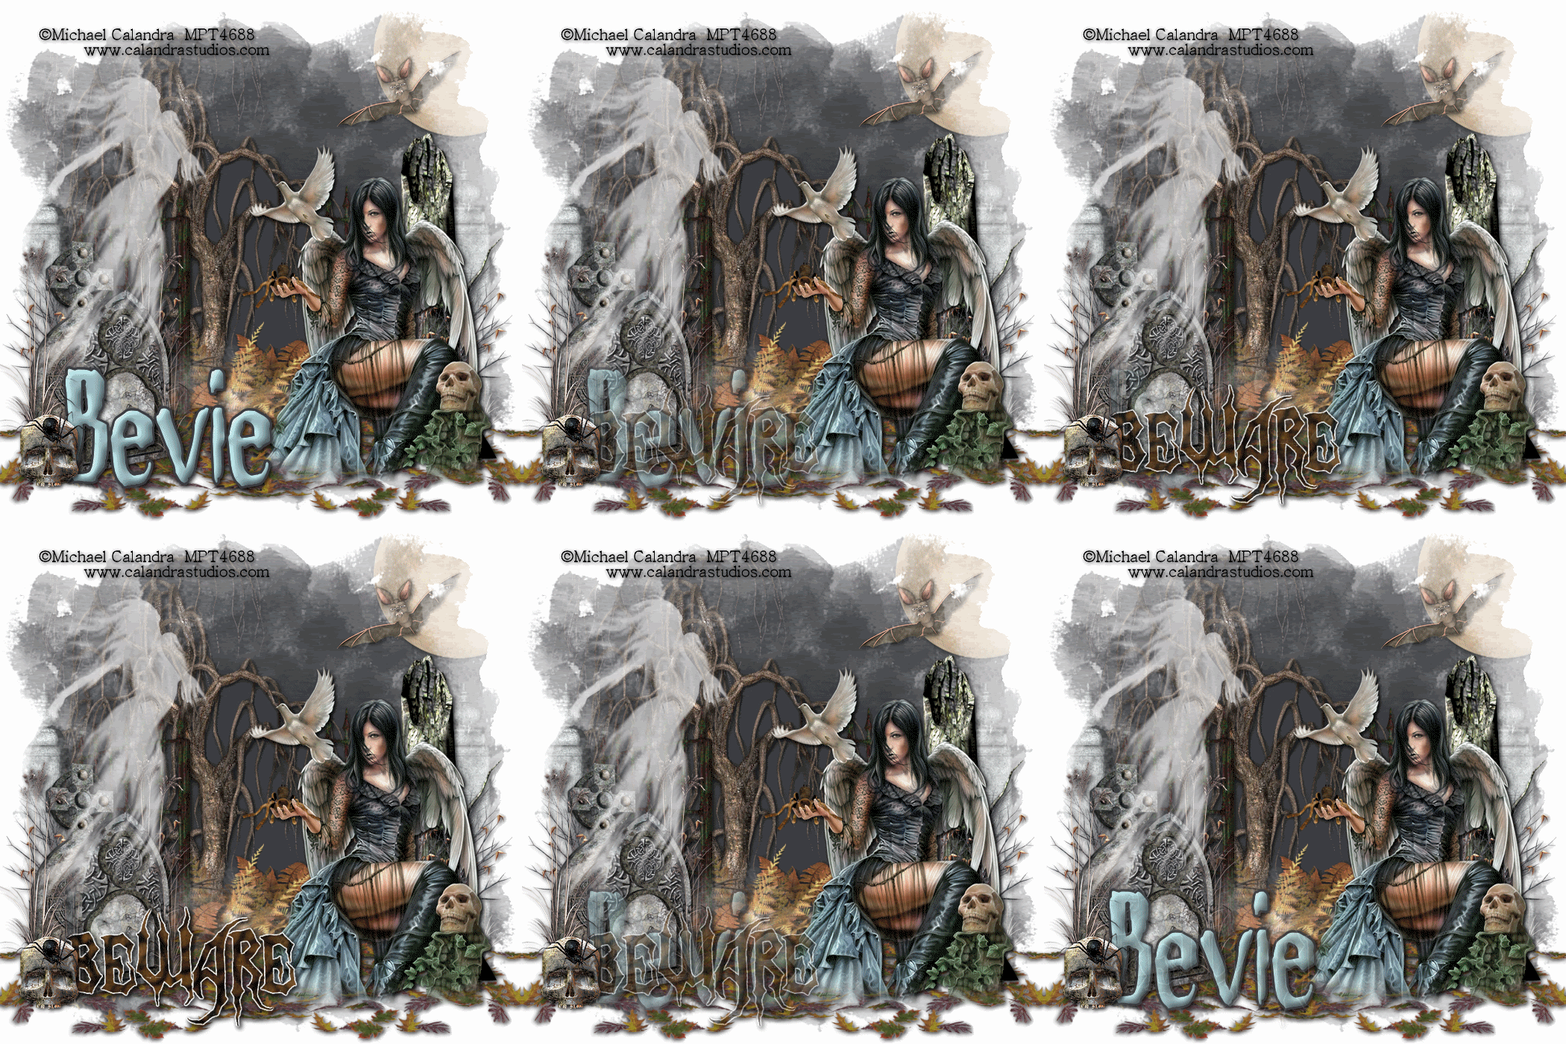
Image below shows the animation


Supplies
1 tube of choice - I’m using the artwork of Michael Calandra which you can purchase here
Font of Choice - Haunt here
Weescotlass Mask 254 here
Animation Shop
“All Hallows Eve” is a PTU tagger size scrap kit created by Nikki of Creative Intentionz and can be purchased at Paradise4Scrappers.
Thank you Nikki for such a spooky kooky kit!
Boo!

This tutorial was written assuming you have a working knowledge of PSP.
The Animation takes a bit of time, but it’s not hard at all!

~♥~ Let’s get started ~♥~

Open up a 700 X 700 transparent image.
Flood fill white.

We’ll create the layer for the mask first.
Flood fill with a dark color of your choice.
I used #3a3b40

Copy and paste the following elements - arranging them as you like:
Moon: Resize 60%
Gates: Resize 90%
Tree 1
Bat 2: Resize 40%

Close out your white canvas.
Merge Visible.
Apply the mask.
Merge Group.
Reopen your canvas.

Copy and paste your tube as a new layer.

Add your embellishments. I used:
Tree Stump: Resize 80%
Headstone 2: Resize 55%
Headstone 3: Resize 50%
Tree 2: Resize 50%
Ghost 1: Resize 80%
Dead Weed 1 & 2: Resize 50%
Skull 1: Resize 40%
Scattered leaves
Spider 2: Resized to fit in palm

Add your copyrights.

Add your name and place is exactly where you want it.
Copy and paste the word art “Beware”.
Resize 80%
Position behind your name.
Lower the opacity to 0.

Resize all layers 85%

Time to animate:
Animating this tag really isn’t hard at all.
Just monotonous.

Copy Merge and carry into Animation Shop
Edit/Paste/As new Animation

Go back into PSP.
Highlight your name and lower the opacity to 90
Highlight “Beware” and open the opacity to 10.

Copy Merge and carry into Animation Shop.
Edit/Paste/After current frame.

Go back into PSP.
Highlight your name and lower the opacity to 80
Highlight “Beware” and open the opacity to 20.

Copy Merge and carry into Animation Shop.
Edit/Paste/After current frame.

Go back into PSP.
Highlight your name and lower the opacity to 70
Highlight “Beware” and open the opacity to 30.

Copy Merge and carry into Animation Shop.
Edit/Paste/After current frame.

Go back into PSP.
Highlight your name and lower the opacity to 60
Highlight “Beware” and open the opacity to 40.

Copy Merge and carry into Animation Shop.
Edit/Paste/After current frame.

Go back into PSP.
Highlight your name and lower the opacity to 50
Highlight “Beware” and open the opacity to 50.

Copy Merge and carry into Animation Shop.
Edit/Paste/After current frame.

Go back into PSP.
Highlight your name and lower the opacity to 40
Highlight “Beware” and open the opacity to 60.

Copy Merge and carry into Animation Shop.
Edit/Paste/After current frame.
Go back into PSP.

Highlight your name and lower the opacity to 30
Highlight “Beware” and open the opacity to 70.
Copy Merge and carry into Animation Shop.

Edit/Paste/After current frame.
Go back into PSP.

Highlight your name and lower the opacity to 20
Highlight “Beware” and open the opacity to 80.
Copy Merge and carry into Animation Shop.

Edit/Paste/After current frame.
Go back into PSP.

Highlight your name and lower the opacity to 10
Highlight “Beware” and open the opacity to 90.
Copy Merge and carry into Animation Shop.

Edit/Paste/After current frame.
Go back into PSP.

Highlight your name and lower the opacity to 0
Highlight “Beware” and open the opacity to 100.
Copy Merge and carry into Animation Shop.

Edit/Paste/After current frame.

You still with me???!!!
Phew! Ok, glad ya are.
Told ya it’d be monotonous….hehehe
Now we’re going to just be working in Animation Shop.

You should have a total of 11 frames.
Highlight Frame 2.
Hold down on the control key and click on frames 3 - 10
You should have Frames 2 - 10 highlighted.

Edit/Copy
Edit/Paste/As New Animation
Ctl + A to highlight all frames
Animation/Reverse Frames
Edit/Copy

Make your Original frames active
(the ones you worked so hard on bringing in from PSP)
Highlight the last frame.
Edit/Paste/After Current Frame
Highlight all frames.
Animation/Frame Properties
Change the number to 25

Highlight Frames 1 and 11
Animation/Frame Properties
Change the number to 250

View your animation.
If you’re happy then save and show off your awesome work!!
I hope you enjoyed this tutorial.
I’d love to see your results and show it off in my Show Arena.
Email me!
Hugs,
Bev

Tuesday, August 25, 2009

Garv's Doves

Clicking on the image will enlarge to full view.

Supplies
2 tubes of choice - I’m using the artwork of Keith Garvey which you can purchase here
Font of Choice - Keyster here
Creative Desires Mask 31 here
If you are or know who the creator is of this mask, will you email me so that I can give proper credit? Thanks.
“Victorian Blue” is a PTU full size scrap kit created by Manda‘s Dazzling Dezignz and can be purchased at Dazzling Scraps. You can visit Manda's blog here.
Thank you Manda for a beautiful kit!

This tutorial was written assuming you have a working knowledge of PSP.

~♥~ Let’s get started ~♥~

Open up a 700 X 700 transparent image.
Flood fill white.
Copy and paste Frame 6 as a new layer.
Resize 25% and 85%
Free rotate left 10 degrees.
Duplicate/Mirror
Move both frames into position - see mine for reference.

Highlight one of the frames.
Use your Magic Wand and click inside of it.
Selections/Modify/Expand by 6.
New Raster Layer below the frame.
Flood fill with a gradient of your choice.
Copy and paste your tube as a new layer below the frame.
Selections/Invert
Tap the delete key.
Deselect.

Repeat the above steps with the other frame.

Close out your white canvas.
Merge Visible.
Reopen your white canvas.

Copy and paste Heart 1 as a new layer.
Resize 70%
Free rotate right 25 degrees.
Copy and paste Flower 8 as a new layer.
Resize 25%
Free rotate right 25 degrees

Copy and paste Flower 10 as a new layer.
Resize 25% and 80%
Free rotate right 40 degrees

Copy and paste Flower 7 as a new layer.
Resize 25% and 80%
Free rotate right 15 degrees

Add your embellishments. I used:
Dove in flight: Resize 40%
Bow 1: Resize 25% and 50%
Butterfly 3: Resize 25% and 90%
Butterfly 3 again: Resize 25% and 60%
Flower 12: Resize 25% and 85%. Free rotate right 85 degrees

Highlight your white canvas.
New Raster Layer
Copy and paste a paper of choice Into Selection.
Deselect.
Apply the mask.
Merge Group.

Add your copyrights.

Add your name.

Resize all layers 85%

I hope you enjoyed this tutorial.
I’d love to see your results and show it off in my Show Arena.
Email me!
Hugs,
Bev

Monday, August 24, 2009

She Dreams

Clicking on the image will enlarge to full view.

Supplies
1 tubes of choice - I’m using the artwork of PinUpToons which you can purchase here
Font of Choice - Arctic here
Weescotlass Mask 297 & Frame 4 in Frame set one -
Both items can be found here
“She Dreams” is a PTU tagger size scrap kit created by Julie of Bits ’n Bobs and can be purchased at Exquisite Scraps. You can visit Julie’s blog here.
Thank you Julie for another fabulous kit!

This tutorial was written assuming you have a working knowledge of PSP.

~♥~ Let’s get started ~♥~

Open up a 700 X 700 transparent image.
Flood fill white.

Open the Frame.
Copy and paste onto your white canvas.
Selections/Select All/Float/Defloat
New Raster layer.
Copy and paste a paper of choice Into Selection.
Deselect.
Delete the template frame.

Use your Magic Wand and click inside of the frame.
Selections/Modify/Expand by 6.
New Raster Layer below the frame.
Copy and paste a paper of choice Into Selection.
Deselect.

Copy and paste Butterfly 3 as a new layer.
Resize 35%
Free rotate right 20 degrees

Copy and paste Butterfly 2 as a new layer.
Resize 40%
Free rotate left 20 degrees.

Copy and paste Bubble 3 as a new layer.
Copy and paste your tube as a new layer over the bubble.
Resize your tube if you like.
Highlight the bubble layer.
Select All/Float/Defloat
Highlight your tube layer.
Selections/Invert
Tap the delete key.
Deselect.
Lower the opacity of your tube to 28.
Merge Down.
Resize 25%

Add your embellishments. I used:
Flower 3
Ivy 1 and 3
Ribbon 2: Resize 50%
Bubbles - resizing all different sizes
Sparkles 1

Copy and paste your tube as a new layer.

Highlight your white canvas.
New Raster Layer
Copy and paste a paper of choice Into Selection.
Deselect.
Apply the mask.
Merge Group.

Add your copyrights.

Add your name.
Crop your image.

Resize all layers 85%

I hope you enjoyed this tutorial.
I’d love to see your results and show it off in my Show Arena.
Email me!
Hugs,
Bev


Sunday, August 23, 2009

I'm Not Afraid

Clicking on the image will enlarge to full view.

Supplies
3 tube of choice - I’m using the artwork of Gennadiy Koufay which you can purchase here
Font of Choice - Aquarelle here and Atlantis Medium here
Weescotlass Mask 19 here
“Olive Branch” is a FTU full size scrap kit created by Kat of KatNKDA and can be downloaded from her blog here. Please leave a thank you when downloading. It's a small gesture for hard work given freely.
Thank you Kat for yet another beautiful kit!

This tutorial was written assuming you have a working knowledge of PSP.

~♥~ Let’s get started ~♥~

Open up a 700 X 700 transparent image.
Flood fill white.

Copy and paste Element 6 as a new layer.
Use your Magic Wand and click inside of all 3 squares.
Selections/Modify/Expand by 3.
New Raster Layer below the frame.
Copy and paste a paper of choice Into Selection.
Deselect.

Use your Magic Wand and click inside one of the squares.
Selections/Modify/Expand by 3
Copy and paste a tube below the frame.
Selections/Invert
Tap the delete key.
Deselect.
Effects/Photo Effects/Sepia Toning
Amount to Age: 60

Repeat with the other remaining 2 squares.

Add your embellishments. I used:
Element 1: Resize 85%
Element 3: Resize 30%
Element 17: Resize 25% Free rotate left 40 degrees
Elements 7 & 8: Resize 30%
Element 15: Resize 30%
Element 12: Resize 40%. Mirror. Free rotate right 40 degrees

Highlight your white canvas.
New Raster Layer.
Select All.
Copy and paste a paper of choice Into Selection.
New Raster Layer.
Copy and paste another paper of choice Into Selection - move it to the far left so that only a bit sticks out. Give it a heavy drop shadow.
New Raster layer.
Copy and paste another paper of choice Into Selection - move it to the far left so that only a bit sticks out from beneath the previous paper. Give it a heavy drop shadow.
And repeat this once more with another paper.
Deselect.
Merge visible all papers.
Apply your mask.
Merge Group.
Resize 120%

Now we’ll be using the Atlantis Medium Font
In your color pallet -
Foreground: Black
Background: Pattern set to a paper of choice
Click on your Ellipse Tool - circle
Line Width: 3
Style: solid
Make a circle that’s just a little bit bigger than your mask.
Objects/Align/Center in Canvas
If it’s too small or too large just click on Image/Resize
Move your curser along the circle until you see a Rocking A
Click your mouse.
A Text Box will open up.
Type in whatever you like.
Apply
In your Layers pallet Click on the + sign beside your writing
Click on the eye beside the New Eclipse layer
Highlight the Vector Layer
Right click
Convert to Raster Layer.

Add your copyrights.

Add your name using the Aquarelle font.
Resize all layers 85%

I hope you enjoyed this tutorial.
I’d love to see your results and show it off in my Show Arena.
Email me!
Hugs,
Bev