Friday, October 4, 2013

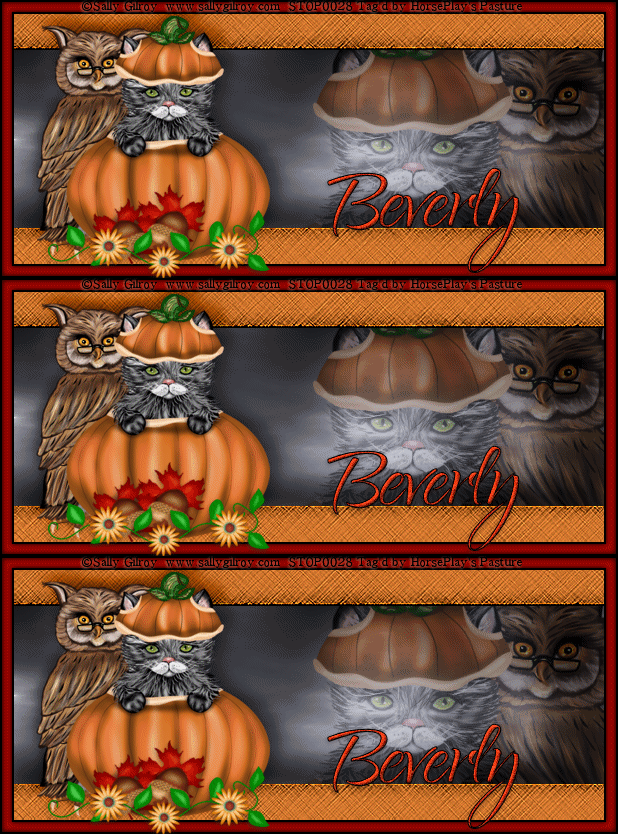
When Night Falls - Forum Set


Supplies

1 tube of choice - I used the wonderful artwork of Sally Gilroy which can be purchased from PSP Tube Stop.  You must have a license to use.

Font of choice - I used Qwigley here

Plug Ins used:
Mura's Meister - Cloud
Brush Strokes - Crosshatch
DSB Flux - Bright Noise
Graphics Plus - Cross Shadow

My Supplies of a template here

Animation Shop

***All elements used in this tutorial came with the tube on seperate layers.

This tutorial assumes you have a working knowledge of PSP.

~♥~ Let's get started ~♥~

Open up a blank 590 x 250 canvas.

Color Pallet:
Foreground:  #1c1e24
Background:  #efefef

Apply Mura's Meister - Cloud:
Use Default settings and play around with the Amount bar to get the effect you want.
OK

Apply Graphics Plus - Cross Shadow:
Use Default settings.
OK

Copy and paste my template as a new layer.
Click on each rectangle with your Magic Wand.
New Raster layer.
Flood fill with #d7772c
Effects/Texture Effects/Straw Wall:


Apply the Straw Wall effect again.

Apply Brush Strokes - Crosshatch:
Strength: 32
Sharpness: 6
Strength: 1
OK
Deselect.
Delete the template layer. 

Copy and paste your tube as a new layer just below the rectangles.
Change the Opacity to Soft Light.

Give the rectangles a drop shadow.

Copy and paste your tube as a new layer above the rectangles and move into position on the left side.

Image/Add Borders:
Symmetric checked
Color: #000000
Top, Left, Right, Bottom: 2
OK

Image/Add Borders:
Change the color to #970200
Symmetric checked
Top, Left, Right, Bottom: 10
OK
Use your Magic Wand and click on the red border.
New Raster layer.
Effects/3D Effects/Cutout:
Vertical and Horizontal: 0
Opacity: 61
Blur: 8.14
OK
Deselect.

Image/Add Borders:
Symmetric checked
Color: #000000
Top, Left, Right, Bottom: 2
OK

Decorate with the following elements from the tube:
Raster 3 (Flowers):  Resize 50%
Raster 6 (acorn):  Resize 50%/Use Pick Tool to turn/Duplicate/Mirror
Raster 8 (leaf):  Resize 70%/Duplicate/Mirror

Add your name -

Color Pallet:
Foreground: #000000
Background: #d43716
Stroke: 1

Type your name.
Give it a slight Inner Bevel 3x's:

Duplicate your name 2x's for a total of 3 name layers.
Rename them Name 1, Name 2, Name 3.

Highlight Name 1 layer.
Apply DSB Flux - Bright Noise:
Intensity: 20
Mix checked
OK

Highlight Name 2 layer.
Apply DSB Flux - Bright Noise:
Same settings accept hit the mix button twice.
OK

Highlight Name 3 layer.
Repeat the above step accept hit the mix button 3 times.

Close out Name 2 and Name 3 layers.

Add your credits.

Copy Merge.

~Time to Animate~

Open up Animation Shop.
Edit/Paste/As New Animation.

Back in PSP.
Close out Name 1 layer.
Open up Name 2 layer.
Copy Merge

Carry into AS
Edit/Paste/After Current Frame.

Back in PSP.
Close out Name 2 layer.
Open up Name 3 layer.
Copy Merge

Carry into AS
Edit/Paste/After Current Frame.

View your animation.
If you're happy then save.

To make the Avatar:
Make a 125 x 125 blank canvas.
Copy the forum banner.
Paste as a new layer.
Resize 80% and move into a position you like.
New Raster layer.
Select All.
Flood fill with #000000
Selections/Modify/Contract by 2.
Tap the delete key.
Flood fill with #970200
Selections/Modify/Contract by 1.
Tap the delete key.
Flood fill with #000000
Selections/Modify/Contract by 2.
Tap the delete key.
Deselect.

Using the same font you used on the banner, type the first initial of your name.
Give it the same slight Inner Bevel 3 times.
Apply DSB Flux - Bright Noise:
Use same settings.

Save as a jpeg.

I hope you enjoyed this tutorial as much as I did creating it.
Would love to see your results...email me!

Hugs,
Bev


Thursday, October 3, 2013

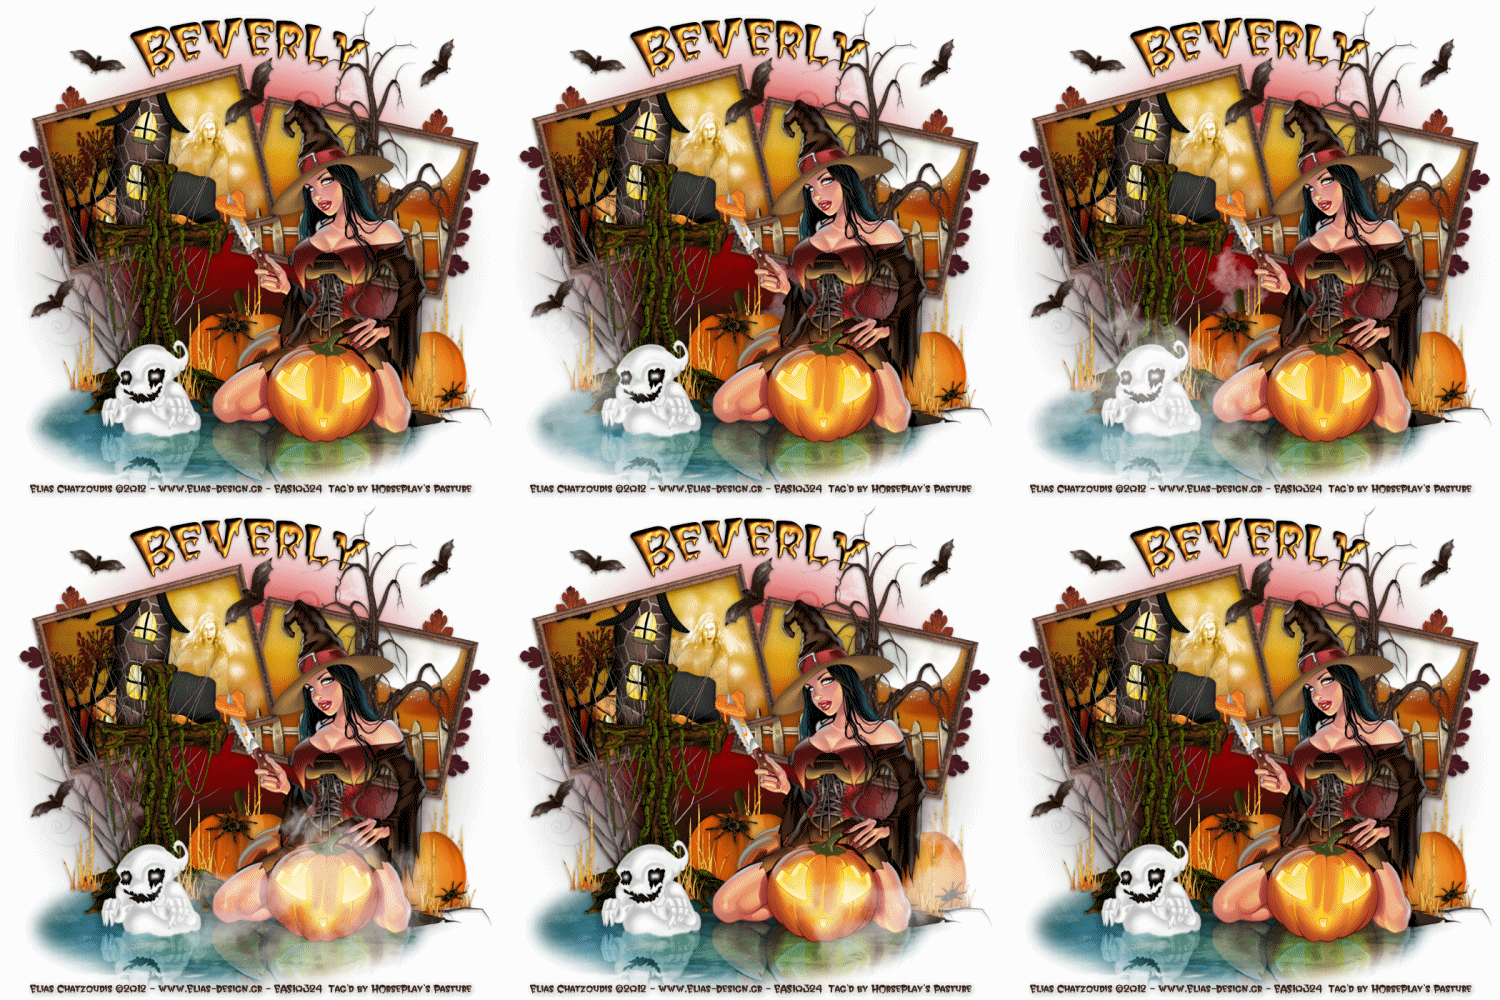
Witches Swamp

 photo SwampWitch_zpsd9ee62e6.gif

Supplies Needed  

1 tube of choice – I used the awesome artwork of Elias Chatzoudis which can be purchased from his shop here.  You must have a license to use. 

Font of choice – I used Creeper here

My Mask 20 here

Animation Shop

"Troubling Bubbling Brew" is a tagger size scrap kit created by me, Bev of HorsePlay's Pasture Designs and can be purchased at any of my stores here.

~♥~ Let’s get started ~♥~

Open up a 700 x 700 blank canvas.
Flood fill white.

Copy and paste El 44 as a new layer.
Copy and paste your tube as a new layer.
Move the frame and your tube into position, moving the frame slightly up on your canvas - see my tag for reference.

Close our tube layer out for now.
(So it won't be in your way of working with the frame)

Highlight the frame layer.
Click inside of each frame with your Magic Wand.
Selections/Modify/Expand by 4.
New Raster layer below the frame.
Copy and paste Paper 8 Into Selection.
Deselect for now.

Add the elements below the frame:
El 68:  Resize 60%
El 74:  Resize 35%
El 59:  Resize Resize 50%/Change the Properties to Hard Light
EL 47:  Resize 40%/Duplicate 2x's and match them up to create one fence

Highlight the paper layer.
Click anywhere outside of it with your Magic Wand.
Highlight each element and tap the delete key.
Deselect.

Open up your tube layer.
Copy and paste El 32 as a new layer.
Resize 90% and move behind your tube.
Copy and paste EL 3 as a new layer below the frame.
Resize 40% - move into exact position.
Highlight the paper layer.
Click anywhere outside of it with your Magic Wand.
Highlight the moon element layer.
Tap the delete key.
Deselect.

Close out your white background layer, tube layer, and tree layer.
Merge Visible.
Reopen all layers.
(Now you can move the merged frame up or down if needed.

Add the rest of your elements.  I used:
El 8
El 38
El 16:  Resize 65%
El 36:  Resize 40%/Duplicate as many times as you like
El 5:  Resize 40%/Duplicate
El 13:  Resize 25%/Duplicate/Resize 80%/Use your Pick Tool to turn as you like
El 53:  Resize 40%/Flip/Duplicate/Mirror/Duplicate Original/Free rotate Right 40 degrees/Duplicate/Mirror
El 27:  Resize 50%/Duplicate/Resize 70%/Duplicate them as many times as you like/Use the Pick Tool to turn as you like
El 80:  Resize 40% - continue with the tutorial to cut the bottom off and mirror this element

Mirroring the ghost and tube elements - 
Highlight the ghost layer.
Make your Freehand Selection Tool active.
Use the default settings accept change the Feather number to 3.
Section off the bottom part of the ghost - don't make a straight line because you want it to appear as if it's rising from the water.
Once you have the bottom sectioned off, tap the delete key.
Deselect.

To mirror the ghost:
Duplicate the element.
Flip
In your layers pallet move the flipped layer below the original layer.
Match them up.
Change the Opacity to Soft Light.
Highlight the water layer (Element 8)
Click anywhere outside of it with your Magic Wand.
Highlight the flipped ghost layer.
Tap the delete key.
Deselect.

Highlight the tube layer.
Repeat the above step 

Highlight your white background.
New Raster layer.
Select All.
Copy and paste Paper 17 Into Selection.
Deselect.
Apply the mask.
Merge Group.

Add your copyright.

Color Pallet:
Foreground: #000000
Background: Null

Make your Ellipse Tool active.
Width: 2.00
Create a rather large oval across your canvas - keeping an eye on the curve at the top.  Make the curve as you'd like your name to appear.

Color Pallet:
Foreground:  #3c2619
Background: #ee872c
Stroke: 1.5

Make your Text Tool active and run it along the top of the oval at the center of it.
Once you see a Rocking A click your mouse.
A Text Box will appear.
Type your name.
Apply.
In your layers pallet click on the + sign.
Click on the eye of the New Ellips layer to close this one out.
Right click on Vector 1 layer.
Choose Convert to Raster layer.
Give your name a slight Inner Bevel:

If you don't want to animate then save your tag.  

Copy and paste El 34 as a new layer.
Rename this layer FRONT FOG
Move this element to the left edge of the "swamp" so you can't see it at all. 

Copy and paste El 33 as a new layer.
Resize 50% and rename this layer BACK FOG.
Move this layer just above the mask layer and position it just behind the tube so you can't see it yet.

You're probably wondering how you're going to move these elements when they blend right in with the background and hidden behind the tube.
It's easy!  Tap the letter K on your keyboard to make your Pick Tool active.
You can see the Pick Tool but in Animation Shop you don't!
Right now you should not see either of the Fog layers.

Copy Merge.

~Time to Animate~

Open up Animation Shop.
Edit/Paste/As New Animation.

Back in PSP.
Highlight the FRONT FOG layer and move it slightly to the right.
Highlight the BACK FOG layer and move it slightly to the left.
Copy Merge.

Carry Into AS.
Edit/Paste/After Current Frame.

Repeat the above 2 steps working both fog layers across your canvas until you can't see either fog layer again.

Ctrl + A - to highlight all frames.
Animation/Frame Proerties:
Display time: 25 (depending on how many frames you have you can play with this time.  The higher the number the slower the animation)
OK

Highlight Frame 1.
Animation/Frame Properties:
Display time: 130
OK

Sit back and watch your Witch Swamp.
If you're happy then resize:
Animation/Resize Animation:
Pixel Size checked
Width: 500
OK

Save.

I hope you enjoyed this tutorial as much as I did creating it for you.
Happy Haunting!
Boo!

I’d love to see your results.
Email me!
Hugs,
Bev 

Tuesday, October 1, 2013

Autumn Afternoon Ride


Supplies Needed  

1 tube of choice – I used the wonderful artwork of Jane Starr Weils which can be purchased from My Tubed Art.  You must have a license to use. 

Font of choice – I used Evanescent here

Weescotlass Mask 362 here

Dee's Sign Post Torture_Template here
It can be found under Monday, September 3, 2012

Plugs Ins used:
Brush Strokes - Crosshatch
Adjust - Variations

"Autumn Blessings" is a tagger size scrap kit created by Jessica of Gothic Inspirations and can be purchased from her store here.  You can visit her blog here.  

~♥~ Let’s get started ~♥~

Open up the template.
Shift + D.
Close out the original.
Delete the top 8 layers, Wordart Overlay, and Wordart mask
Resize all layers 90%
Image/Canvas Size:
700 x 600
OK
Highlight bg layer.
Flood fill white.

Highlight Orange Circle layer.
Click on it with your Magic Wand.
New Raster layer.
Copy and paste Brad element Into Selection.
Deselect.
Delete the template layer.

Highlight Purple Square layer.
Click on it with your Magic Wand.
New Raster layer.
Coy and paste Paper 24 Into Selection.
Deselect.
Delete the template layer.

Highlight Left Orange Circle layer.
Click on it with your Magic Wand.
New Raster layer.
Copy and paste Paper 16 Into Selection.
Deselect.
Delete the template layer.

Highlght Right Orange Circle layer.
Repeat the above step.

Highlight White Strip layer.
Click anywhere outside of it with your Magic Wand.
Selections/Invert
New Raster layer.
Copy and paste Paper 11 Into Selection.
Adjust/Add Remove Noise/Add Noise:
Random and Monochrome checked
Noise: 10%
OK
Deselect.
Delete the template layer.

Highlight White Rims layer.
Click on it with your Magic Wand.
New Raster layer.
Paste Paper 11 (it should still be in the memory) Into Selection.
Add the same Noise effect.
Deselect.
Delete the template layer.

Open up Paper 3.
Shift + D.
Close out the original.
Apply Brush Strokes - Crosshatch:
Stroke Length: 37
Sharpness: 6
Strength: 1
OK
Copy the paper.

Highlight Blue Strip layer.
Click on it with your Magic Wand.
New Raster layer.
Paste the paper Into Selection.
Deselect.
Delete the template layer.
Close out the paper you applied the Crosshatch effect to as you won't be using it any more.

Highlight Right Gree Rectangle layer.
Merge Down.
Merge Down.
All 3 rectangles should be on the same layer.
Rename this layer "Merged" layer.
Click on each rectangle with your Magic Wand.
New Raster layer.
Copy and paste Paper 1 Into Selection.
Deselect for now.

Add the following elements within the rectangles.  Don't worry about what overhangs the rectangles.  We'll come back and clean that up in a bit.
Tree:  Resize 80% (I placed this on the left side of the rectangles)
Paste Tree again:  Resize 50%/Mirror (I placed on the right side of the rectangles)
Paste Tree again:  Resize 30%
Carriage:  Resize 50%/Mirror
I resized my tube small enough and made it appear to be sitting in the carriage.

Once all elements are in their exact position -
Highlght the paper layer below all the elements.
Click anywhere outside of it with your Magic Wand.
Highlight each element and tap the delete key.
Deselect.

Color Pallet:
Foreground: #000000
Background: #90281d

Highlight Dotted Frames layer.
Make your Color Replacer Tool active.
Double right click on the dots.
Duplicate the layer.
Merge Down.
Apply Variations:
Click on Original once.
Click on Darker 3x's.

Copy and paste your tube as a new layer.

Add your elements.  I used:
Leaves 2:  Resize 50%/Duplicate
Sunflower 1:  Resize 70%/Duplicate
Sunflower 2:  Resize 15%/Duplicate/Resize 70%
Cauldron:  Resize 40%
Grass:  Resize 30%/Duplicate/Resize 70%
Glitter Bling:  Duplicate/Flip
Tree:  Resize 70%

Crop your Image.

Highlight your white background.
New Raster layer.
Select All.
Copy and paste Paper 6 Into Selection.
Deselect.
Apply the mask.
Merge Group.

Add your copyright.

Add your Name:
Color Pallet - 
Foreground: #6f3401 
Background: #e9b003
Stroke: 1.
Type your name.
Give it a slight Inner Bevel:

Save your tag.

I’d love to see your results.
Email me!
Hugs,
Bev 

Sunday, September 29, 2013

Cozy Autumn Days


Supplies

1 tube of choice - I used the wonderful artwork of Mitzi- Sato-Wiuff which can be purchased from PSP Tube Stop.  You must have a license to use.

Font of choice - I used Parseltongue here

Melissaz Creationz Mask 14 here

Dangerously Delicious template "Template - 2 - Sunshine" here
It can be found under Thursday, August 1, 2013

Plug Ins used:
Brush Strokes - Crosshatch

"Autumn Beauty" is a tagger size scrap kit created by Lysira of Lysira's Graphic World and can be purchased from Heartbeatz Creationz.  You can visit her blog here.  Thank you Lysira for an incredibly beautiful scrap kit!

This tutorial assumes you have a working knowledge of PSP.

~♥~ Let's get started ~♥~

Open up the template.
Shift + D.
Close out the original.
Image/Resize all layers 90%
Image/Canvas Size:
700 x 600
Highlight the bg layer.
Flood fill white.
Delete the following layers:
Info, Love Me or Hate, Me, me d/s, I'm still ganna, Shine teal, shile white, shine d/s, dotted star, and gray star 

Highlight Teal Square layer.
Click on it with your Magic Wand.
New Raster layer.
Copy and paste Paper 9 Into Selection.
Deselect.
Delete the template layer.

Highlight Rust Rectangle layer.
Click on it with your Magic Wand.
New Raster layer.
Copy and paste Paper 1 Into Selection.
Apply Brush Strokes - Crosshatch:
Stroke Length: 27
Sharpness: 6
Strength: 1
OK
Deselect.
Delete the template layer.

Highlight Brown Square layer.
Click on it with your Magic Wand.
New Raster layer.
Copy and paste Paper 8 Into Selection.
Deselect.
Delete the template layer.

Highlight White Circle layer.
Click anywhere outside of it with your Magic Wand.
Selections/Invert
New Raster layer.
Copy and paste Paper 9 Into Selection.
Adjust/Add Remove Noise/Add Noise:
Uniform and Monochrome checked
Noise: 35%
OK
Deselect.
Delete the template layer.

Highlight Creame Circle layer.
Click on it with your Magic Wand.
New Raster layer.
Copy and paste Paper 7 Into Selection.
Copy and paste your tube as a new layer.
Change the Properties to Overlay.
Selections/Invert
Tap the delete key.
Deselect.
Delete the template layer.

Highlight Dotted Circle layer.
Select All/Float/Defloat
New Raster layer.
Flood fill with #3b0000.
Duplicate the layer.
Merge Down.
Deselect.
Delete the template layer.

Repeat the above step with Dotted Square layer.

Highlight Gray Square layer.
Click on it with your Magic Wand.
New Raster layer.
Copy and paste Paper 7 Into Selection.
Copy and paste your tube as a new layer.
Change the Properties to Overlay.
Move into a position you like over the paper.
Selections/Invert
Tap the delete key.
Deselect.
Delete the template layer.

Copy and paste your tube as a new layer.
Move into position in front of the circle - see my tag for reference.

Add your elements.  I used:
Ivy 03: Duplicate/Mirror/Flip
Floral Gazing Ball:  Resize 35%/Duplicate
Fall Cluster:  Resize 70%
Daisy 01:  Resize 25%/Duplicate
Daisy 02:  Resize 20%/Duplicate
Daisy 03:  Resize 15%/Duplicate
Fall Leaf 02:  Resize 55%/Free rotate Right 30 degrees/Duplicate/Duplicate/Mirror/Duplicate/Resize 70%/Duplicate/Mirror/Duplicate/Resize 70% 2x's/Duplicate

Crop your image.

Highlight your white background.
New Raster layer.
Select All.
Copy and paste Paper 10 Into Selection.
Deselect.
Apply the mask.
Merge Group.

Add your copyrights.

Add your name:
Color Pallet - 
Foreground: #3b0000
Background: #ebb876
Stroke: 1.0

Type your name.
Give it a slight Inner Bevel:


Merge Visible all layers.
Save.

I hope you enjoyed this tutorial.

Hugs,
Bev