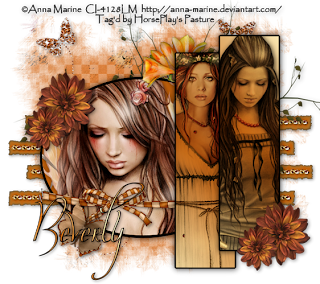
Saturday, November 20, 2010

Thankfulness of the Season


Clicking on the image will allow you to enlarge for bigger view.

Supplies

3 tubes of choice - I used the artwork of Anna Marine at CILM
Font of Choice - I used Oh Lara - a pay font
Weescotlass mask 297 here
Brush Strokes: Sprayed Strokes - optional
Xenofex 2: Burnt Edges
Artmama Made Template 5 here - click on Templates at the top of the blog.
“Beary Autumn” is a PTU tagger size scrap kit created by Valerie of BabyV Dezigns and can be purchased from Stargazer Scraps. You can visit her site here.
Thank you Valerie for such a warm and wonderful autumn kit!

This tutorial was written assuming you have a working knowledge of PSP.

~♥~ Let’s get started ~♥~

Open up the template.
Shift + D.
Close out the original.
Delete the top layer and Dots layer.
Flood fill Raster 3 white.

In your Color Pallet:
Foreground: #c2610c
Background: #f4d0a9

Highlight Strips layer.
Select All/Float/Defloat
New Raster layer.
Flood fill with the foreground color.
Deselect.
Delete the template layer.
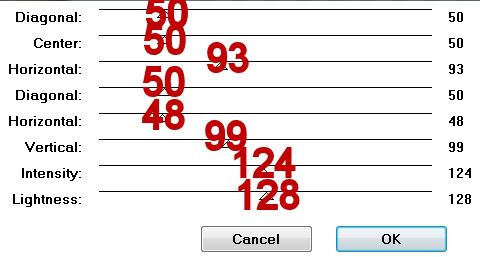
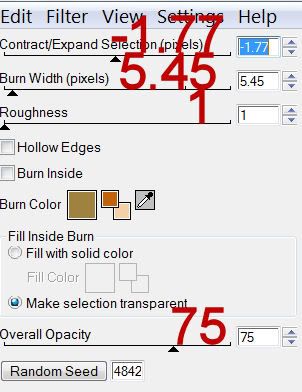
Apply Xenofex - Burnt Edges:

Highlight Oval layer.
Select All/Float/Defloat
New Raster layer.
Flood fill with #000000
Selections/Modify/Contract by 5
OK
New Raster layer.
Flood fill with #c2610c
Copy and paste your tube as a new layer - move into position over the oval.
Selections/Invert
Tap the delete.
Deselect.
Delete the template layer.

Highlight Back Rectangle layer.
Select All/Float/Defloat
New Raster layer.
Flood fill with #000000
Selections/Modify/Contract by 3
New Raster layer.
Make a gradient with your foreground and background colors I have at the beginning of this tutorial.
Angle: 45
Repeat: 1
Invert checked.
Flood fill the layer.
New Raster layer.
Flood fill again
Adjust/Blur/Gaussian blur:
Radius: 20
OK
Copy and paste another tube as a new layer above the blurred gradient.
Selections/Invert
Tap the delete key.
Deselect.
Delete the template layer.
Change the Properties to Multiply.

Highlight Front Rectangle.
Repeat the above steps using a different tube.

Add your embellishments. I used:
Trim: Resize 50%/Duplicate as needed to position over the strips
Butterfly Bling: Resize 80%
Ribbon: Resize 70%
Tree 2
Flower 1: Resize 50%/Duplicate/Resize 70%
Flower 6
Butterfly: Resize 50%/Free rotate right 30 degrees

Crop your image.

Highlight your white background.
Select All.
New Raster layer.
Copy and paste Paper 3 Into Selection.
Deselect.
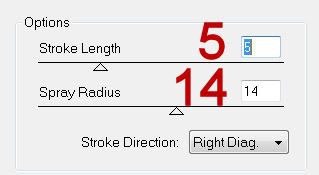
Apply Brush Strokes - Sprayed Strokes:

Apply the mask.
Merge Group.

Add your credits.

Add your name:
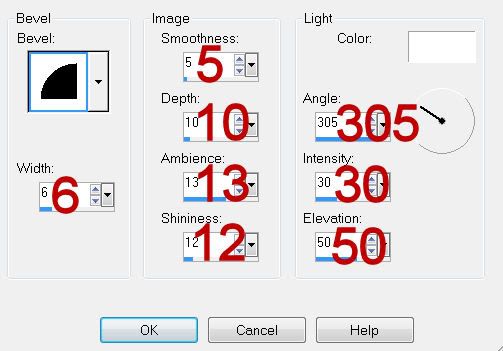
Give it a slight Inner Bevel:

Resize all layers 90%.

I hope you enjoyed this tutorial.
I’d love to see your results and show it off in my gallery.
Email me!
Hugs,
Bev

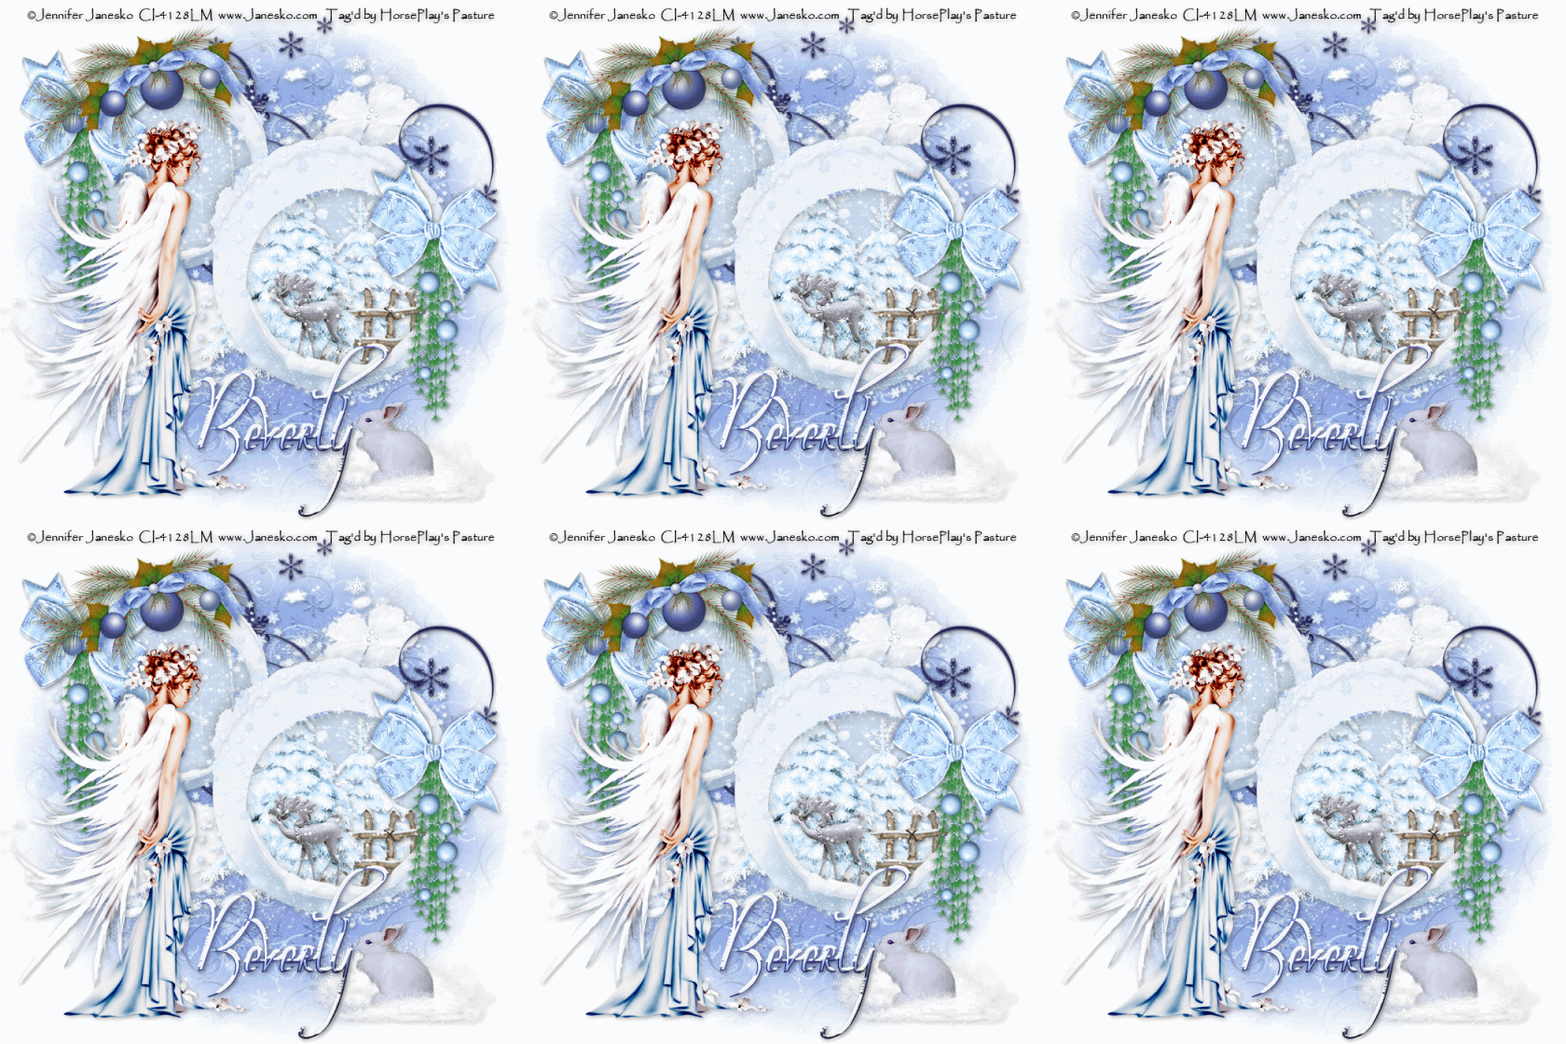
Snowflake Magic


Supplies

1 tube of choice - I used the artwork of Jennifer Janesko at CILM
Font of Choice - I used Oh Lara - a pay font
Monti Circular mask here
Greg’s Factory Output Vol. II - Pool Shadow
Eyecandy 5: Nature - Snow Drift
Snow Animation which I’ve supplied here
Animation Shop
“Snowflakes Winter” is a PTU tagger size scrap kit created by Cindy of Puddicat Creations and can be purchased from Butterfly Blush Designs. You can visit her blog here.
Thank you Cindy for a kit that‘s as gentle and beautiful as a snowflake!

This tutorial was written assuming you have a working knowledge of PSP.

~♥~ Let’s get started ~♥~

Open up a 700 x 700 blank canvas.
Flood fill white.

I normally don’t apply the mask until the very end of my tutorials, but because the elements are light in color it might be easier to see so we’ll apply it now.

Select All.
New Raster layer
Copy and paste Paper 10 Into Selection.
Deselect.
Apply the Mask.
Merge Group.

Copy and paste Frame 4 as a new layer.
Resize 85%
Use your Magic Wand and click inside both of the frames.
Selections/Modify/Expand by 7.
New Raster layer below the frame.
Copy and paste Paper 12 Into Selection.
Deselect.

Copy and paste Tree 1 as a new layer.
Resize 50%
Move into position below the bottom frame at the left side - see my tag for reference.
Duplicate/lower it within the frame. If any part is peeking outside of the frame then use your Eraser Tool and erase it.
Copy and paste Deer 1 as a new layer below the frame.
Resize 25% - move into position - see my tag for reference.
Copy and paste Fence 1 as a new layer.
Resize 25%
Move into position between the trees - see my tag for reference.

Open up the snow animation that I’ve supplied.
Highlight Frame 1
Copy
Make your working canvas active and past just below the frame in your layers pallet.
Rename the layer Snow 1.
Make the animated snow frame active.
Highlight Snow 2.
Copy
Make your working canvas active and paste just above Snow 1.
Rename it Snow 2.

Repeat the above steps until you have all 10 snow frames copied onto your working canvas.
It looks like quite the mess, doesn’t it?! No worries. We’ll clean it up.
Highlight the frame paper layer.
Click anywhere outside of it with your Magic Wand.
Now highlight each Snow layer and tap the delete key.
Close out all snow layers accept for Snow 1.

Add your embellishments. I used:
Deco Ball 1: Resize 60%
Snow 2: Resize 80%
Doodle 2: Resize 60%/Mirror/Erase any of it that you can see through the frames.
Bunny 1: Resize 40%
Bow 1: Resize 40%
Heart Deco 1: Resize 70%/Move behind the bow and erase the Heart.

Copy and paste your tube as a new layer.

Add your credits.

Add your name.
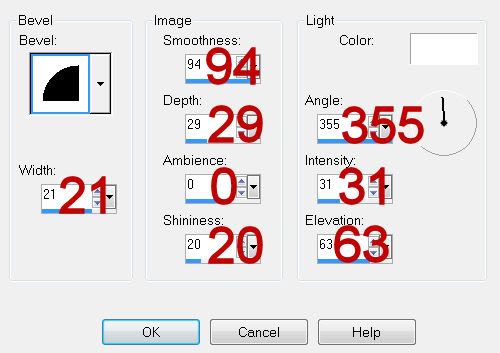
Give it a slight inner bevel:


Apply Greg’s Factory Output Vol. II - Pool Shadow:
Default Settings

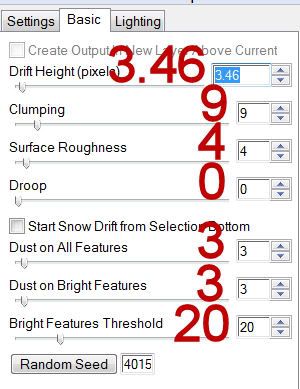
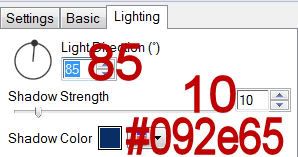
Apply Eyecandy 5: Nature - Snowdrift
Settings Tab:
Small, First Flakes

Basic Tab:


Lighting Tab:


Resize all layers 80%.

Copy Merge

~Time to Animate~

Open up AS
Edit/Paste/As New Animation

Back into PSP.
Close out Snow 1 layer.
Open up Snow 2 layer.
Copy Merge

Back into AS.
Edit/Paste/After Current Frame.

Back into PSP.
Close out Snow 2 layer.
Open up Snow 3 layer.
Copy Merge

Back into AS.
Edit/Paste/After Current Frame.

Repeat the above steps until you have all 10 frames pasted in AS.
View your Animation.
If you’re happy then resize:
Animation/Resize Animation
Percentage of Original checked.
Width x Height: 80
OK
Save your animation.

I hope you enjoyed this tutorial.
I’d love to see your results and show it off in my gallery.
Email me!
Hugs,
Bev
Friday, November 19, 2010

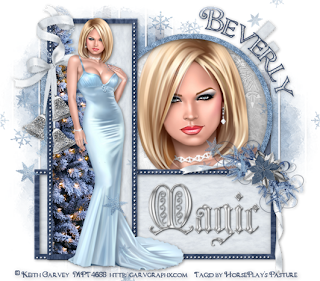
Magic of Christmas


Clicking on the image will allow you to enlarge for bigger view.

Supplies

1 tube of choice and 1 close up - I used the artwork of Keith Garvey at MPT
Font of Choice - I used Chocolate Box here
Vix Mask 452 here - scroll down the page under March 15.
DSB Flux - Bright Noise
Artmama Made Template 26 here - click on Templates at the top of the blog.
“Magic of Christmas” is a PTU tagger size scrap kit created by Kissed by Cari and can be purchased from TKO Scraps.
Thank you Kathi for a kit that has captured the holiday Magic!

This tutorial was written assuming you have a working knowledge of PSP.

~♥~ Let’s get started ~♥~

Open up the template.
Shift + D.
Close out the original.
Image/Canvas Size
700 x 650
Open up the background layer and flood fill white.
Delete the top 8 layers, Small Square layer, and Large Circle layer.

Highlight Small Circle layer.
Click on it with your Magic Wand.
New Raster layer.
Copy and paste Paper 4 Into Selection.
Copy and paste your close up image as a new layer.
Move into position over the paper.
Selections/Invert
Tap the delete key.
Deselect.
Delete the template layer.

Highlight Circle Frame layer.
Select All/Float/Defloat
New Raster layer.
Copy and paste Paper 5 Into Selection.
Apply DSB Flux - Bright Noise:
Intensity: 35
Mix checked
OK
Deselect
Delete the template layer.

Highlight Horizontal Rectangle layer.
Click on it with your Magic Wand.
New Raster layer.
Copy and paste Paper 8 Into Selection.
Deselect.
Delete the template layer.

Highlight Vertical Rectangle.
Click on it with your Magic Wand.
New Raster layer.
Copy and paste Paper 8 Into Selection.
Copy and paste Tree as a new layer.
Resize 60%. Move into position - see my tag for reference.
Selections/Invert
Tap the delete key.
Deselect.
Delete the template layer.

Lets go ahead and get rid of the template that’s going across the tree.
Highlight Horizontal Frame layer.
Erase the area that’s going across the vertical rectangle.
Select all/Float/Defloat
New Raster layer.
Copy and paste Paper 6 Into Selection.
Deselect.
Delete the template layer.

Highlight Vertical Frame layer.
Click on it with your Magic Wand.
New Raster layer.
Copy and paste Paper 6 Into Selection.
Deselect.
Delete the template layer.

Highlight Horizontal Dots layer.
Select All/Float/Defloat
New Raster layer.
Copy and paste Paper 8 Into Selection.
Deselect.
Delete the template layer.

Highlight Vertical Dots layer.
Repeat the above step.

Copy and paste your tube as a new layer.

Add your embellishments. I used:
Bells 1: Resize 35%
Corner 4: Resize 35%/Mirror
Word Art 4: Resize 70%
Ribbon 4: Resize 50%/Free rotate Left 45 degrees/Duplicate/Free rotate right 10 degrees
Snowflake 1 & 2: Resize them as you like and splash them around

Crop your image.

Highlight your white background.
Select All.
New Raster layer.
Copy and paste a paper of choice Into Selection.
Deselect.
Apply the mask.
Resize 105%
Merge Group.
I had to move my mask down just a tad.

Add your credits.

Add your name.
Make your Ellipse Tool active.
Color Pallet:
Foreground: Black
Background: Null
Stroke: 2
Make a circle slightly larger than the circle frame.
TIP: If the circle is too large or too small just resize as needed
Position it around the circle frame.
Move your curser along the inside edge of it where you want your name until you see a rocking A.
Click the mouse.
A text box will appear.
Type your name.
Apply.
Click on the plus sign in your layers pallet.
Close out the New Ellipse layer.
Highlight the top layer.
Convert to Raster layer.
You can apply some noise to your name if you like.

Resize all layers 80%.

I hope you enjoyed this tutorial.
I’d love to see your results and show it off in my gallery.
Email me!
Hugs,
Bev
Thursday, November 18, 2010

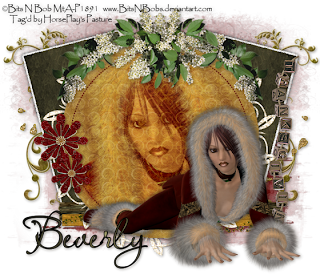
Holiday Tradition


Clicking on the image will allow you to enlarge for bigger view.

Supplies

1 tube of choice and 1 close up - I used the beautiful artwork of Bits N Bob at Mistaken Art. You must check out all of her awesome tubes!!
Font of Choice - I used LavishlyYoursROB
Vix Mask 403 here
Scrap Rebellion Template 43 here
“A Little Goes a Long Way” is a FTU tagger size scrap kit created by Artmama Made and can be found on her blog here. It’s part of the Bits N Bob blog train.
Please leave a thank you when downloading as it’s a small gesture for hard work given freely.
Thank you Artmama for a fantastic freebie!

This tutorial was written assuming you have a working knowledge of PSP.

~♥~ Let’s get started ~♥~

Open up the template.
Shift + D.
Close out the original.
Resize all layers 90%
Image/Canvas Size
700 x 600
Open up the background layer and flood fill white.
Delete the top 3 layers.

Highlight Rectangle 1 layer.
Click on it with your Magic Wand.
New Raster layer.
Open up Paper 6.
Mirror
Copy
Make the template active.
Paste Into Selection.
Deselect.

Highlight Pink Rectangle 2 layer.
Click on it with your Magic Wand.
New Raster layer.
Make Paper 6 active. Undo the mirroring you did.
Copy
Make the template active.
Paste Into Selection.
Deselect.
Delete the template layer.

Highlight Thin Bk rectangle layer.
Click on it with your Magic Wand.
New Raster layer.
Copy and paste Paper 2 Into Selection.
Deselect.
Delete the template layer.

Highlight Thin Pk Rectangle layer.
Click on it with your Magic Wand.
New Raster layer.
Copy and paste Paper 1 Into Selection.
Deselect.
Delete the template layer.

Highlight Black Circle layer.
Click on it with your Magic Wand.
New Raster layer.
Copy and paste Paper 4 Into Selection.
Copy and paste your close up image as a new layer. Center it over the circle.
Selections/Invert
Tap the delete key.
Change the Properties to Overlay.
Selections/Modify/Feather:
Number of Pixels:
53
OK
Tap the delete key until you have a nice feathered effect.
Deselect.

Highlight Dotted Circle layer.
Select All/Float/Defloat
New Raster layer.
Copy and paste Paper 3 Into Selection.
Deselect.
Delete the template layer.

Copy and paste your tube as a new layer.

Add your embellishments. I used:
Embellie 5: Resize 80%/Duplicate/Mirror - erase a bit of the overlap
Embellie 1: Resize 40%/Duplciate/Resize 80%
Embellie 18: Resize 70%
Embellie 10: Resize 80%
Embellie 20: Resize 60%/Free rotate Right 90 degrees
Embellie 11: Resize 80%/Free rotate Right 70 degrees/Duplicate/Mirror
Embellie 17

Highlight your white background.
Select All.
New Raster layer.
Copy and paste a paper of choice Into Selection.
Deselect.
Apply the mask.
Use your Pick tool and bring the bottom up a little.
Merge Group.
Duplicate/Mirror
Use your Eraser Tool and erase the bottom left corner.

Add your credits.

Add your name.

Resize all layers 80%.

I hope you enjoyed this tutorial.
I’d love to see your results and show it off in my gallery.
Email me!
Hugs,
Bev
Tuesday, November 16, 2010

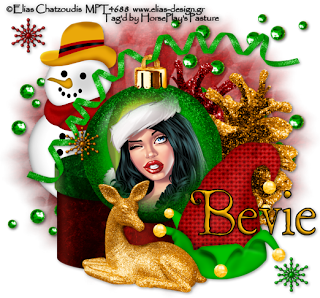
Under the Christmas Tree


Clicking on the image will allow you to enlarge for bigger view.

Supplies

1 tube of choice - I used the artwork of Elias Chatzoudis - this particular tube was a Xmas Gift from MPT
Font of Choice - I used St. Nicholas here
Weescotlass Mask 138 here
“Christmas Past” is a PTU tagger size scrap kit created by Pixie of Kissed by Pix Design and can be purchased from her store TKO Scraps. You can visit her blog here.
Thank you Pix for a terrific Christmas kit!

This tutorial was written assuming you have a working knowledge of PSP.

~♥~ Let’s get started ~♥~

Open up a 700 x 700 blank canvas.
Flood fill white.

Copy and paste Green Curly as a new layer.
Resize 80%
Move it up slightly on your canvas.

Copy and paste Glitterbulb 2 as a new layer.
Position it so that it in front of the curly ribbon - see my rag for reference.
Duplicate the bulb - In your layers pallet move it below the ribbon.
Highlight the bulb above the ribbon and erase a small part of the topper to give it the effect as if the ribbon is curled through it.

Copy and paste Blank Button Green as a new layer.
Resize 60%
Center it over the bulb.
Copy and paste your tube as a new layer - center it over the button.
Highlight the button.
Select All/Float/Defloat
Selections/Invert
Highlight your tube.
Merge Down.
Tap the delete key.
Selections/Modify/Feather:
Number of Pixels:
53
OK
Tap the delete key until you have a nice feathered effect.
Select none.

Close out your white canvas.
Merge Visible.
Reopen your canvas.

Add your embellishments. I used:
Gift 3: Resize 60%
Snowman: Resize 60%/Mirror
Gold Cone
Red Cone/Mirror
Elf Hat: Resize 70%
Golden Deer: Resize 40%
Beads 2: Duplicate/Mirror/Flip
Snowflakes Gold, Red, and Green: Resize all 25%

Highlight your white background.
Select All.
New Raster layer.
Copy and paste a paper of choice Into Selection.
Deselect.
Apply the mask.
Resize 125%
Merge Group.

Add your credits.

Add your name.
Foreground: Black
Background: I used the yellow color from the snowman’s hat
Stroke Width: 2

Type out your name.
Convert to Raster layer.
Select All/Float/Defloat
Selections/Modify/Contract by 2
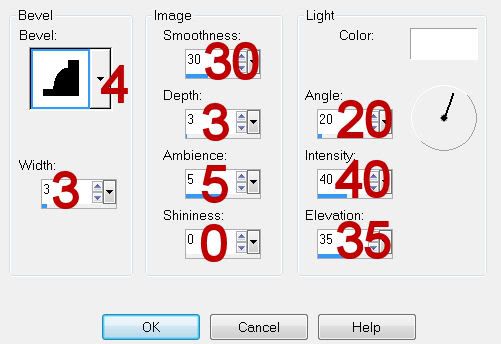
Give it a slight inner bevel:


Deselect.

Resize all layers 80%.

I hope you enjoyed this tutorial.
I’d love to see your results and show it off in my gallery.
Email me!
Hugs,
Bev
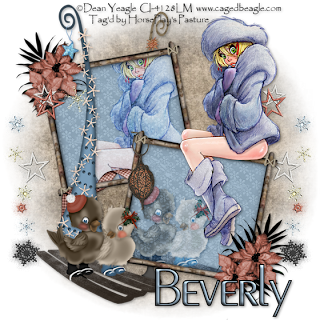
Baby It's Cold Outside


Clicking on the image will allow you to enlarge for bigger view.

Supplies

1 tube of choice (one that is sitting works best) - I used the artwork of Dean Yeagle at CILM
Font of Choice - I used Piano Light
Monti Circular Mask here
“A Cozy Christmas” is a PTU tagger size scrap kit created by Artmama Made and can be purchased from Exquisite Scraps. You can visit her blog here.
Thank you Artmama for another wonder winter kit!

This tutorial was written assuming you have a working knowledge of PSP.

~♥~ Let’s get started ~♥~

Open up a 700 x 700 blank canvas.
Flood fill white.

Copy and paste 16 as a new layer.
Resize 65%/Free rotate left 10 degrees.
Duplicate/Mirror
Move both frames into position - see my tag for reference.

Highlight the top frame.
Click inside of it with your Magic Wand.
New Raster layer below the frame.
Copy and paste Paper 12 Into Selection.
Deselect.

Highlight the bottom frame.
Repeat the above step.

Copy and paste your tube as a new layer.
Position it so that it’s sitting on the top of the bottom frame.
Duplicate your tube. Move it to the left.
In your layers pallet move it beneath the top frame.
Highlight the paper of the top frame. Click anywhere outside of it.
Highlight the tube just above the paper.
Hit the delete key.
Deselect.
Change the Properties to Soft Light.
Duplicate.

Copy and paste 28 as a new layer.
Resize 70%/Duplicate
Move it to the right. In your layers pallet move it just below the bottom frame.
Highlight the paper of the bottom frame.
Click anywhere outside of it with your Magic Wand.
Highlight the embellishment layer.
Tap the delete key.
Deselect.
Change the Properties to Soft Light.
Duplicate.

Add your embellishments. I used:
37: Resize 80%
36: Resize 80%
39: Resize 65%/Free rotate left 10 degrees
17: Duplicate/Mirror
4: Resize 45%
3: Resize 45%/Duplicate/Mirror/Flip/Resize 80%
5: Erase the stem part you don’t want to see

Highlight your white background.
Select All.
New Raster layer.
Copy and paste Paper 2 Into Selection.
Deselect.
Apply the mask.
Merge Group.

Add your credits.

Add your name.
Foreground: Black
Background: Pattern/Paper 12
Stroke Width: 2

Type out your name.
Convert to Raster layer.
Select All/Float/Defloat
Selections/Modify/Contract by 2
Give it a slight inner bevel:


Repeat the inner bevel.
Deselect.

Resize all layers 80%.

I hope you enjoyed this tutorial.
I’d love to see your results and show it off in my gallery.
Email me!
Hugs,
Bev
Monday, November 15, 2010

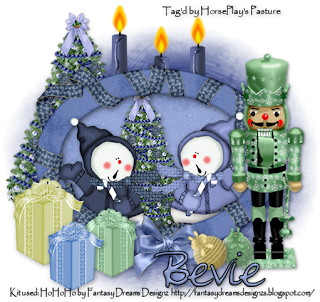
Ho Ho Ho


Clicking on the image will allow you to enlarge for bigger view.

Supplies

Font of Choice - I used Oei here
Monti Circular Mask here
“Ho Ho Ho” is a PTU tagger size scrap kit created by Heike of Fantasy Dreams Designz and can be purchased from Scraps with Attitude. You can visit her blog here.
Thank you Heike for a very beautiful winter kit!

This tutorial was written assuming you have a working knowledge of PSP.

~♥~ Let’s get started ~♥~

Open up a 700 x 700 blank canvas.
Flood fill white.

Copy and paste E81 as a new layer.
Free rotate left 90 degrees.
Click inside with your Magic Wand.
Selections/Modify/Expand by 6.
New Raster layer below the frame.
Copy and paste a paper of choice Into Selection.
Deselect.

Copy and paste below the frame.
E63: Resize 80%
E64: Resize 80%/Mirror
E35: Resize 80%

Add your embellishments. I used:
E59: Duplicate twice for a total of 3
E35
E3: Resize 50%
E97: Resize 50%
E98 & E99: Resize 40%
E17: Resize 40%/Free rotate left 45 degrees
E18: Resize 40%
E44: Resize 150%
Crop your Image.

Highlight your white background.
Select All
Copy and paste a paper of choice Into Selection.
Deselect.
Apply the mask.
I had to use my Pick tool to push the top of the mask down just a bit.
Merge Group.

Add your credits.

Add your name.

Resize 80%

I hope you enjoyed this tutorial.
I’d love to see your results and show it off in my gallery.
Email me!
Hugs,
Bev
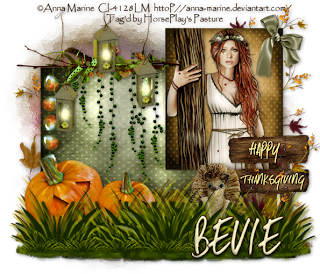
Happy Thanksgiving


Clicking on the image will allow you to enlarge for bigger view.

Supplies

1 tube of choice - I used the artwork of Anna Marine at CILM
Font of Choice - I used Same Same But Different here
Vix Mask 452 here - under March 15, 2010
My Template 98 here
Greg’s Factory Output Vol. II - Pool Shadow
“A Little Goes a Long Way” is a Free for a Limited Time tagger size scrap kit created by Julie of Bits ’n Bobs and can be downloaded from her blog here. Please leave a thank you behind as it’s a small gesture for hard work given freely, not to mention extremely generous.
Thank you Julie! You know I’m a big fan of all your pretties♥

This tutorial was written assuming you have a working knowledge of PSP.

~♥~ Let’s get started ~♥~

Open up the template.
Shift + D.
Close out the original.
Delete the following layers:
Credit, Rectangle 3 Squares, and Words.
Image/Canvas size:
700 x 600
Flood fill the background layer white.

Highlight Strips layer.
Click on all 3 strips with your Magic Wand.
Copy and paste Paper 3 as a new layer.
Resize 60%
Move into position.
Selections/Invert
Tap the delete key.
Deselect.
Delete the template layer.

Highlight Rectangle 1 layer.
Click on it with your Magic Wand.
Copy and paste Paper 7 as a new layer.
Resize 60%
Move into position.
Selections/Invert
Tap the delete key.
Deselect.
Delete the template layer.

Highlight Rectangle 2 layer.
Click on it with your Magic Wand.
New Raster layer.
Copy and paste Paper 6 Into Selection.
Deselect.
Delete the template layer.
Apply Greg’s Factory Output Vol. II - Pool Shadow:


Highlight Rectangle 3 layer.
Click on it with your Magic Wand.
New Raster layer.
Copy and paste Paper 5 Into Selection.
Copy and paste your tube as a new layer.
Position it over the paper.
Selections/Invert
Tap the delete key.
Deselect.
Delete the template layer.

Copy and paste Element 20 as a new layer.
Resize 25% and 80%
Move it into position over the top square of Rectangle 2 Squares template layer.
Duplicate the element and free rotate as you like - move into position over the square below.
Repeat this until you have all the squares on the template covered with a stone.
Delete the template layer.

Add your embellishments. I used:
51
23: Resize 80%/Duplicate
24: Resize 80%/Duplciate/Position both of these behind 23
9: Resize 70%/Free rotate Left 30 degrees
9 again: Resize 50%
46
58: Resize 40%
68: Resize 40%
8: Duplicate as many times as you like and move into position just above the white background.
8 again: Resize 70%/Position before the wood sign.

Copy and paste 28 as a new layer.
Resize 50%
Move into position.
Highlight your white background.
Select All.
Selections/Modify/Feather
Number of Pixels: 53
OK
Selections/Invert
Highlight Element 28.
Tap the delete key until you have a feathered effect to it.
Deselect.

Highlight your white background.
Select All
Copy and paste a paper of choice Into Selection.
Deselect.
Apply the mask
Merge Group.

Type out the words “Happy” and “Thanksgiving” each on their own layers.
Move them into position over the wood sign. If the words are too large use your Pick Tool to fix that small problem.
Change the Properties of each layer to Hard Light.

Add your credits.

Add your name.

Resize 85%

I hope you enjoyed this tutorial.
I’d love to see your results and show it off in my gallery.
Email me!
Hugs,
Bev
Sunday, November 14, 2010

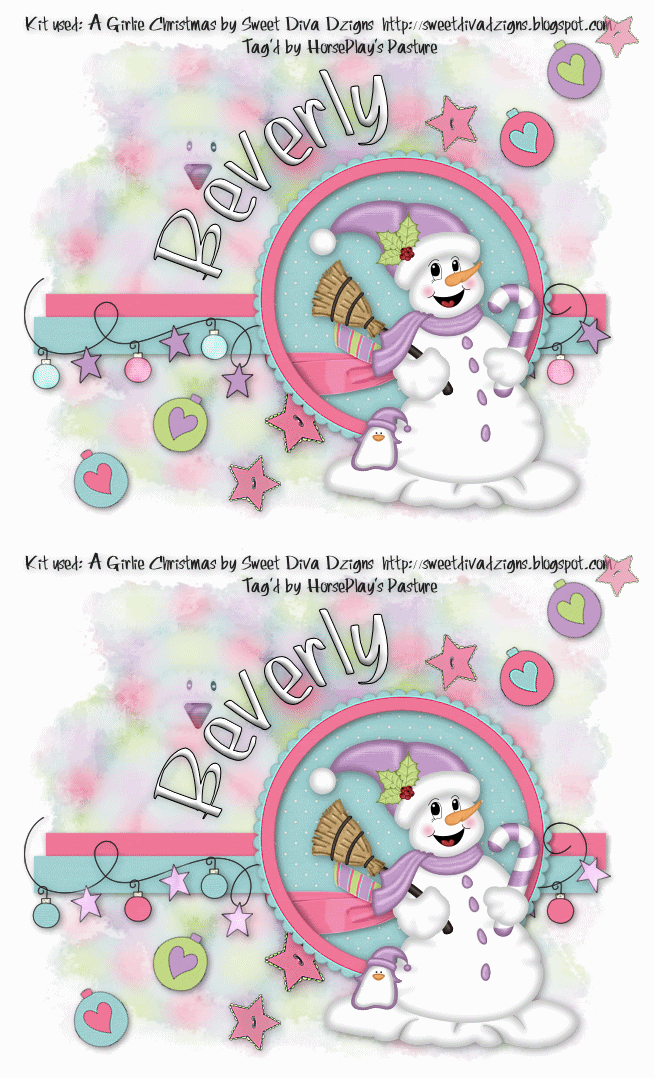
A Girlie Christmas


Supplies

Font of Choice - I used Rolina here
Becky Mask 9 here
Mura Meister - Copies
Animation Shop
“A Girlie Christmas” is a PTU tagger size scrap kit created by Brooke of Sweet Diva Dzigns and can be purchased from her store Butterfly Blush Designs. You can visit her blog here.
Thank you Brooke. This kit is drop dead adorable!

This tutorial was written assuming you have a working knowledge of PSP.

~♥~ Let’s get started ~♥~

Open up a 700 x 700 blank canvas.
Flood fill white.

Copy and paste Frame 3 as a new layer.
Resize 50%
Move into position toward the left side of your canvas.
Click inside of it with your Magic Wand.
Selections/Modify/Expand by 6.
New Raster layer below the frame.
Copy and paste Paper 8 Into Selection.
Copy and paste Ribbon 2 as a new layer below the frame.
Resize 40% - move into position - see my tag for reference.
Selections/Invert
Tap the delete key.
Deselect.

Make your Selection Tool active - set on rectangle.
Make a rectangle approximately 45 x 550 - it doesn’t matter where it is on your canvas.
New Raster layer.
Copy and paste a paper of choice Into Selection.
New Raster layer.
Copy and paste a different paper of choice Into Selection.
Deselect.
Move the strips into position - see my tag for reference.

Copy and patse Xmasdecs1 as a new layer.
Resize 75%
Duplicate/Merge down.
Move into position over the bottom rectangle - see my tag for reference.
Duplicate.
Rename the layers Dec 1 and Dec 2

Highlight Dec 1 layer.
Make your Lighten/Darken tool active and beginning with the first ornament lighten every other one on the line.

Highlight Dec 2 layer.
Starting with the 2nd ornament lighten every other one.
When you’re done close this layer out.
You should now only have Dec 1 layer open.

Copy and paste Button 1 as a new layer.
Resize 50%
Apply Mura Meister - Copies
Wallpaper (Perspective) - Default Settings
Use your eraser tool to erase any of the buttons you don’t want.

Add your embellishments. I used:
Button 1: Resize
Xmas Balls 1 - 4: Erase the hook at the top of each one, Resize 30%/Free rotate 30 degrees
Snowman 1
Pbear 4 - Apply the Becky Mask/Merge Group/Change the Properties to Soft Light/Duplicate

Crop your image.

Highlight your white background.
Select All
Copy and paste a paper of choice Into Selection.
Deselect.
Apply the mask
Merge Group.

Add your credits.

Add your name.
To make it slightly rounded:
Foreground: Black
Background: null
Width: 2
Make a circle that’s larger than the frame.
Move your curser along the edge of the circle where you want your name.
When you see the rocking A click the mouse.
A Text Box will appear.
Type your name in it.
In your layers pallet click on the + sign.
Close out the New Ellipse layer.
Highlight Vector 1 layer.
Convert to Raster layer.
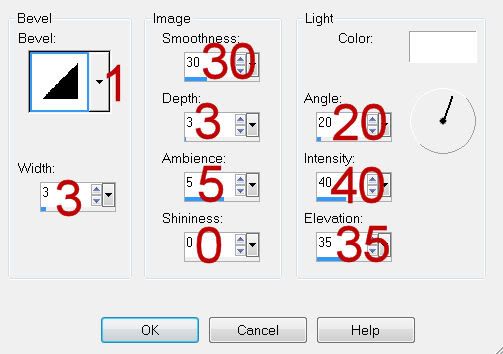
Give your name a slight inner bevel:


Resize all layers 90%.

Copy Merge

~Time to Animate~

Open up Animation Shop
Edit/Paste/As New Animation

Back in PSP.
Close out Dec 1.
Open up Dec 2.
Copy Merge

Carry into AS
Edit/Paste/After Current Frame.

Ctrl + A to highlight both frames.
Animation/Frame Properties
Change the display time to 20.
OK

View your Animation.
If you’re happy then save.

I hope you enjoyed this tutorial.
I’d love to see your results and show it off in my gallery.
Email me!
Hugs,
Bev