Saturday, September 24, 2011

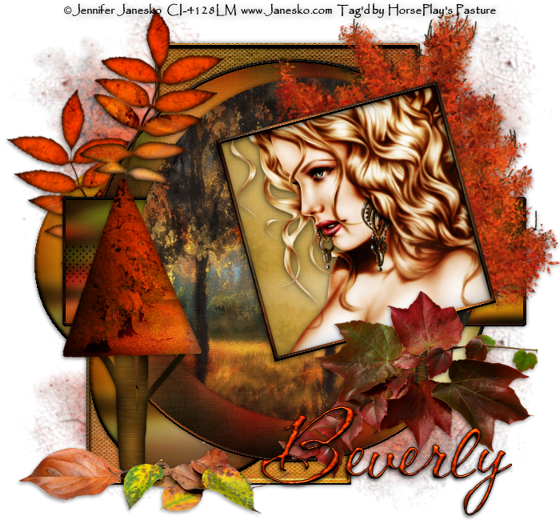
Autumn Wonderland


Supplies

1 tube of choice - I used the artwork of Jennifer Janesko which can now be purchased from CDO.  You must have a license to use.

Font of choice - I used CAC Shishoni Brush here

Gem Mark 161 here

Divine Intentionz Template 313 here

“Autumn Wonderland”  is a scrap kit created by Heppy of HF Projekte and can be purchased from his store Inspirations of Scrap Friends.  You can visit his blog here
Thank you for another fantastic kit!

This tutorial was written assuming you have a working knowledge of PSP.

~♥~ Let’s get started ~♥~

Open up the template
Shift + D.
Close out the original.
Delete the top 2 layers.
Image/Canvas Size
700 x 650
OK
Open up the background layer.
Flood fill white.

Open up Paper 2.
Mirror
Copy

Make your working canvas active.
Highlight Small Circle 1 layer.
Click on it with your Magic Wand.
New Raster layer.
Paste Into Selection.
Deselect.
Delete the template layer.
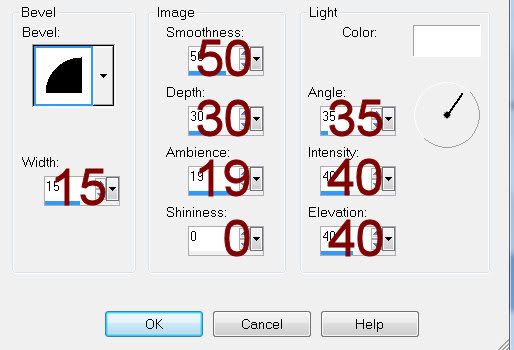
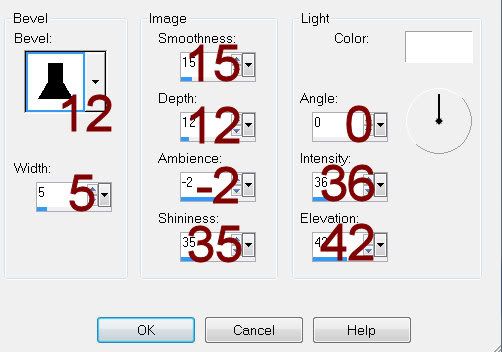
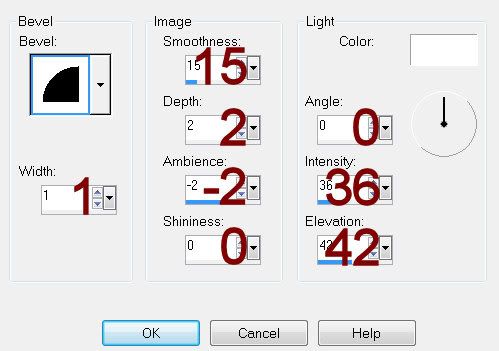
Give it a slight Inner Bevel:
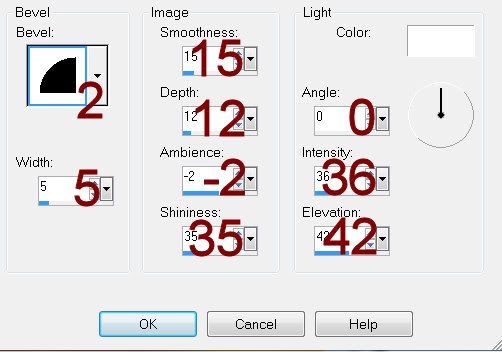

Highlight Small Circle 2 layer.
Repeat the above step.

Highlight Square 1 layer.
Click anywhere outside of it with your Magic Wand.
Copy and paste Paper 10 as a new layer.
Resize 50%
Move into a position you like.
Tap the delete key.
Deselect.
Delete the template layer.
Give it a slight Inner Bevel:

Highlight Square 2 layer.
Repeat the above step.

Highlight Glittered Circle layer.
Click anywhere outside of it with your Magic Wand.
Selections/Invert
New Raster layer.
Copy and paste Paper 7 Into Selection.
Deselect.
Delete the template layer.
Give it the same slight Inner Bevel.

Highlight Glittered Rectangle.
Repeat the above step.

Highlight Frame layer.
Select All/Float/Defloat
New Raster layer.
Paste Paper 7 Into Selection.
Deselect.
Delete the template layer.
Give it the same slight Inner Bevel.

Highlight Large Circle 1 layer.
Click on it with your Magic Wand.
New Raster layer.
Copy and paste Paper 10 Into Selection.
Deselect.
Delete the template layer.

Highlight Rectangle layer.
Repeat the above step.

Highlight Large Circle 2 layer.
Click on it with your Magic Wand.
New Raster layer.
Copy and paste Paper 8 Into Selection.
Deselect.
Delete the template layer.

Highlight Background Frame.
Click on it with your Magic Wand.
New Raster layer.
Copy and paste Paper 1 Into Selection.
Copy and paste your tube above the paper.
Selections/Invert
Tap the delete key.
Deselect.
Delete the template layer.

Add your elements.  I used:
5:  Resize 50%/Erase what overhangs the circle.  It doesn’t have to be very neat as you have another element that covers the trunk.
25:  Resize 25%
9:  Resize 25%/Free rotate Left 15 degrees/Duplicate/Mirror
4:  Resize 35%
31:  Resize 15%
30:  Resize 25%

Highlight your white canvas.
New Raster layer.
Select All.
Copy and paste Paper 3 Into Selection.
Deselect.
Apply the mask.
Merge Group.

Add your copyrights.

Add your name.
Open up Element 9
Use your Selection Tool and section off an area of a leaf.

Color Pallet:
Foreground:  #000000
Background:  Pattern/Find the area of the leaf you sectioned off
Stroke: 1.0
Type your name.
Give it the first Inner Bevel you used in this tutorial.

Resize all layers 80%.

I hope you enjoyed this tutorial.
I’d love to see your results and show it off in my gallery.
Email me!
Hugs,
Bev

Friday, September 23, 2011

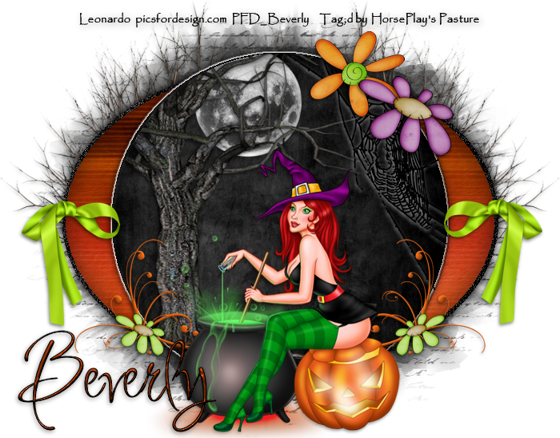
Toil and Trouble


Supplies

1 tube of choice - I used the artwork of Leonardo which can be purchased from Pics for Design.  You must generate a license to use.

Font of choice - I used Inspiration here

Weescotlass Mark 236 here

Divine Intentionz Template 269 here

Plug Ins:
Eyecandy 3.1 - Glow

“Bad Witch Taggers Kit” is a tagger size scrap kit created by Cindy of Scrappin with Lil Ole Me and can be purchased from Inspirations of Scrap Friends.  You can visit his blog here
Thank you Cindy for a fantastic Halloween kit!

This tutorial was written assuming you have a working knowledge of PSP.

~♥~ Let’s get started ~♥~

Open up the template
Shift + D.
Close out the original.
Delete the top 5 layers and Rectangle layer.
Resize all layers 85%
Image/Canvas Size
700 x 600
OK
Open up Raster 1 layer.
Flood fill white.

Highlight Glittered Oval layer.
Click anywhere outside of it with your Magic Wand.
Selections/Invert
New Raster layer.
Copy and paste Paper 5 Into Selection.
Deselect.
Delete the template layer.
Adjust/Add Remove Noise/Add Noise:
Gaussian and Monochrome checked
Noise: 53%
OK

Highlight Oval layer.
Click on it with your Magic Wand.
New Raster layer.
Copy and paste Paper 15 Into Selection.
Deselect.
Delete the template layer.

Highlight Circle layer.
Click anywhere outside of it with your Magic Wand.
Selections/Invert
New Raster layer.
Copy and paste Paper 5 Into Selection.
Deselect.
Delete the template layer.

Copy and paste the following elements and move into position in front of the circle paper - see my tag for reference.  Don’t worry about what overhangs the paper.  We’ll clean that mess up in a bit.
Dead Tree:  Resize 80%
Moon:  Resize 25%
Spider Web 2:  Resize 40% (give this a white drop shadow)

Highlight the circle paper that’s just below the elements.
Click anywhere outside of it with your Magic Wand.
Highlight each of the element layers and tap the delete key.
Deselect.
To the circle paper layer apply Eyecandy 3.1 - Glow
Width:  3
Opacity: 100
Opacity Drop off:  Fat
Color:  White
OK

Copy and paste your tube as a new layer.

Add your elements.  I used:
Bow 4:  Resize 25%
Dead Bush:  Resize 70%/Duplicate/Mirror
Flower 2:  Resize 25%
Flower 3:  Resize 25%
Doodle 2:  Resize 30%/Duplicate/Mirror

Highlight your white canvas.
New Raster layer.
Select All.
Copy and paste Paper 5 Into Selection.
Deselect.
Apply the mask.
Resize 105%
Merge Group.

Add your copyrights.

Add your name.
Color Pallet:
Foreground:  #000000
Background:  #9d3509
Stroke: 1.0
Type your name.
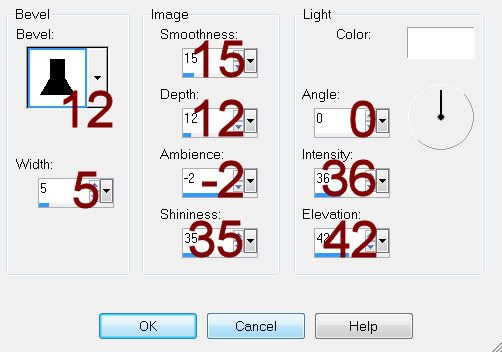
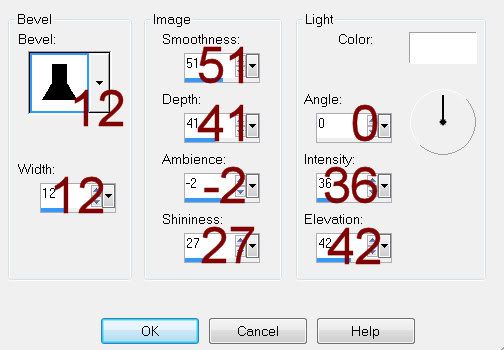
Give it a slight Inner Bevel:


Resize all layers 80%.

I hope you enjoyed this tutorial.
I’d love to see your results and show it off in my gallery.
Email me!
Hugs,
Bev 
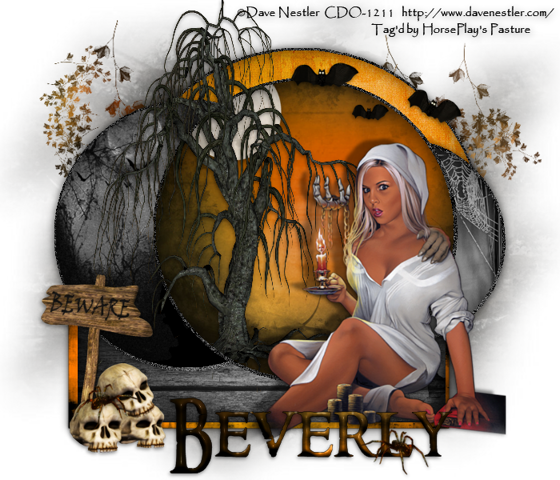
Get Spooked


Supplies

1 tube of choice - I used the artwork of Dave Nestler which can be purchased from CDO.  You must have a license to use.

Font of choice - I used Ringerbearer Medium here

Dee’s Sign Post mask 1 here

Divine Intentionz Template 358 here

“Get Spooked” is a tagger size scrap kit created by Cindy of Chichi Designz can be purchased from Twilight Scraps.  You can visit his blog here
Thank you Cindy for a fantastic Halloween kit!

This tutorial was written assuming you have a working knowledge of PSP.

~♥~ Let’s get started ~♥~

Open up the template
Shift + D.
Close out the original.
Delete top 2 layers, Heart 1, Heart 2, and Heart 3 layers.
Resize all layers 85%
Image/Canvas Size
700 x 700
OK
Open up Raster 1 layer.
Flood fill white.

Highlight Glitter Circle 1 layer.
Click anywhere outside of it with your Magic Wand.
Selections/Invert
New Raster layer.
Copy and paste Paper 7 Into Selection.
Deselect.
Delete the template layer.
Adjust/Add Remove Noise/Add Noise:
Gaussian and Monochrome checked
Noise: 53%
OK

Repeat the above step with:
Glitter Circle Left
Glitter Circle Right
Glitter Circle Center

Highlight Circle 1 layer.
Click on it with your Magic Wand.
New Raster layer.
Copy and paste Paper 10 Into Selection.
Deselect.
Delete the template layer.

Highlight Rectangle 1 layer.
Select All/Float/Defloat
New Raster layer.
Copy and paste Paper 3 Into Selection.
Deselect.
Delete the template layer.
Give it a slight Inner Bevel:


Highlight Rectangle 2 layer.
Click anywhere outside of it with your Magic Wand.
Copy and paste Paper 7 as a new layer.
Resize 60%
Selections/Invert
Tap the delete key.
Delete the template layer.
Give it the same slight Inner Bevel.

Highlight Circle Left layer.
Click on it with your Magic Wand.
New Raster layer.
Copy and paste Paper 13 Into Selection.
Deselect.
Delete the template layer.

Highlight Circle Right Layer.
Click anywhere outside of it with your Magic Wand.
Copy and paste Paper 2 as a new layer.
Resize 40%
Move into position over the template layer.
Tap the delete key.
Deselect.
Delete the template layer.

Highlight Circle Center layer.
Click anywhere outside of it with your Magic Wand.
Copy and paste Paper 5 as a new layer.
Resize 55%
Move into position over the template layer.
Tap the delete key.
Deselect.
Delete the template layer.

Copy and paste the following elements and move into position in front of the circle paper - see my tag for reference.  Don’t worry about what overhangs the paper.  We’ll clean that mess up in a bit.
Tree 1
Moon:  Resize 25%

Highlight the circle paper that’s just below the elements.
Click anywhere outside of it with your Magic Wand.
Highlight the moon layer
Tap the delete key.
Use your Eraser Tool and erase the base roots at the bottom of the tree.
Deselect.

Copy and paste your tube as a new layer.
Give it an exaggerated drop shadow.

Add your elements.  I used:
Bats:  Resize 40%
Leaves:  Resize 90%
Beware Sign:  Resize 40%
Skulls:  Resize 30%
Spider:  Resize 25% and 80%

Highlight your white canvas.
New Raster layer.
Select All.
Copy and paste Paper 9 Into Selection.
Deselect.
Apply the mask.
Resize 120%
Merge Group.

Add your copyrights.

Add your name.
Color Pallet:
Foreground:  #000000
Background:  Pattern/Paper 5
Stroke: .5
Type your name.
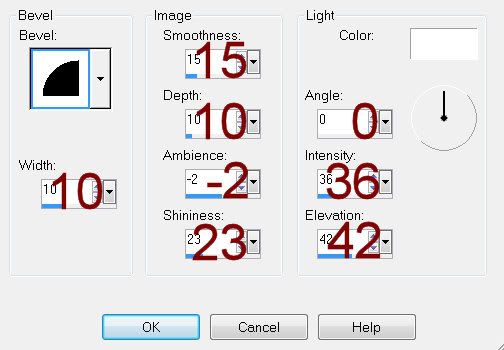
Give it a slight Inner Bevel:


Resize all layers 80%.

I hope you enjoyed this tutorial.
I’d love to see your results and show it off in my gallery.
Email me!
Hugs,
Bev
Spider Delight


Supplies

1 tube of choice - I used the gorgeous artwork of Duncan Long which can be purchased from Up Your Art.  You must have a license to use.

Font of choice - I used Anglo-Saxon Caps here

Weescotlass Mask 133 here

My Template 132 here

Plug Ins:
Greg’s Factory Output Vol. II - Pool Shadow

“Spider Delight” is a tagger size scrap kit created by Conchi of DnScraps and can be purchased from Butterfly Blush Designs.  You can visit his blog here
Thank you Conchi for a terrific Halloween kit!

This tutorial was written assuming you have a working knowledge of PSP.

~♥~ Let’s get started ~♥~

Open up the template
Shift + D.
Close out the original.
Delete top 2 layers.

Highlight Rectangle 1 layer.
Click on it with your Magic Wand.
New Raster layer.
Copy and paste Paper 14 Into Selection.
Deselect.
Delete the template layer.
Give it a slight Inner Bevel:


Highlight Rectangle 2 layer.
Click anywhere outside of it with your Magic Wand.
Copy and paste Paper 8 as a new layer.
Resize 65%
Move into position over template layer.
Tap the delete key.
Deselect.
Delete the template layer.
Give it the same Inner Bevel.

Highlight Circle Back layer.
Click on it with your Magic Wand.
New Raster layer.
Flood fill with #000000
Deselect.
Delete the template layer.
Adjust/Add Remove Noise/Add Noise:
Monochrome and Gaussian checked
Noise: 53%
OK

Highlight Circle layer.
Click on it with your Magic Wand.
New Raster layer.
Copy and paste Paper 19 Into Selection.
Apply Greg’s Factory Output Vol II - Pool Shadow:
Use Default Settings
Deselect for now.
Delete the template layer.

Copy and paste the following eliments and move into position over circle - see my tag for reference.  Don’t worry about what overhangs the circle.  We’ll clean the mess up in a bit.
Moon:  Resize 25%
Tree:  Resize 70%/Duplicate/Mirror
Ghost:  Resize 60%
Medi-grave bag 21:  Resize 50%

Highlight the circle paper layer.
Click anywhere outside of it with your Magic Wand.
Highlight each element layers and tap the delete key.
Deselect.

Copy and paste your tube as a new layer.

Add your elements.  I used:
Bow 5:  Resize 25%
Button:  Resize 110%
Lantern:  Resize 25%
Skulls:  Resize 25%
Cat 2:  Resize 30%
Spiderss2:  Resize 25% and 40%/Duplicate as many times as you like
Stone:  Resize 40%
Bat:  Resize 50%
Bat 2:  Resize 50%/Mirror

Highlight your white canvas.
New Raster layer.
Select All.
Copy and paste Paper 19 Into Selection.
Deselect.
Apply the mask.
Merge Group.

Add your copyrights.

Add your name.

Give it a slight Inner Bevel:


Resize all layers 90%.

I hope you enjoyed this tutorial.
I’d love to see your results and show it off in my gallery.
Email me!
Hugs,
Bev
Tuesday, September 20, 2011

Autumn Blessings


Supplies

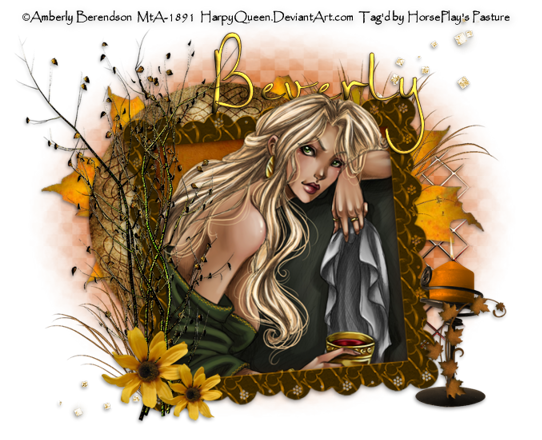
1 tube of choice - I used the artwork of Amberly Berendson which can be purchased from My Tubed Art.  You must have a license to use.

Font of choice - I used Al Charisma here

Weescotlass Mask 208 here

“Autumn Blessings” is a scrap kit created by Jessica of Gothic Inspirations and can be purchased from her store Gothic Inspirations.  You can visit her blog here
Thank you Jessica for such a truly beautiful autumn kit!

This tutorial was written assuming you have a working knowledge of PSP.

~♥~ Let’s get started ~♥~

Open up a 700 x 700 blank canvas.
Flood fill white.

Copy and paste Frame 3 as a new layer.
Resize 70%
Free rotate Left 5 degrees/
Click inside of all the windows with your Magic Wand.
Selections/Modify/Expand by 4.
New Raster layer below the frame.
Copy and paste Paper 1 Into Selection.
Copy and paste your tube as a new layer below the frame.
Selections/Invert
Tap the delete key.
Deselect.

Add your embellishments.  I used:
Screen Back:  Resize 60%
Tag Back:  Resize 60%
Leaves 2
Tree 2:  Resize 70%
Candle 3:  Resize 50%
Sunflower 2:  Resize 25% and 70%/Duplciate/Resize 70%
Grass:  Resize 70%
Glitter Trail:  Resize 70%/Mirror

Crop your image.

Highlight your white canvas.
New Raster layer.
Select All.
Copy and paste Paper 16 Into Selection.
Deselect.
Apply the mask.
Merge Group.

Add your copyrights.

Add your name:
Color Pallet: 
Foreground:  #392913
Background:  #e7b93b
Type your name.
Give it a slight Inner Bevel:


Resize all layers 80%.

I hope you enjoyed this tutorial.
I’d love to see your results and show it off in my gallery.
Email me!
Hugs,
Bev
Witches Britches


Supplies

Font of choice - I used Burton’s Nightmare here

Weescotlass mask 241 here

Plug Ins:
Xenofex 2:  Burnt Edges

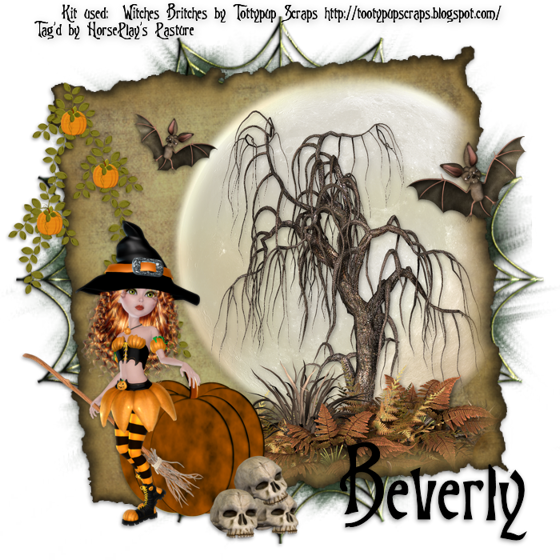
“Witches n' Britches” is a tagger size scrap kit created by Susan of Tootypup Scraps and can be purchased from Twilight Scraps.  You can visit her blog here
Thank you Susan for an awesome Halloween kit!

This tutorial was written assuming you have a working knowledge of PSP.

~♥~ Let’s get started ~♥~

Open up a 700 x 700 blank canvas.
Flood fill white.

Select All.
New Raster layer.
Copy and paste Paper 7 Into Selection.
Deselect.
Resize 80%
Apply Xenofex 2:  Burnt Edges:
Use Default Settings

Free rotate Left 5 degrees.

Copy and paste Halloween Moon 3 as a new layer.
Position over the burnt paper - see my tag for reference.
Highlight the paper layer.
Click anywhere outside of it with your Magic Wand.
Selection/Modify/Inside Outside Feather
Both checked
Feather Amount: 43
OK
Highlight the Halloween Moon 3 layer.
Tap the delete key 5 times.
Deselect.

Add your embellishments.  I used:
Pumpkin Vine 2:  Resize 25% and 70%
Frame 4:  Resize 60%
Witch Poser 1:  Resize 50%
Bat 1:  Resize 25%/Duplicate/Mirror/Resize 70%

Highlight your white background.
Select All.
New Raster layer.
Copy and paste Paper 11 Into Selection.
Deselect.
Apply the mask.
Merge Group.

Add your name.

Add your copyrights.

Resize all layers 80%.

I hope you enjoyed this tutorial.
I’d love to see your results and show it off in my gallery.
Email me!
Hugs,
Bev 

Eat, Drink and be Scary


Supplies

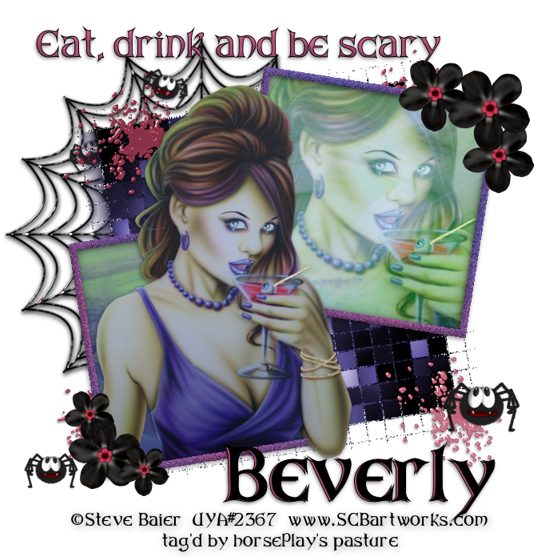
1 tube of choice and 1 image - I used the beautiful artwork of Steve Baier which can be purchased from Up Your Art.  You must have a license to use.

Font of choice - I used Arkam Regular here

Mary of Country Bug Template 17 here - Thanks Mary!!

My supplies here - These are only to be used for this tutorial.  Do Not Share.

This tutorial was written assuming you have a working knowledge of PSP.

~♥~ Let’s get started ~♥~

Open up the template
Shift + D.
Close out the original.
Delete Raster 2 layer.
Image/Canvas Size
700 x 700
OK
Flood fill Raster 1 white.

Color Pallet:
Foreground:  #534c8f
Background:  #ac3b57

Highlight bg layer.
Use your Target Tool and change the color the background using the purple color.

Highlight Splatter layer.
Use your Target Tool and change the color of the splatters to the pink color.

In your color pallet change it to a gradient of your choice using the purple and pink color.

Highlight Frame 1 layer.
Click on it with your Magic Wand.
New Raster layer.
Flood fill with the gradient.
Adjust/Add Remove Noise/Add Noise:
Gaussian and Monochrome checked
Noise: 23%
OK
Deselect.
Delete the template layer.

Repeat the above step with Frame 2.

Using your Selection Tool set on Rectangle choose an area of your image.
Copy.

Make your working canvas active.
Highlight Back 1 layer.
Click anywhere outside of it with your Magic Wand.
Selections/Invert
New Raster layer.
Paste Into Selection.
Deselect.
Delete the template layer.

Make your Image active.
Deselect.
Choose a different area to section off.
Copy

Make your working canvas active.
Highlight Back 2 layer.
Click anywhere outside of it with your Magic Wand.
Selections/Invert
New Raster layer.
Paste Into Selection.
Copy and paste your tube as a new layer.
Selections/Invert
Tap the delete key.
Change the Properties to Overlay.
Deselect.
Delete the template layer.

Copy and paste your tube as a new layer.
Give it an exaggerated drop shadow.

Copy and paste the Forget-me-Not as a new layer.
Resize 40%
Duplicate/Resize 70%/Duplicate 2X/Duplicate/Resize 70%/Duplicate

Copy and paste Spider and Web element.

Copy and paste Spider element.
Duplicate/Mirror/Resize 70%

Color Pallet:
Foreground:  #000000
Background: #ac3b57
Stroke: 1

Make your text tool active using the Arkham font.
Type out the sentence “Eat, drink and be scary”
Give it a slight Inner Bevel 2x’s:


Add your name.
Type out your name.
Convert to Raster layer.

Change the background color to #000000
Type out your name again.
Match both name layers up and then slightly offset the top name layer.
Merge Visible both name layers.

Add your copyrights.

Resize all layers 80%.

I hope you enjoyed this tutorial.
I’d love to see your results and show it off in my gallery.
Email me!
Hugs,
Bev 
Sunday, September 18, 2011

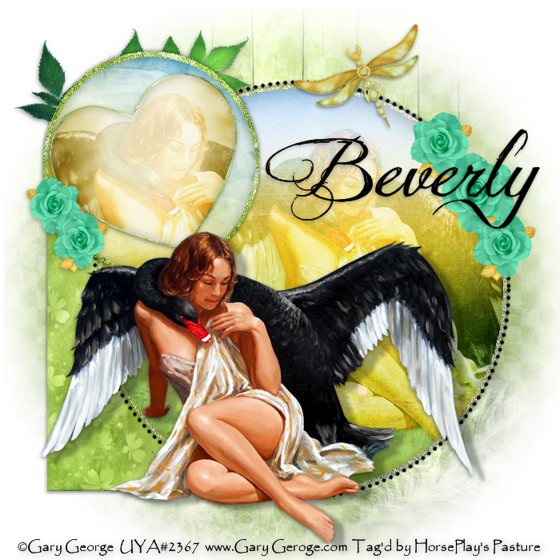
Black Swan


Supplies

1 tube of choice - I used the elegant artwork of Gary George which can be purchased from Up Your Art.  You must have a license to use.

Font of choice - I used Jellyka Delicious Cake here

Weescotlass Mask 208 here

Artmama’s template 14 - Valentines here

“A Summer That Never Was” is a full size scrap kit created by Heppy of HF Projekte and can be purchased from his store Inspirations of Scrap Friends.  You can visit his blog here
Thank you Heppy for such a classy and elegant kit!

This tutorial was written assuming you have a working knowledge of PSP.

~♥~ Let’s get started ~♥~

Open up the template
Shift + D.
Close out the original.
Image/Canvas Size:
700 x 700
OK
New Raster layer
Send to bottom.
Flood fill white.
Delete layer, Strip, Word, and Tiny Words layer.

Highlight Rectangle layer.
Click anywhere outside of it with your Magic Wand.
Selections/Invert
New Raster layer.
Copy and paste Paper 5 Into Selection.
Deselect.
Delete the template layer.
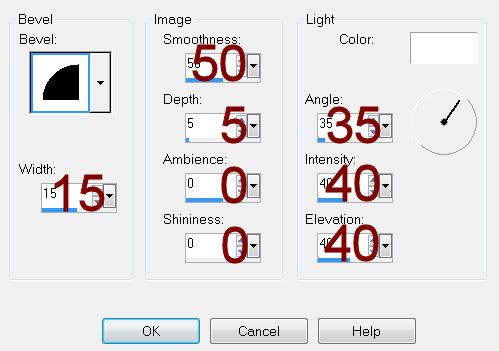
Give it a slight Inner Bevel:


Highlight C. Back layer (just above the rectangle layer).
Click on it with your Magic Wand.
New Raster layer.
Copy and paste Paper 4 Into Selection.
Deselect.
Delete the template layer.
Adjust/Add Remove Noise/Add Noise
Monochrome and Gaussian checked
Noise: 43%
OK

Highlight Circle layer.
Click on it with your Magic Wand.
New Raster layer.
Copy and paste Paper 6 Into Selection.
Copy and paste your tube as a new layer.
Move into position over the circle - see my tag for reference.
Selections/Invert
Tap the delete key.
Deselect.
Delete the template layer.
Change the Properties to Soft Light.
Duplicate

Highlight C. Back layer (just above the circle layer).
Click on it with your Magic Wand.
New Raster layer.
Copy and paste Paper 12 Into Selection.
Deselect.
Delete the template layer.
Apply the same Noise Effect.

Highlight Circle layer.
Click anywhere outside of it with your Magic Wand.
Selections/Invert
New Raster layer.
Copy and paste Paper 7
Deselect.
Delete the template layer.

Highlight H. Back layer.
Click anywhere outside of it with your Magic Wand.
Selections/Invert
New Raster layer.
Copy and paste Paper 10 Into Selection.
Copy and paste your tube as a new layer.
Move into position over the heart - see my tag for reference.
Selections/Invert
Tap the delete key.
Deselect.
Delete the template layer.
Change the Properties to Soft Light.
Duplicate.

Copy and paste your tube as a new layer.

Add your embellishments.  I used:
23:  Resize 25%
10:  Resize 25% and 60%/Free rotate Left 25 degrees
24:  Resize 25% and 40%/Free rotate Right 90 degrees/Duplciate/Resize 80%/Duplicate/Duplicate original rose/Resize 70%/Mirror/Duplicate

Highlight your white canvas.
New Raster layer.
Select All.
Copy and paste Paper 9 Into Selection.
Deselect.
Apply the mask.
Resize 120%
Merge Group.

Add your copyrights.

Add your name.

Resize all layers 80%.

I hope you enjoyed this tutorial.
I’d love to see your results and show it off in my gallery.
Email me!
Hugs,
Bev