Friday, May 13, 2011

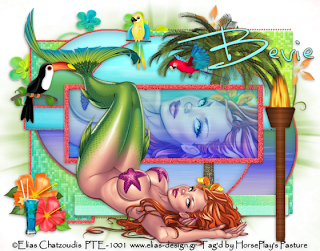
Hot Tropics


Supplies

1 tube of choice and 1 Close Up image - I used the artwork of Elias Chatzoudis which you can purchase from PSP Tubes Emporium. You must have a license to use.

Font of choice - I used Luna Bar here

Gem Mask 71 here

Divine Intentionz Template 345 here

Eyecandy 3.1 - Glow

Xerox - Porcelain and Fritillary

“Hot Tropics” is a tagger size scrap kit created by Em of EmJay Scraps and can be purchased from Heartbeatz Creationz. You can visit her blog here. Thank you Aurelie for such a wicked kit!

This tutorial was written assuming you have a working knowledge of PSP.

~♥~ Let’s get started ~♥~

Open up the template.
Shift + D.
Close out the original.
Delete the following layers:
By Missy, Gurlz like 2 rock it 2, Pixel Wording, Yo dj, Circle, Large Circle 2, Glittered Circle 2.
Resize all layers 85%
Image/Canvas size
700 x 550
OK
Flood fill the background layer white.

Highlight Glittered Rectangle layer.
Click anywhere outside of it with your Magic Wand.
Selections/Invert
New Raster layer.
Copy and paste Paper 14 Into Selection.
Adjust/Add Remove Noise/Add Noise:
Gaussian and Monochrome checked
Noise: 35%
OK
Deselect.
Delete the template layer.

Repeat the above step with Glittered Circle 1 and Glittered Rectangle Centre layers.

Highlight Frame layer.
Click on it with your Magic Wand.
New Raster layer.
Paste Paper 14 Into Selection.
Deselect.
Delete the template layer.
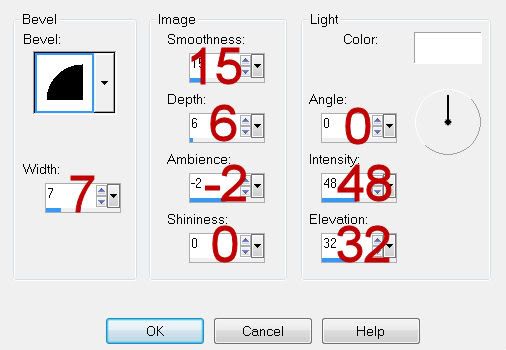
Give it a slight Inner Bevel:
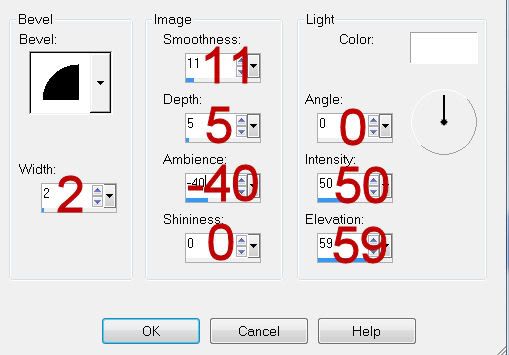

Apply the same Noise effect.

Highlight Dotted Line 2 layer.
Merge Down.
Both dotted line layers should now be on the same layer.
Select All/Float/Defloat
New Raster layer.
Paste Paper 14 Into Selection.
Duplicate.
Deselect.
Delete the template layer.

Highlight Gradient Rectangle layer.
Click anywhere outside of it with your Magic Wand.
New Raster layer.
Copy and paste Paper 11 Into Selection.
Deselect.
Delete the template layer.
Apply Xerox - Fritillary:
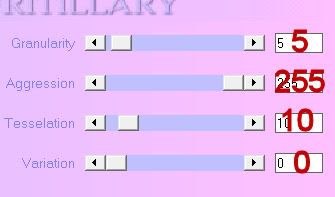

Give it the same slight Inner Bevel.

Highlight Square layer.
Repeat the above step.

Highlight Circle Left layer.
Click on it with your Magic Wand.
New Raster layer.
Copy and paste Paper 4 Into Selection.
Deselect.
Delete the template layer.
Give it the same Inner Bevel.
Apply Eyecandy 3.1 - Glow:
Width: 5
Opacity: 100
Opacity Drop Off: Fat
Color: #df4345
OK

Highlight Circle Right layer.
Repeat the above step.

Highlight Large Circle 1 layer.
Click on it with your Magic Wand.
Copy and paste Paper 3 Into Selection.
Deselect.
Delete the template layer.

Highlight Gradient Rectangle Centre
Click anywhere outside of it with your Magic Wand.
Paste Paper 3 as a new layer above the template layer.
Tap the delete key.
Copy and paste your Close up image as a new layer above the paper layer.
Tap the delete key.
Deselect.
Delete the template layer.
Be sure your tube image is highlighted and apply Xero-Porcelain:
Match your settings to mine:
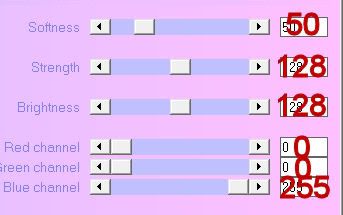

Change the Properties to Soft Light.
Duplicate.

Highlight Rectangle Centre layer.
Click anywhere outside of it with your Magic Wand.
Selections/Invert
New Raster layer.
Copy and paste Paper 7 Into Selection.
Deselect.
Delete the template layer.

Highlight Thin Rectangle layer.
Click anywhere outside of it with your Magic Wand.
Copy and pate Element 29 as a new layer.
Position the bottom of the element over the template layer.
Tap the delete key.
Deselect.
Delete the template layer.
Give it the same Inner Bevel.

Copy and paste your tube as a new layer.

Add your embellishments. I used:
39
38
3: Resize 70%
20: Resize 30%/Mirror
9: Resize 25%
45: Resize 35%/Mirror
23: Resize 30%
24: Resize 25%
8: Resize 25%
41: Resize 70%

Highlight your white canvas.
New Raster layer.
Select All.
Copy and paste Paper 7 Into Selection.
Deselect.
Apply the mask.
Merge Group.
You can use your Pick Tool to pull the sides out slightly if you like.
You can also use your Target Tool to change the color of this layer as well. I used a green shade from my tube.

Add your copyrights.

Add your name:
Give it the same Inner Bevel.

Resize all layers 80%.

I hope you enjoyed this tutorial.
I’d love to see your results and show it off in my gallery.
Email me!
Hugs,
Bev

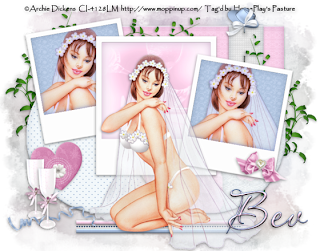
That Special Day


Supplies

1 tube of choice - I used the artwork of Archie Dickens which can now be purchased from CDO. You must have a license to use.

Font of choice - I used Aquarelle here

Becky Mask 22 here

Divine Intentionz Template 351 here

Xerox - Porcelain and Fritillary

“Simply Romantic ” is a tagger size scrap kit created by Linda of Linda’s Deram Designs and can be purchased from TKO Scraps. You can visit her blog here. Thank you Aurelie for such a wicked kit!

This tutorial was written assuming you have a working knowledge of PSP.

~♥~ Let’s get started ~♥~

Open up the template.
Shift + d.
Close out the original.
Resize all layers 90%
Image/Canvas Size:
700 x 550
OK
Open up the background layer.
Flood fill white.
Delete the top 3 layers.

Highlight Circle Left layer.
Click on it with your Magic Wand.
New Raster layer.
Copy and paste Paper 12 Into Selection.
Deselect.
Delete the template layer.
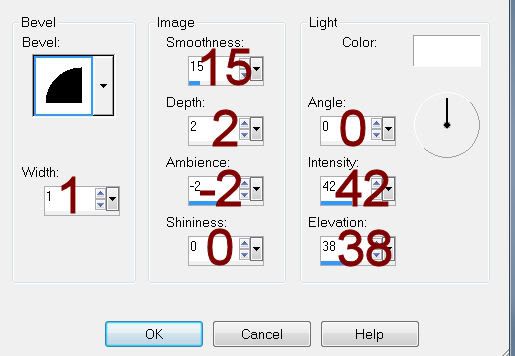
Give it a slight Inner Bevel:


Highlight Rectangle Shape layer.
Click on it with your Magic Wand.
New Raster layer.
Copy and paste Paper 3 Into Selection.
Deselect.
Delete the template layer.
Give it the same slight Inner Bevel.

Highlight Thin Rectangle (xero) layer.
Click anywhere outside of it with your Magic Wand.
Selections/Invert
New Raster layer.
Copy and paste Paper 2 Into Selection.
Deselect.
Delete the template layer.
Apply Xero - Fritillary:
Match your settings to mine:


Give it the same slight Inner Bevel.

Highlight Circle Right layer.
Click on it with your Magic Wand.
New Raster layer.
Copy and paste Paper 13 Into Selection.
Deselect.
Delete the template layer.
Give it the same slight Inner Bevel.

Highlight Polaroid Frame 3 by Missy layer.
Click on the black area with your Magic Wand.
New Raster layer.
Copy and paste Paper 9 Into Selection.
Copy and paste your tube as a new layer.
Position over the paper.
Selections/Invert
Tap the delete key.
Deselect.
Apply Xero-Porcelain to the tube layer:
Use Default settings.
Give the template layer the same slight Inner Bevel:

Highlight Polaroid Frame 2 by Missy layer.
Repeat the above step.

Highlight Polaroid Frame by Missy layer.
Click on the black area with your Magic Wand.
New Raster layer.
Copy and paste Paper 16 Into Selection.
Deselect.
Give the template layer the same slight Inner Bevel.

Highlight Thin Rectangle 2 layer.
Click on it with your Magic Wand.
New Raster layer.
Copy and paste Paper 2 Into Selection.
Deselect.
Delete the template layer.
Give it the same slight Inner Bevel.

Highlight Thin Rectangle layer.
Click on it with your Magic Wand.
New Raster layer.
Copy and paste Paper 5 Into Selection.
Deselect.
Delete the template layer.
Give it the same slight Inner Bevel.

Highlight Dotted Line layer.
Select All/Float/Defloat
New Raster layer.
Make a new 700 x 700 canvas.
Flood fill with #385278
Copy
Close it out as you won’t be using it any more
Make your working canvas active.
Paste Into Selection.
Deselect.
Delete the template layer.

Copy and paste your tube as a new layer.

Add your embellishments. I used:
Greenery: Resize 70%
Deco 3: Resize 40%/Free Rotate Left 10 degrees
Champagne Glass: Resize 25% and 70%/Duplicate
Ribbon 3: Resize 30%
Bow 3: Resize 30%/Free rotate Left 10 degrees/Mirror

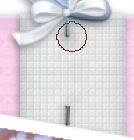
Hat Stick Pin: Resize 25%:
Make your Burn Tool active.
Highlight the paper layer that the Pin seems to be “pinned into”.
Position your burn tool over each area of the pin that looks like it’s pinned into the paper and click your mouse until you have a slight shadow effect:


Highlight your white canvas.
New Raster layer.
Select All.
Copy and paste the Preview of the kit Into Selection.
Deselect.
Adjust/Blur/Gaussian Blur:
Radius: 35
OK
Apply the mask.
Resize 110%
Merge Group.

Add your copyrights.

Add your name:
Give it a slight Inner Bevel:


Resize all layers 80%.

I hope you enjoyed this tutorial.
I’d love to see your results and show it off in my gallery.
Email me!
Hugs,
Bev
Tuesday, May 10, 2011

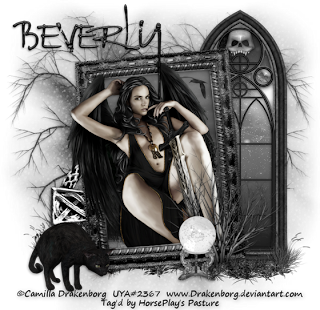
Dark Dreams


Link
Supplies

1 tube of choice - I used the beautiful artwork of Camilla Drakenborg which you can purchase from Up Your Art. You must have a license to use.

Font of choice - I used Rat Infested Mailbox here

Amy and Leah mask 2 here

Greg’s Factory Output Vol. II - Pool Shadow

“Nightmare ” is a tagger size scrap kit created by Aurelie of Pink Candy Designs and can be purchased from Twilight Scraps. You can visit her blog here. Thank you Aurelie for such a wicked kit!

This tutorial was written assuming you have a working knowledge of PSP.

~♥~ Let’s get started ~♥~

Open up a 700 x 700 blank canvas.
Flood fill white.

Copy and paste Arch as a new layer.
Try to position it on your canvas in the same place as I have mine.
Using your Freehand Selection Tool follow around the window.
Copy and paste Paper 1 as a new layer below the arch.
Move into position.
Selections/Invert
Tap the delete key.
Deselect.
Apply Greg’s Factory Output Vol. II - Pool Shadow:
Default settings.
Ok

Close out your white background.
Merge Visible.
Reopen your white background.

Copy and paste Frame 3 as a new layer.
Resize 80%
Free rotate Left 5 degrees.
Click inside of it with your Magic Wand.
Selections/Modify/Expand by 4.
Copy and paste Paper 1 as a new layer below the frame.
Resize 70%
Move into position.
Selections/Invert
Tap the delete key.
Copy and paste your tube below the frame.
Tap the delete key.
Deselect.

Merge Visible the tube, frame, and paper.

Now you can move both merged layers into a better position if you choose.

Add your embellishments. I used:
Tree/Duplicate/Mirror
Grass: Resize 90%
Jewel
Bush: Resize 50%/Duplicate/Mirror(place this one behind the frame)
Cat: Resize 50%
Crystal Ball: Resize 40%

Highlight your white canvas.
New Raster layer.
Select All.
Copy and paste Paper 14 Into Selection.
Deselect.
Apply the mask.
Merge Group.

Add your copyrights.

Add your name:
Color Pallet:
Foreground: Black
Background: Pattern/Set to Paper 13
Stroke: 1
Type your name.
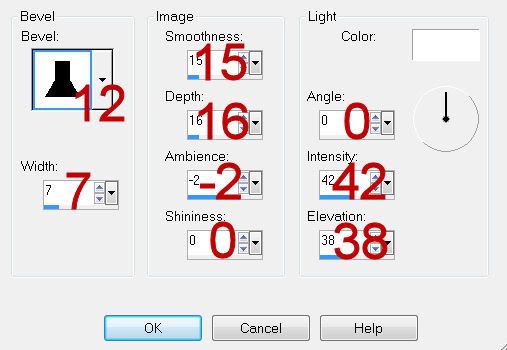
Give it a slight Inner Bevel:


Repeat the inner bevel.

Resize all layers 80%.

I hope you enjoyed this tutorial.
I’d love to see your results and show it off in my gallery.
Email me!
Hugs,
Bev
Monday, May 9, 2011

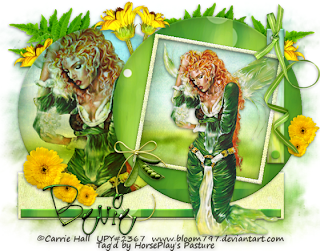
Spring's Serenade


Supplies

1 tube of choice - I used the beautiful artwork of Carrie Hall which you can purchase from Up Your Art. You must have a license to use.

Font of choice - I used Second Lyrics here

Gem Mask 22 here

Divine Intentionz Template 325 here

“Spring’s Serenade ” is a tagger size scrap kit created by Leigh of Heartfelt Perfections and can be purchased from Butterfly Blush Designs. You can visit her blog here. Thank you Leigh for such a wonderful spring kit!

This tutorial was written assuming you have a working knowledge of PSP.

~♥~ Let’s get started ~♥~

Open up a the template.
Shift + D.
Close out the original.
Delete the top 2 layers and Raster 1 layer.
Highlight the background layer and open it up.
Image/Canvas Size:
700 x 550
OK
Flood fill white.

Highlight Rectangle layer.
Click on it with your Magic Wand.
Copy and paste Paper 1 as a new layer.
Move into a position you like
Selections/Invert
Tap the delete key.
Adjust/Add Remove Noise/Add Noise:
Gaussian and Monochrome checked
Noise: 25%
OK
Deselect.
Delete the template layer.
Give it a slight Inner Bevel:


Highlight Thin Rectangle layer.
Click on it with your Magic Wand.
New Raster layer.
Open up SSE 1.
Using your Selection Tool set on rectangle, section out a large portion of the boot.
In your color pallet set the foreground to Pattern and find the boot pattern.
Make your working canvas active.
Flood fill with the boot pattern.
Deselect.
Delete the template layer.
Give it the same slight Inner Bevel.

Highlight Tiny Circle 1 template layer.
Merge down.
Both tiny circle template layers should be on the same layer.
Click on both circles with your Magic Wand.
New Raster layer.
Flood fill with your pattern.
Deselect.
Delete the template layer.
Give it the same Inner Bevel.

Highlight Circle 2 template layer.
Click on it with your Magic Wand.
New Raster layer.
Flood fill with your pattern.
Deselect.
Delete the template layer.
Give it the same slight Inner Bevel.

Highlight Small Rectangle 1 layer.

Click on it with your Magic Wand.
New Raster layer.
Copy and paste Paper 2 Into Selection.
Deselect.
Delete the template layer.
Give it the same slight Inner Bevel.

Highlight Circle 1 layer.
Click on it with your Magic Wand.
New Raster layer.
Copy and paste Paper 9 Into Selection.
Copy and paste your tube as a new layer above the circle paper layer.
Resize much larger.
Selections/Invert
Tap the delete key.
Deselect.
Delete the template layer.
Change the Properties of the tube layer to Multiply.
Give the Circle paper layer the same slight Inner Bevel.

Highlight Frame Background layer.
Click on it with your Magic Wand.
New Raster layer.
Copy and paste Paper 2 Into Selection.
Deselect.
Delete the template layer.

Highlight Frame 1 as a new layer.
Click on it with your Magic Wand.
Copy and paste Paper 1 as a new layer.
Resize 60%
Selections/Invert
Tap the delete key.
Deselect.
Delete the template layer.
Give it the same slight Inner Bevel.
Give it the same noise effect.

Copy and paste your tube as a new layer.
Position in front of the frame.

Add your embellishments. I used:
15: Resize 30%
20: Resize 40%/Flip/Duplicate/Mirror/Duplicate. Duplicate Original/Resize 70%
2: Duplicate/Mirror. Duplicate Original/Resize 70%
16: Resize 30%
21: Resize 70%/Duplicate/Resize 70%Duplicate/Resize 70%. Duplicate and mirror the flowers of your choice.

Highlight your white canvas.
New Raster layer.
Select All.
Copy and paste Paper 9 Into Selection.
Deselect.
Apply the mask.
Merge Group.
Duplicate/Change the Properties to Multiply.
Use your Pick Tool on each layer to pull the sides out slight.

Add your copyrights.

Add your name:
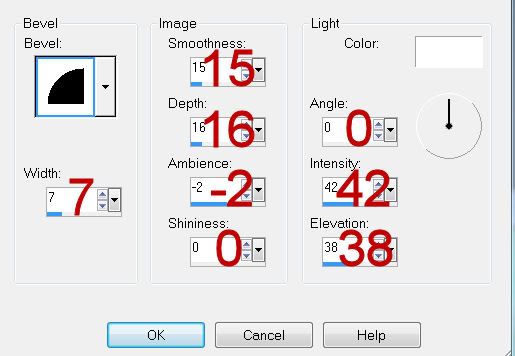
Give it a slight Inner Bevel:


Resize all layers 80%.

I hope you enjoyed this tutorial.
I’d love to see your results and show it off in my gallery.
Email me!
Hugs,
Bev
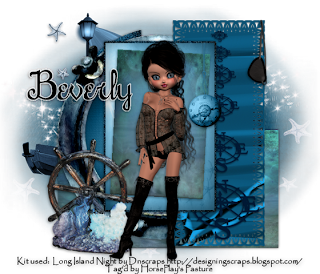
Long Island Night


Supplies

Font of choice - I used Sachiko here

Mask here - this is not mine. If you know whose mask this is please email me so that I can give proper credit. Thanks!

Divine Intentionz Template 295 here

Eyecandy 3.1 - Glow

“Long Island Night ” is a tagger size scrap kit created by Conchi of Dnscraps and can be purchased from Butterfly Blush Designs. You can visit her blog here. Thank you Conchi for such a brilliant kit!

This tutorial was written assuming you have a working knowledge of PSP.

~♥~ Let’s get started ~♥~

Open up a the template.
Shift + D.
Close out the original.
Delete the top 3 layers, Small Circle 2, and Small Circle 1
Highlight the background layer and open it up.
Image/Canvas Size:
700 x 600
OK
Flood fill white.

Copy and paste Tag 2 as a new layer.
Resize 55%
Move into position over Oval Edge Rectangle template layer.
Delete the template layer.

Highlight Half Circle layer.
Click anywhere outside of it with your Magic Wand.
Selections/Invert
New Raster layer.
Copy and paste Paper 5 Into Selection.
Adjust/Add Remove Noise/Add Noise:
Gaussian and Monochrome checked
Noise: 50%
OK
Deselect.
Delete the template layer.

Highlight Large Rectangle layer.
Click on it with your Magic Wand.
New Raster layer.
Copy and paste Paper 7 Into Selection.
Deselect.
Delete the template layer.
Give it a slight Inner Bevel:


Copy and paste Imon as a new layer.
Resize 75%
Move into position over Circle template layer.
Delete the template layer.
Click inside the element with your Magic Wand.
Selections/Modify/Expand by 4.
New Raster layer below the frame.
Copy and paste Paper 5 Into Selection.
Deselect.

Highlight Rectangle 1 layer.
Click on it with your Magic Wand.
New Raster layer.
Copy and paste Paper 12 Into Selection.
Apply the same noise effect as before.
Deselect.
Delete the template layer.

Highlight Rectangle 2 layer - the black template layer.
Click on it with your Magic Wand.
New Raster layer.
Copy and paste Paper 10 Into Selection.
Deselect.
Delete the template layer.

Highlight Rectangle 2 layer - it‘ll be the last template layer you have left.
Click on it with your Magic Wand.
New Raster layer.
Copy and paste Paper 7 Into Selection.
Deselect.
Delete the template layer.

Add your embellishments. I used:
Eye Patch: Resize 25%/Free rotate Right 80 degrees
Clock 2: Resize 25%
Brujula 2: Resize 55%
Boa4: Resize 60%
Starfishs2: Resize 35%/Mirror
Imon 2: Resize 40%
Sparkles 2
sm_CGUhspirate3_1 - Resize 70%

Highlight your white canvas.
New Raster layer.
Select All.
Copy and paste Paper 12 Into Selection.
Deselect.
Apply the mask.
Resize 105%
Merge Group.

Add your copyrights.

Add your name:
Apply Eyecandy 3.1 - Glow:
Width: 3
Opacity: 100
Opacity Drop off: Fat
Color: white

Resize all layers 80%.

I hope you enjoyed this tutorial.
I’d love to see your results and show it off in my gallery.
Email me!
Hugs,
Bev