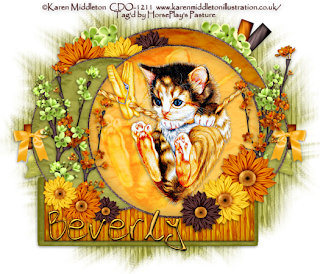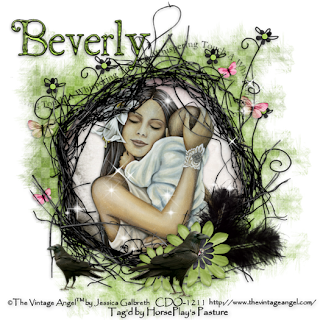
Supplies
1 tube of choice - I used the artwork of Karen Middleton which can be purchased from CDO. You must have a license to use.
Font of choice - I used Rober here
Weescotlass mask 241 here
Divine Intentionz Template 358 here
“So Natural” is a tagger size scrap kit created by Lysira of Lysira’s Graphic World and can be purchased from Inspirations of Scrap Friends. You can visit her blog here.
Thank you Lysira for such a beautiful kit!
This tutorial was written assuming you have a working knowledge of PSP.
~♥~ Let’s get started ~♥~
Open up the template.
Shift + D.
Close out the original.
Resize all layers 85%
Image/Canvas Size:
700 x 600
OK
Open up Raster 1 layer and flood fill white.
Delete the following layers:
Top 2 layers, Heart 1, Heart 2, and Heart 3 layers.
Highlight Glitter Circle 1 layer.
Use your Magic Wand and click anywhere outside of it.
Selections/Invert
New Raster layer.
Copy and paste Paper 25 Into Selection.
Adjust/Add Remove Noise/Add Noise
Monochrome and Gaussian checked
Noise: 43%
OK
Deselect.
Delete the template layer.
Repeat the above step with:
Glitter Circle Left
Glitter Circle Right
Glitter Circle Center
Highlight Circle 1 layer.
Click on it with your Magic Wand.
New Raster layer.
Copy and paste Paper 7 Into Selection.
Deselect.
Delete the template layer.
Highlight Rectangle 1 layer.
Click on it with your Magic Wand.
New Raster layer.
Copy and paste Paper 24 Into Selection.
Deselect.
Delete the template layer.
Highlight Rectangle 2 layer.
Click anywhere outside of it with your Magic Wand.
Copy and paste Paper 12 as a new layer.
Tap the delete key.
Deselect.
Delete the template layer.
Highlight Circle Left layer.
Click on it with your Magic Wand.
New Raster layer.
Copy and paste Paper 9 Into Selection.
Deselect.
Delete the template layer.
Highlight Circle Right layer.
Repeat the above step.
Highlight Circle Center layer.
Click on it with your Magic Wand.
New Raster layer.
Copy and paste Paper 6 Into Selection.
Copy and paste your tube as a new layer.
Position it over the circle.
Paste your tube again and keep it slightly larger.
Move below the other tube layer and to the left a little.
Change the Properties to Soft Light.
Selections/Invert
Tap the delete key.
Highlight the other tube layer and use your Eraser Tool to erase whatever overhangs the circle that your don’t want.
Deselect.
Delete the template layer.
Add your embellishments. I used:
Branch 3: Duplicate/Mirror/If any of the bottom branch is sticking out then erase it.
Daisy 2: Resize 35%/Duplicate/Duplicate/Resize 70%
Daisy 1: Resize 30%/Duplicate/Duplicate/Resize 70%
Daisy 5: Resize 25%/Duplicate/Duplicate/Resize 70%
Twisted Tape 5: Resize 50%/Free rotate Left 45 degrees
Twisted Tape 2: Resize 50%/Free rotate Left 70 degrees
Cherry Blossom 3: Free rotate Right 7 degrees/Erase the top of the tallest branch/Erase the branch that sticks lower than the daisy flowers/Duplicate/Mirror
Cherry Blossom 2: Resize 85%/Erase the branch that sticks lower than the daisy flowers/Duplicate/Mirror
Pastel Bow 1: Resize 25% and 80%/Duplicate/Mirror
Highlight your white canvas.
New Raster layer.
Select All.
Copy and paste Paper 14 Into Selection.
Deselect.
Apply the mask.
Resize 110%
Merge Group.
Add your copyrights.
Add your name.
Foreground: #310000
Background: Pattern/Paper 26
Stroke: 1
Type your name.
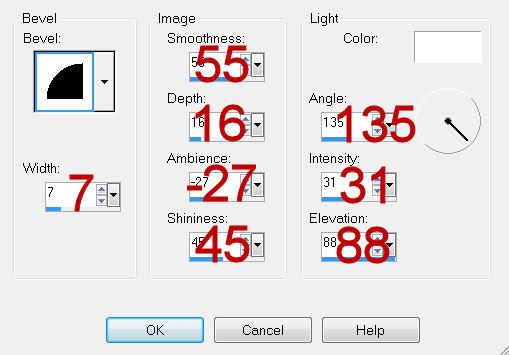
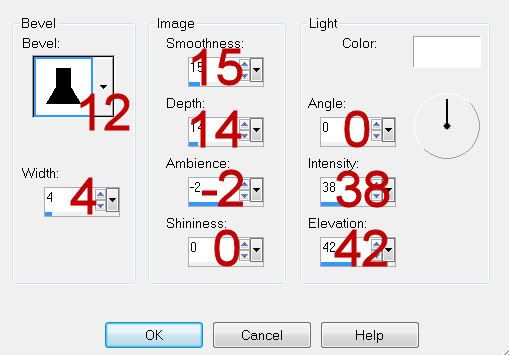
Give it a slight Inner Bevel:

Resize all layers 80%.
I hope you enjoyed this tutorial.
I’d love to see your results and show it off in my gallery.
Email me!
Hugs,
Bev


