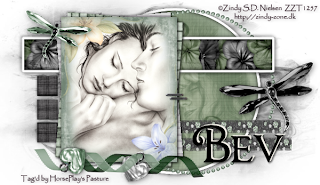
Saturday, July 31, 2010

After the Thunder


Clicking on the image will enlarge to full view.

Supplies

2 tubes of your choice - I used the wonderful artwork of Zindy S.D. Nielsen here
Font of Choice - I used Chocolate Box
Scrapity Scrap and More Template 17 here
“Urban Chic” is a FTU tagger size scrap kit created by Candy of Candy’s Treats and can be downloaded from her blog here.
Please leave a thank you when downloading as it‘s a small gesture for hard work given freely.

This tutorial was written assuming you have a working knowledge of PSP.

~♥~ Let’s get started ~♥~

Open up the template.
Shift + D.
Close out the original.
Open up the Background layer.
Delete the Raster 8 and Raster 5 layers.

Highlight Raster 3 layer.
Use your Magic Wand and click on it.
New Raster layer.
Copy and paste Paper 1 C Into Selection.
Copy and paste a tube as a new layer above the paper.
Selections/Invert
Tap the delete key.
Selections/Modify/Feather
Number of Pixels:
43
OK
Tap the delete key a couple of times.
Deselect.
Delete the template layer.

Highlight Raster 4 layer.
Click on each square with your Magic Wand.
Copy and paste Paper 1 as a new layer.
Resize 46%
Try to match pattern of the paper up with the template layer squares.
Selections/Invert
Tap the delete key.
Deselect.

Highlight Raster 6 layer.
Click on it with your Magic Wand.
New Raster layer.
Copy and paste Paper 14 Into Selection.
Select All/Float/Defloat
New Raster layer.
Copy and paste Paper 5 Into Selection.
Deselect.

Now we’re going to make the flower strip to go across Raster 6 template layer…
Copy and paste any of the flowers from the kit as new layers.
Resize them 25%
Arrange them across the paper of Template 6 layer.
TIP: Go ahead and get creative with the flowers by rotating and flipping some of them.
Once you have your flowers in a strip going across be sure to give each of them a drop shadow and then merge visible all the flower layers.

Highlight Template 6 layer.
Click on it with your Magic Wand.
Selections/Invert
Highlight the flower strip layer.
Tap the delete key.
Deselect.
Change the Properties to Difference.
Duplicate - Change the Properites to Multiply and lower the Opacity to about 65 or so.
Delete the template layer.

Highlight Copy of Vector layer.
Click on it with your Magic Wand.
New Raster layer.
Copy and paste Paper 1 C Into Selection.
Deselect.
Delete the template layer.

Highlight Copy of Raster layer.
Click on it with your Magic Wand.
New Raster layer.
Copy and paste Paper 1 B Into Selection.
Deselect.
Delete the template layer.

Highlight Raster 7 layer.
Click on it with your Magic Wand.
New Raster layer.
Copy and paste Paper 15 Into Selection.
Copy and paste your tube as a new layer.
Selections/Invert
Tap the delete key.
Selections/Modify/Feather
Number of Pixels:
43
OK
Tap the delete key a couple of times.
Deselect.
Delete the template layer.

Add your embellishments. I used:
Bling 1: Resize 74%
Distressed Ribbon: Resize 30%
Curly 2: Resize 40% Free rotate left 90 degrees
Curly 1: Resize 40% Free rotate right 90 degrees
Charm 1: Resize 50% Free rotate left 130 degrees
Charm 4: Resize 50% Free rotate right 25 degrees
Staples 2: Resize 80%
Dragonfly 1: Resize 50%
Dragonfly 2: Resize 35%/Mirror

Highlight Raster 2 layer.
Select All.
Copy and paste a paper of choice Into Selection.
Deselect.
Apply the mask.
Merge Group.

Add your credits.

Add your name.

I hope you enjoyed this tutorial.
I’d love to see your results and show it off in my gallery.
Email me!
Hugs,

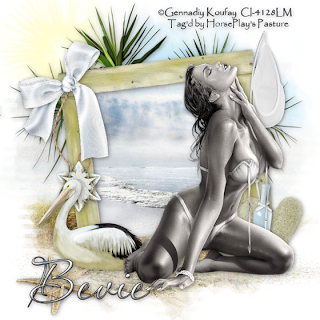
Friday, July 30, 2010

Southern Moments


Clicking on the image will enlarge to full view.
Supplies

1 tube of choice - I’m using the artwork of Gennadiy Koufay which you can purchase at CILM
Font of Choice - I used Aquarelle here
Weescotlass Mask 161 here
“Ocean Blue” is a PTU tagger size scrap kit created Gina of Gina’s Gem’s Scraps and can be purchased at Butterfly Blush Designs. You can visit her blog here.
Thank you Gina for a most elegantly beautiful beach kit! It’s truly gorgeous!

This tutorial was written assuming you have working knowledge of PSP.

~♥~ Let’s get started ~♥~

Open up a 700 x 700 blank canvas.
Flood fill white.

Copy and paste Square Frame as a new layer.
Resize 85%
Free rotate left 7 degrees.
Use your Magic Wand and click inside of it.
Selections/Modify/Expand by 6.
New Raster layer below the frame.
Copy and paste a paper of choice Into Selection.
Deselect.

Copy and paste your tube as a new layer.

Add your embellishments. I used:
Cloud 3
Tree 1: Resize 60%
Tree 1 again: Resize 70%/Mirror
Sun: Resize 50%
Bow 1
Star Pendant: Resize 50%
Fishing Net: Resize 70%
Pelican 1: Resize 40%/Mirror
Bottle: Resize 35%/Free rotate right 7 degrees
Starfish Spray: Resize 80%/Erase the starfish you don’t want
Heart Rocks: Resize 50%
Sand

Highlight your white canvas.
New Raster Layer
Select All
Copy and paste a paper of choice Into Selection.
Deselect.
Apply the mask.
Resize 130%.
Merge Group.

Add your copyrights.

Add your name.
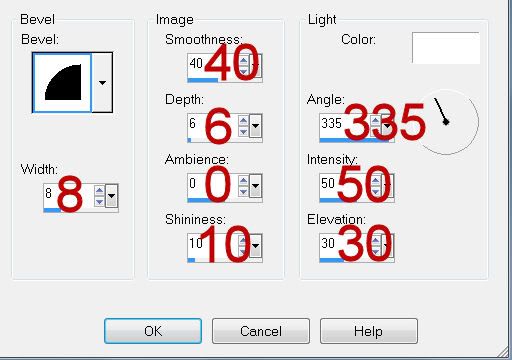
Give it a slight inner bevel:
INSERT PIC HERE

Resize all layers 80%.

I’d love to see your results.
Email me!
Hugs,
Bev

Under the Moonlight


Clicking on the image will enlarge to full view.

Supplies

Font of Choice - I’m using Aquarelle here
Gem’s Mask 161 here
“Moonblight Dreams” is a PTU art kit created by KatNKDA. It can be downloaded from her store NK Art Shop. You can visit Kat’s blog here.
Kat, your talent is amazing…you certainly blow me away with each new art kit you create!

This tutorial was written assuming you have a working knowledge of PSP.

~♥~ Let’s get started ~♥~

Open up a transparent 700 X 700 canvas.
Flood Fill white.

Copy and paste Element 31 as a new layer.
Resize 360%
Position at the left side of your canvas.

Make your Selection Tool active - set to Rectangle.
Make a 590 X 250 rectangle.
New Raster layer.
Copy and paste Paper 6 Into Selection.
Selections/Modify/Contract by 8
OK
Tap the delete key.
Selections/Modify/Expand by 3.
New Raster layer below your new frame.
Copy and paste Paper 40 Into Selection.
Deselect.
Give the frame an Inner Bevel:


Merge Visible the frame and paper.
Move the circle and merged layer into better position.

Copy and paste Element 34 as a new layer.
Resize 25% and 55%
Free rotate left 10 degrees.
Move into position - see my tag for reference.
Click inside the frame with your Magic Wand.
Selections/Modify/Expand by 3.
New Raster layer below the frame.
Make Paper 40 active/Mirror
Make your canvas active.
Copy and paste Into Selection.
Copy and paste Element 16 as a new layer.
Resize 25% and 60% - center it below the frame.
Selections/Invert
Tap the delete key.
Deselect.

Merge Visible the frame, paper, and swan.

Move all the merged layers into their exact position.

Copy and paste Element 43 as a new layer.
Resize 25% and 70%
Move into position behind the circle.
See my tag for reference.
Using your Pick Tool move the edge in slightly to align it with the merged rectangle layer.

Duplicate Element 43 layer.
Move it lower on your canvas - see my tag for reference.
Using your Pick Tool again, shorten the length of it by bringing the edge in.

Copy and paste Element 44 as a new layer.
Resize 25% and 70%
Using your Pick Tool bring the edge in to make it the same length as the above element.

Add your embellishments. I used:
Element49: Resize 25%
Element 6: Resize 25% and 25%
Element 7: Resize 25% and 25%/Mirror
Element 1: Resize 25%
Element 60: Resize 25% and 25%
Element 25: Resize 25% and 80% Free rotate left 90 degrees

Crop your image.

Highlight your white background.
New Raster layer.
Select All.
Copy and paste a paper of choice Into Selection.
Deselect.
Apply the mask.
Merge Group.

Add your copyrights.

Add your name.
Give it the same inner bevel.
Add some Noise.

Resize all layers 80%.

I hope you enjoyed this tutorial.
I’d love to see your results and show it off in my gallery.
Email me!
Hugs,
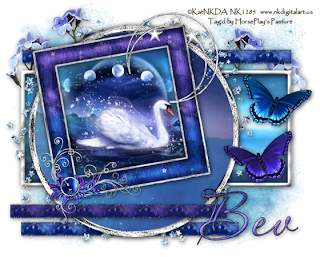
Bev

Thursday, July 29, 2010

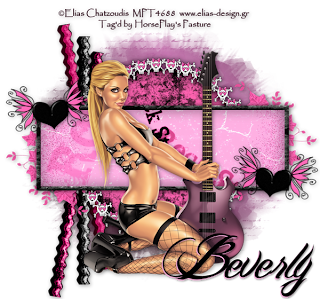
Rocker Chick


Clicking on the image will enlarge to full view.

Supplies

1 tube of choice - I’m using the wonderful artwork of Elias Chatzoudis at MPT
Font of Choice - I’m using Billy Argel here
Weescotlass Mask 236 here
“Rock Princess” is a PTU scrap kit created by Julie of Bits n Bobs and can be purchased at Exquisite Scraps. You can visit her blog here.
Thank you Julie for another fabulous kit!

This tutorial was written assuming you have a working knowledge of PSP.

~♥~ Let’s get started ~♥~

Open up a transparent 750 X 700 canvas.
Flood Fill white.

Copy and paste Element 43 as a new layer.
Click inside with your Magic Wand.
Selections/Modify/Expand by 3
New Raster layer below the frame.
Copy and paste a paper of choice Into Selection.
Deselect.

Close out your white background.
Merge Visible.
Reopen your white background.

Make your Selection Tool Active and set on rectangle.
Create a rectangle size approximately 600 x 200
New Raster layer.
Copy and paste a dark colored paper Into Selection.
Selections/Modify/Contract by 10.
Tap the delete key.
Selections/Modify/Expand by 6
Copy and paste a paper of choice as a new layer below this new frame you just created.
Resize 70%
Move into position.
Selections/Invert
Tap the delete key.
Deselect.

Give the new frame a slight inner bevel:


Close out all layers.
Merge Visible the new frame you just created and the paper.
Reopen all layers.
Center the merged rectangle layer over the merged circle layer.

Copy and paste your tube as a new layer.

Add your embellishments. I used:
Element 1: Free rotate left 100 dgrees
Element 2: Free rotate left 90 degrees
Element 3: Free rotate left 80 degrees
Element 40
Element 8: Resize 50%

Highlight your white background.
New Raster layer.
Flood fill with a gradient of your choice.
Apply the mask.
Merge Group.

Add your copyrights.

Add your name.
I typed my name out in black and again in pink.
I moved either name slightly over and merged visible.

Resize all layers 80%.

I hope you enjoyed this tutorial.
I’d love to see your results and show it off in my gallery.
Email me!
Hugs,
Bev

Wednesday, July 28, 2010

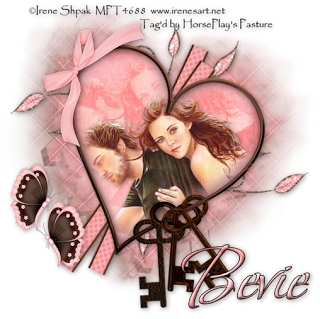
Us


Clicking on the image will enlarge to full view.

Supplies

1 tube of your choice - I used the wonderful artwork of Irene Shpak at MPT
Font of Choice - I used Bonheur Royale
Gem Mask 153 here
“Keirsten Rain” is a PTU scrap kit created by
Jacki of Wishing Well Designs and can be purchased from Lollipops n Gumdrops. You can visit her blog here.
Thank you Jacki for a truly delightful kit!!

This tutorial was written assuming you have a working knowledge of PSP.

~♥~ Let’s get started ~♥~

Open up a 700 X 700 blank canvas.
Flood fill white.

Copy and paste Keys and Heart element as a new layer.
Free rotate right 20 degrees.
Using your Freehand Selection tool outline the heart.
New Raster layer below the heart.
Copy and paste a paper of choice Into Selection.
DO NOT DESELECT.

Copy and paste your tube as a new layer below the heart.
Keeping it on the large size, move it up and to the left just a bit and change the Properties to Soft Light.
Paste your tube again.
Resize to make it just a bit smaller than your other tube layer and move it down and to the right just a bit.
Selections/Invert
Highlight each of the tube layers and tap the delete key.
Selections/Modify/Feather
Number of Pixels:
43
OK
Highlight each of the tube layers again and tap the delete key twice.
Deselect.

Add your embellishments. I used:
Flourish: Resize 60%/Free rotate right 20 degrees/Duplicate/Mirror/Flip
Bow 1: Resize 50%/Mirror
Ribbon 1: Resize 70%/Free rotate left 65 degrees/Duplicate/Free rotate right 10 degrees
Butterfly 1: Resize 25% and 80%

Highlight your white background.
Select All
New Raster layer.
Copy and paste a Dark colored Paper of choice Into Selection.
Deselect.
Apply the mask.
Mirror
Merge Group.
Resize 90%

Highlight your white background again.
Select All
New Raster layer.
Copy and paste a Light colored Paper of choice Into Selection.
Deselect.
Apply the mask.
Mirror
Merge Group.
Resize 90%

Position both mask layers below the heart in alignment.

Add your credits.

Add your name.
Give it a slight inner bevel.

Resize all layers 80%.

I hope you enjoyed this tutorial.
I’d love to see your results and show it off in my gallery.
Email me!
Hugs,
Bev

Monday, July 26, 2010

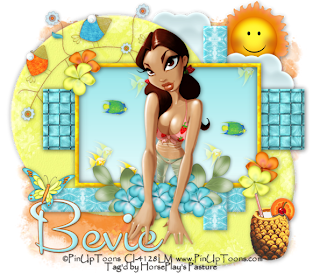
Summer Breeze


Clicking on the image will enlarge to full view.

Supplies

1 tube of your choice - I used the wonderful artwork of PinUpToons at CILM
Font of Choice - I used Cocktail Script
Becky Mask 22 here
Dezigns by Ali Template 190 here
“Summer Breeze” is a PTU scrap kit created by
Nette of Nette’s NightOwl Works and can be purchased from Lollipops n Gumdrops. You can visit her blog here.
Thank you Nette for such a precious summer kit!

This tutorial was written assuming you have a working knowledge of PSP.

~♥~ Let’s get started ~♥~

Open up a 700 X 700 blank canvas.
Flood fill white.

Open up the template.
Shift + D.
Close out the Original.
Delete the top 3 layers (the hearts)
Flood fill Raster 1 layer white.

Highlight Raster 2 layer.
Click on it with your Magic Wand.
New Raster layer.
Copy and paste Paper 1 Into Selection.
Deselect.
Delete the template layer.
Give it a slight inner bevel:


Highlight Raster 3 layer.
Repeat the above step.

Highlight Raster 6 layer.
Click on it with your Magic Wand.
Copy and paste Paper 7 as a new layer.
Resize 60%
Move into position.
Selections/Invert
Tap the delete key.
Deselect.
Delete the template layer.
Give it the same inner bevel.

Highlight Copy of Raster 6 layer.
Repeat the above step.

Highlight Raster 7 layer.
Click on it with your Magic Wand.
Copy and paste Paper 8 as a new layer.
Resize 80%
Move into position.
Selections/Invert
Tap the delete key.
Deselect.
Delete the template layer.
Give it the same slight inner bevel.

Highlight Raster 4 layer.
Click on it with your Magic Wand.
New Raster layer.
Flood fill with a gradient of choice.
Deselect.
Delete the template layer.

Highlight Raster 5 layer.
Click on it with your Magic Wand.
New Rater layer.
Copy and paste Paper 2 Into Selection.
Deselect.
Delete the template layer.
Give it the same slight inner bevel.

Add your embellishments. I used:
Fish 1: Resize 45% Free rotate left 90 degrees/Duplicate as many times as you like…turn the opacity down on some of them.
Summer Breeze: Resize 25%/Duplicate as many times as you like…turn the opacity down on some of them.
Birdy Wire: Resize 50%
Flower 23 & 24 (the single flower): Resize 25% and 70%
Flower 22 (the cluster of flowers and leaves): Resize 40%
Fly 3: Resize 25% and 60%
Cloud: Resize 25%/Duplicate
Sun 2: Resize 25% and 80%
Pineapple Drink: Resize 25%

Highlight your white background.
Select All
New Raster layer.
Copy and paste a Paper of choice Into Selection.
Deselect.
Apply the mask.
Merge Group.
Duplicate

Add your credits.

Add your name.
Give it the same slight inner bevel.

Resize all layers 80%.

I hope you enjoyed this tutorial.
I’d love to see your results and show it off in my gallery.
Email me!
Hugs,
Bev

Sassy


Clicking on the image will enlarge to full view.

Supplies

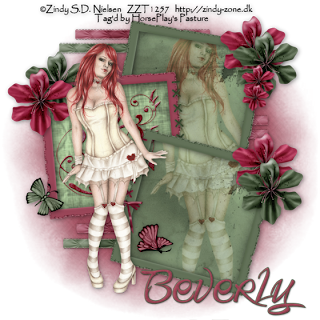
1 tube of your choice - I used the beautiful artwork of Zindy S.D. Nielsen here
Font of Choice - I used Fmiring Campotype
Monti Circular Mask here
“Delightful” is a FTU scrap kit created by
Terry of Treasure’s by Terry and can be downloaded from her blog here. Please leave a thank you when downloading as it’s a small gesture for hard work given freely.
Thank you Terry for sharing such a beautiful freebie! And it’s great to have you back with us again!

This tutorial was written assuming you have a working knowledge of PSP.

~♥~ Let’s get started ~♥~

Open up a 700 X 700 blank canvas.
Flood fill white.

Copy and paste Freame 3 as a new layer.
Resize 70%
Use your Magic Wand and click inside of it.
Selections/Modify/Expand by 6.
Copy and paste Paper 1 as a new layer below the frame.
Resize 60%
Selections/Invert
Tap the delete key.
Deselect.
Merge Visible the paper and frame.
Free rotate left 5 degrees.
Copy and paste Doodle 1 as a new layer.
Resize 50%
Move into position in the center of the frame.
Merge Down.

Copy and paste Frame 4 as a new layer.
Resize 70%
Free rotate right 10 degrees.
Duplicate/Free rotate right 5 degrees
Move the merged layer and both of the frames into position - see my tag for reference.

Highlight the top frame.
Use your Magic Wand and click inside of it.
Selections/Modify/Expand by 6
New Raster layer below the frame.
Copy and paste Paper 3 Into Selection.
Deselect.

Highlight the bottom frame.
Repeat the above step using the same paper.

Copy and paste your tube as a new layer.
Position it before the merged layer.

Paste your tube again.
Resize to be a little larger and move into position below the top frame in your layers pallet.
Move it into the exact position you want it.
Duplicate
Move the duplicate below the bottom frame in your layers pallet.

Highlight the top frame.
Click inside with your Magic Wand.
Selections/Modify/Expand by 6.
Selections/Invert
Highlight the tube that just below the frame.
Tap the delete key.
Deselect.
Change the Properties to Soft Light.

Highlight the bottom frame and repeat the above step.

Add your embellishments. I used:
Laced Ribbon 1: Resize 50%/Free rotate right 15 degrees
Laced Ribbon 2: Resize 50% Free rotate left 5 degrees
Flowers 1 & 2: Resize 50%
Flower 1 again: Resize 25%/Duplcicate/Resize 80%
Ribbon 3 & 4: Resize 50%
Butterflies 2 & 3: Resize 25%

Highlight your white background.
Select All
New Raster layer.
Copy and paste a Paper of choice Into Selection.
Deselect.
Apply the mask.
Merge Group.

Add your credits.

Add your name.
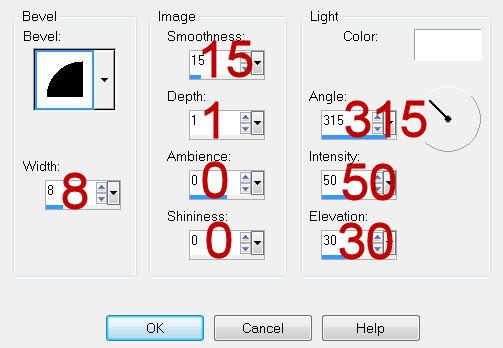
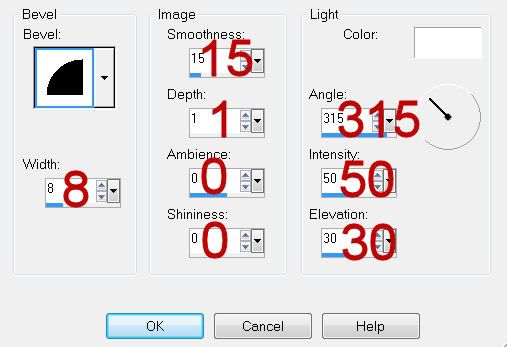
Give it a slight inner bevel:


Resize all layers 80%.

I hope you enjoyed this tutorial.
I’d love to see your results and show it off in my gallery.
Email me!
Hugs,
Bev

Classy Lady


Clicking on the image will enlarge to full view.

Supplies

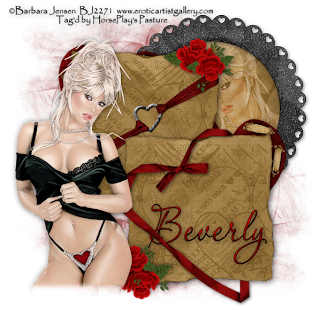
1 tube of your choice - I used the beautiful artwork of Barbara Jensen here
Font of Choice - I used Aquarelle here
Gem’s Mask 60 here
“Darker Side of Love” is a PTU scrap kit created by
Monti of Monti’s Scraps can be purchased from I Got Lucky Scraps. You can visit her site here.
Thank you Monti for such a beautiful kit!

This tutorial was written assuming you have a working knowledge of PSP.

~♥~ Let’s get started ~♥~

Open up a 700 X 700 blank canvas.
Flood fill white.

Copy and paste Paper-Hearts 1-Brown as a new layer.
Resize 40%
Duplicate/Mirror
Move into position - see my tag for reference.

Copy and paste Ribbon and Heart Red as a new layer.
Resize 50%
Free rotate left 30 degrees
Move into position over the paper.
Highlight the paper layer and click anywhere outside of it with your Magic Wand.
Selections/Invert
Highlight the ribbon layer.
Use your Eraser tool and erase all that overhangs the paper.
Deselect.
Use your Burn Tool - default settings - and barely burn the ends of the ribbon at the paper’s edge.

Copy and paste Heart Ribbon Red as a new layer.
Resize 60%
Free rotate left 25 degrees
Move into position.
Duplicate/Move it behind the paper.
Highlight the paper layer and click anywhere outside of it with your Magic Wand.
Highlight the Heart Ribbon layer that’s above your paper in your layers pallet.
Selections/Invert
Use your Eraser tool and erase parts of the heart to give it the effect like it’s hung over the paper.
Deselect.

Copy and paste Frame Circle Heart Black as a new layer.
Resize 60%
Click inside of it with your magic Wand.
Selections/Modify/Expand by 6.
New Raster layer below the frame.
Copy and paste a paper of choice Into Selection.
Copy and paste your tube as a new layer.
Selections/Invert
Tap the delete key.
Deselect.
Change the Properties to Hard Light.
Lower the Opacity to about 51 or so.

Copy and paste your tube as a new layer.

Add your embellishments. I used:
Love Rose: Resize 40%
Love Rose again: Resize 35%/Flip
Love Heart Red Brown: Resize 60%

Highlight your white background.
Select All
New Raster layer.
Copy and paste a paper of choice Into Selection.
Deselect.
Apply the mask.
Merge Group.

Crop your Image.

Add your credits.

Add your name.
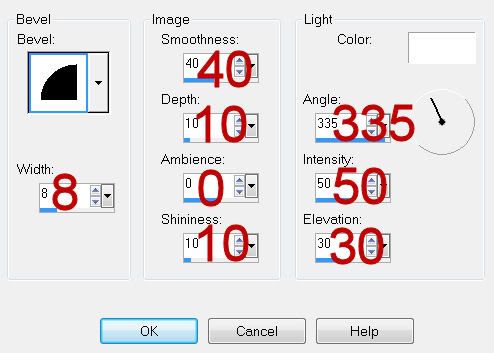
Give it a slight inner bevel:


I hope you enjoyed this tutorial.
I’d love to see your results and show it off in my gallery.
Email me!
Hugs,
Bev