Saturday, October 31, 2015

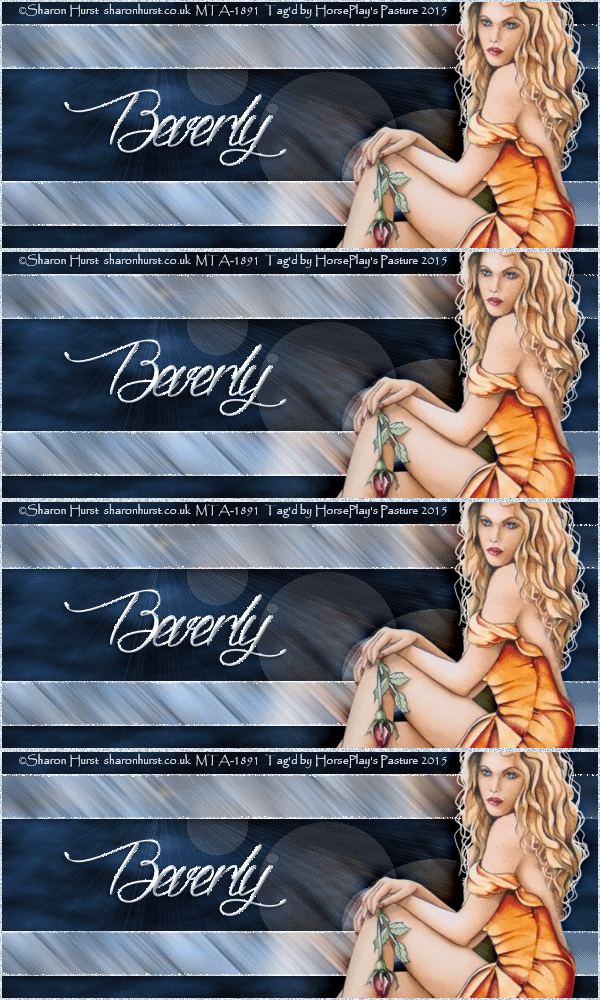
Past Midnight


Supplies Needed

1 tube of choice – I used the beautiful artwork of Sharon Hurst and can be purchased from My Tubed Art.  You must have a license to use.

Font of choice – I used Dragon is Coming here

Plug Ins used:
Mura’s Meister – Cloud
Mura’s Meister – Copies
Xenofex 2 – Constellation
Artistic - Watercolor

Animation Shop
  
This tutorial was written assuming you have working knowledge of PSP. 

~~ Let’s get started ~~

Open up a 600 x 250 pixel blank canvas.
Flood fill white.

Color Pallet:
Foreground: #17202d
Background: #658fb4

New Raster layer.
Apply Mura’s Meister – Cloud
(your color pallet colors will already be in it)
OK
Duplicate the cloud layer.  Change the Properties to Multiply.
Merge Down.

Color Pallet:
Close out the foreground.

Make your Rectangle Tool active.
Create a strip that’s approximately 48 pixels long and runs across your canvas and beyond the edge.  (This is important because you don’t want sparkles on the side edges of the strip)
Move it into position near the top of your canvas – see my tag as reference.
Duplicate the strip.
Flip.
Be sure both strips are in exact position – see my tag for reference.
Merge Visible both strip layers.
These strips will be used as a “template” in just a little bit.

Copy and paste your tube as a new layer (don’t worry about resizing).
Apply Mura’s Meister – Copies:
Choose Wallpaper (shrink)
OK
Adjust/Blur/Motion Blur:
Angle: 315
Strength: 100%
OK
Repeat the Blur effect.
New Raster layer below the Blur layer.
Flood fill with your foreground color.
Merge Visible the Blur layer and Flood fill layer.
Highlight the “template” layer you created.
Click on each strip with your Magic Wand.
Highlight the merged blur and flood fill layer.
Right click on it and choose “Promote Section to Layer” from the sub menu.
Do Not deselect.
Adjust/Sharpness/Sharpen More
Sharpen again.
Delete the Original merged blur and flood fill layer.
Duplicate the Promoted Section layer 3x’s for a total of 4.
Rename them Strip 1, Strip 2, Strip 3, and Strip 4.
Change the Properties of each of these layers to Luminance (Legacy).

Highlight Strip 1.
Selections/Modify/Select Selections Border:
Both Sides and Anti Alias checked
Border Width: 2
OK
Apply Xenofex 2 – Constellation –

OK

Highlight Strip 2.
Repeat the above step accept hit the Random Seed button once.
OK.

Repeat the above step with Strip 3 and Strip 4 layers.
Deselect.
Close out Strip 2, 3, and 4 layers.
Only keep Strip 1 layer open.

Highlight the Cloud layer.
Effects/Illumination Effects/Sunburst –
Match your settings to mine:

OK.

Copy and paste your tube as a new layer at the top of your layers pallet.
Resize as you like..
Move into position at the right side of your canvas – see my tag as reference.
Paste your tube again and leave it a bit larger than the other.  Move this just below the other tube in your layers pallet.  Move into position just slightly to the left and up a little from the other tube.
Apply Artistic – Watercolor:
Brush Detail: 9
Shadow Intensity: 0
Texture: 1
OK
Adjust/Blur/Motion Blur 2x’s:
Use same settings.
Change the Properties to Overlay.

Color Pallet:
Foreground: Close it out
Background: #d0dae4

Type your name.
Give it a slight Inner Bevel:

Apply Constellation:
Use same settings
OK

New Raster layer at the top of your layers pallet.
Flood fill with #d0dae4.
Select All.
Selections/Modify/Contract by 2.
Tap the delete key.
Deselect.
Adjust/Add Remove Noise/Add Noise:
Gaussian and Monochrome checked
Noise: 34%
OK

Copy Merged.

~Time to Animate~

Open up Animation Shop.
Edit/Paste As New Animation.

Back in PSP.
Close out Strip 1.
Open up Strip 2.
Copy Merged.

Carry into AS
Edit/Paste/After Current Frame.

Back in PSP.
Close out Strip 2.
Open up Strip 3.
Copy Merged.

Carry into AS
Edit/Paste/After Current Frame.

Back in PSP.
Close out Strip 3.
Open up Strip 4.
Copy Merged.

Carry into AS
Edit/Paste/After Current Frame.

View your animation.
If you’re happy with it then save.
   
I’d love to see your results.
Email me!
Hugs,
Bev

Thursday, October 29, 2015

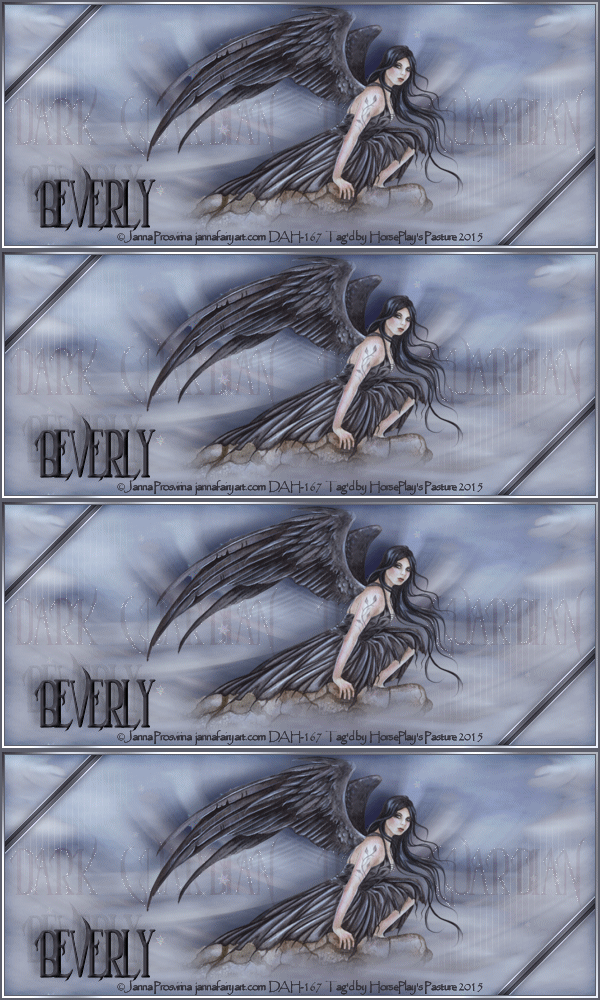
Dark Guardian


Supplies Needed

1 tube of choice – I used the artwork of Janna Prosvirina which can be purchased from Digital ArtHeaven.  You must have a license to use.

Font of choice – I used Parseltongue here

Plug Ins used:
Mura’s Meister – Cloud
Tramages – Tow the Line
Greg’s Factory Output Vol. II – Pool Shadow
Xenofex 2 – Constellation

Animation Shop

This tutorial was written assuming you have working knowledge of PSP. 

~~ Let’s get started ~~

Open up a 600 x 250 image.
Flood fill white.

New Raster layer.
Select All.
Copy and paste the image layer from the tube Into Selection.
Lock the layer by clicking on the icon at the top of the layers pallet.
Adjust/Blur/Radial Blur:
Spin checked.
Use Default settings.
OK.
Duplicate this layer.
Mirror
Change the Properties to Lighten.

Color Pallet:
Foreground: #646572
Background:  #b6c0ce

New Raster layer.
Apply Mura’ s Meister – Cloud.
You’ll already have the correct colors (from setting your color pallet) so just click OK.
Change the Properties of this layer to Hard Light.

Close out your white background.
Merge Visible.
Reopen your white background.

Duplicate the merged layer.
Apply Tramages – Tow the Line -
Match your settings to mine:

Make your Freehand Selection Tool active.
At the top where the settings are for this tool, be sure the following settings are:
Selection Type: Freehand
Mode: Add (Shift)
Feather: 25
Smoothing: 0
Section out 2 areas where the light lines are:

Selections/Invert
Tap the delete key until you have a nice feathered effect of the areas you chose.
Deselect.
Change the Properties to Soft Light.
Lower the Opacity to about 34.

In your Color Pallet, switch the colors so the dark color is now your background color.
Close out the foreground color.

Make your Rectangle Tool active:
Mode: Rectangle.
Create a thin strip about 10 pixels wide by about 200 pixels long.
Objects/Align/Center in Canvas.
Convert to Raster layer.
Click on it with your Magic Wand (be sure to change Feather amount back to 0!)
Effects/Text Effects/Blinds -
Match your settings to mine:

Free Rotate Right 45 degrees.
Click anywhere outside of it with your Magic Wand.
Selections/Invert
Apply Greg’s Factory Output Vol. II – Pool Shadow –
Match your settings to mine:

Deselect.
Duplicate/Mirror/Flip
Merge Down
Both Strips should now be on the same layer.
Effects/Edge Effects/Enhance

Color Pallet:
Make your lighter color your background.
Close out the foreground.

Make your Symmetric Tool active.
Mode: Draw Stellated
Create on Vector checked
Number of Sides: 6
Radius: 49.21
Round Inner and Round Outer Unchecked
Line Style: Solid
Width: 2.00
Miter Limit: 15

Near the center of your canvas create a small star.
Objects/Align/Center on Canvas.
Convert to Raster layer.
Adjust/Add Remove Noise/Add Noise:
Uniform checked
Noise: 30%
OK
Apply Mura’s Meister – Copies:
Choose Wallpaper (Perspective)
Use default settings
OK
Erase the stars you don’t want to keep.

Color Pallet:
Foreground: #2a242a
Background: #6e5e5a

Make your merged background layer active.
Type the words “Dark Guardian” over and again until the words run across your canvas – see my tag for reference.
Convert to Raster layer.
Change the Properties to Soft Light.
Duplicate 3 x’s for a total of 4 word layers.
Rename the layers – DG1, DG2, DG3, DG4
Highlight DG1 layer.
Apply Xenofex 2 – Constellation:
Match your settings to mine:

OK

Highlight DG 2 layer.
Apply the same effect accept hit the Random Seed button once.

Repeat the above step with DG 3, and DG 4.
Close out all DG layers 2, 3, and 4.  Keep DG1 Open.

New Raster layer at the top of your layer’s pallet.
Flood fill with #5e5f6c
Select All
Select/Modify/Contract:
Number of Pixels: 2
OK
Tap the delete key.
Flood fill with #dde1eb
Selections/Modify/Contract by 2.
Tap the delete key.
Flood fill with #5e5f6c
Selections/Modify/Contract by 1.
Tap the delete key.
Deselect.
Make your Magic Wand active.
Zoom in on the frame you just created and click on the light colored area.
Apply Greg’s Factory Output Vol. II – Pool Shadow:
Change the settings to match mine:

OK


Copy and paste your tube as a new layer - see my tag for reference.

Color Pallet:
Foreground and Background: #3a3840

Type your name.
Give it a slight Inner Bevel:

Duplicate your name layer and move it slightly to the lift and up a little.
In your layers pallet move this name layer below the other.
Change the Properties to Soft Light and lower the Opacity to about 18.

Add your credit.

Copy Merged.

~Time to Animate~

Open up Animation Shop.
Edit/Paste/As New Animation

Back in PSP.
Close out DG 1 layer.
Open up DG 2 layer.
Copy Merged.

Carry into AS.
Edit/Paste/After Current Frame.

Back in PSP.
Close out DG 2 layer.
Open up DG 3 layer.
Copy Merged.

Carry into AS.
Edit/Paste/After Current Frame.

Back in PSP.
Close out DG 3 layer.
Open up DG 4 layer.
Copy Merged.

Carry into AS.
Edit/Paste/After Current Frame.

View your animation.
If you’re happy then save.
   
I’d love to see your results.
Email me!
Hugs,
Bev

Tuesday, October 27, 2015

Slayer


Supplies Needed

1 tube of choice – I used the amazing artwork of Ariane Soares which can be purchased from My Tubed Art.  You must have a license to use. 

Font of choice – I used Black Adder II here

JWY Mask here

My template 168 here

Plug Ins used:
Xenofex 2: Burnt Edges
Eyecandy 5: Nature – Fire
Eyecandy 5: Textures – Stone Wall and Wood

“Enchanted Warrior” is a PTU tagger size scrap kit created by Tracey of Scrapz n Pleasure and can be purchased from Mystical Scraps.  You can visit her blog here.  Thank you Tracey for a wonderful kit! 
  
This tutorial was written assuming you have working knowledge of PSP. 

~~ Let’s get started ~~

Open up the template.
Shift + D.
Close out the original.
Delete the credit layer, Raster layers 9, 6, 4, 3, and 1.
Highlight the background layer.  
Image/Canvas Size:
700 x 600
OK
Flood fill white.

Highlight Raster 2 template layer.
Click on it with your Magic Wand.
New Raster layer.
Copy and paste Paper 1 Into Selection.
Deselect.
Apply Xenofex 2: Burnt Edges:
Match your settings to mine:

OK
Delete the template layer.
Duplicate the burnt paper.
Tap the letter K on your keyboard to activate your Pick Tool and push the side in until you have a very thin strip.  Center it over the burnt paper – see my tag for reference.

Highlight Raster 5 template layer.
Click on it with your Magic Wand.
New Raster layer.
Copy and paste Paper 4 Into Selection.
Copy and paste Element 63 as a new layer (it’s very large, you won’t see it)
Resize 20%
Move into a position you like over the circle paper layer.
Right click on the element in your layer’s pallet.  Choose “Promote Section to Layer” from the sub menu.
Close out the original element layer.
Selections/Modify/Expand by 4.
New Raster layer below the paper layer.
Copy and paste Paper 1 Into Selection.
Deselect.
Give it a slight Inner Bevel:
Delete the template layer.

Highlight Raster 8 template layer.
Repeat the above step.
At this step you can also delete the original element layer.

Highlight Raster 7 template layer.
Click on it with your Magic Wand.
Apply Eyecandy 5: Textures – Wood
Settings Tab:
Choose Pine Floor

Basic Tab:

Grain Tab:

Panel Tab:

OK
Deselect.

Move Raster 11 template layer just below Raster 13 layer in your Layers Pallet.
We’ll come back to these in a bit.

Highlight Raster 10 layer.
Click on it with your Magic Wand.
Copy and paste element 41 as a new layer.
Resize 130%
Move into position over the template layer so that only the rock floor and background are seen – see my tag for reference.
In your layers pallet, right click on the element and choose “Promote Section to Layer”
Deselect.
Delete the template layer.

Move the original element about Raster 12 template layer.
Repeat the above step.
Once you’ve completed the step, delete the original element layer.
Merge Visible both of the promoted layers.

Highlight Raster 11 layer.
Click on it with your Magic Wand.
Apply Eyecandy 5: Texture – Stone Wall.
Settings Tab:
Cobble Stone

Basic Tab:

DO NOT deselect yet.

Selections/Modify/Select Selections Border:
Both and Anti Alias checked
Border Width: 2
Selections/Modify/Inside Outside Feather:
Both checked
Feather Amount: 2
OK
Press Shift + B on your keyboard.
Your Brightness/Contrast box will appear:
Brightness: -100
Contrast: -30
OK
Select None.

Highlight Raster 13 template layer.
Repeat the above step.

Merge Visible both stone frame layers.

Copy and paste your tube below the frame layers.
Change the Opacity to Soft Light and Lower the Opacity to about 48.
Move into position beneath the left frame.
Highlight the merged frame layer.
Use your Magic Wand and click just inside the left frame.
Selections/Modify/Expand by 4.
Selections/Invert
Tap the delete key.
Deselect.

Add your elements below the frames.  I used:
(Don’t worry about what overhangs the frames.  We’ll clean that up in a bit)
Element 46:  Resize 30%
Element 11:  Resize 25%
Element 58:  Resize 5%
Element 62:  Resize 5% and 25%/Duplicate as many times as you like.
Element 6:  Resize 45%

Highlight the merged stone frames layer.
Click inside each one with your Magic Wand.
Selections/Modify/Expand by 4.
Selections/Invert
Highlight and tap the delete key of each element that overhangs the frames.
Deselect.

Copy and paste Element 30 as a new layer.
Resize 40%
Give it a drop shadow.
Make your Freehand Selection Tool active.
Section off an area where you’d like the fire to be:

Apply Eyecandy 5: Nature – Fire:
Settings Tab:
Medium – Torch

Basic Tab:

Click the Random Seed button until you have a flame you like.
OK
Deselect.

Copy and paste your tube as a new layer.

Add your elements.  I used:
EL6:  Resize 45%
EL 37:  Resize 65%
EL55:  Resize 70%/Flip/Duplicate/Mirror
EL27:  Resize 70%
EL60:  Resize 25%
EL28:  Resize 25%
EL7:  Resize 60%/Free rotate Left 7 degrees/Duplicate/Mirror
EL10:  Resize 8%/Duplicate 3x’s
EL15:  Resize 30%/Use Target Tool to change the color to #a67f4b

Add your copyrights.

Add your name:
Open up Paper 1 and 4
Color Pallet:
Foreground and Background:  Pattern/Paper 4
Make your Text Tool active
Type your name
Give it a slight Inner Bevel:

Select All/Float/Defloat
Selections/Modify/Expand by 2.
New Raster layer below your name.
Flood fill with Paper 1.

Open up the mask.
Rotate the mask right:

Highlight your white background.
New Raster layer.
Select All.
Copy and paste Paper 1 Into Selection.
Deselect.
Apply the mask.
Merge Group.

I’d love to see your results.
Email me!
Hugs,
Bev