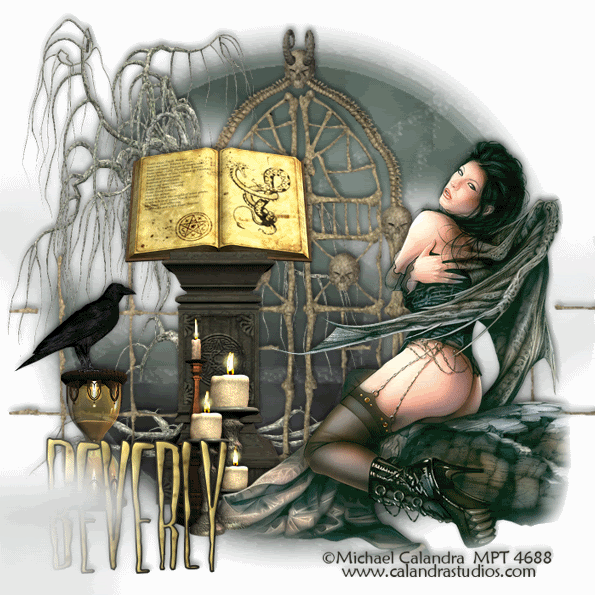
Clicking on the above image will enlarge to full view
and show the animation.
Supplies
1 tube of choice - I’m using the artwork of Jennifer Janesko which you can purchase here
Font of Choice - I’m Artifice SSK here
Becky Mask 22 here
Animation Shop
“Wind Song” is a PTU tagger size scrap kit created by Lynne of Baby Cakes Scraps and can be purchased at Scraps with Attitude.
Thank you Lynne for an amazingly delicate kit!
This tutorial was written assuming you have a working knowledge of PSP.
~♥~ Let’s get started ~♥~
Open up a 700 X 700 transparent image.
Flood fill white.
Copy and paste Ribbon Frame 3 as a new layer.
Use your Magic Wand and click inside of it.
Selections/Modify/Expand by 3.
New Raster Layer below the frame.
Copy and paste a paper of choice Into Selection.
DO NOT DESELECT.
New Raster Layer beneath the frame.
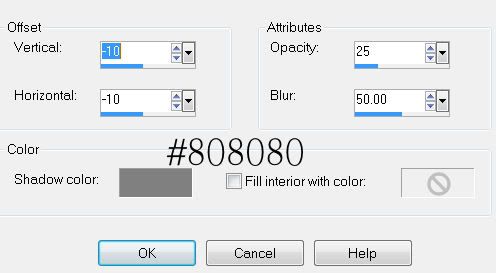
Effects/3D Effects/CutOut
New Raster Layer.
Repeat the cutout effect accept change the horizontal numbers to 10.
Copy and paste Baby’s Breath as a new layer.
Resize 60%
Free rotate right 25 degrees.
Position behind the frame.
Duplicate as many times as you like and move them into position.
Copy and paste Glitter Flower 2 as a new layer.
Resize 40%.
Duplicate as many times as you like and position behind the frame.
Copy and paste Floral Butterfly as a new layer.
Resize 25%
Duplicate.
Highlight your white canvas.
New Raster Layer.
Select All.
Copy and paste a paper of choice Into Selection.
Deselect.
Copy and paste Wire as a new layer.
Position at the top left corner of your canvas. Lower the Opacity to 89.
Copy and paste Cloud 2 as a new layer.
Position it near the bottom right corner a little. Lower the opacity to 77.
Copy and paste the bubbles as a new layer.
Merge visible the paper, wire, cloud, and bubbles.
Apply the mask.
Merge Group.
Add your copyrights.
Add your name.
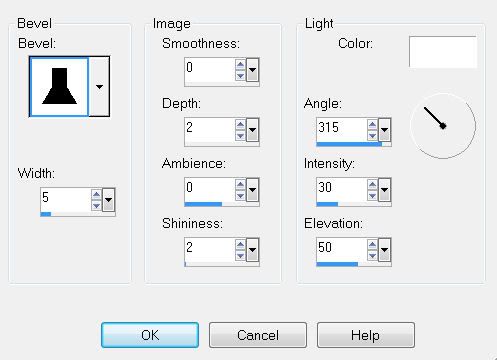
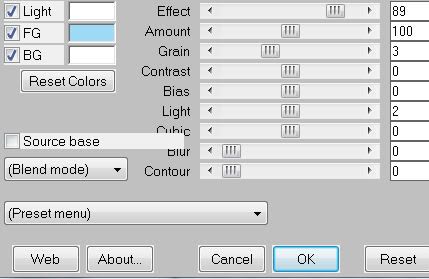
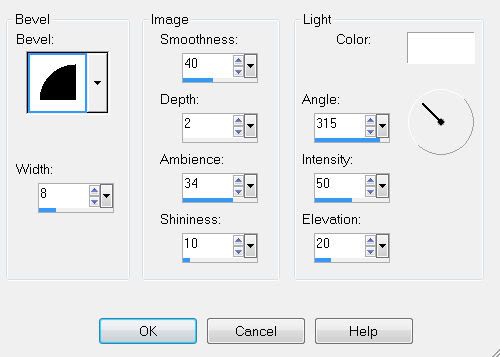
I gave mine a slight inner bevel:
Duplicate twice for a total of 3 layers.
Rename them Name 1, 2, and 3.
Highlight Name one.
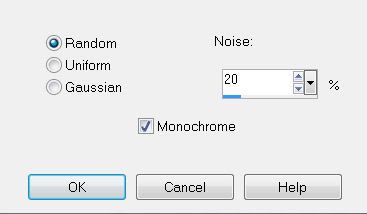
Adjust/Add/Remove Noise/Add Noise
Highlight Name 2 and apply the Noise accept change the Noise number to 30.
Repeat with Name 3 accept change the Noise number to 40.
Close out Names 2 & 3.
Resize all layers 85%.
Copy Merge.
Time to animate:
Carry into Animation Shop.
Edit/Paste/As New Animation.
Back in PSP.
Close out Name 1.
Open Name 2.
Copy Merge.
Carry into AS.
Edit/Paste/After Current Frame.
Back in PSP.
Close out Name 2.
Open Name 3
Copy Merge.
Carry into AS.
Edit/Paste/After Current Frame.
View your animation.
If you’re happy then save.
I hope you enjoyed this tutorial.
I’d love to see your results and show it off in my Show Arena.
Email me!
Hugs,
Bev