Saturday, March 21, 2009

Sexy, Sensual, Seductive


Clicking on the image will show the enlarged version

Supplies Needed

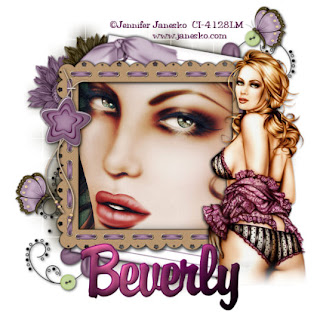
1 tube of choice and 1 close up image of choice. I'm using the artwork of Jennifer Janesko which you can purchase here
Font of choice - I'm using Ge Brady here
Weescotlass Mask 84 here
"Crossed Emotions" PTU scrap kit by Creative Intentionz which can be found at Paradise4Scrappers. Please visit Nikki’s blog here.
This kit is stunning!

This tutorial was written assuming you have working knowledge of PSP.

~♥~ Let’s get started ~♥~

Open up a 700 X 700 blank canvas. Flood fill white.

Copy and paste Frame 2 as a new layer. Resize 70%. Click inside of it with your Magic Wand. Selections/Modify/Expand by 4.

Copy and paste a paper of choice below the frame.

Copy and paste your image below the frame. Hit the delete button. Close out your white canvas and merge visible. Open up all your layers.

Copy and paste Journal 2 as a new layer beneath the frame layer. Free rotate right 10 degrees.

Copy and paste Flower Doodle 1 as a new layer. Image flip. Move into position near the bottom left corner of your frame. Duplicate/Flip/Mirror. Merge down.

Copy and paste Flower 2 as a new layer. Resize 50%. Move into position. See my tag for reference. Duplicate/Mirror/Flip.

Copy and paste Flower 2 as a new layer. Resize 50%. Move into position. See my tag for reference. Duplicate/Mirror/Flip.

Copy and paste your tube as a new layer above the frame layer.

Highlight your white canvas. New Raster layer. Select All. Copy and paste a paper of choice Into Selection. Deselect. Apply your mask. Merge Group.

Add your copyrights.

Add your name.

Crop your image. Resize if you like.

I hope you enjoyed this tutorial.
I’d love to see your results.
Email me!
Hugs,
Bev

Beautiful


Clicking on the image will show it in full view.
Supplies Needed

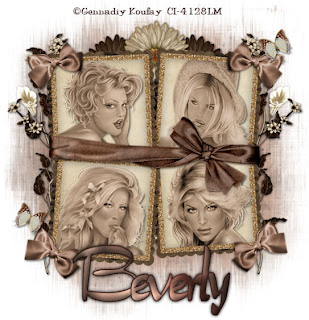
4 tubes of choice – I'm using the artwork of Gennadiy Koufay
which you can purchase here
Font of choice - I'm using Tabitha Regular
Weescotlast Mask 39 here
Greg’s Factory Output Vol. II – Pool Shadow
"Beautiful" FTU scrap kit by Bel Vidotti Scraps which can be found at here.
Please leave a thank you when downloading.
It’s a small gesture in return for hard work given freely.

This tutorial was written assuming you have working knowledge of PSP.

~♥~ Let’s get started ~♥~

Open a 700 X 700 canvas. Flood fill white.

Copy and paste Frame 4 as a new layer. Use your magic wand and click inside of each square. Selections/Modify/Expand by 4.

Copy and paste a paper of choice as a new layer beneath the frame. Selections/Invert. Hit the delete key.

Copy and paste a tube as a new layer beneath the frame layer. Position inside one of the frame squares. Hit the delete key.
Effects/Photo Effects/Sepia Toning
Amoun to age:
64
Ok

Repeat the above step for each square. Once that is done, deselect. Close out your white background and Merge Visible.

Copy and paste Flower 6 as a new layer. Resize 80%. Position behind the frame, but allowing some of the leaves to peek out. Duplicate/Mirror.

Copy and paste Flower 4 as a new layer. Free rotate left 25 degrees. Duplicate/Mirror. Merge down. Duplicate and move that layer lower. Merge down. Move this behind your merged frame layer. Use your eraser tool to erase anything that is sticking from behind the frame.

Copy and paste Wrap 5 as a new layer. Resize 62%. Image/Mirror. Image/Flip.

Copy and paste Bow 2 as a new layer. Resize 40%. Free rotate left 25 degrees. Move it to the top left corner. Duplicate/Mirror. Paste the bow as a new layer once again. Resize again. Free rotate right 25 degrees. Duplicate/Mirror.

Copy and paste Flower 2 as a new layer. Resize 40%. Move into position. See my tag for reference.

Copy and paste Flower 1 as a new layer. Move it slightly to the left of the other flower. Move it behind the flower. Duplicate/Mirror.

Copy and paste a butterfly as a new layer. Resize 20%. Free rotate 25 degrees in the direction of your choice.
Highlight your white canvas. Select All. Copy and paste a paper of choice Into Selection. Deselect. Apply your mask. Merge Group.

Add your copyrights.

Add your name. For mine I used:
Stroke set at 1
Foreground: #311b17
Background: #311b17

Click the Gradient tab on the background:
Style: Linear
Angle: 45
Repeats: 2

Once you’ve added your name be sure it’s now a Raster layer and not Vector. Select All/Float/Defloat/Modify/Contract by 1.
Effects/Plugs-Ins/Greg’s Factory Output Vol II/Pool Shadow
Use default settings.
Ok
Deselect.
Add a slight inner bevel and heavy drop shadow.

Crop your image.

I hope you enjoyed this tutorial.
I’d love to see your results.
Email me!
Hugs,
Bev
Poppy Love

Clicking on the image will give full view
Supplies Needed

Font: Cooper Black – should already be in your PSP program
Weescotlass Mask 62 here
Filters Unlimited 2 (optional)
“Poppy Love” PTU tag size mini kit by Bits ‘n Bobs here. Please visit Julie’s bog here.
Thank you Julie for such a wonderful mini kit!

This tutorial was written assuming you have working knowledge of PSP.

~♥~ Let’s get started ~♥~

Open a 600 X 600 canvas. Flood fill white.

Copy and paste Element 4 as a new layer. Resize 75%. Click inside with your magic wand. Selections/Modify/Expand by 4.

New Raster Layer beneath the frame layer. Flood fill with your gradient.
Adjust/Blur/Gaussian Blur
Radius: 5.00

I gave my gradient a texture using Filters Unlimited 2.
Paper Texture/Canvas,Fine
Factory settings
Ok

Copy and pate Element 1 as a new layer. Image/Mirror. Resize 80%.

Copy and paste your elements. I used:
Butterfly: Resize 30%. Duplicate. Resize 80%.
Poppy Flowers: Resize 40%. Duplicate. Resize 80%.
Element 2.

Highlight your white canvas. New Raster layer. Select All. Copy and paste a paper of choice Into Selection. Deselect. Apply the mask. Merge Group.

If you used a tube, add your copyrights. I gave credit to Julie.

Add your name. I used a paper each for the foreground and background.

Crop your image.

I hope you enjoyed this tutorial.
I’d love to see your results.
Email me!
Hugs,
Bev

Diva's with Attitude


Clicking on the image will enlarge it to full view.
Supplies Needed

4 tubes of choice – I'm using the artwork of Keith Garvey
which you can purchase here
Font of choice - I'm using Rum Bubber
Becky Mask 22 here
DSB Flux (Optional)
Animation Shop (optional)
"Diva with an Attitude" tagger kit by Twinky Dezines which can be found here.
Please visit her blog here.
Thank you Twinky for another awesome kit!

This tutorial was written assuming you have working knowledge of PSP.

~♥~ Let’s get started ~♥~

Open a 750 X 750 canvas. Flood fill white.

Copy and paste Negative Frame 1 as a new layer. Use your magic wand and click inside of each square, including the piece of a square at the very top. Copy and paste a paper of choice below the frame layer. Selections/Invert. Hit the delete key. Deselect.

Use your magic wand and click inside the top square. Selections/Modify/Expand by 3. Copy and paste a tube beneath the frame. Hit the delete key. Repeat this step for the other 2 squares. Merge visible the frame, tubes, and background paper. You should not have only your white canvas and the merged frame layer.

Copy and paste a Journal of choice as a new layer. Position behind the frame.

Copy and paste a Butterfly of choice as a new layer. Resize 40%. Free rotate right 20 degrees.

Copy and paste your tube as a new layer.

Copy and paste word art as a new layer. Resize 60%. Move into position behind your tube.

Add your embellishments. I used:
Ribbon: Resize 30%
Heart: Resize 50%.

Copy and paste the Lips as a new layer behind your tube. Resize 40%. Free rotate right 15 degrees. If you intend to animate then duplicate twice for a total of 3 and rename Lips 1, 2, and 3.

On Lips 1 apply the DSB Flux/Bright Noise with these settings:
Intensity: 47
Mix
OK

On Lips 2 apply the same accept hit the mix button twice. On Lips 3 apply the same accept hit the mix button 3 times.

Close out all lip layers, word art, and white canvas. Merge visible. Duplicate the word art. Close out the duplicated word art layer and move the other word art layer behind the merged layer. Close out your white canvas and merge visible. Duplicate. Open up your white canvas. Highlight the merged layer. Adjust/Blur/Gaussian Blur:
Radius 35.
Duplicate/Mirror/Merge Down. Apply your mask to this layer. Merge group.

Now open up your word art layer and move behind the Copy of Merged Layer.

Yikes! That was a lot of copying, merging, duplicating, opening and closing, merging down! I hope you’re still with me...hehehe.

Add your copyrights.

Add your name.

Onto the Animation:
Be sure Lips 1 layer is open and Lips layer 2 & 3 are closed. Copy merge. Carry into Animation shop. Edit/Paste as New Animation. Go back into PSP. Close out Lips layer 1 and open Lips layer 2. Copy merge. Carry into AS. Edit/Paste after Current Frame. Go back into PSP. Close out Lips 2 layer and open up Lips 3 layer. Carry back into Animation Shop. Edit/Paste after Current Frame. View your animation. If you’re happy with it then save.

I hope you enjoyed this tutorial.
I’d love to see your results.
Email me!
Hugs,
Bev

Wednesday, March 18, 2009

Spring Celebration


Clicking on the image will let you see it in full view

Supplies Needed

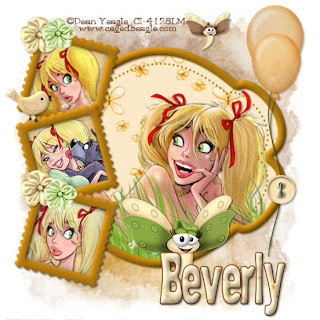
4 tubes of choice – I'm using the artwork of Dean Yeagle
which you can purchase here
Font of choice - I'm using Tom Bombadill
Template Created by Jill #13 here
Becky Mask 22 here
"Sweet Spring" scrap kit by Scraps by Danielle which can be found at Dazzling Scraps. Please visit her blog here.
This kit is gorgeous and shouts spring without a doubt!
Thank you, Danielle for another beautiful kit.

This tutorial was written assuming you have working knowledge of PSP.

~♥~ Let’s get started ~♥~

Open up the template. Shift +D. Close out the original. Delete the copyright layer.

Highlight Large Tag. Select All/Float/Defloat. Copy and paste a paper of choice as a new layer. Resize to your liking. Selections/Invert. Hit the delete key. Copy and paste your tube as a new layer. Hit the delete key. Deselect. Delete the template layer.

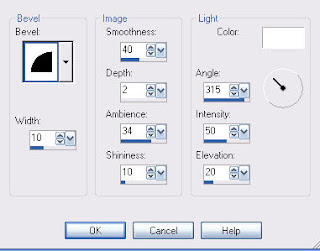
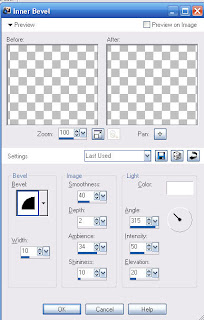
Highlight Large Frame Tag layer. Select All/Float/Defloat. New Raster Layer. Choose a complimentary color from your paper and flood fill. Deselect. Delete the template layer. Add an inner bevel to the frame:


Repeat the above for Stamp Frame 1, Stamp Frame 2, and Stamp Frame 3.

Highlight Stamp Frame 1 bg. Select All/Float/Defloat. Copy and paste a paper of choice, resizing to your liking. Selections/Invert. Hit the delete key. Copy and paste your tube beneath the frame layer. Merge visible the frame, tube, and background. Delete the template layer. Repeat for Layers Frame 2 bg and Frame 3 bg.

I figured out a way to “cheat” and make things easier on me when it comes to coloring the Diamond Tag Line layer. Select All/Float/Defloat.
Create a new 700 X 700 blank image. Flood fill it with the same color you used on the frames. Copy and then close it out. You don’t need it any more. Paste as a new layer on your working canvas just above the Diamond Tag Line Layer. Selections/Invert. Hit the delete key.

Add your elements. I used:
Bird 3: Resize 10% and 50%. I gave it a slight inner bevel.
Dragonfly: Resize 25% and another at 10%.
Silk Flowers: Resize 10% and 70%. Another I resized once again 80%.
Balloon: Resize 25% and 60%. Duplicate, resize 80%.
Button: Resize 25% and 70%.

Highlight your white canvas. New Raster Layer. Create a gradient using 2 colors from your paper or tubes. Flood fill the layer.
Adjust/Blur/Gaussian Blur
Radius: 20.00
OK

Apply your mask. Merge Group.

Add your copyrights.

Add your name.
I used stroke 2 of a dark color, and the fill I created a pattern from one of the papers.
Add a slight inner bevel.

I hope you enjoyed this tutorial.
I’d really love to see your results.
Email me!
Hugs,
Bev
Hangin' with the Girls


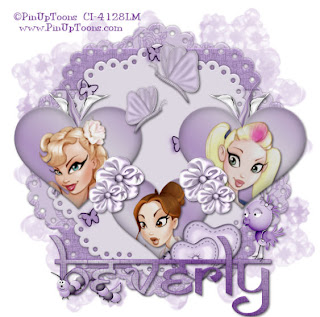
Clicking on the image will show you the full view

Supplies Needed

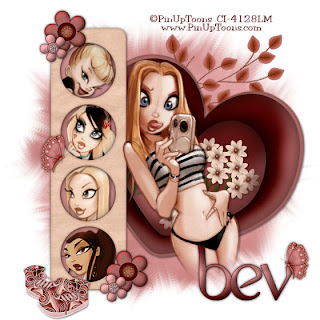
5 tubes of choice – I'm using the artwork of PinUpToons
which you can purchase here
Font of choice - I'm using HandScript Lcase
Weescotlass Mask 241 here
"Rion Rocks II" PTU tagger size kit by Created by Jill which can be found at Cotton Candy Kreations.
This kit is gorgeous and the possibilities of creating with it are endless!
This tutorial was written assuming you have working knowledge of PSP.

~♥~ Let’s get started ~♥~

Open up a 700 x 700 blank canvas. Flood fill white.

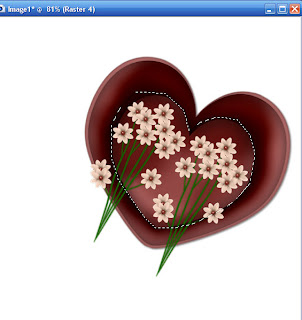
Copy and paste Box Heart as a new layer. Free Rotate right 25 degrees. Copy and paste Flowers 2 as a new layer. Free rotate right 25 degrees. Position the flowers so they’re within the inner circle. Don’t panic, the long green stems are supposed to be hanging way out there…hehehe.

Merge visible the flower layers. We’re going to feather them. Highlight the heart layer. Use your selection tool to outline the inner heart.

Selections/Modify/Feather. Number of Pixels: 52. Selections/Invert. Tap the delete key until you have the feathered look you want. Merge visible the heart and flowers.

I hope I didn’t lose you! The hardest part of this tut is done!

Copy and paste Frameg as a new layer. Use your magic wand and click inside of each circle. Selections/Modify/Expand by 4. Copy and paste a paper of choice below the frame. Selections/Invert. Hit the delete key. DON’T DESELECT YET.

Selections/Invert again. New Raster layer beneath the frame layer. Effects/3D Effects/Cutout with these settings:
Vertical and Horizontal: 5
Opacity & Blur: 25
Color: Black
OK
Repeat on another new raster layer accept change the horizontal and vertical to -5. Deselect. Merge the cutout layers together.

Use your magic wand and click inside the top hole. Selections/Modify/Expand by 4. Copy and paste a tube as a new layer just above the paper layer. Selections/Invert. Hit the delete key. Deselect. Repeat this until you have a tube in each hole. Once you’ve got that done then merge visible the frame, tubes, and merged cutout layer.

Position your heart and frame where you like on your canvas. Copy and paste your tube as a new layer. If you like, feather it the same as you did the flowers.

Add your elements. I used:
Flower 1: Resize 25% and 90%.
Flower 6: Resize 25% and 70%.
Butterfly 3: Resize 25%
Leaves 2
Sneakers: Resize 40% and 90%

Highlight your white canvas. New Raster Layer. Select All. Copy and paste a paper of choice Into Selection. Deselect. Apply the mask. Merge Group.

Add your copyrights.

Add your name.

I hope you enjoyed this tutorial.
I’d love to see your results.
Email me!
Hugs,
Bev
Butterfly Dreams


Clicking on the image will show it in full view.

Supplies Needed
3 tubes of choice – I'm using the artwork of PinUpToons
which you can purchase here
Font of choice - I'm using Samarkan here
Weescotlass Mask 277 here
Template #54 here
Filters Unlimited 2 (optional)
"Pastel Dreams" PTU tagger size kit by Scraps by Danielle which can be found here.
You can visit her blog here.

This tutorial was written assuming you have working knowledge of PSP.

~♥~ Let’s get started ~♥~

Open up the template. Shift + D. Close out the original. Delete the credit layer. Click on the bottom layer. New Raster Layer. Send to bottom. Flood Fill white. Make canvas 700 X 700.

Highlight Black Shape layer. Select All/Float/Defloat. Copy and paste a paper of choice as a new layer. Selections/Invert. Hit the delete key. Delete the template layer. Add a slight Inner Bevel:

Highlight Line 2. Select All/Float/Defloat. Copy and paste a paper of choice as a new layer. Selections/Invert. Hit the delete key. Delete the template layer. Add the same slight Inner Bevel. Effects/Filter Unlimited 2/Paper Texture/Papyrus. Use the factory settings. Ok.

Repeat the above step with Layer Line 1.

Highlight Shape 1. Select All/Float/Defloat. Copy and paste a paper of choice as a new layer. Selections/Invert. Hit the delete key. Delete the template layer. Add the same slight Inner Bevel.

Repeat this next step for Heart Layers 1 & 2.
Create a gradient that will match your papers.
Angle 45
Repeat 2
Invert checked
Highlight a heart. Select All/Float/Defloat. New Raster Layer. Flood fill with the gradient. Effects/3D Effects/Cutout with the following settings:
Vertical and Horizontal: 3
Opacity & Blur: 25
Color: Black
OK.
New Raster Layer. Repeat the Cutout Effect accept change the vertical and horizontal to -3. OK.
Copy and paste your tube above the heart layer. Selections/Invert. Hit the delete key. Delete the template layer. Merge visible (or merge down, whichever you find easier) the cutout effect layers, tube, and heart layer.

Highlight Heart 3. Select All/Float/Defloat. New Raster Layer. Invert your gradient and flood fill. Apply the same Cutout Effect. Copy and paste your tube as a new layer just above the heart layer. Merge visible (or merge down, whichever you find easier) the cutout effect layers, tube, and heart layer.

Apply the embellishments. I used:
Satin Flower 3: Resize 25%. Duplicate. Resize 80%.
Butterfly 3: Resize 25%. Duplicate. Resize 80%.
Hearts 2: Resize 50%.
Calla lilies 4: Resize 50%.
Chicken 2: Resize 40%.

Highlight you white canvas. New Raster Layer. Select All. Copy and paste a paper choice Into Selection. Apply the mask. Merge Group. Resize 90%. Crop your image. Be sure you don’t crop any of the mask off…hehehe

Add your copyrights.

Add your name. I used Filters Unlimited 2 on my name with the same settings as before. Gave it the same inner bevel. I also added a little fun to my name by making a catapiller crawl through one of the letters.

I hope you enjoyed this tutorial.
I would love to see your results and add them to my gallery.
Email me!
Hugs,
Bev


Tuesday, March 17, 2009

Eye of the Beholder


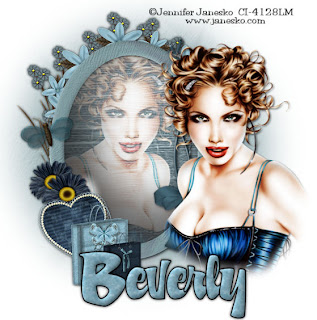
Clicking on the image will show full view.

Supplies Needed

1 tube of choice – I'm using the artwork of Jennifer Janesko
which you can purchase here
Font of choice - I'm using A & S Rhino
Becky Mask 19
"Grungeee Blu" PTU tagger size kit by Stitchy Angel Creationz which can be found here.
Supplies which include Font and Mask here.

This tutorial was written assuming you have working knowledge of PSP.

~♥~ Let’s get started ~♥~

Open up a 700 x 700 blank canvas. Flood fill white.

Copy and paste Bow Mirror as a new layer. Move slightly to the left side of your canvas. Using your Freehand Selection Tool, draw around the mirror, making the draw line only half way through the frame. Copy and paste a paper of choice below the frame layer. Selections/Invert. Hit the delete key.

Copy and paste your tube of choice as a new layer below the frame layer. Hit the delete key. Deselect. Close out your white canvas. Merge visible. Open all the layers back up.

Highlight the top layer and paste your tube as a new layer again. We’re going to feather it. Use your Freehand Selection Tool and trace around your tube in the shape you want it to be feathered. I did mine oval. Selections/Modify/Feather. Apply these settings:
Number of Pixels: 52
Ok
Selections/Invert. Tap the delete key until your image is feathered to your liking.

Copy and paste Blue Flowers as a new layer. Resize 50%. Move behind the frame layer and let the flowers peek out just a bit. Duplicate/Mirror. Duplicate once more and move it to peek out at the top of the frame. Merge visible the 3 flower layers.

Copy and paste Real Bouquet as a new layer. Resize 60%. Move beneath the Blue flowers layer, allowing these flowers to peek out from behind the blue flowers. Layer/duplicate. Duplicate and move it up toward the top middle of the frame. Layer/Duplicate. Merge visible all Real Bouquet layers. Open up all layers.

Add your elements. I used:
Butterfly 2: Resize 10%. Free rotate left 5 degrees.
Heart Tone: Resize 30% and again 60%. Free Rotate left 15 degrees.
Bag 2: Resize 30%.
Bag 1: Resize 20%.
Butterbow & Bow one: Resize 10%.

Highlight your white canvas. New Raster Layer. Select All. Copy and paste a paper of choice Into Selection. Deselect. Apply your mask. Merge Group. Move the mask slightly to the left.

Add your copyrights.

Add your name. I used
Foreground: #000000
Background: I made a pattern as follows:
Open up Bag 2. Use your Selection Tool and make a square on the light blue area. Edit/Copy. Edit/Paste as new image. Effects/Image Effects/Image Tiling. Use factory default settings. Hit ok.
Set your background color to Pattern (find the image you just created and click on it). Ok.
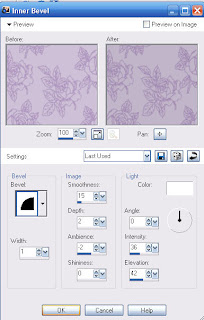
Now type your name. I gave mine an Inner Bevel:


Add a heavy drop shadow.

Crop your image and save your tag.

I hope you enjoyed this tutorial.
I would love to see your results and put it into my gallery.
Email me!
Hugs,
Bev

Brave Soldier


Clicking on the image will let you see it in full view.


Supplies Needed

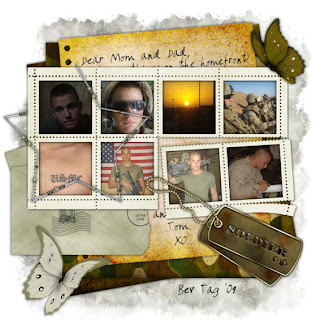
8 images of choice – I used pics my son brought back from Iraq
Font of choice – I used Amano here
Becky Mask 22 here
"Hero" FTU tagger kit by Cinnamon Scraps which can be found here.

When you download please leave a thank you.

This tutorial was written assuming you have working knowledge of PSP.

~♥~ Let’s get started ~♥~

Open up a 600 x 600 blank canvas. Flood fill white.

New Raster Layer. Select All. Copy and paste a paper of choice Into Selection. Deselect. Resize 60%. Effects/3D Effects/Inner Bevel:


Add a heavy drop shadow. Free Rotate left 10 degrees.

New Raster Layer. Repeat the above step with a new paper. Do not rotate.

Copy and paste Notepaper 1 as a new layer. Resize 90%. Using the font Amano, write a few words down at the top of the page and at the bottom of the page. Merge visible the notepaper and typed words only. Free Rotate left 5 degrees.

Copy and paste Frame 7 as a new layer. Resize 70%. For each square of this stamp do this:
Click inside with your magic wand. Selections/Modify/Expand by 2. Copy and paste your image of choice, resizing as necessary. Selections/Invert. Hit the delete key.

Once you’ve repeated the above step in each square, close out all layers accept the frame and images. Merge visible. Reopen all layers.

Copy and paste Envelope 1 as a new layer. Resize 60% and move beneath the frame layer. See my tag for reference.

You can add your elements. I used:
Dog Tags: Resize 80%.
Frame 2: Resize 50% and 90%.
Butterfly 1: 50%
Butterfly 2: resize 40%.

Highlight your white canvas. Select All. Copy and paste a paper of choice Into Selection. Deselect. Apply the mask. Merge Group.

Add your copyrights if you didn’t use your own personal images.

Add your name or a particular name you choose.

I hope you enjoyed this tutorial.
I would very much love to see your results and put it into my gallery.
If I get enough images from this tut from people I’d like to create another slide show to put on my blog dedicating it to all those brave soldiers that are fighting for freedom.
Email me!
Hugs,
Bev

Date Night

Clicking on the image will let you see it in full view
Supplies Needed

1 Tube of choice - I'm using the artwork of Keith Garvey
which you can purchase here
Font of choice - I'm using Cecily here
Becky Mask 23 here
"Valentine Blog Train" FTU taggers kit by RebelChick which can be found on her blog Whispers of a Memory.
When you download please leave a thank you.
It’s a small gesture in return for hard work that is given freely.

This tutorial was written assuming you have knowledge of PSP.

~♥~ Let’s get started ~♥~

In this tutorial use your target tool to change the color of the elements to match your tube if you wish.
Open a 600 X 600 transparent canvas. Flood fill white.
Copy and paste Frame 2 as a new layer. Resize 70%. Free rotate 90 degrees. Click inside of it with your Magic Wand. Selections/Modify/Expand by 6.

New Raster layer beneath the frame. Flood fill with a gradient of your choice using colors from your tube.

Copy and paste your tube as a new layer above your frame layer. Position. Duplicate/Mirror.

Highlight your frame layer. Click inside with your Magic Wand. Selections/Invert. Highlight the tube layer that you want to have appear as if it’s the image in the mirror. Hit the delete key.

Add your elements. I used:
Bow: Resize 30%.
Rose: Resize 30%. Duplicate. Resize 90%.

Highlight your white canvas. New Raster Layer. Select All. Copy and paste a paper of choice Into Selection. Deselect. Apply your mask. Merge Group.

Add your copyrights.

Add your name.

I hope you enjoyed this tutorial and would love to see your results.
Email me!
Hugs,
Bev
Lavendar Beauty

Clicking on the image will enlarge to full view.
Supplies Needed

1 Tube of choice - I'm using the artwork of PinUpToons
which you can purchase here
Font of choice - I'm using Aquarelle here
Sophisticated Simone Mask 14 here
DSB Flux (Optional)
Animation Shop (optional)
"About Love" FTU taggers kit by Monica’s Sweet Addiction which can be found on her blog here. When you download please leave a thank you.

This tutorial was written assuming you have knowledge of PSP.

~♥~ Let’s get started ~♥~
Open a 600 X 600 transparent canvas. Flood fill white.Copy and paste Element 10 (Frame) as a new layer. Resize 80%. Use your magic wand and click inside. Selctions/Modify/Expand by 6. Invert.

Copy and paste a paper of choice. Hit the delete key.

Copy and paste your tube of choice beneath your frame. Select none.

Add your elements. I used:
Flowers – resize 30%
Butterfly – resize 30%. Free rotate right 25 degrees.

Highlight your white background. New Raster layer. Select All. Copy and Paste Into selection a paper of choice. Deselect. Apply your mask. Merge Group. Duplicate twice for a total of 3 layers. Rename Mask 1, Mask 2, and Mask 3.

Highlight Mask 1. DSB Flux/Bright Noise with these settings:
Intensity: 28
OK

Highlight Mask 2. Apply the Bright Noise accept hit the mix button twice and then OK.

Highlight Mask 3. Apply the Bright Noise accept hit the mix button 3 times and then OK. Be sure to close out Mask layers 2 & 3.

Add your copyrights.

Add your name.

***Onto the Animation***

In PSP Copy Merge. Carry into AS.
Edit/Paste/As New Animation
Go back into PSP. Close out Mask Layer 1. Open up Mask Layer 2. Copy Merge. Carry into AS.
Edit/Paste/After Current Frame.
Go back into PSP. Close out Mask Layer 2. Open up Mask Layer 3.
Copy Merge. Carry into AS.
Edit/Paste/After Current Frame.

View your animation. If you’re happy with it then save your tag.

I hope you enjoyed this tutorial.
I’d love to see your results to put up in my gallery!
Email me!
Hugs,
Bev

Luck of the Irish


Clicking on the image will enlarge the tag to full size.
Supplies Needed

1 Tube of choice (and one close-up – optional) - I'm using the artwork of PinUpToons
which you can purchase here
Font of choice - I'm using Algerian here
Toadies – Ommadawn
"Lucky In Love" FTU taggers kit by Jaded Delusions designed by Eclipse which can be found on her blog here. When you download please leave a thank you.

This tutorial was written assuming you have knowledge of PSP.

~♥~ Let’s get started ~♥~
Open a 600 X 600 transparent canvas.
Flood fill white.Copy and paste Frame 1 as a new layer. Resize 80%. Use your magic wand and click inside. Selctions/Modify/Expand by 6. Invert.

Copy and paste a paper of choice. Hit the delete key.

Copy and paste your tube of choice beneath your frame (or your close up if you’re using one). If you’re resizing your tube, then hit the delete key afterward. Select none.

Copy and paste your tube of choice and position to one side of your frame.

Copy and paste the Shamrock as a new layer. Resize 60%. Move into position.

Copy and paste Vine 1 as a new layer just above your white canvas. Duplicate and move it down slightly. Merge down. Duplicate/Mirror/Flip.

Close out your white background. Merge visible. Duplicate. Highlight the original layer. Adjust/Blur/Gaussian Blur/Radius: 15

Toadies/Ommadawan/default settings.

Add your copyrights.

Add your name.

I hope you enjoyed this tutorial.
I’d love to see your results to put up in my gallery!
Email me!
Hugs,
Bev

Sunday, March 15, 2009

Seashells by the Seashore


Clicking on the image will let you see it full size.
Supplies Needed

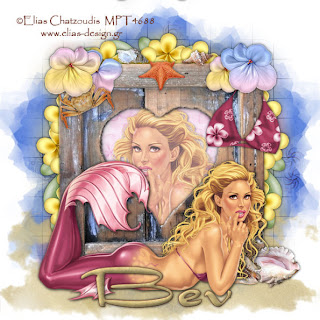
1 Tube of choice - I'm using the artwork of Elias Chatzoudis
which you can purchase here at Aussie Scraps Designs.
Font of choice - I'm using Dragonfly here
Weescotlass Mask 220 here
Toadies – Ommadawn
"Summertime" PTU taggers kit by Scrap Designs by Donna which can be found here.

Please visit her blog here.

This kit definately screams "Summertime"!

This tutorial was written assuming you have knowledge of PSP.

~♥~ Let’s get started ~♥~

Open a 700 X 700 transparent canvas. Flood fill white.

Copy and paste Frame 4 as a new layer. Use your Freehand Selection tool and draw around the rope handle. Hit the delete button.

Use your magic wand and click inside the frame. Selections/Modify by 6. Copy and paste a paper of choice as a new layer. Resize 60%. Hit the delete button.

Copy and paste your tube as a new layer just below the frame. Hit the delete button. Deselect. Close out your white background and merge visible. Open your background back up.

Copy and paste Bikini Top of your choice as a new layer. Resize 30%. Move into position so that it looks as if it’s hanging on the corner of the frame. Use your Selection Tool to remove part of the bikini string.

Copy and paste elements of your choice. I used:
Starfish: Resize 20%.
Crab: Resize 25%.
Different Flowers: Resize anywhere from 20% to 15%.
Frangipani (use selection tool to outline the cluster of flowers):
Resize 70%
Seashells: Resize anywhere from 15% to 10%.
Sand: Resize 70%. Duplicate/Mirror/Flip.

Close out your white canvas and merge visible. Duplicate. Adjust/Blur/Gaussian Blur with Radius: 10. Apply Toadies/Ommadawn with default settings. Use your Eraser Tool and erase the part of the Ommadawn layer that is overlapping the sand.

Open up your white canvas and highlight it. New Raster layer. Select All. Copy and paste a paper of choice Into Selection. Deselect. Apply your mask. Merge Visible. Resize 110%.

Add your copyrights.

Add your name. I gave mine an innerbevel:


I hope you enjoyed this tutorial.
I would love to see your results and put them into my gallery!
Email me!
Hugs,
Bev