Saturday, April 25, 2009

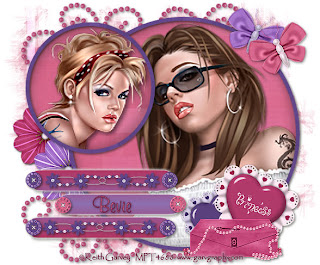
Princess Rules


Clicking on the image will enlarge to full view.

Supplies

2 tubes of choice - I’m using the artwork of Keith Garvey which you can purchase here
Font of Choice - I’m using Muriel here
Weescotlass Mask 297 here
Dezigns by Ali Template 115 here
Eye Candy 5 Impact - Optional
“Little Miss Princess” a PTU tagger scrap kit by Creative Intentionz and can be purchased here. You can visit her blog here.
Thank you Nikki for such a fun kit!!

This tutorial was written assuming you have working knowledge of PSP.

~♥~ Let’s get started ~♥~

Open up the template. Shift + D. Close out the original. Delete Raster 6 (the copyright layer), Raster 5, Copy of Raster 5, and Copy (2) of Raster 5.
New Raster Layer. Send to bottom. Flood fill white.

Highlight Raster 1. Select All/Float/Defloat. Copy and paste a paper of choice as a new layer. Selections/Invert. Hit the delete key. Copy and paste your tube of choice as a new layer. Position in the circle - resizing as necessary. Hit the delete key. Select none. Delete the template layer.

Repeat the above steps with Raster 3.

Highlight Raster 4. Select All/Float/Defloat. Copy and paste a paper of choice as a new layer. Selections/Invert. Hit the delete key. Delete the template layer.

Repeat the above step with Raster 4.

Highlight the merged layer. Select All/Float/Defloat. New Raster layer. Flood fill with a gradient of choice. Select none. Delete the template layer. Give it a Glow:
Eye Candy 5: Impact
Basic Tab:
Outside Glow checked
Mask Selection: checked
Glow Radius: 40
Soften corners: 0
Overall Opacity: 100
Distortion Amount: 0
Gradient Smoothness: 100
Color: your choice
Ok

Add your embellishments. I used:
Buttons 2 & 3: Resize 25%
Flower 5: Resize 55%
Flower 3: Resize 45%
Heart 6: Resize 50%. Free rotate right 25 degrees
Heart 4: Resize 40%. Free rotate left 25 degrees
Locked Box 2: Resize 30%
Butterfly 3 & 4: Resize 40%
Doodle 4: Resize 80%

Highlight your white canvas. New Raster layer. Copy and paste a paper of choice Into Selection. Deselect. Apply the mask. Merge Group. Resize 105%.

Add your copyrights.

Add your name.

I hope you enjoyed this tutorial.
I’d love to see your results.
Email me!
Hugs,
Bev
 

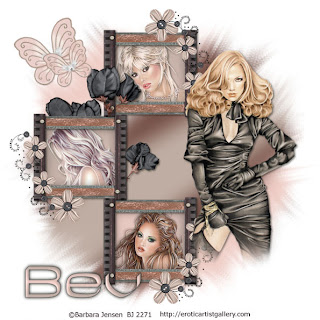
Into the Night


Clicking on the image will enlarge to full view.

Supplies

4 tubes of choice - I’m using the artwork of Barbera Jensen which you can purchase here
Font of Choice - I’m using Casa Sans here
Weescotlass Mask 241 here
“Alice Cullen” a tagger scrap kit created by Simply Iresistible Designz and can be found here.

This tutorial was written assuming you have working knowledge of PSP.

~♥~ Let’s get started ~♥~

Open a 700 X 700 blank canvas. Flood fill white.

Copy and paste Frame 1 as a new layer. Resize 45%. Use your Magic Wand and click inside of each square. Selections/Modify/Expand by 6.

New Raster Layer beneath the frame. Flood fill with a gradient of your choice. (I picked 2 colors from the color pallet that came with the kit). Deselect.

Use your Magic Wand and click inside the top frame. Selections/Modify/Expand by 6. Selections/Invert. Copy and paste a tube beneath the frame. Hit the delete button. Deselect.

Repeat the above step with the other 2 frames. Close out your white canvas. Merge visible. Re-open your white canvas.

Copy and paste your tube beside the frame - moving both into position.

Add your embellishments. I used:
Doodle Flower: Resize 60%
Flower 2: Resize 50%
Wings: Resize 25%. Free rotate left 20 degrees. Duplicate/Resize 70%

Highlight your white canvas. New Raster layer. Using your paint brush, paint the layer with different colors from the color pallet that came with the kit. Once the canvas is multi-colored covered
Adjust/Blur/Gaussian Blur
Radius 20

Apply your mask. Merge Group.

Add your copyrights.

Add your name.
I gave mine a slight inner bevel:
Bevel: 2
Width: 20
Smoothness: 17Depth: 3
Ambience: 0
Shininess: 14
Color: White
Angle: 248
Intensity: 28
Elevation: 63
OK

I hope you enjoyed this tutorial.
I’d love to see your results.
Email me!
Hugs,
Bev

Wednesday, April 22, 2009

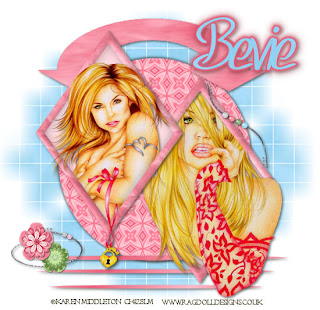
Softly Summer Comes


Clicking on the image will enlarge to full view.

Supplies

2 tubes of choice - I’m using the artwork of Karen Middleton which you can purchase here
Font of Choice - I’m using SF Foxboro Script here
Zuzzanna Mask 7 here
Template by Charlii here - Thank you so much Charlii!!
Eye Candy 5 Impact - Optional
Mura’s Meister - Cloud (optional)
“Spring into Summer” a free tagger scrap kit created by Scraps in Your Pocket and can be found here. Please leave a much appreciated Thank You when downloading. It’s a small gesture in exchange for beautiful work given freely :O)

This tutorial was written assuming you have working knowledge of PSP.
~♥~ Let’s get started ~♥~

Open up the template. Shift + D. Close out the original. Delete the credit layer. Resize all layers 130%. Highlight Raster 1 and Flood fill white.

Highlight the Oval layer. Select All/Float/Defloat. Copy and paste a paper of choice as a new layer. Selections/Invert. Hit the delete key. Delete the template layer.

Highlight the Diamond layer. Select All/Float/Defloat. Copy and paste a paper of choice as a new layer. Selections/Invert. Hit the delete key. Delete the template layer. Add a slight Inner Bevel:
Bevel: 2
Width: 20
Smoothness: 17Depth: 3
Ambience: 0
Shininess: 14
Color: White
Angle: 248
Intensity: 28
Elevation: 63
OK

Duplicate Raster 3.

Close out the Copy of Raster 3. Highlight Raster 3. Use your Magic Wand and click inside of it. Selections/Modify/Expand by 6. Copy and paste a paper of choice below the diamond. Selections/Invert. Hit the delete key. Copy and paste your tube below the diamond. Hit the delete key. Merge visible the diamond, tube, and paper. Resize 80%.

Open up the Copy of Raster 3 and repeat the above step. Then move both merged visible diamonds into position on your canvas.

Highlight the Lines layer. Select All/Float/Defloat. New Raster layer. Flood will with a gradient that will match your tubes. Delete the template layer.

Highlight the Arrow layer. Select All/Float/Defloat. Flood fill with the same gradient you used for the Lines. Keep Selected.
Mura’s Meister/Clouds:
Blend Mode
Change the FG and BG colors to the same colors you have for your gradient.
Effect: 100
Amount: 100
Grain: 3
All the rest should be 0
OK

Deselect.

Highlight the Flower layer. Select All/Float/Defloat. New Raster Layer. Flood fill with your gradient. Apply the same settings of Mura’s Meister Copies. Deselect. (I did one flower in pink, another in green)

Copy and paste Flower Sticker (Pink Flower) as a new layer. Resize 60%. Place over the template flower you just made. Merge Down.

Repeat the above step with the green flower. You can resize the merged flowers to your liking.
Add your embellishments. I used:
Doodle Beads: Resize 40%
Doodle Beads 2: Resize 40%

Highlight your white canvas. New Raster Layer. Select All. Copy and paste a paper of choice Into Selection. Deselect. Apply the mask. Merge Group.

Add your copyrights.

Add your name. I gave mine a Glow:
Eye Candy 5: Impact
Basic Tab:
Outside Glow checked
Mask Selection: checked
Glow Radius: 40
Soften corners: 0
Overall Opacity: 100
Distortion Amount: 0
Gradient Smoothness: 100
Color: your choice
Ok

Apply again and then give a drop shadow.

I hope you enjoyed this tutorial.
I’d love to see your results.
Email me!
Hugs,
Bev

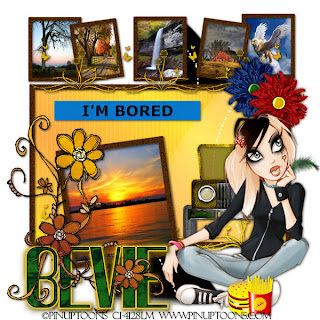
Are We There Yet?


Clicking on the image will enlarge to full view.

Supplies

1 tube of choice - I’m using the artwork of PinUpToons which you can purchase here
6 scenery images. Mine are from various Yahoo groups.
Font of Choice - I’m using Quimbie here
Weescotlass Mask 216 here
Dezigns by Ali Template 141 here
Eye Candy 5 Impact - Optional
Filters Unlimited 2 - Optional
“Are We There Yet?” a PTU tagger scrap kit by Bits ’n Bobs and can be purchased here. You can visit her blog here.
Thank you Julie for such a fun kit!! It brought back memories of when I was a kid….stuck in a car traveling up and down the east coast of the U.S.!

This tutorial was written assuming you have working knowledge of PSP.
~♥~ Let’s get started ~♥~

Open up the template. Shift + D. Close out the original.
New Raster Layer. Send to bottom. Flood fill white.

Highlight Raster 2. Select All/Float/Defloat. Copy and paste Paper 11 as a new layer. Resize 75%. Move into position beneath the frame where you like. Selections/Invert. Hit the delete button. New Raster layer. Selections/Invert. Flood fill with a gradient of your choice.
Right Click on the layer. Choose “Properties”. Change Blend Mode to Overlay.

Copy and paste a Truck of your choice as a new layer just above the overlay layer. Resize 80%. Position it just over the pic of the truck on the paper. Selections/Invert. Hit the delete button. Deselect.

Highlight Raster 3. (the Frame) Select All/Float/Defloat. Selections/Modify/Expand by 2. New Raster Layer. Flood fill with a color you’d like the picture frames to be. Deselect.
Apply Filters Unlimited:
Mineral Paper, Sandstone
Default Settings
Ok

Highlight Raster 12. Select All/Float/Defloat. Selections/Invert. New Rater layer. Flood fill with a gradient. Deselect. Delete template layer. Repeat with Raster 11.

Highlight Raster 4. Select All/Float/Defloat. New Rater Layer. Copy and paste your image Into Selection. Deselect. Delete the template layer.

Highlight Raster 5. Select All/Float/Defloat. Selections/Modify/Expand by 2. New Rater Layer. Flood fill with the same color you used for the other frame. Apply Filters Unlimited - same default settings as before. Delete the template layer.

Repeat the above steps for the remainder of the frames.

Highlight Raster 10. Select All/Float/Defloat. Selections/Invert. New Rater layer. Flood fill with the same gradient as you already used before. Deselect. Change the blend mode to Overlay.

Copy and paste your tube as a new layer.

Add your embellishments. I used:
Flowers 1 & 2: Resize 40%
Charm 1 & Charm 2: Resize 90%. Use eraser tool to remove chain.
Feather of choice. Resize to your liking.

Highlight your white canvas. Copy and paste the Road as a new layer. Resize 80%. Select All/Float/Defloat. Selections/Invert. New Raster layer. Flood fill black. Deselect. Change the Blend Mode to Overlay.

Highlight your white canvas. New Raster layer. Select all. Copy and paste a paper of choice Into Selection. Deselect. Apply the mask. Resize 140%.

Add your copyrights.

Add your name. I gave mine a Glow:
Eye Candy 5: Impact
Basic Tab:
Outside Glow checked
Mask Selection: checked
Glow Radius: 40
Soften corners: 0
Overall Opacity: 100
Distortion Amount: 0
Gradient Smoothness: 100
Color: your choice
Ok

Apply again and then give a drop shadow.

Resize all layers 75%.

I hope you enjoyed this tutorial.
I’d love to see your results.
Email me!
Hugs,
Bev

Tuesday, April 21, 2009

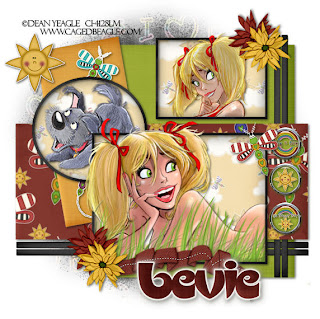
Springtime Smiles


Clicking on the image will enlarge to full view.

Supplies
3 tubes of choice - I’m using the artwork of Dean Yeagle which you can purchase here
Font of Choice - I’m using Slugfest here
Weescotlass Mask 119 here
Dezigns by Ali Template 50 here
Eye Candy 5 Impact - Optional
“Cute as a Bug 2” a PTU tagger scrap kit by Twinky Dezines and can be purchased here. You can visit her blog here.
Thank you Twinky for a totally fun and adorable kit!! It put a smile on my face for sure :O)

This tutorial was written assuming you have working knowledge of PSP.

~♥~ Let’s get started ~♥~

Open up the template. Shift + D. Close out the original.
Image/Canvas Size
Width & Height: 700New Raster layer. Send to Bottom. Flood fill white.
Delete the credit layer.

Highlight Back Rectangle. Select All/Float/Defloat. Copy and paste a paper of choice as a new layer. Selections/Invert. Hit the delete key. Deselect. Delete the template layer. Give it a slight inner bevel:
Bevel: 2
Width: 20
Smoothness: 17
Depth: 3
Ambience: 0
Shininess: 14
Color: white
Angle: 248
Intensity: 28
Elevation: 63
Ok

Highlight Bottom Lines. Select All/Float/Defloat. Copy and paste a paper of choice as a new layer. Selections/Invert. Hit the delete key. Deselect. Delete the template layer.

Repeat the above step for Side Lines layer.

Highlight Black Rectangle Layer. Select All/Float/Defloat. Copy and paste a paper of choice as a new layer. Resize 110%. Selections/Invert. Hit the delete key. Deselect. Delete the template layer.

Highlight Side Rectangle layer. Select All/Float/Defloat. Copy and paste a paper of choice as a new layer. Selections/Invert. Hit the delete key. Deselect. Delete the template layer.

Highlight Back Frame 1. Select All/Float/Defloat. Copy and paste a paper of choice as a new layer. Selections/Invert. Hit the delete key. Deselect. Delete the template layer. Reduce the opacity to 45.

Highlight Frame 1. Select All/Float/Defloat. Copy and paste a paper of choice as a new layer. Selections/Invert. Hit the delete key. Deselect. Delete the template layer.

Use your Magic Wand and click inside the frame. Select All/Modify/Expand by 2. Copy and paste your tube of choice below the frame. Selections/Invert. Hit the delete key. Deselect.

Repeat the above 3 steps for Circle Back, Circle Back Frame, Middle Frame, Main Middle Frame layers.
Highlight Small Circle 1. Merge Down. Merge Down again. Select All/Float/Defloat. Copy and paste a paper of choice as a new layer. Selections/Invert. Hit the delete key. Deselect. Delete the template layer.

Add your embellishments. I used:
Flowers 1 & 3: Resize 25%
Brad 1, 2, & 3: Resize 30%
Clipart 16: Resize 60%
Clipart 1: Resize 25%. Free rotate left 20 degrees
Folded Ribbon 4: Resize 50%
Clipart 21: Resize 30%
Highlight your white canvas. New Raster layer. Select All. Copy and paste a paper of choice Into Selection. Select none. Apply your mask. Merge Group.

Add your copyrights.

Add your name. I gave mine the same slight inner bevel and a Glow:
Eye Candy 5: Impact
Basic Tab:Outside Glow checked
Mask Selection: checked
Glow Radius: 40
Soften corners: 0
Overall Opacity: 100
Distortion Amount: 0
Gradient Smoothness: 100
Color: white
Ok

Apply again and then give a drop shadow.

I hope you enjoyed this tutorial.

I’d love to see your results.

Email me!
Hugs,
Bev

Monday, April 20, 2009

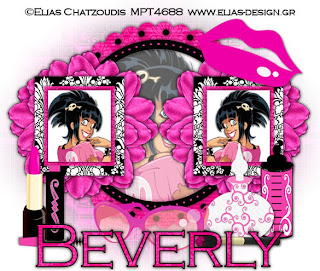
It's a Girl Thing


Clicking on the image will enlarge to full view.

Supplies

1 tube of choice - I’m using the artwork of Elias Chatzoudis which you can purchase here
Font of Choice - I’m using Copperplate Gothic Light (came with pc)
Weescotlass Mask 62 here
Babe’s Designs Template 17 here
“Girly Girl” a PTU tagger scrap kit created by Southern Scrapz by Cindy and can be purchased here. Visit her blog here.
Cindy, this kit is awesome!

This tutorial was written assuming you have working knowledge of PSP.
~♥~ Let’s get started ~♥~

Open up the template. Shift + D. Close out the original. Delete Raster 1.

Highlight Circle Frame layer. Select All/Float/Defloat. Copy and paste a paper of choice as a new layer. Selections/Invert. Hit the delete key. Deselect. Delete the template layer. Give it a heavy drop shadow.

Repeat the above steps for Dots, Inner Frame, Inner Dots layers.

Highlight Square Frames. Selections/Float/Defloat. Copy and paste a paper of choice as a new layer. Selections/Invert. Hit the delete key.
Selections/Invert.
Selections/Modify/Contract by 20.
Copy and paste a paper of choice.
Selections/Invert. Hit the delete key.
Selections Invert.
Selections/Modify/Contract by 8.
New Raster Layer. Flood Fill white.
Copy and paste your tube of choice into one of the squares.
Selections/Invert.
Hit the delete key.
Deselect.
Duplicate/Mirror.

I didn’t lose ya, did I?!
If not, then go back and give the same heavy drop shadow to all those layers we just made.

Highlight your inner frame layer. Use your Magic Wand and click inside of it. Copy and paste your tube into the circle. Selections/Invert. Hit the delete button. Lower the opacity down to 63.

Copy and paste Element 50 as a new layer behind one of the squares. Duplicate/Mirror.

Add your embellishments. I used:
Element 15: Resize 50%
Element 16: Resize 50%
Element 14: Resize 40%
Element 18: Resize 40%
Element 1: Resize 50%
Element 4: Resize 30%
Element 10: Resize 70%

Close off your white canvas and merge visible. Reopen your white canvas.

New Raster Layer. Select All. Copy and paste a paper of choice Into Selection. Apply the mask. Merge Group.

Keeping the mask layer highlighted, use your eraser tool and erase where the mask shows through your tube in the inner frame.

Copy and paste Element 13. Resize 50%.

Add your copyrights.

Add your name.

I hope you enjoyed this tutorial.
I’d love to see your results.
Email me!
Hugs,
Bev