Friday, March 18, 2011

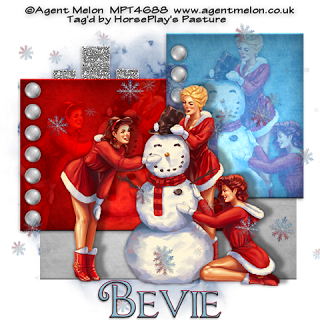
Frosty Friends


Clicking on the image will allow you to enlarge for bigger view.

Supplies

Font of Choice - I used Annabelle here
Monti Circular mask here
“Seasons” is a massive collaboration put together by many many designers in the scrapping and tagging community to help with the devastation in New Zealand caused by the tragic earthquake. This collaboration is FTU after a donation of $10 USD to the Salavation Army of NZ is made. Please visit Taggers Together for New Zealand to read more on how these talented designers are helping with this cause and to make your donation. This portion of the collaboration was created by Mystic Creations. Please visit her blog here.

This tutorial was written assuming you have a working knowledge of PSP.

~♥~ Let’s get started ~♥~

Open up a 700 x 700 blank canvas.
Flood fill white.

Copy and paste Scalloped Frame as a new layer.
Resize 40%
Use your Selection Tool set on Circle and make a circle that doesn’t go beyond the edge of the frames - it’s alright if it’s not exactly centered over the frame.
New Raster layer below the frame.
Paste Paper 6 Into Selection.
Deselect.
If you need to center the paper more do that now.

Add your embellishments. I used:
Outdoor Fire: Resize 50%
Winter Bears 1 & 2: Resize 60%
Cedar: Resize 120% twice/Duplicate/Resize 80%

Highlight the white background layer.
New Raster layer.
Select All.
Copy and paste Paper 9 Into Selection.
Deselect.
Apply the mask.
Merge Group.

Add your copyrights.

Add your name.

Resize all layers 80%.

I hope you enjoyed this tutorial.
I’d love to see your results and show it off in my gallery.
Email me!
Hugs,
Bev

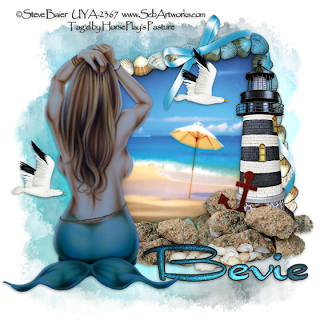
Ocean Mist


Clicking on the image will allow you to enlarge for bigger view.

Supplies

1 tube of choice - I used the artwork of Steve Baier which can be purchased at Up Your Art. You must use a license to use.
Font of Choice - I used Dragonfly here
Becky Mask 22 here
DSB Flux - Bright Noise
Greg’s Factory Output Vol. II - Pool Shadow
“Seasons” is a massive collaboration put together by many many designers in the scrapping and tagging community to help with the devastation in New Zealand caused by the tragic earthquake. This collaboration is FTU after a donation of $10 USD to the Salavation Army of NZ is made. Please visit Taggers Together for New Zealand to read more on how these talented designers are helping with this cause and to make your donation. This portion of the collaboration was created by Ocean Myst Designs. Please visit her blog here.

This tutorial was written assuming you have a working knowledge of PSP.

~♥~ Let’s get started ~♥~

Open up a 700 x 700 blank canvas.
Flood fill white.

Copy and paste Element 18 as a new layer.
Resize 70%
Free rotate Left 10 degrees.
Move it just a tad to the right on your canvas.
Click inside of it with our Magic Wand.
New Raster layer below the frame.
Copy and paste Paper 6 Into Selection.
Deselect.

Add your embellishments. I used:
Element 7: Resize 120%/Duplicate as many times as you like
Element 3
Element 21: Resize 70%/Mirror/Free rotate Left 100 degrees
Element 17: Apply Greg’s Factory Output Vol. II - Pool Shadow/Default Settings/Resize 60%/Free rotate Left 15 degrees
Element 2
Element 4: Resize 40%/Duplicate

Copy and paste your tube as a new layer.

Highlight the white background layer.
New Raster layer.
Select All.
Copy and paste Paper 9 Into Selection.
Deselect.
Apply the mask.
Merge Group.
Apply Pool Shadow effect:
Same Settings

Add your copyrights.

Add your name.
Choose your colors.
Stroke: 2
Type out your name.
Convert to Raster layer.
Select/Select All/Float/Defloat
Selections/Modify/Contract by 2.
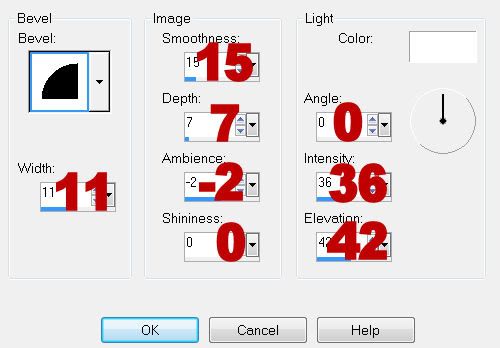
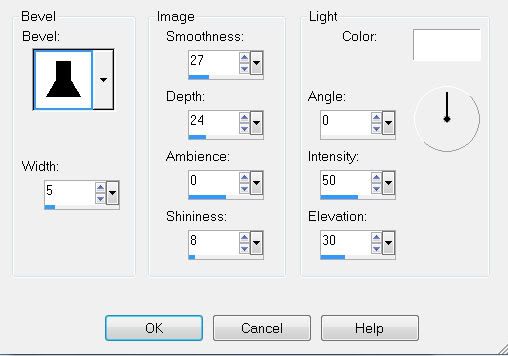
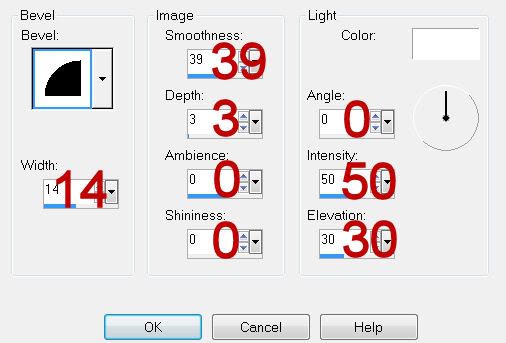
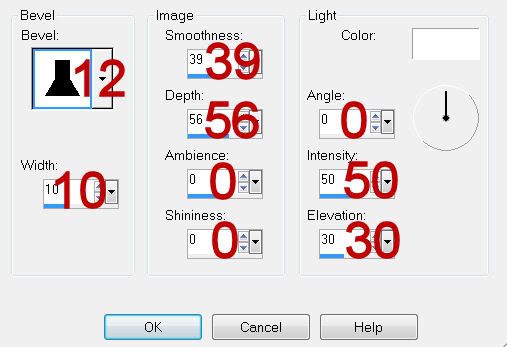
Give it a slight Inner Bevel:


Apply DSB Flux - Bright Noise:
Intensity: 35
Mix checked
OK

Deselect.

Resize all layers 80%.

I hope you enjoyed this tutorial.
I’d love to see your results and show it off in my gallery.
Email me!
Hugs,
Bev

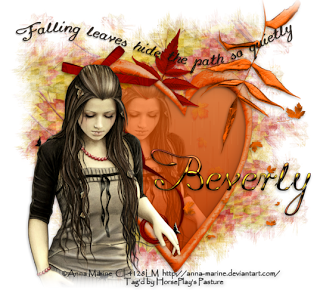
Falling Leaves


Clicking on the image will allow you to enlarge for bigger view.

Supplies

1 tube of choice - I used the artwork of Anna Marine which can now be purchased at CDO. Please do not use unless you have a license to do so.
Font of Choice - I used Promocyja here
Weescotlass Mask 297 here
Mura’s Meister - Copies
My Supplies which contains word art made by me - here
“Seasons” is a massive collaboration put together by many many designers in the scrapping and tagging community to help with the devastation in New Zealand caused by the tragic earthquake. This collaboration is FTU after a donation of $10 USD to the Salavation Army of NZ is made. Please visit Taggers Together for New Zealand to read more on how these talented designers are helping with this cause and to make your donation. This portion of the collaboration was created by Laura‘s Designz. Please visit her blog here.

This tutorial was written assuming you have a working knowledge of PSP.

~♥~ Let’s get started ~♥~

Open up a 700 x 700 blank canvas.
Flood fill white.

Color Pallet:
Foreground: #ba430d
Background: #d5763e
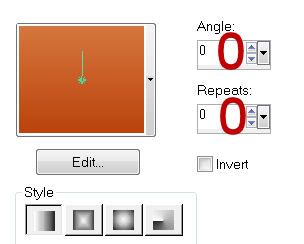
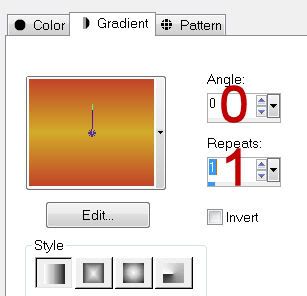
Set the gradient to match mine:


Copy and paste Element 28 as a new layer.
Click inside of it with your Magic Wand.
New Raster layer below the frame.
Selections/Modify/Expand by 4
Flood fill with the gradient.
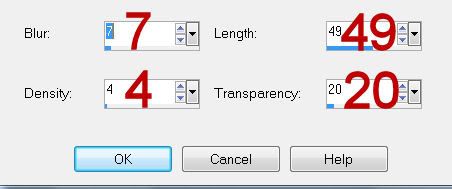
Effects/Text Effects/Fur:
Match your settings to mine


Deselect.

Highlight the bottom right frame.
Click inside of it with your Magic Wand.
Selections/Modify/Expand by 4
New Raster layer below the frame.
Apply Mura’s Mesiter - Copies:
Same settings
Copy and paste Lilly Candle 2 as a new layer below the frame.
Resize 40%
Move into position.
Selections/Invert
Tap the delete key.
Deselect.

Copy and paste you tube as a new layer above the frame.
Move into position at the left side - see my tag for reference.
Duplicate and move to the right.
In your layer’s pallet move the duplicate below the frame.
Don’t worry about what’s overhanging the frame…we’ll take care of that in a bit.

Copy and paste Element 10 as a new layer.
Resize 25%
Mura’s Meister - Copies:
Wallpaper (perspective):
Use default settings.
OK
Move the leaves below the your tube and into a position you like.

Highlight the gradient layer.
Click anywhere outside of it with your Magic Wand.
Highlight the duplicated tube layer and tap the layer.
Change the Properties to Luminance (Legacy)
Highlight the leaves layer.
Tap the delete key.
Change the Properties to Soft Light.
Deselect.


Add your embellishments. I used:
Element 6: Resize 70%/Mirror
Element 1: Resize 70%
Element 8: Resize 70%
Element 7: Resize 50%/Mirror

Highlight your white background.
New Raster layer.
Copy and paste Element 10 as a new layer.
Apply Mura’s Meister - Copies:
Wallpaper:
Use Default settings accept change Number to 56
OK
Apply the mask.
Merge Group.

Open up my word art that I supplied.
Copy and Paste as a new layer.
Move into position - see my tag for reference.

Add your copyrights.

Color Pallet:
Foreground: #c14428
Background: #d2ac2a
Change the gradient settings to match mine:


Type your name.
On your working canvas right click - choose Properties
Click on the color box below the word Stroke
When the Materials Pallet opens change the color to #1b180f
OK
Highlight the numbers in the Stroke Width box:
Change the numbers to 1.00
Click OK
Give it a slight Inner Bevel:


Resize all layers 80%.

I hope you enjoyed this tutorial.
I’d love to see your results and show it off in my gallery.
Email me!
Hugs,
Bev

Shifting Winds


Clicking on the image will allow you to enlarge for bigger view.

Supplies

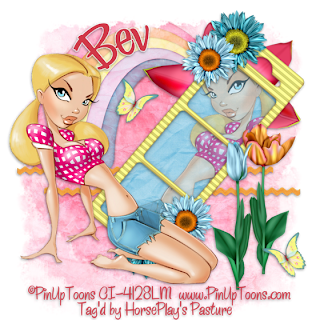
1 tube of choice - I used the artwork of PinUpToons which can now be purchased from CDO. You must use a license to use.
Font of Choice - Clive Barker here
Weescotlass Mask 297 here
“Seasons” is a massive collaboration put together by many many designers in the scrapping and tagging community to help with the devastation in New Zealand caused by the tragic earthquake. This collaboration is FTU after a donation of $10 USD to the Salavation Army of NZ is made. Please visit Taggers Together for New Zealand to read more on how these talented designers are helping with this cause and to make your donation. This portion of the collaboration was created by Julie of Bits n Bobs. Please visit her blog here.

This tutorial was written assuming you have a working knowledge of PSP.

~♥~ Let’s get started ~♥~

Open up a 700 x 700 blank canvas.
Flood fill white.

Copy and paste Frame 4 as a new layer.
Resize 85%
Click inside of it with your Magic Wand.
New Raster layer below the frame.
Copy and paste Paper 10 Into Selection.
Deselect.

Copy and paste your tube as a new layer.
Position in front of the frame.

Add your embellishments. I used:
Bow 1: Resize 70%
Element 4
Ladder 3
Trails 3

Highlight the white background layer.
New Raster layer.
Select All.
Copy and paste Paper 9 Into Selection.
Deselect.
Apply the mask.
Merge Group.

Add your copyrights.

Add your name.

Resize all layers 80%.

I hope you enjoyed this tutorial.
I’d love to see your results and show it off in my gallery.
Email me!
Hugs,
Bev

Thursday, March 17, 2011

Text and More


Clicking on the image will allow you to enlarge for bigger view.

Supplies

1 tube of choice - I used the artwork of PinUpToons which can now be purchased from CDO. You must use a license to use.
Font of Choice - Papyrus that came with my pc
Becky mask 22 here
“Seasons” is a massive collaboration put together by many many designers in the scrapping and tagging community to help with the devastation in New Zealand caused by the tragic earthquake. This collaboration is FTU after a donation of $10 USD to the Salavation Army of NZ is made. Please visit Taggers Together for New Zealand to read more on how these talented designers are helping with this cause and to make your donation. This portion of the collaboration was created by VermontAngeleyes. Please visit her blog here.

This tutorial was written assuming you have a working knowledge of PSP.

~♥~ Let’s get started ~♥~

Open up a 700 x 700 blank canvas.
Flood fill white.

Copy and paste Frame 1 as a new layer.
Resize 70%
Click inside of it with your Magic Wand.
Selections/Modify/Expand by 2.
New Raster layer below the frame.
Copy and paste Paper 3 Into Selection.
Deselect.

Copy and paste your tube as a new layer.
Position in front of the frame.

Add your embellishments. I used:
27: Resize 25% and 70%/Add a touch of Noise/Duplicate/Resize 60%/Duplciate/Resize 60%
Element 25: Resize 25% and 40%/Free rotate Right 25 degrees/Duplicate/Mirror

Highlight the white background layer.
New Raster layer.
Flood fill with a gradient of choice.
Deselect.
Apply the mask.
Merge Group.

Add your copyrights.

Add your name.

Resize all layers 80%.

I hope you enjoyed this tutorial.
I’d love to see your results and show it off in my gallery.
Email me!
Hugs,
Bev

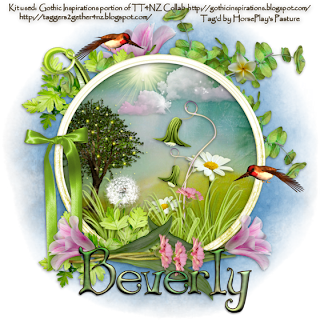
Spring's Touch


Clicking on the image will allow you to enlarge for bigger view.

Supplies

Font of Choice - I used Bibliotheque here
Monit Circular mask here
“Seasons” is a massive collaboration put together by many many designers in the scrapping and tagging community to help with the devastation in New Zealand caused by the tragic earthquake. This collaboration is FTU after a donation of $10 USD to the Salavation Army of NZ is made. Please visit Taggers Together for New Zealand to read more on how these talented designers are helping with this cause and to make your donation. This portion of the collaboration was created by Jessica of Gothic Inspirations. Please visit her blog here.

This tutorial was written assuming you have a working knowledge of PSP.

~♥~ Let’s get started ~♥~

Open up a 700 x 700 blank canvas.
Flood fill white.

Copy and paste Frame 4 as a new layer.
Resize 70%
Click inside of it with your Magic Wand.
New Raster layer below the frame.
Copy and paste Paper 3 Into Selection.
Deselect for now.

You’re going to add elements below the Frame layer. Don’t worry about what overhangs the edges of the frame because we’ll come back to that later and clean it up.
For placement of the elements see my tag for reference.

Sprigs: Resize 30%/Duplicate as many times as you like
Dandelion: Resize 30%
Flower 3: Resize 30%/Duplicate/Resize 70%
Blooms: Resize 50%
Flower 1: Resize 25%
Light: Resize 30%
Cloud: Resize 40%

Highlight the paper layer.
Click anywhere outside of it with your Magic Wand.
Highlight each element layer and tap the delete key.
Deselect.

Add the rest of your embellishments. I used:
Greenery: Resize 70%
Pot of Flower: Resize 80%
Flower 6: Free rotate Left 90 degrees (place behind the frame)
Bow 2: Resize 50%
Bird: Resize 30%
Flower 6: Resize 70%/Duplicate/Mirror
Flower 1: Resize 30%/Free rotate Right 70 degrees/Duplicate/Twice/Flipping one of them
Leaves 3: Resize 40%/Mirror

Highlight the white background layer.
New Raster layer.
Select All.
Copy and paste Paper 1 Into Selection.
Deselect.
Apply the mask.
Merge Group.

Add your copyrights.

Add your name.
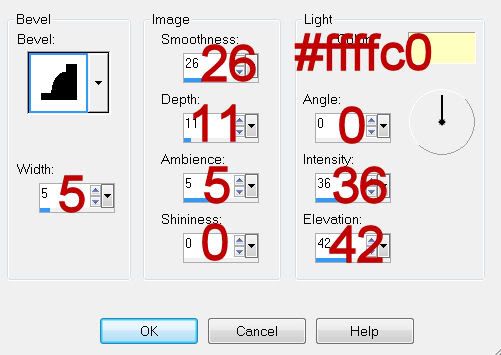
Give it a slight Inner Bevel:


Resize all layers 80%.

I hope you enjoyed this tutorial.
I’d love to see your results and show it off in my gallery.
Email me!
Hugs,
Bev

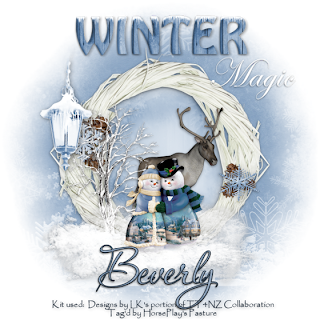
Winter Magic


Clicking on the image will allow you to enlarge for bigger view.

Supplies

Font of Choice - I used Aquarelle here
Monti Circular mask here
“Seasons” is a massive collaboration put together by many many designers in the scrapping and tagging community to help with the devastation in New Zealand caused by the tragic earthquake. This collaboration is FTU after a donation of $10 USD to the Salavation Army of NZ is made. Please visit Taggers Together for New Zealand to read more on how these talented designers are helping with this cause and to make your donation. This portion of the collaboration was created by Designs by LK. Please visit her blog here.

This tutorial was written assuming you have a working knowledge of PSP.

~♥~ Let’s get started ~♥~

Open up a 700 x 700 blank canvas.
Flood fill white.

Copy and paste Frame 5 as a new layer.
Click inside of it with your Magic Wand.
New Raster layer below the frame.
Copy and paste Paper 10 Into Selection.
Deselect.

Add your embellishments. I used:
Reindeer 2: Resize 70%/Mirror
Snowcouple
WordArt 2
Lantern

Highlight the white background layer.
New Raster layer.
Select All.
Copy and paste Paper 9 Into Selection.
Deselect.
Apply the mask.
Merge Group.

Add your copyrights.

Add your name.

Resize all layers 80%.

I hope you enjoyed this tutorial.
I’d love to see your results and show it off in my gallery.
Email me!
Hugs,
Bev

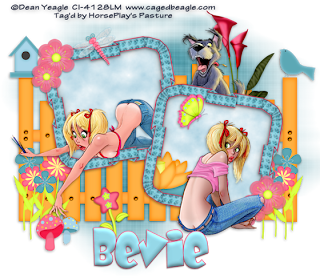
Summer Surprises


Clicking on the image will allow you to enlarge for bigger view.

Supplies

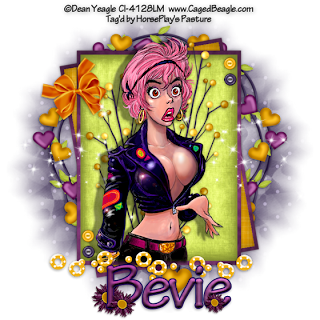
2 or 3 tubes of choice - I used the artwork of Dean Yeagle which can now be purchased at CDO. Please do not use unless you have a license to do so.
Font of Choice - I used Baby Kruffy here
Becky mask 23 here
Mura’s Meister - Copies
“Seasons” is a massive collaboration put together by many many designers in the scrapping and tagging community to help with the devastation in New Zealand caused by the tragic earthquake. This collaboration is FTU after a donation of $10 USD to the Salavation Army of NZ is made. Please visit Taggers Together for New Zealand to read more on how these talented designers are helping with this cause and to make your donation. This portion of the collaboration was created by Debs Design. Please visit her blog here.

This tutorial was written assuming you have a working knowledge of PSP.

~♥~ Let’s get started ~♥~

Open up a 700 x 700 blank canvas.
Flood fill white.

Color Pallet:
Foreground: #c2deea
Background: #ffffff

Copy and paste Frame 2 as a new layer.
Resize 60%
Free rotate Left 10 degrees/
Duplicate/Mirror
Move both frames into position - see my tag for reference.

Highlight the Top left frame.
Click inside of it with your Magic Wand.
Selections/Modify/Expand by 4
New Raster layer below the frame.
Apply Mura’s Meister - Cloud:
Hit the Reset button.
OK
Copy and paste your tube as a new layer below the frame.
Selections/Invert
Tap the delete key.
Deselect.

Highlight the bottom right frame.
Click inside of it with your Magic Wand.
Selections/Modify/Expand by 4
New Raster layer below the frame.
Apply Mura’s Mesiter - Copies:
Same settings
Copy and paste Lilly Candle 2 as a new layer below the frame.
Resize 40%
Move into position.
Selections/Invert
Tap the delete key.
Deselect.

Copy and paste you tube as a new layer in front of the bottom frame.

Copy and paste your 3rd tube (If you chose to use a 3rd one) as a new layer behind the frames.

Copy and paste Fence as a new layer.
Move to the left side of your canvas.
In your layers pallet move it just above your white canvas.
Duplicate/Move to the right side of your canvas.
Using your Selection Tool set on rectangle, section out the area of the fence that you can see overlapping.
Tap the delete key.
Deselect.

Add your embellishments. I used:
Calla Lilly 1: Resize 70%
Flower 5: Resize 25%/Duplicate/Resize 80%
Flower 2: Resize 25% and 80%
Shroom 3: Resize 25% and 80%
Shroom 2: Resize 25% and 60%
Dragonfly 1: Resize 25% and 80%
Butterfly 1: Resize 25%

Highlight your white background.
New Raster layer.
Select All.
Copy and paste paper 8 Into Selection.
Deselect.
Apply the mask.
Merge Group.

Add your copyrights.

Add your name.
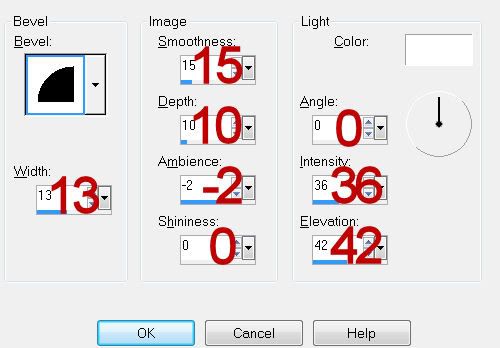
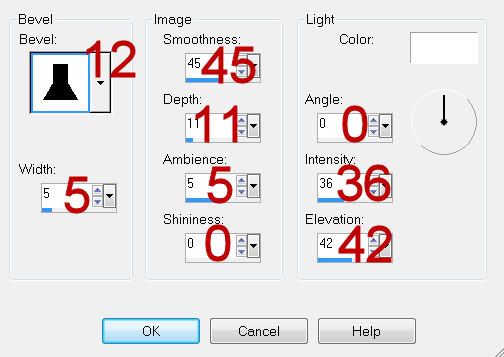
Give it a slight Inner Bevel:


Resize all layers 80%.

I hope you enjoyed this tutorial.
I’d love to see your results and show it off in my gallery.
Email me!
Hugs,
Bev

Wednesday, March 16, 2011

No Way


Clicking on the image will allow you to enlarge for bigger view.

Supplies

1 tube of choice - I used the artwork of Dean Yeagle which can now be purchased from CDO. You must obtain a license to use.
Font of Choice - I used Tekron which came with my PC
Weescotlass Mask 138 here
“Obsession” is a TS scrap kit created by Nikki of Creative Intentionz and can be purchased from her store Twilight Scraps. You can visit her blog here.
Thank you Nikki for a lovely kit filled with such fun colors!

This tutorial was written assuming you have a working knowledge of PSP.

~♥~ Let’s get started ~♥~

Open up a 700 x 700 blank canvas.
Flood fill white.

Make you Selection Tool active set on Rectangle.
Make a rectangle approximately 350 x 475 - It’s alright if it’s not centered on your canvas.
New Raster layer.
Copy and paste Paper 5 Into Selection.
Deselect.
Center it on your canvas.
Rename Rectangle 1.
Click anywhere outside of the rectangle with your Magic Wand.
Selections/Invert
Selections/Modify/Contract by 10.
New Raster layer.
Copy and paste Paper 3 Into Selection.
Deselect.

Highlight Rectangle 1 layer.
Duplicate.
Free rotate Left 10 degrees.
Move just above your white canvas in your layers pallet.
Click anywhere outside of it with your Magic Wand.
Selections/Invert
Selections/Modify/Contract by 10
New Raster layer.
Copy and paste Paper 4 Into Selection.
Deselect.

Copy and paste your tube as a new layer.
Give it an exaggerated drop shadow.

Add your embellishments. I used:
Berries - Duplicate
Bow 2: Resize 35%/Free rotate Left 10 degrees
Buttons 1 & 2: Resize 25% and 50%/Duplicate
Sparkles
Heart Wreath
Rings: Resize 60%

Highlight your white background.
New Raster layer.
Select All.
Copy and paste Paper 7 Into Selection.
Deselect.
Apply the mask.
Merge Group.

Add your copyrights.

Add your name.
Give it a slight Inner Bevel:


Resize all layers 80%.

I hope you enjoyed this tutorial.
I’d love to see your results and show it off in my gallery.
Email me!
Hugs,
Bev

Spring Innocense


Clicking on the image will allow you to enlarge for bigger view.

Supplies

1 tube of choice - I used the artwork of PinUpToons which can now be purchased from CDO. You must use a license to use.
Font of Choice - I used Chicken Basket
Becky Mask 22 here
Eyecandy 3.1 - Glow
“Seasons” is a massive collaboration put together by many many designers in the scrapping and tagging community to help with the devastation in New Zealand caused by the tragic earthquake. This collaboration is FTU after a donation of $10 USD to the Salavation Army of NZ is made. Please visit Taggers Together for New Zealand to read more on how these talented designers are helping with this cause and to make your donation. This portion of the collaboration was created by Julie of Whispy‘s D‘zines. Please visit her blog here.

This tutorial was written assuming you have a working knowledge of PSP.

~♥~ Let’s get started ~♥~

Open up a 700 x 700 blank canvas.
Flood fill white.

Copy and paste 28 as a new layer.
Resize 80%
Free rotate Right 40 degrees

Copy and paste your tube as a new layer.
Position at the left side of the frame - see my tag for reference.
Duplicate/Mirror
You can either move the frame into the position you want over the duplicated tube layer OR you can move the tube left or right.

Once you’ve done that Highlight the frame layer.
Click inside each square with your Magic Wand.
Selections/Modify/Expand by 4.
New raster layer below the frame.
Copy and paste Paper 6 Into Selection below the duplicated tube layer.
Selections/Invert
Highlight the tube layer.
Tap the delete key.
Deselect.
Lower the Opacity to about 55 or so.

Add your embellishments. I used:
4: Resize 25% and 90%/Duplicate
3: Resize 25% and 70%/Duplicate
5 & 6: Resize 50%
1: Resize 25%
19: Resize 70%/Duplicate
7: Resize 80%

Highlight the white background layer.
New Raster layer.
Select All.
Copy and paste Paper 1 Into Selection.
Deselect.
Apply the mask.
Merge Group.

Copy and paste 27 as anew layer.
Resize 50%
Move into position just over the mask layer.
Apply the mask.
Merge Group.
Change the Properties to Hard Light.

Add your copyrights.

Add your name.
Apply Eyecandy 3.1 - Glow
Width: 3
Opacity: 100
Opacity Dropoff: Fat
Color: White
OK

Resize all layers 80%.

I hope you enjoyed this tutorial.
I’d love to see your results and show it off in my gallery.
Email me!
Hugs,
Bev

Autumn Winds


Clicking on the image will allow you to enlarge for bigger view.

Supplies

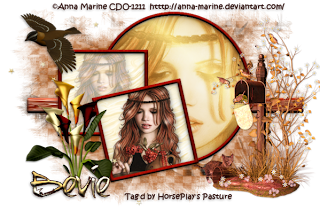
1 tube of choice and one close up image - I used the artwork of Anna Marine which was purchased from CDO. You must use a license to use.
Font of Choice - I Brushtip-C here
Weescotlass Mask 297 here
Scraps of Enchantment Template 109 here
“Seasons” is a massive collaboration put together by many many designers in the scrapping and tagging community to help with the devastation in New Zealand caused by the tragic earthquake. This collaboration is FTU after a donation of $10 USD to the Salavation Army of NZ is made. Please visit Taggers Together for New Zealand to read more on how these talented designers are helping with this cause and to make your donation. This portion of the collaboration was created by Terry of Treasures by Terry. Please visit her blog here.

This tutorial was written assuming you have a working knowledge of PSP.

~♥~ Let’s get started ~♥~

Open up the template.
Shift + D.
Close out the original.
Delete the top 2 layers.

Move Grey Strip layer in your layers pallet to just above the white background layer.
Click on it with your Magic Wand.
New Raster layer.
Copy and paste Paper 10 Into Selection.
Deselect.
Delete the template layer.
Give it a slight Inner bevel:


Highlight Circle Background layer.
Click on it with your Magic Wand.
New Raster layer.
Flood fill with a gradient of choice.
Copy and paste your close up image as a new layer.
Selections/Invert
Tap the delete key.
Deselect.
Change the Properties to Soft Light.
Duplicate.

Highlight Circle Frame layer.
Select All/Float/Defloat
New Raster layer.
Copy and paste Paper 4 Into Selection.
Deselect.
Delete the template layer.
Give it the same Inner Bevel.

Repeat the above step with Top Frame and Bottom Frame layers.

Highlight Stars layer.
Select All/Float/Defloat
New raster layer.
Copy and paste Paper 8 Into Selection.
Deselect.
Delete the template layer.

Highlight Bottom Background layer.
Click on it with our Magic Wand.
New Raster layer.
Paste Paper 8 Into Selection.
Copy and paste your tube as a new layer above the paper.
Resize as needed.
Selections/Invert
Tap the delete key.
Deselect.
Delete the template layer.

Highlight Top Background layer.
Click on it with our Magic Wand.
New Raster layer.
Paste Paper 8 Into Selection.
Copy and paste your tube as a new layer above the paper.
Resize as needed.
Selections/Invert
Tap the delete key.
Deselect.
Delete the template layer.
Lower the Opacity to 33.

Add your embellishments. I used:
Bird 1: Resize 65%/Mirror
Mailbox: Resize 80%
Callas 3: Resize 50%

Highlight the white background layer.
New Raster layer.
Select All.
Copy and paste Paper 6 Into Selection.
Deselect.
Apply the mask.
Merge Group.

Add your copyrights.

Add your name.
Give it the same Inner Bevel.

Resize all layers 80%.

I hope you enjoyed this tutorial.
I’d love to see your results and show it off in my gallery.
Email me!
Hugs,
Bev

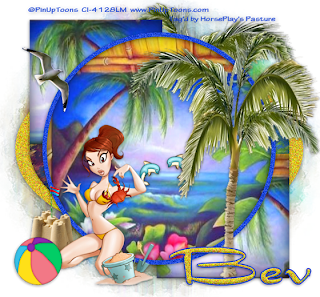
Island Fun


Clicking on the image will allow you to enlarge for bigger view.

Supplies

1 tube of choice - I used the artwork of PinUpToons which can now be purchased from CDO. You must obtain a license to use.
Font of Choice - I used Dragonfly here
Vix Mask 451 here
Scrap Rebellion Template 27 here
Brush Strokes - Sprayed Strokes
Xenofex 1.0 - Shatter
Greg’s Factory Output Vol. II - Pool Shadow
“Seasons” is a massive collaboration put together by many many designers in the scrapping and tagging community to help with the devastation in New Zealand caused by the tragic earthquake. This collaboration is FTU after a donation of $10 USD to the Salavation Army of NZ is made. Please visit Taggers Together for New Zealand to read more on how these talented designers are helping with this cause and to make your donation. This portion of the collaboration was created by DDCreations. Please visit her blog here.

This tutorial was written assuming you have a working knowledge of PSP.

~♥~ Let’s get started ~♥~

Open up the template.
Shift + D.
Close out the original.
Delete the top 5 layers and Blue Strip layer.
Highlight and open up the background layer.
Image/Canvas Size
700 x 650
OK
Flood fill the background layer white.

Highlight White Oval layer.
Select All/Float/Defloat.
New Raster layer.
Flood fill with #e4bb23
Adjust/Add Remove Noise/Add Noise:
Monochrome checked
Noise: 73%
OK
Deselect
Delete the template layer.

Highlight Blue Oval layer.
Click on it with your Magic Wand.
New Raster layer.

Open up Paper 4.
Shift + D.
Close out the original.
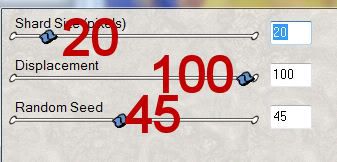
Apply Xenofex 1.0 - Shatter:


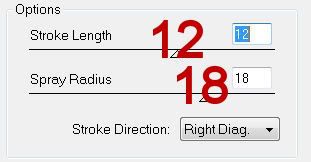
Apply Brush Strokes - Sprayed Strokes:


Copy
Make your working canvas active
Paste Into Selection
Deselect.
Give it a slight Inner Bevel:


Highlight Top Square layer.
Click on it with your Magic Wand.
Paste Paper 4.
Resize 70%
Choose an area of the paper you want in the boxed area.
Selections/Invert
Tap the delete key.
Delete the template layer.
Give it the same Inner Bevel.
Apply Greg’s Factory Output Vol. II - Pool Shadow:
Use Default settings accept move the Intensity slider to 25.

Highlight Bottom Square layer.
Repeat the above step choosing a different area of the paper.

Highlight Circle layer.
Click on it with your Magic Wand.
New Raster layer.
Paper 4 Into Selection.
Give it the same Inner Bevel.
Deselect.
Delete the template layer.

Highlight Frame layer.
In your layers pallet change the foreground color to #0d3ed9
Make your Target tool active and recolor the frame.

Copy and paste your tube as a new layer.

Add your embellishments. I used:
Seagull: Resize 25%
Palm Tree: Resize 85%/Duplicate/Mirror
Dolphin: Resize 25% and 35%
Sandcastle: Resize 30%
Beach ball: Resize 35%

Highlight your white background.
New Raster layer.
Select All.
Copy and paste Paper 14 Into Selection.
Deselect.
Adjust/Blur/Motion Blur:
Angle: 0
Strength: 97
OK
Apply the mask.
Merge Group.

Add your copyrights.

Add your name.
Choose your colors
Stroke set on 2.
Type your name.
Convert to Raster layer.
Select All/Float/Defloat
Selections/Modify/Contract by 2
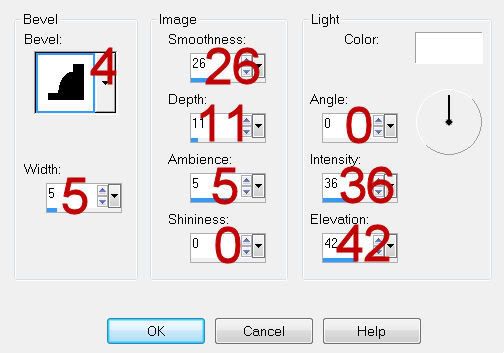
Give it a slight Inner Bevel:


Adjust/Add Remove Noise/Add Noise:
Use same settings.
Deselect.

Resize all layers 80%.

I hope you enjoyed this tutorial.
I’d love to see your results and show it off in my gallery.
Email me!
Hugs,
Bev

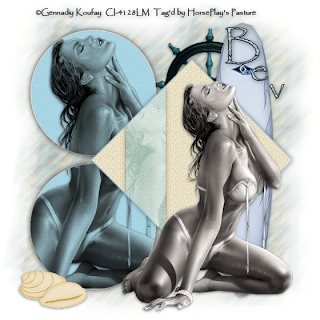
Ocean Affair


Clicking on the image will allow you to enlarge for bigger view.

Supplies

1 tube of choice - I used the artwork of Gennadiy Koufay which was purchased at CILM. I am currently trying to find out where this artist sells tubes now.
Font of Choice - I used Papyrus which came with my pc
Vaybs mask 133 here
My template 73 here
“Seasons” is a massive collaboration put together by many many designers in the scrapping and tagging community to help with the devastation in New Zealand caused by the tragic earthquake. This collaboration is FTU after a donation of $10 USD to the Salavation Army of NZ is made. Please visit Taggers Together for New Zealand to read more on how these talented designers are helping with this cause and to make your donation. This portion of the collaboration was created by Cuddz Reflections. Please visit her blog here.

This tutorial was written assuming you have a working knowledge of PSP.

~♥~ Let’s get started ~♥~

Open up the template.
Shift + D.
Close out the original.
Delete the top 2 layers.
Image/Canvas size
700 x 700
OK
Flood fill the background layer white.

Highlight Circle 1 layer.
Click on it with your Magic Wand.
New Raster layer.
Copy and paste Paper 8 Into Selection.
Deselect.
Apply Eyecandy 3.1 - Glow:
Width: 3
Opacity: 100
Opacity Dropoff: 100
Color: White
DO NOT DELETE THE TEMPLATE LAYER.

Repeat the above step with Circle 2 layer.
Merge Visible both circle paper layers.

Merge Visible both template layers.
Keep the template layers closed off.

Highlight Diamond layer.
Click on it with your Magic Wand.
New Raster layer.
Copy and paste Paper 9 Into Selection.
Deselect.
Apply Eyecandy 3.1 - Glow:
Same settings accept change the color to #a2d1e1
Delete the template layer.

Highlight Strip layer.
Click on it with your Magic Wand.
New Raster layer.
Copy and paste Paper 8 Into Selection.
Deselect.
Lower the Opacity to 48.
DO NOT DELETE THE TEMPLATE LAYER, but close it out.

Copy and paste your tube as a new layer.
Move it into position in front of the diamond shape.
Duplicate

Highlight Stripe template layer.
Click anywhere outside of it with your Magic Wand.
Highlight your duplicate tube layer.
In your layers pallet move it just over the stripe paper layer.
Using the arrow key on your keyboard move to the Left until it’s in position - see my tag for reference.
Tap the delete key.
Change the Properties to Soft Light.
Delete the template layer.

Paste your tube again as a new layer over the merged circle paper layer.
Size to be larger than the tube that’s pasted before the diamond.
Once you have it in position highlight the merged circle template layer.
Click anywhere outside of it with your Magic Wand.
Highlight the tube layer.
Tap the delete key.
Deselect.
Delete the template layer.

Add your embellishments. I used:
Surf Board: Resize 120%
Shell 2 & Shell 3: Resize 30% and 90%.
Ships Wheel: Resize 70%

Highlight the white background layer.
New Raster layer.
Select All.
Copy and paste Paper 6 Into Selection.
Deselect.
Adjust/Blur/Motion Blur:
Angel: 225
Strength: 97
OK
Apply the mask.
Merge Group.

Add your copyrights.

Add your name.

Resize all layers 80%.

I hope you enjoyed this tutorial.
I’d love to see your results and show it off in my gallery.
Email me!
Hugs,
Bev

Tuesday, March 15, 2011

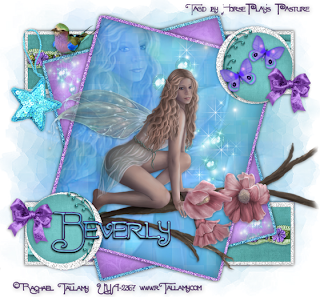
Flutter Sounds of the Fairy


Clicking on the image will allow you to enlarge for bigger view.

Supplies

1 tube of choice - I used the beautiful artwork of Rachael Tallamy which can be purchased from Up Your Art. You must obtain a license to use.
Font of Choice - I used Fortunaschwein here
My Mask 27 here
Scrap Rebellion Template 38 here
“Kitty Kat” is a FTU scrap kit created by Funky of WishingonaStarr and can be downloaded from her blog here.
Please leave a thank you when downloading as it’s a small gesture for hard work given freely.
Thank you Funky for yet another beautiful as well as generous freebie!! You rock chickadee!

This tutorial was written assuming you have a working knowledge of PSP.

~♥~ Let’s get started ~♥~

Open up the template.
Shift + D.
Close out the original.
Delete the top 6 layers.
Highlight the background layer and open it up.
Image/Canvas Size
700 x 650
OK
Flood fill white.

Highlight Color Rectangles layer.
Select All/Float/Defloat
New Raster layer.
Copy and paste Paper 18 Into Selection.
Deselect.

Highlight Glitterback 1 layer.
Click anywhere outside of it with your Magic Wand.
Seletions/Invert
New Raster layer.
Copy and paste Paper 6 Into Selection.
Adjust/Add Remove Noise/Add Noise:
Random and Monochrome checked
Noise: 65%
OK
Deselect.
Delete the template layer.

Highlight Blacksquare 1 layer.
Click on it with your Magic Wand.
New Raster layer.
Copy and paste Paper 17 Into Selection.
Deselect.
Delete the template layer.

Highlight Glitterback 2 layer.
Click anywhere outside of it with your Magic Wand.
Selections/Invert
New Raster layer.
Copy and paste Paper 2 Into Selection.
Apply the same noise effect.
Deselect.
Delete the template layer.

Highlight Blacksquare 2 layer.
Click on it with your Magic Wand.
New Raster layer.
Copy and paste Paper 6 Into Selection.
Copy and paste your tube as a new layer.
Resize larger and position near the top left corner of the square - see my tag for reference.
Selections/Invert
Tap the delete key.
Deselect.
Change the Properties to Soft Light.
Delete the template layer.

Highlight Glitter Circle 1 layer.
Click anywhere outside of it with your Magic Wand.
Selections/Invert
New Raster layer.
Flood fill with #ffffff
Apply the same noise effect.
Deselect.

Repeat the above step with Glitter circle 2 layer.

Highlight Purple Circle 1 layer.
Click on it with your Magic Wand.
Copy and paste Paper 18 as a new layer.
Resize 35%
Position over the circle.
Selections/Invert
Tap the delete key.
Deselect.

Repeat the above step with Purple circle 2 layer.

Copy and paste your tube as a new layer.

Add your embellishments. I used:
Border: Resize 50%
Blue Star: Resize 50%
Bird: Resize 25%
Bow: Resize 25%
Décor: Resize 40%
Sparkle
Painted Butterfly: Resize 25% and 70%/Free rotate Right 25 degrees

Highlight your white background.
New Raster layer.
Select All.
Copy and paste Paper 6 Into Selection.
Deselect.
Apply the mask.
Resize 110%
Merge Group.
Duplicate

Add your copyrights.

Add your name.
Give it a slight Inner Bevel:


Resize all layers 80%.

I hope you enjoyed this tutorial.
I’d love to see your results and show it off in my gallery.
Email me!
Hugs,
Bev

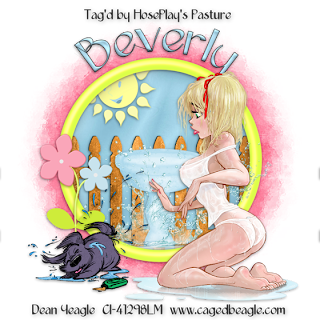
Splish Splash!


Clicking on the image will allow you to enlarge for bigger view.

Supplies

1 tube of choice and 1 image - I used the artwork of Dean Yeagle and can be purchased from CDO. You must obtain a license to use.
Font of Choice - I used Epittazio here
Vix mask 451 here
“Seasons” is a massive collaboration put together by many many designers in the scrapping and tagging community to help with the devastation in New Zealand caused by the tragic earthquake. This collaboration is FTU after a donation of $10 USD to the Salavation Army of NZ is made. Please visit Taggers Together for New Zealand to read more on how these talented designers are helping with this cause and to make your donation. This portion of the collaboration was created by Broken Dreams Scraps. Please visit her blog here.


This tutorial was written assuming you have a working knowledge of PSP.

~♥~ Let’s get started ~♥~

Open up a 700 x 700 blank canvas.
Flood fill white.

Copy and paste 32bds as a new layer.
Resize 75%
Click inside of each frame with your Magic Wand.
Selections/Modify/Expand by 4.
New Raster layer below the frame.
Copy and paste Paper 4bds Into Selection.
Deselect.

Now you’re going to add the elements that go below the frame. Don’t worry about what overhangs the frame. We’ll clean that up in a bit.
23bds: Resize 70%
21bds: Resize 60%
16bds: Resize 50%
11bds: Resize 25%

Highlight the paper layer.
Click anywhere outside of it with your Magic Wand.
Highlight each element layer below the frame and tap the delete key.
Deselect.

Copy and paste 25bds as a new layer.
Resize 25%

Copy and paste your tube as a new layer.

Crop your image.

Highlight your white canvas.
New Raster layer.
Select All.
Copy and paste 7bds Into Selection.
Deselect.
Apply the mask.
Merge Group.

Add your copyrights.

Add your name.
Color Pallet:
Foreground: Black
Background: Null
Width: 2
Make a circle that’s slightly larger than your frame.
Position it evenly around the frame.

Color Pallet:
Foreground: #202020
Background: Patten/10bds (from the kit)
Stroke: 1.0

Move your cursor along the circle line where you want your name until you see a Rocking A.
Click your mouse and a text box will appear.
Type your name.
Click on the plus sign beside your name in your layers pallet.
Close out the New Ellipse layer.
Highlight your name layer.
Right Click.
Convert to Raster layer.
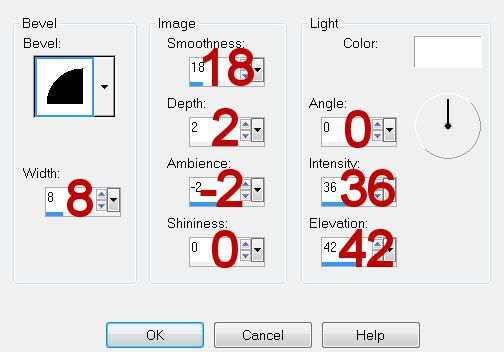
Give it a slight inner bevel:


Resize all layers 80%.

I hope you enjoyed this tutorial.
I’d love to see your results and show it off in my gallery.
Email me!
Hugs,
Bev

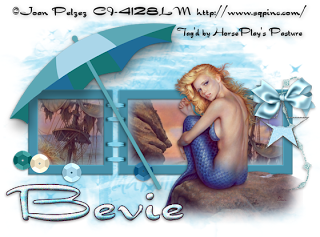
By the Sea


Clicking on the image will allow you to enlarge for bigger view.

Supplies

1 tube of choice and 1 image - I used the artwork of Joan Palaez and can be purchased from CDO.
Font of Choice - I used Dragonfly here
Gem 204 mask here
“Seasons” is a massive collaboration put together by many many designers in the scrapping and tagging community to help with the devastation in New Zealand caused by the tragic earthquake. This collaboration is FTU after a donation of $10 USD to the Salavation Army of NZ is made. Please visit Taggers Together for New Zealand to read more on how these talented designers are helping with this cause and to make your donation. This portion of the collaboration was created by Shellez Creations. Please visit her blog here.

This tutorial was written assuming you have a working knowledge of PSP.

~♥~ Let’s get started ~♥~

Open up a 700 x 700 blank canvas.
Flood fill white.

Copy and paste Element 24 as a new layer.
Resize 50%
Click inside of each frame with your Magic Wand.
Selections/Modify/Expand by 4.
New Raster layer below the frame.
Copy and paste Paper 6 Into Selection.
Deselect.

Copy and paste your image below the frame layer.
Highlight the frame layer.
Click inside the left square with your Magic Wand.
Selections/Modify/Expand by 4.
Position your image below the frame.
Selections/Invert
Tap the delete key.
Selections/Modify/Inside Outside Feather
Both checked
Feather amount: 23
Highlight the image layer.
Tap the delete key until you have a nice feathered effect.
Deselect.

Repeat the above step with the remaining 2 squares.

Copy and paste Element 13 as a new layer in front of the frame.
Move into position at the left side of the frame - see my tag for reference.
Once you have it in exact position/Duplicate/move just above your white canvas in your layers pallet.
Highlight the umbrella that’s at the top of your canvas.
Lower the Opacity and use your Freehand Selection tool to section out the part of the umbrella you don’t want so that you have the effect the umbrella is leaning on the frame.
Tap the delete key.
Deselect.

Copy and paste your tube as a new layer.
Position to the right of your canvas.

Add your embellishments. I used:
32: Resize 70%
15: Resize 60%
5: Resize 40%/Mirror
6, 7, 8, and 9: Resize 40%

Crop your image.

Highlight your white canvas.
New Raster layer.
Select All.
Copy and paste Paper 2 Into Selection.
Deselect.
Apply the mask.
Merge Group.

Add your copyrights.

Add your name.
Give it a small Inner Bevel:


Resize all layers 80%.

I hope you enjoyed this tutorial.
I’d love to see your results and show it off in my gallery.
Email me!
Hugs,
Bev

Winter's Chill


Clicking on the image will allow you to enlarge for bigger view.

Supplies

1 tube of choice - I used the artwork of Agent Melon which was a free Xmas gift from MPT a couple of years ago. I don’t know where the tube can be found now but when I do I will be sure to put a link in this tutorial.
Font of Choice - I used Chocolate Box here
Gem Mask 21 here
My Template 98 here
Mura’s Meister - Copies
Greg’s Factory Output Vol. II - Pool Shadow
My Supplies which contains word art made by me - here
“Seasons” is a massive collaboration put together by many many designers in the scrapping and tagging community to help with the devastation in New Zealand caused by the tragic earthquake. This collaboration is FTU after a donation of $10 USD to the Salavation Army of NZ is made. Please visit Taggers Together for New Zealand to read more on how these talented designers are helping with this cause and to make your donation. This portion of the collaboration was created by Bluebird Designz. Please visit her blog here.

This tutorial was written assuming you have a working knowledge of PSP.

~♥~ Let’s get started ~♥~

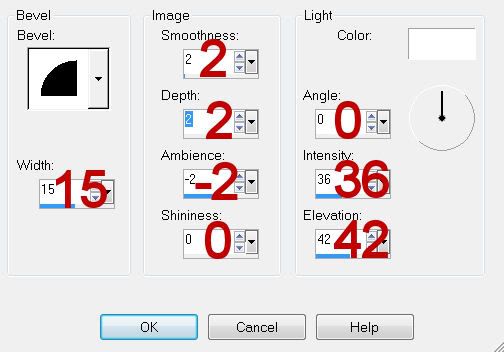
Open up the template.
Shift + D.
Close out the original.
Delete the Credit and Words layers.

Highlight Strips layer.
Click on each shape with your Magic Wand.
New Raster layer.
Open up a glitter color of your choice form the kit.
In your color pallet set it to pattern:
Scale 25.
Flood fill each shape.
Deselect.
Adjust/Sharpness/Sharpen
Sharpen again.
Delete the template layer.

Highlight Rectangle 1 layer.
Click on it with your Magic Wand.
New Raster layer.
Copy and paste Paper 4 Into Selection.
Deselect.
Delete the template layer.
Give it a slight Inner Bevel:
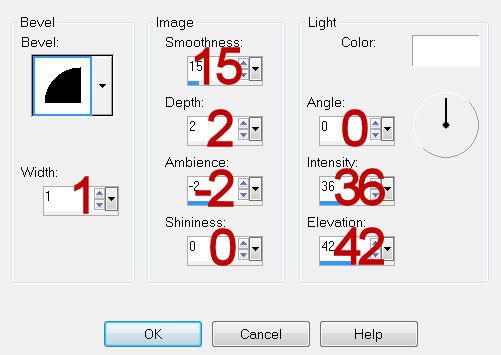

Apply Greg’s Factory Output Vol. II - Pool Shadow:
Default Settings accept slide Intensity to 15
OK

Highlight Rectangle 2 layer.
Click on it with your Magic Wand.
New Raster layer.
Copy and paste Paper 5 Into Selection.
Deselect for now - Rename Rec 2
DO NOT GIVE IT A DROP SHADOW YET.
Delete the template layer.
Apply Greg’s Factory Output Vol. II - Pool Shadow
Same settings.

Highlight Rectangle 3 layer.
Click on it with your Magic Wand.
New Raster layer.
Copy and paste Paper 6 Into Selection.
Deselect for now - Rename Rec 3 layer.
DO NOT GIVE IT A DROP SHADOW YET.
Delete the template layer.
Apply Greg’s Factory Output Vol. II - Pool Shadow
Same settings.

Copy and paste your tube as a new layer.
Move into position.
Duplicate/Position over Rec 2 layer.
In your layers pallet move just above Rec 2 layer.
Highlight Rec 2 layer.
Click anywhere outside of it with your Magic Wand.
Highlight the tube layer just above the rec layer.
Tap the delete key.
Deselect.
Merge Down.
Give it a slight Inner Bevel:
Use same settings.
Duplicate/Change the Opacity to Multiply.

Highlight your original tube layer.
Duplicate/Position over Rec 3 layer.
Repeat the above step.

Make the Beads element active.
Use your Selection Tool to select the white bead.
Copy.
Paste on your working canvas.
Resize 80%
Apply Mura’s Meister - Copes:
Line:
Use default settings accept change Number to 14.
OK
Free rotate Left 90 degrees.
Duplicate/Position each bead line at the left side of each rectangle.
Highlight each rectangle.
Click anywhere outside of it with your Magic Wand.
Highlight the bead line and tap the delete key.
Deselect.

Open up Glass Snowflakes elements.
Chose one you like and use your Selection Tool to section it out.
Copy and paste as a new layer.
Resize 25% and 40%
Apply Mura’s Meister - Copies - Wallpaper (Prospective)
Use Default Settings accept change Number to any number you want.
OK
Erase whatever flakes you don’t want.

Highlight your white background.
New Raster layer.
Select All.
Copy and paste Paper 3 Into Selection.
Deselect.
Apply the mask.
Merge Group.

Add your copyrights.

Add your name.

Resize all layers 80%.

I hope you enjoyed this tutorial.
I’d love to see your results and show it off in my gallery.
Email me!
Hugs,
Bev

Monday, March 14, 2011

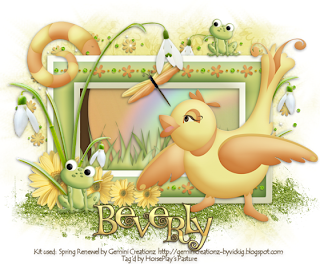
Spring Renewal

Clicking on the image will allow you to enlarge for bigger view.

Supplies

Font of Choice - I used TS Curly here
Weescotlass Mask 249 here
“Spring Renewal” is a TS scrap kit created by Vicki of Gemini Creationz and can be purchased from TKO Scraps. You can visit her blog here.
Thank you Vicki for an incredibly cute spring time kit!

This tutorial was written assuming you have a working knowledge of PSP.

~♥~ Let’s get started ~♥~

Open up a 700 x 700 blank canvas.
Flood fill white.

Copy and paste Frame 3 as a new layer.
Resize 90%
Click inside of it with your Magic Wand.
Selections/Modify/Expand by 6.
New Raster layer below the frame.
Copy and paste Paper 10 Into Selection.
Deselect for now.

Below the frame copy and paste the following elements:
(For placement see my tag for reference and don’t worry about what overhangs the edges of the frame. We’ll clean that up in a bit)
Tree 2
Rainbow
Grass: Resize 30%/Duplicate

Highlight the paper layer.
Click anywhere outside of it with your Magic Wand.
Highlight each element layer and tap the delete key.
Deselect.

Copy and paste Floral Border as a new layer.
Resize 60%
Erase the little bead at each end.
Duplicate
Move each border into position - see my tag for reference.

Add the rest of your embellishments. I used:
Flourish 3: Resize 70%
Flower 8: Place in front of the frame.
Flower 8 again: Resize 70%/Place behind the frame.
Floral Circle: Resize 50%/Duplicate
Frog: Resize 40%/Duplicate/Resize 70%
Flower 7: Resize 30%/Flip/Duplicate/Resize 70%/Duplicate/Reize 70%/Duplicate
Dragonfly: Resize 35%
Bird: Mirror
Glitter

Highlight your white background.
New Raster layer.
Select All.
Copy and paste Paper 2 Into Selection.
Deselect.
Apply the mask.
Use your Pick Tool to pull the top down and side out
Merge Group.

Add your copyrights.

Add your name.
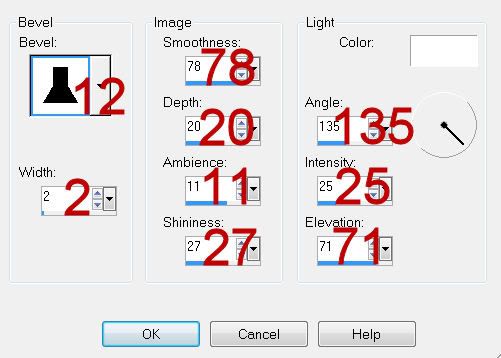
Give it a slight Inner Bevel:


Resize all layers 80%.

I hope you enjoyed this tutorial.
I’d love to see your results and show it off in my gallery.
Email me!
Hugs,
Bev
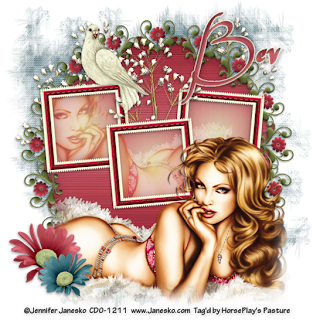
Renewed Promises

Clicking on the image will allow you to enlarge for bigger view.

Supplies

1 tube of choice - I used the beautiful artwork of Jennifer Janesko which can be purchased from CDO. You must obtain a license to use.
Font of Choice - I used Wankstaberg Battles here
Weescotlass Mask 297 here
“Springtime” is a TS scrap kit created by Em of EmJay Scraps and can be purchased from Butterfly Blush Designs. You can visit her blog here.
Thank you Em for a beautiful spring kit in the most wonderful colors!

This tutorial was written assuming you have a working knowledge of PSP.

~♥~ Let’s get started ~♥~

Open up a 700 x 700 blank canvas.
Flood fill white.

Copy and paste Element 32 as a new layer.
Resize 90%
Click inside of it with your Magic Wand.
Selections/Modify/Expand by 2.
New Raster layer below the frame.
Copy and paste Paper 2 Into Selection.
Deselect.

Copy and paste Element 3 as a new layer.
Resize 30%
Free rotate Left 5 degrees.
Duplicate twice for a total of 3 frames.
Mirror one of them.
Move all the frame into exact position - see my tag for reference.

Highlight the middle frame.
Click inside of it with your Magic Wand.
Selections/Modify/Expand by 6.
Highlight the Left frame.
Tap the delete key.
Highlight the Right frame.
Tap the delete key.
Deselect.
Merge Visible all frames.

Click inside of all the frames with your Magic Wand.
Selections/Modify/Expand by 4.
New Raster layer below the frames.
Copy and paste Paper 16 Into Selection.
Deselect for now.

Copy and paste your tube as a new layer.
Move into exact position in front of all frames.
Duplicate/Mirror/Move into exactly position below the merged frame layer.
Highlight the paper layer.
Click anywhere outside of it with your Magic Wand.
Highlight the tube layer just below the frames.
Tap the delete key.
Deselect.
Change the Properties to Soft Light.

Add your embellishments. I used:
Element 9: Resize 40%
Element 10: Resize 30%/Mirror
Element 46: Your choice
Element 42

Highlight your white background.
New Raster layer.
Select All.
Copy and paste Paper 2 Into Selection.
Deselect.
Apply the mask.
Merge Group.

Add your copyrights.

Add your name.
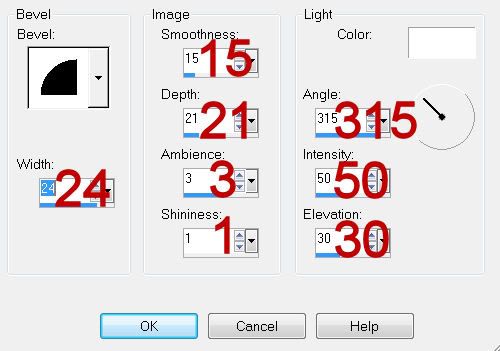
Give it a slight Inner Bevel:


Apply Eyecandy 3.1 - Glow:
Width: 3
Opacity: 100
Dropoff Opacity: Fat
Color: White
OK

Resize all layers 80%.

I hope you enjoyed this tutorial.
I’d love to see your results and show it off in my gallery.
Email me!
Hugs,
Bev
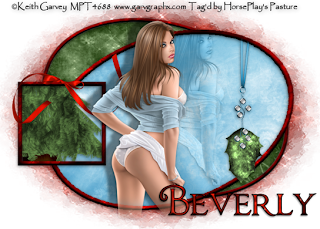
Winter Enticement


Clicking on the image will allow you to enlarge for bigger view.

Supplies

1 tube of choice - I used the artwork of Keith Garvey which can now be purchased from PSP Tubes Emporium. You must use a license to use.
Font of Choice - I used Chocolate Box here
Vix Mask 451 here
Scrap of Enchantment Template 112 here
Greg’s Factory Output Vol. II - Pool Shadow
“Seasons” is a massive collaboration put together by many many designers in the scrapping and tagging community to help with the devastation in New Zealand caused by the tragic earthquake. This collaboration is FTU after a donation of $10 USD to the Salavation Army of NZ is made. Please visit Taggers Together for New Zealand to read more on how these talented designers are helping with this cause and to make your donation. This portion of the collaboration was created by Jess of LittleGirlBlue Designs. Please visit her blog here.

This tutorial was written assuming you have a working knowledge of PSP.

~♥~ Let’s get started ~♥~

Open up the template.
Shift + D.
Close out the original.
Delete the top 6 layers.
New Raster layer.
Flood fill white.
Send to bottom.

Highlight BlkOval layer.
Click on it with your Magic Wand.
New Raster layer.
Copy and paste Paper 1 Into Selection.
Deselect.
Delete the template layer.

Highlight GreOvalFrame layer.
Click on it with your Magic Wand.
New Raster layer.
Copy and paste Paper 17 Into Selection.
Deselect.
Delete the template layer.
Give it a slight inner bevel:


Repeat the above step with BlkOvalFrame layer and SquareGreyFrame layer.

Highlight Blacksquare layer.
Click on it with your Magic Wand.
New Raster layer.
Copy and paste Paper 8 Into Selection.
Copy and paste Element 51 as a new layer above the paper.
Resize 60%
Move into position.
Selection/Invert
Tap the delete key.
Deselect.
Delete the template layer.

Highlight WhiteOval layer.
Click on it with your Magic Wand.
New Raster layer.
Copy and paste Paper 7 Into Selection.
Deselect.
Delete the template layer.

Copy and paste your tube as a new layer.
Move it into the position you want.
Duplicate/Move to the right a little.
In your layers pallet move it just above the oval paper.
Highlight the paper layer.
Click anywhere outside of it with your Magic Wand.
Highlight the duplicate tube layer.
Tap the delete key.
Deselect.
Change the Properties to Luminance Legacy.
Lower the Opacity to about 40.

Add your embellishments. I used:
30: Resize 60%
44: Resize 40%/Free rotate Right 90 degrees

Give your original tube an exaggerated Drop Shadow.

Highlight the white background layer.
New Raster layer.
Select All.
Copy and paste Paper 18 Into Selection.
Deselect.
Apply the mask.
Resize 120%
Merge Group.

Add your copyrights.

Add your name.
Give it the same Inner Bevel.

Resize all layers 80%.

I hope you enjoyed this tutorial.
I’d love to see your results and show it off in my gallery.
Email me!
Hugs,
Bev
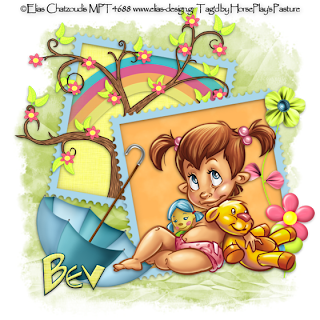
Lazy Spring Afternoon


Clicking on the image will allow you to enlarge for bigger view.

Supplies

1 tube of choice - I used the artwork of Elias Chatzoudis which can now be purchased from PSP Tubes Emporium. You must use a license to use.
Font of Choice - I used Toontime Regular here
Weescotlass mask 22 here
“Seasons” is a massive collaboration put together by many many designers in the scrapping and tagging community to help with the devastation in New Zealand caused by the tragic earthquake. This collaboration is FTU after a donation of $10 USD to the Salavation Army of NZ is made. Please visit Taggers Together for New Zealand to read more on how these talented designers are helping with this cause and to make your donation. This portion of the collaboration was created by Nancy of GeoGirl Designs. Please visit her blog here.

This tutorial was written assuming you have a working knowledge of PSP.

~♥~ Let’s get started ~♥~

Open up a 700 x 700 blank canvas.
Flood fill white.


Copy and paste Frame 2 as a new layer.
Resize 60%
Free rotate Right 10 degrees
Duplicate/Mirror
Move the frame into position - see my tag for reference.

Highlight the top frame.
Click inside of it with your Magic Wand.
Selections/Modify/Expand by 4.
New Raster layer below the frame.
Copy and paste Paper 11 Into Selection.
Copy and paste Element 6 as a new layer.
Resize 60%/Move into position below the frame.
Copy and paste Element 3 as a new layer below the frame.
Move into position/Duplicate
Selections/Invert
Highlight one of the tree layers and tap the delete key.
Move the other tree layer above the frame in your layers pallet.
Deselect.
Use your Eraser Tool to erase the base of the tree that you can see over the frame.

Highlight the bottom frame.
Click inside of it with your Magic Wand.
Selections/Modify/Expand by 4.
New Raster layer below the frame.
Copy and paste Paper 10 Into Selection.
Deselect.

Copy and paste your tube as a new layer.

Add your embellishments. I used:
Flower 6: Resize 60%
Element 4: Resize 60%/Mirror
Flower 1: Resize 40%
Flower 4: Resize 35%

Highlight the white background layer.
New Raster layer.
Select All.
Copy and paste Paper 7 Into Selection.
Deselect.
Apply the mask.
Merge Group.

Add your copyrights.

Add your name.

Resize all layers 80%.

I hope you enjoyed this tutorial.
I’d love to see your results and show it off in my gallery.
Email me!
Hugs,
Bev
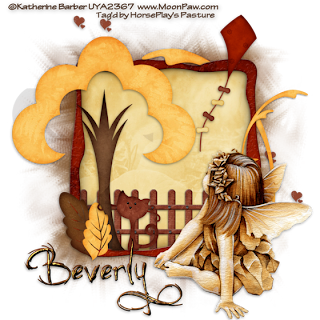
Autumn Magic


Clicking on the image will allow you to enlarge for bigger view.

Supplies

1 tube of choice - I used the artwork of Katherine Barber which can be purchased at Up Your Art. Please do not use unless you have a license to do so.
Font of Choice - I used Jellyka Castle’s Queen here
Weescotlass mask 249 here
“Seasons” is a massive collaboration put together by many many designers in the scrapping and tagging community to help with the devastation in New Zealand caused by the tragic earthquake. This collaboration is FTU after a donation of $10 USD to the Salavation Army of NZ is made. Please visit Taggers Together for New Zealand to read more on how these talented designers are helping with this cause and to make your donation. This portion of the collaboration was created by Annette of AW Design. Please visit her blog here.

This tutorial was written assuming you have a working knowledge of PSP.

~♥~ Let’s get started ~♥~

Open up a 700 x 700 blank canvas.
Flood fill white.

Copy and paste 16 as a new layer.
Click inside of it with your Magic Wand.
New Raster layer below the frame.
Copy and paste Paper 7 Into Selection.
Copy and paste 13 as a new layer below the frame.
Resize 85%
Move into position - see my tag for reference.
Selection/Invert
Tap the delete key.
Deselect.

Add your embellishments. I used:
23
24: Resize 30%
37: Mirror/Place behind the frame
37 again: Resize 50%
38: Resize 60%/Mirror
35: Resize 70%

Copy and paste your tube as a new layer.

Highlight your white background.
New Raster layer.
Select All.
Copy and paste paper 10 Into Selection.
Deselect.
Apply the mask.
Resize 105%
Merge Group.

Add your copyrights.

Add your name.
Give it a slight Inner Bevel:


Resize all layers 80%.

I hope you enjoyed this tutorial.
I’d love to see your results and show it off in my gallery.
Email me!
Hugs,
Bev
Sunday, March 13, 2011

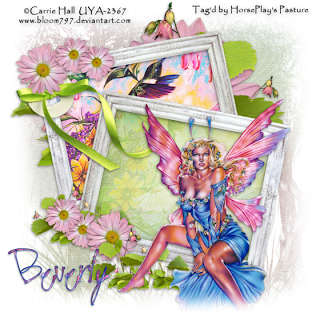
Spring Whispers


Clicking on the image will allow you to enlarge for bigger view.

Supplies

1 tube of choice and 1 image - I used the beautiful artwork of Carrie Hall which can be purchased from Up Your Art. You must obtain a license to use.
Font of Choice - I used Second Lyrics here
My Mask 39 here
“Fresh Memories” is a TS scrap kit created by Dani of Darkmoon’s Dreams and can be purchased from Scraps with Attitude. You can visit her blog here.
Thank you Dani for a kit that shouts “breath of fresh air”!

This tutorial was written assuming you have a working knowledge of PSP.

~♥~ Let’s get started ~♥~

Open up a 700 x 700 blank canvas.
Flood fill white.

Copy and paste Frame 1 as a new layer.
Resize 60%
Duplicate/Mirror
Move both into position - see my tag for reference.

Highlight the top frame.
Click inside of it with your Magic Wand.
Selections/Modify/Expand by 6.
New Raster layer below the frame.
Copy and paste Paper 4 Into Selection.
Copy and paste your image below the frame.
Move into the position you like.
Selections/Invert
Tap the delete key.
Deselect.
Change the Properties to Hard Light - or whichever you prefer.

Highlight the bottom frame.
Click inside of it with your Magic Wand.
Selections/Modify/Expand by 6.
New Raster layer below the frame.
Copy and paste Paper 1 Into Selection.
Copy and paste your image below the frame.
Move into the position you like.
Selections/Invert
Tap the delete key.
Deselect.
Change the Properties to Soft Light - or whichever you prefer.

Copy and paste your tube as a new layer.

Add your embellishments. I used:
Button: Resize 40%
Flower 3: Resize 50% (position behind both frames)
Flower 3 again: Resize 25% and 60%/Duplicate/Resize 70%/Duplicate
Flowers 1: Resize 80% (position behind the frames)
Flowers 1 again: Resize 30%

Highlight your white background.
New Raster layer.
Select All.
Copy and paste Paper 2 Into Selection.
Deselect.
Apply the mask.
Merge Group.
Duplicate

Add your copyrights.

Add your name.

Resize all layers 80%.

I hope you enjoyed this tutorial.
I’d love to see your results and show it off in my gallery.
Email me!
Hugs,
Bev
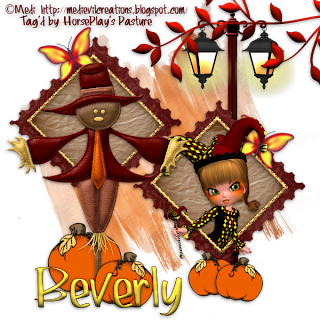
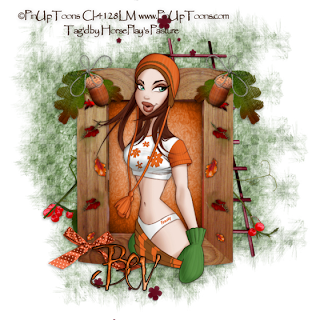
Among the Pumpkin Patch


Clicking on the image will allow you to enlarge for bigger view.

Supplies

Font of Choice - I used Rolina here
Vix Mask 350 here
My Template 56 here
Brush Strokes - Sprayed Strokes
Greg’s Factory Output Vol. II - Pool Shadow
“Seasons” is a massive collaboration put together by many many designers in the scrapping and tagging community to help with the devastation in New Zealand caused by the tragic earthquake. This collaboration is FTU after a donation of $10 USD to the Salavation Army of NZ is made. Please visit Taggers Together for New Zealand to read more on how these talented designers are helping with this cause and to make your donation. This portion of the collaboration was created by KissedbyPix Design. Please visit her blog here.

This tutorial was written assuming you have a working knowledge of PSP.

~♥~ Let’s get started ~♥~

Open up the template.
Shift + D.
Close out the original.
Delete the top 2 layers.

Highlight Right Stamp Back layer.
Click on it with your Magic Wand.
New Raster layer.
Copy and paste Paper 2 Into Selection.
Deselect.
Delete the template layer.

Highlight Left Stamp Back.
Repeat the above step.

Highlight Right Stamp Square.
Click on it with your Magic Wand.
New Raster layer.
Copy and paste Paper 4 Into Selection.
Copy and paste Medi Custom 2 as a new layer above the paper layer.
Resize 70%
Move into position.
Selection/Invert
Tap the delete key.
Deselect.
Delete the template layer.

High Left Stamp Square.
Click on it with your Magic Wand.
New Raster layer.
Copy and paste Paper 4 Into Selection.
Deselect.
Delete the template layer.

Highlight Right Stamp Frame.
Select All/Float/Defloat
New Raster layer.
Copy and paste Paper 1 Into Selection.
Deselect.
Delete the template layer.
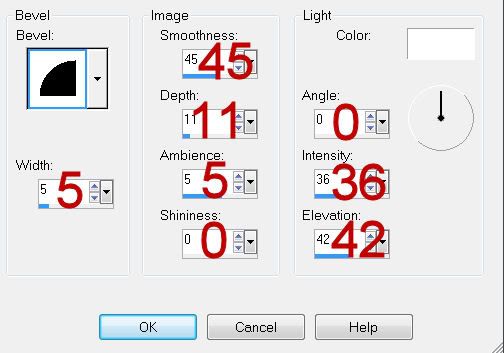
Give it a slight Inner Bevel:


Copy and paste Branch 1 as a new layer.
Resize 65%/Mirror
Select All/Float/Defloat
Apply Greg’s Factory Output Vol. II - Pool Shadow:


Give it an Inner Bevel:
Same settings.
Deselect.

Add your embellishments. I used:
Lamp
Scarecrow 1: Resize 70%
Flutter: Resize 25% and 80%/Free rotate Right 25 degrees
Pumpknz: Resize 35%/Duplicate/Mirror/Resize 80%/Duplicate twice

Highlight your white background.
New Raster layer.
Select All.
Copy and paste Paper 8 Into Selection.
Deselect.
Apply Brush Strokes - Sprayed Strokes:
Default Settings
OK
Apply again.
Apply the mask.
Resize 105%
Merge Group.

Add your copyrights.

Add your name.
Give the same Inner Bevel.

Resize all layers 80%.

I hope you enjoyed this tutorial.
I’d love to see your results and show it off in my gallery.
Email me!
Hugs,
Bev
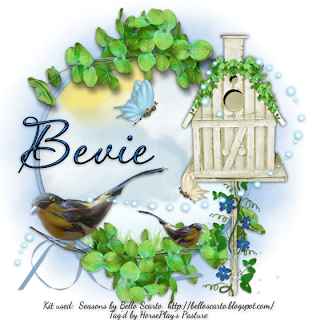
Seasons


Clicking on the image will allow you to enlarge for bigger view.

Supplies

Font of Choice - I used Aquarelle here
Monti Circular mask here
“Seasons” is a massive collaboration put together by many many designers in the scrapping and tagging community to help with the devastation in New Zealand caused by the tragic earthquake. This collaboration is FTU after a donation of $10 USD to the Salavation Army of NZ is made. Please visit Taggers Together for New Zealand to read more on how these talented designers are helping with this cause and to make your donation. This portion of the collaboration was created by Jay of Bello Scarto. Please visit her blog here.
To make your donation and receive the collaboration click on the link in the top right side bar of my blog.

This tutorial was written assuming you have a working knowledge of PSP.

~♥~ Let’s get started ~♥~

Open up a 700 x 700 blank canvas.
Flood fill white.

Use your Selection Tool active set on Circle.
Make a circle in the center of your canvas that’s approximately 500 x 500.
New Raster layer.
Copy and paste Paper 5 Into Selection.
Adjust/Add Remove Noise/Add Noise:
Uniform checked
Noise: 35%
OK
Selections/Modify/Contract by 10
New Raster layer.
Copy and paste Paper 11 Into Selection.
Deselect for now.

Copy and paste the following elements over the circle paper layer and don’t worry about what overhangs the edges after positioning them….we’ll take care of the mess in a little bit.
4: Resize 60%/Duplicate/Arrange both clouds over the circle.
33: Resize 50%

Highlight the paper layer.
Click anywhere outside of it with your Magic Wand.
Highlight each element layer and tap the delete key.
Deselect.
Add your embellishments. I used:
36: Resize 85%/Mirror/Duplicate/Flip/Mirror
38: Resize 85%/Mirror/Duplicate/Mirror/Resize 50%
37: Resize 90%
35: Resize 50%
8: Resize 40%
6: Resize 40% and 70%/Mirror
16: Resize 50%
23

Highlight your white canvas.
New Raster layer.
Select All.
Copy and paste Paper 8 Into Selection.
Deselect.
Apply the mask.
Merge Group.

Add your copyrights.

Add your name
Give it a small Inner Bevel:


Resize all layers 80%.

I hope you enjoyed this tutorial.
I’d love to see your results and show it off in my gallery.
Email me!
Hugs,
Bev
Lighthouse


Clicking on the image will allow you to enlarge for bigger view.
Supplies

1 tube of choice - I used the artwork of Gennadiy Koufay which was purchased from CILM. I no longer know where this artist sells. If you do please email me.
Font of Choice - I used Jellyka Western Princess here and Birth of a Hero here
Gem Mask 71 here
Brush Strokes - Sprayed Strokes
“Seasons” is a massive collaboration put together by many many designers in the scrapping and tagging community to help with the devastation in New Zealand caused by the tragic earthquake. This collaboration is FTU after a donation of $10 USD to the Salavation Army of NZ is made. Please visit Taggers Together for New Zealand to read more on how these talented designers are helping with this cause and to make your donation. This portion of the collaboration was created by Artmama Made. This massive collaboration was all her idea and is responsible for pulling this massive donation together. Hats off to her! Please visit her blog here.

This tutorial was written assuming you have a working knowledge of PSP.

~♥~ Let’s get started ~♥~

Open up a 700 x 700 blank canvas.
Flood fill white,

Copy and paste Embellie 8 as a new layer.
Resize 80%
Use your Selection Tool and section off the elements at the left side of the frame:


Tap the delete key.

Section off the ribbon that sticks out on the inside of the bottom frame:


Tap the delete key.

Center the frame on your canvas.
Click inside of both frames with your Magic Wand.
Selections/Modify/Expand by 4.
New Raster layer below the frame.
Copy and paste Paper 4 Into Selection.
Deselect for now.

We’re going to add elements below the frame - don’t worry about what sticks out. We’ll take care of the mess later on.

Copy and paste Embellie 28 as a new layer.
Position at the left - see my tag for reference.

Copy and paste Embellie 13 as a new layer.
Move into position before the lighthouse.
Duplicate/Move into position behind the lighthouse.

Copy and paste Embellie 6 as a new layer.
Resize 25% and 50%
Duplicate 8 times for a total of 9.
Position between the sand layers and free rotate each anywhere from 2% - 7% either left or right.

Copy and paste Embellie 11 as a new layer.
Resize 25%
Using the font Birth of a Hero, type out “No” and “Swimming”.
Arrange them over the wood sign.
Lower the Opacity of the words to about 70.

Copy and paste Embellie 10 as a new layer.
Resize 25%
Position near the bottom of the wood sign.

Copy and paste Embellie 30 as a new layer.
Resize 70%
Move into position.

Copy and paste your tube as a new layer.
Resize very small and position behind the wood sign.

Paste your tube again.
Keep it sized large.
In your layers pallet move it just above the paper layer.
Change the Properties to Soft Light.

Highlight the paper layer.
Click anywhere outside of it with your Magic Wand.
Highlight each element layers and your large tube layer that sticks outside of the frame and tap the delete key.
Deselect.

Add the rest of your embellishments. I used:
Embellie 21: Resize 70%/Duplicate/Resize 70%/Duplicate/Resize 70%/Duplicate.
Embellie 10
Embellie 19: Resize 60%
Embellie 13
Embellie 18
Embellie 15: Resize 60%
Embellie 5

Copy and paste your tube as a new layer.
Position it to the left of the frame.

Highlight your white background.
New Raster layer.
Select All.
Copy and paste Paper 7 Into Selection.
Deselect.
Apply Brush Strokes - Sprayed Strokes:
Default Settings
OK
Apply the mask.
Merge Group.

Add your copyrights.

Add your name.

Resize all layers 80%.

I hope you enjoyed this tutorial.
I’d love to see your results and show it off in my gallery.
Email me!
Hugs,
Bev