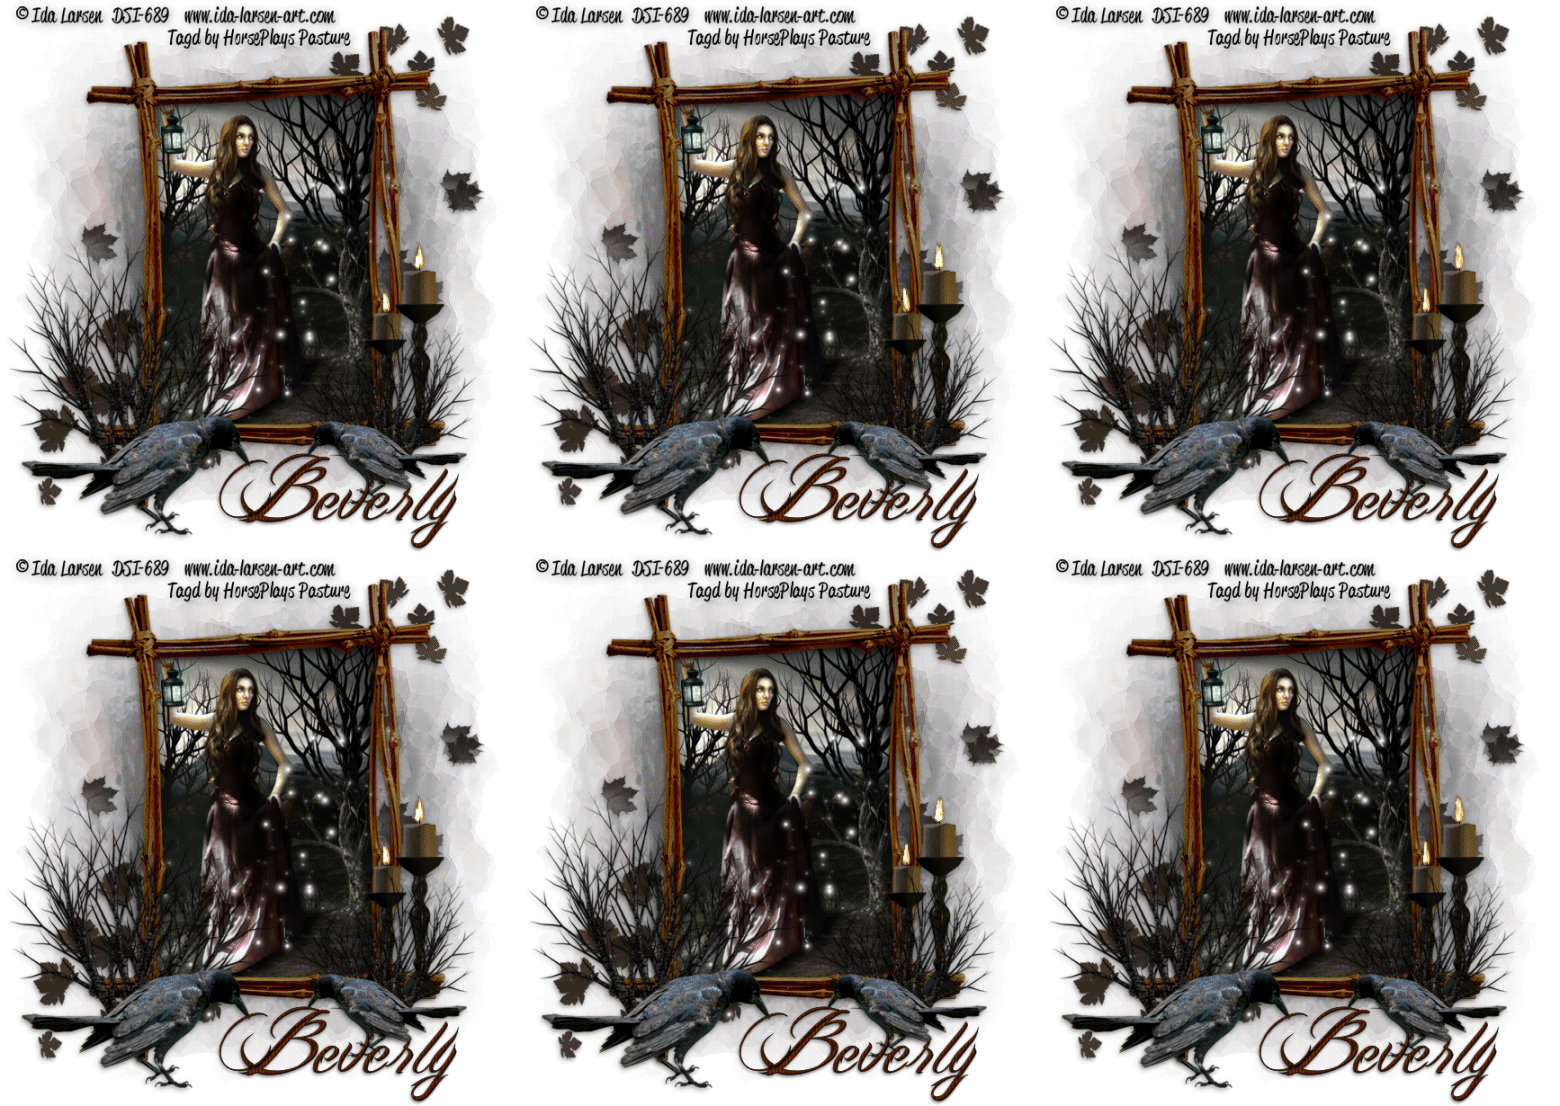
Friday, January 28, 2011

Quietly...


Supplies

1 Image of choice - I used the artwork of Ida Larsen at Dreamscape Imaging
Font of Choice - I used Billy Argel here
My mask 27 here
Eyecandy 5: Nature - Fire and Snow
Animation Shop
“Sleepy Hollow” is a PTU tagger size scrap kit created by Jessica of Gothic Inspirations and can be purchased from her store Gothic Inspirations. You can visit her blog here.
Thank you Jessica for a kit that‘s every bit as awesome as your others!

This tutorial was written assuming you have a working knowledge of PSP.

~♥~ Let’s get started ~♥~

Open up a 700 x 700 blank canvas.
Flood fill white.

Copy and paste Frame 1 as a new layer.
Resize 65%
Click inside of it with your Magic Wand.
Selections/Modify/Expand by 4.
Copy and paste your image as a new layer below the frame.
Resize as you like.
Selections/Invert
Tap the delete key.
Deselect.

Add your embellishments. I used:
Tree 1: Resize 50%/Dupplicate/Mirror/Resize 70%
Crow: Resize 50%/Duplicate/Mirror/Resize 70%
Candle 2: Resize 40%/Duplicate/Resize 80%
Leaves: Resize 70%
Lantern Bling: Resize 50%

Crop your Image.

Highlight your white background.
New Raster layer.
Select All.
Copy and paste Paper 13 Into Selection.
Deselect.
Apply the mask.
Merge Group.

Merge Visible the two candle layers.
Duplicate 3 times for a total of 4 candle layers.
Rename them Candle 1, 2, 3, and 4.

Highlight Candle 1 layer.
Use your Freehand Selection Tool and outline the flame of each candle.
Apply Eyecandy 5 Nature - Fire

Settings Tab:
Small, Candle

Basic Tab:
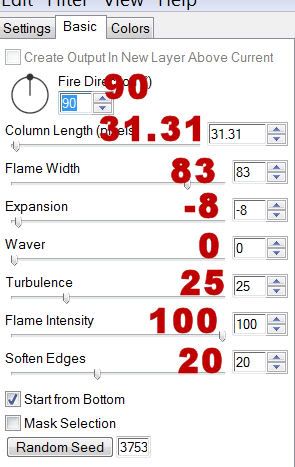

OK

Highlight Candle 2 layer.
Apply the same fire effect accept hit the random seed button once.
OK

Highlight Candle 3 layer.
Repeat the above effect.

Highlight Candle 4 layer.
Repeat the same effect.

Deselect.

Close out Candle layers 2, 3, and 4, leaving open Candle 4 layer.

Copy Merge.

~Time to Animate~

Open up Animation Shop.
Edit/Paste/As New Animation

Back in PSP.
Close out Candle 1 layer.
Open up Candle 2 layer.
Copy Merge

Carry into AS
Edit/Paste/After Current Frame.

Back in PSP.
Close out Candle 2 layer.
Open up Candle 3 layer.
Copy Merge.

Back in PSP.
Close out Candle 3 layer.
Open up Candle 4 layer.
Copy Merge.

Back in PSP.
Edit/Paste/After Current Frame.

Shift + A to be sure all frames are highlighted.
Animation/Frame Properties
Display time: 30
OK

Animation/Resize Animation
Percentage of Original checked.
Width and Height:
90
OK

I hope you enjoyed this tutorial.
I’d love to see your results and show it off in my gallery.
Email me!
Hugs,
Bev

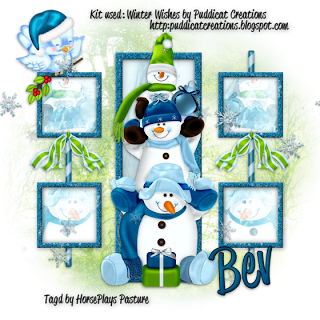
Thursday, January 27, 2011

Winter Wishes


Clicking on the image will allow you to enlarge for bigger view.

Supplies

Font of Choice - I used Reklame Script Demo here - choose the top one (free), place in cart and go through the purchase routine.
My Mask 5 here
Country Bug’s template 14 here
DSB Flux - Bright Noise
Eyecandy 5: Impact
Mura’s Meister - Copies
“Winter Wishes” is FTU scrap kit created by Cindy of Puddicat Creations and can be downloaded from her blog here.
Please leave a thank when downloading as it‘s a small gesture for hard work given freely.

This tutorial was written assuming you have a working knowledge of PSP.

~♥~ Let’s get started ~♥~

Open up the template.
Shift + D.
Close out the original.
Image/Canvas size
700 x 700
OK
Flood fill Raster 1 white.
Delete Dotted Lines layer and Raster 2 (credit) layer.

Highlight Rec Frame layer.
Click on it with your Magic Wand.
New Raster layer.
Copy and paste Paper 3 Into Selection.
Deselect.
Delete the template layer.
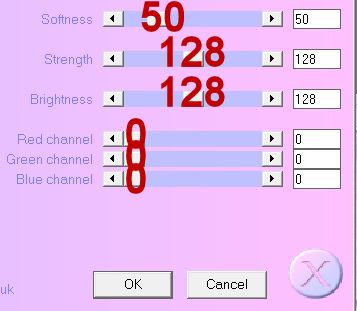
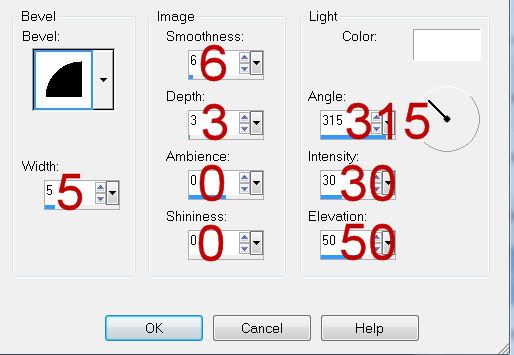
Give it a sight Inner Bevel:


Apply DSB Flux - Bright Noise:
Intensity: 42
Mix checked
OK

Repeat the above steps with the following layers:
Square Frame, Square Frame 2, Square Frame 3, and Square Frame 4

Highlight Square back layer.
Click on it with your Magic Wand.
New Raster layer.
Copy and paste Paper 1 Into Selection.
Deselect.
Delete the template layer.

Repeat the above step with Square Back 2, 3, and 4 layers.

Merge Visible both square back layers on the left side.

Merge Visible both square back layers on the right side.

Copy and paste Snowmen 1 as a new layer.
Center it in front of the large rectangle.
Duplicate/In your layers pallet move just above the merged square back layers on the right side. Move them into position - see my tag for reference.
Highlight the merged square back paper layers.
Click anywhere outside of them with your Magic Wand.
Highlight the element layer above it.
Tap the delete key.
Deselect.
Change the Properties to Overlay.
Duplicate/Mirror/In your layers pallet move just above the merged square back layers on the right side. It should already be in position beneath the frame, but if not, go ahead and move it.

Open up Santa’s Sign 1.
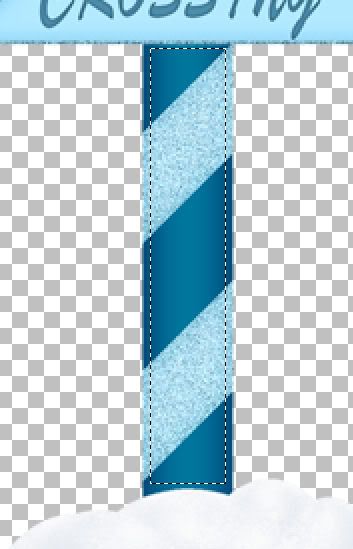
Use your Selection Tool set on rectangle and section out the barber pole area:


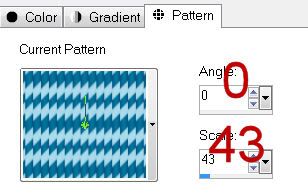
In your materials pallet set it to Pattern and look for the barber pole. Match your settings to mine:


On your working canvas Highlight Black Line layer.
Click on it with your Magic Wand.
New Raster layer.
Flood fill with your pattern.
Deselect.
Delete the template layer.
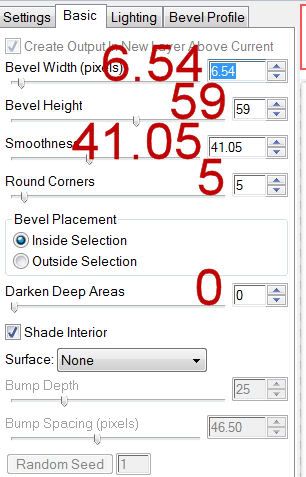
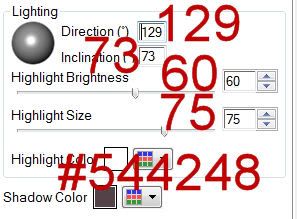
Apply Eyecandy 5: Impact-Bevel:
Basic Tab:


Lighting Tab:


Bevel Profile tab:
Set to Button

Highlight Black Line 2 and repeat the above step.

Add your embellishments. I used:
Bird 1: Resize 50%
Bow 1: Resize 25% and 80%/Duplicate/Mirror

Open up Snow Doodle 1.
Use your Selection Tool set on Rectangle and section out a snowflake of your choice.
Copy
Make your working canvas active and paste.
Move the flake anywhere on your canvas.
Apply Mura’s Meister: Copies
Set to Wallpaper (perspective)
Default settings.
OK
If you don’t like the way the flakes look then simply undo, move the flake and apply the effect again. You can also use your eraser tool to erase any unwanted flakes.

Highlight Raster 1 (white canvas layer)
Select All.
New Raster layer.
Copy and paste Paper 5 Into Selection.
Deselect.
Apply the mask.
Resize 130%
Merge Group.

Add your credits.

Add your name.
Give it the same slight inner bevel.
Free rotate Left 10 degrees.

Resize all layers 80%.

I hope you enjoyed this tutorial.
I’d love to see your results and show it off in my gallery.
Email me!
Hugs,
Bev
Wednesday, January 26, 2011

Interlude


Clicking on the image will allow you to enlarge for bigger view.

Supplies

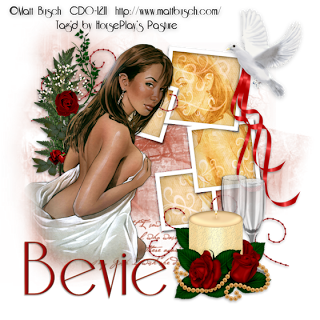
1 tube of choice - I used the artwork of Matt Busch that can be purchased at CDO
Font of Choice - I used Riesling here
Vix Mask 393 here
“Colors of Love” is an AC Diva’s collaboration. This tutorial uses Julie of Bits N Bobs portion of it and can be purchased at Exquisite Scraps. You can visit Julie’s blog here.
Thank you Julie for such a beautiful as well as elegant kit.

This tutorial was written assuming you have a working knowledge of PSP.

~♥~ Let’s get started ~♥~

Open up a 700 x 700 blank canvas.
Flood fill white.

Copy and paste 50 as a new layer.
Click inside each of the squares with your Magic Wand
Selections/Modify/Expand by 3.
New Raster layer below the frame.
Copy and paste Paper 3 Into Selection.
Deselect.

Copy and paste your tube as a new layer.
Position it to the left of the frames.
Duplicate/Mirror/Move into position below the frames.
Highlight the paper layer.
Click anywhere outside of it with your Magic Wand.
Highlight the tube layer below the frame.
Tap the delete key.
Deselect.
Change the Properties to Soft Light.
Duplicate.

If you want to feather the tube that’s to the left of the frames then make your Freehand Selection Tool active.
Go around your tube making sure the dotted line touches the tube wherever you want it to be feathered and stay away from the parts of the tube you don’t want feathered.
Selections/Modify/Inside Outside Feather
Both checked
Feathered amount: 43
OK
Selections/Invert
Tap the delete key until you have the effect you want.
Deselect.

Add your embellishments. I used:
38: Resize 70%
33: Resize 60%
42: Resize 70%
20: Resize 70%

Highlight your white background.
New Raster layer.
Select All.
Copy and paste Paper 13 Into Selection.
Deselect.
Apply the mask.
Resize 110%
Merge Group.

Add your credits.

Add your name.
Give it a slight Inner Bevel:


I hope you enjoyed this tutorial.
I’d love to see your results and show it off in my gallery.
Email me!
Hugs,
Bev
Colors of Love


Clicking on the image will allow you to enlarge for bigger view.

Supplies

1 tube of choice - I used the artwork of Zindy S.D. Nielsen here
Font of Choice - I used Shardee here
Gem Mask 23 here
“Colors of Love” is an AC Diva’s collaboration. This tutorial uses Artmama Made’s portion of it and can be purchased at Exquisite Scraps. You can visit her blog here.
Thank you Julie for such a beautiful as well as elegant kit.

This tutorial was written assuming you have a working knowledge of PSP.

~♥~ Let’s get started ~♥~

Open up a 700 x 700 blank canvas.
Flood fill white.

Copy and paste 22 as a new layer.
Resize 65%
Free rotate Right 90 degrees
Click inside of the frame.
Selections/Modify/Expand by 4.
New Raster layer below the frame.
Copy and paste Paper 13 Into Selection.
Deselect.

Copy and paste your tube as a new layer.
Position in front of the frame.

Copy and paste 22 again.
Resize 25%
Free rotate Right 5 degrees.
Duplicate/Mirror
Move both frames into position - see my tag for reference.
Click inside the top frame.
Selections/Modify/Expand by 3.
New Raster layer below the frame.
Copy and paste Paper 1 Into Selection.
Copy and paste your tube as a new layer below the frame.
I resized mine a bit larger - move into position.
Selections/Invert
Tap the delete key.
Deselect.

Highlight the bottom frame and repeat the above step.

Add your embellishments. I used:
38: Resize 70%
26: Resize 50%
5: Resize 35%
28: Resize 50%
29: Resize 60%
19: Place behind the top left corner of the frame.
19 again: Resize 40%
20: Resize 50%
19 & 20 again: Resize 15%/duplicate 3 times/make a flower line across the bottom of each small frame.

Highlight your white background.
New Raster layer.
Select All.
Copy and paste Paper 11 Into Selection.
Deselect.
Apply the mask.
Merge Group.

Add your credits.

Add your name.
Give it a slight Inner Bevel:


I hope you enjoyed this tutorial.
I’d love to see your results and show it off in my gallery.
Email me!
Hugs,
Bev
Tuesday, January 25, 2011

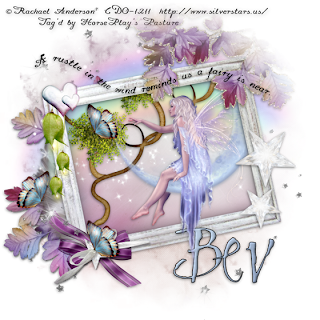
Rustle in the Wind


Clicking on the image will allow you to enlarge for bigger view.

Supplies

1 tube of choice - I used the artwork of Rachael Anderson that can be purchased at CDO
Font of Choice - I used Cliver Barker here and Promocyja here
Gem Mask 21 here
Monti Circular Mask here
“La vie en mauve” is a PTU tagger size scrap kit created by Sky Scraps Designs and can be purchased from Stargazer Scraps. You can visit Sky’s blog here.
Thank you Sky for an amazing kit. You create such beautiful things.

This tutorial was written assuming you have a working knowledge of PSP.

~♥~ Let’s get started ~♥~

Open up a 700 x 700 blank canvas.
Flood fill white.

Copy and paste Frame F8 as a new layer.
Resize 85%
Click inside of it with your Magic Wand.
Selections/Modify/Expand by 6.
New Raster layer below the frame.
Copy and paste Paper PP2 Into Selection.
Copy and paste your tube as a new layer just below the frame.
Selections/Invert
Tap the delete key.
Copy and paste E13 as a new layer below the frame.
Resize 75%
Move into position.
Tap the delete key.
Deselect.

Copy and paste E63 as a new layer.
Resize 80%
Move into position - see my tag for reference.
Apply Monti Circular Mask.
Merge Group.

Copy and paste E55 as a new layer.
Resize 80%
Mirror
Move it into position in front of the frame.
Duplicate and move behind the frame.
Highlight the element in front of the frame.
Using your Eraser Tool erase the area that’s showing in front of the frame accept zoom in and be careful around the bow - you don’t want to erase any of that!


Add your embellishments. I used:
E35
E 16: Resize 40%/Duplicate/Mirror/Resize 70%
E 34: Resize 50%
E 22

Highlight your white background.
New Raster layer.
Copy and paste PP 1 Into Selection.
Deselect.
Apply the mask.
Merge Group.

Color pallet:
Foreground: Black
Background: doesn’t matter right now.
Stroke set to 3.

Make your Pen Tool active, set to Draw Freehand.
Make a wavy line across your canvas.

Color pallet:
Foreground: Null
Background: Black

Make your Text tool active using Promocyja font.
Be sure the alignment is set to center.
(Understand that the typing will be very light on the canvas and that’s ok. We’ll darken it up in a bit)
Move your curser along the center of the line until you see a Rocking A.
Click the mouse.
A text box should open.
Type out the words “ A rustle in the wind reminds us a fairy is near.” The typing will be very light on the canvas and that’s ok. We’ll darken it up in a bit.
Click Apply
In your layers pallet click on the plus sign.
Close out the eye on the New Path layer.
Highlight Vector 1 layer.
Convert to Raster layer.
Duplicate/Merge Down
Duplicate/Merge Down.

Add your credits.

Add your name.
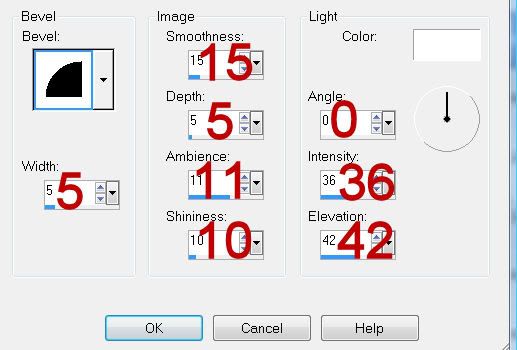
Give it a slight Inner Bevel:


I hope you enjoyed this tutorial.
I’d love to see your results and show it off in my gallery.
Email me!
Hugs,
Bev
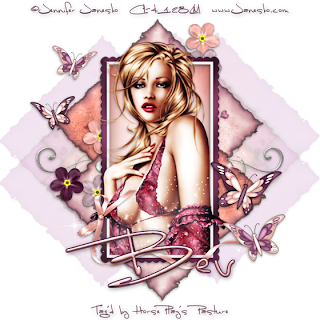
Love Is II


Clicking on the image will allow you to enlarge for bigger view.

Supplies

1 tube of choice - I used the artwork of Jennifer Janesko that can now be purchased at CDO
Font of Choice - I used Luna Bar here
Toadies - What Are You
Xenofex 2: Burnt Edges
“Love Is” is a FTU tagger size scrap kit created by me and can be downloaded from my blog here.

This tutorial was written assuming you have a working knowledge of PSP.

~♥~ Let’s get started ~♥~

Open up a 700 x 700 blank canvas.
Flood fill white.

Copy and paste Frame 7 as a new layer.
Resize 85%
Click inside of it with your Magic Wand.
Selections/Modify/Expand by 4.
New Raster layer below the frame.
Copy and paste Paper 4 Into Selection.
Copy and paste your tube as a new layer just below the frame.
Selections/Invert
Tap the delete key.
Deselect.

Add your embellishments. I used:
Flower Cluster
Butterfly 1: Resize 40%
Butterfly 1 again: Resize 25%/Mirror
Butterfly 2: Resize 40%/Mirror
Butterfly 2 again: Resize 25%
Ribbon 4: Resize 60%
Double Heart Wire 1: Resize 60%
Sparkle

Highlight your white background.
New Raster layer.
Copy and paste Paper 1 Into Selection.
Deselect.
Resize 80%
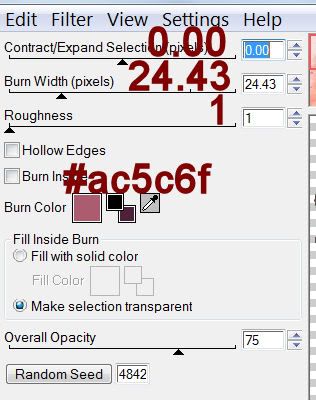
Apply Xenofex 2: Burnt Edges:


Resize 60%
Free rotate Right 45 Degrees.
Move into position near the top of the frame - see my tag for reference.
Duplicate/Flip/Mirror
Merge Down.
Duplicate
Highlight the original layer.
Apply Toadies - What Are You:
Move X and Y does scales to 34
OK
Free rotate Left 90 degrees.

Add your credits.

Add your name.
Give it a slight Inner Bevel:


I hope you enjoyed this tutorial.
I’d love to see your results and show it off in my gallery.
Email me!
Hugs,
Bev
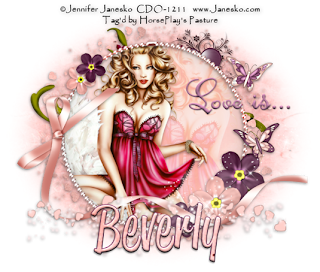
Love Is


Clicking on the image will allow you to enlarge for bigger view.

Supplies

1 tube of choice - I used the artwork of Jennifer Janesko and can be purchased at CDO
Font of Choice - I used Reklame Script Demo here - choose the top one (free), place in cart and go through the purchase routine.
My Mask 1 here
“Love Is” is a FTU tagger size scrap kit created by me and can be downloaded from my blog here.

This tutorial was written assuming you have a working knowledge of PSP.

~♥~ Let’s get started ~♥~

Open up a 700 x 700 blank canvas.
Flood fill white.

Copy and paste Frame 2 as a new layer.
Resize 85%
Click inside of it with your Magic Wand.
Selections/Modify/Expand by 3
New Raster layer below the frame.
Copy and paste Paper 6 Into Selection.
Copy and paste your tube as a new layer just below the frame.
Position it to the left - see my tag for reference.
Selections/Invert
Tap the delete key.
Paste your tube again and move this layer below the other in your layers pallet.
Keep the size a bit larger than the other.
Move into position toward the left.
Tap the delete key.
Change the Properties to Soft Light.
Deselect.

Add your embellishments. I used:
Butterfly 1: Resize 25%
Butterfly 2 : Resize 25%/Mirror
Ribbon 4
Heart Swirl 1: Resize 60%
Forget Me Not 2: Resize 30%/Duplicate/Resize 70%
Forget me Not 2 again: Resize 25% and 70%
Forget Me Not 1: Resize 30%/Duplicate/Resize 70%
Forget me Not 1 again: Resize 25% and 70%
Scattered Hearts 2
Flower Stem 1: Resize 70%/Mirror
Sparkle

Copy and paste Word Art 1 (or a word art of your choice) as a new layer.
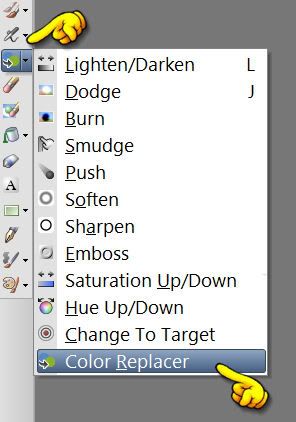
Make your Color Replacer tool active:


In your layer’s pallet set your background color to the color you want the word art to be.
Click on the foreground color - the materials property box will open up.
Move the courser onto your working canvas and Right click on the black word art.
Click OK on the Materials Pallet. It will close.
Move your cursor over the word art - be sure its ON the black word art and Double Left Click your mouse.
There you go! Your word art is now colored.
Give it a slight inner bevel:


Highlight your white background.
New Raster layer.
Copy and paste Paper 5 Into Selection.
Deselect.
Apply the mask.
Merge Group.

Add your credits.

Add your name.
Give it the same slight Inner Bevel.

Resize all layers 80%

I hope you enjoyed this tutorial.
I’d love to see your results and show it off in my gallery.
Email me!
Hugs,
Bev
Sunday, January 23, 2011

Hearts Emotions


Clicking on the image will allow you to enlarge for bigger view.

Supplies

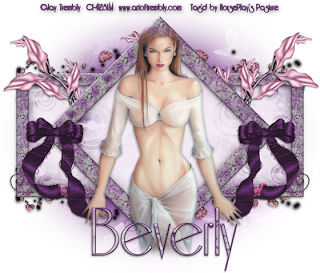
1 tube of choice - I used the artwork of Jay Trembly that can now be purchased at Up Your Art
Font of Choice - I used Riesling here
My Mask 20 here
“Hearts Emotions” is a PTU tagger size scrap kit created by Nette of Nette’s NightOwl Works and can be purchased from Stargazer Scraps. You can visit her blog here.
Thank you Nette for such a beautiful kit!! I so love your kits!

This tutorial was written assuming you have a working knowledge of PSP.

~♥~ Let’s get started ~♥~

Open up a 700 x 700 blank canvas.
Flood fill white.

Copy and paste Frame 2 as a new layer.
Resize 30%
Duplicate/Mirror
Paste the frame again.
Resize 40%
Free rotate right 45 degrees.
Move all 3 frames into position - see my tag for reference.

To each frame do the following step:
Highlight the frame layer.
Click inside with your Magic Wand.
Selections/Modify/Expand by 6.
New Raster layer below the frame.
Copy and paste Paper 12 Into Selection.
Deselect.

Copy and paste your tube as a new layer.
If you want to feather it use your Freehand Selection Tool and outline your tube - be sure the dotted line is touching your tube wherever you want the feathered effect.
Selections/Modify/Feather Inside Outside:
Both: checked
Feather amount: 25
OK
Selections/Invert
Tap the delete key until you have the effect you want.

Apply Xerox - Porcelain:


Copy and paste Bow 4 as a new layer.
Resize 25%
Adjust/Brightness and Contrast/Brightness Contrast:
Brightness: 11
Contrast: -11
OK
Duplicate the bow
Mirror

Add your embellishments. I used:
Heart Scatter: Resize 70%/Duplicate/Mirror/Flip
Wire Hearts: 80%/Erase the half of it you don’t want. Duplicate/Mirror
Branch: Resize 50%/Duplciate/Mirror
Branch again: Resize 40%/Free rotate Right 45 degrees/Duplicate/Mirror

Crop your image.

Highlight your white background.
New Raster layer.
Copy and paste Paper 2 Into Selection.
Deselect.
Apply the Mask.
Merge Group.

Add your credits.

Add your name.

I hope you enjoyed this tutorial.
I’d love to see your results and show it off in my gallery.
Email me!
Hugs,
Bev