Saturday, November 28, 2009

Christmas Morning

Clicking on the image will enlarge to full view.

Supplies
1 tube or image of choice - I used the wonderful artwork of Dean Yeagle here
Font of choice - I used Saginaw here
Weescotlass Mask 81 here
“Christmas Night” is a PTU tagger size scrap kit created by Connie’s Creative Chaos and can be purchased at Creative Scraps Store. You can visit her blog here.
Thank you Connie for a really beautiful kit!
This tutorial was written assuming you have a working knowledge of PSP.
~♥~ Let’s get started ~♥~

Open up a 700 X 700 transparent image.
Flood fill white.

Copy and paste Frame 6 as a new layer.
Use your Magic Wand and click inside of it.
Selections/Modify/Expand by 6
New Raster layer below the frame.
Copy and paste a paper of choice Into Selection.
DO NOT DESELECT
Copy and paste your image below the frame.
Selections/Modify/Feather
Number of Pixels:
53
OK
Selections/Modify/Invert
Tap the delete key until you have the feathered look you want.
Deselect.
Add your embellishments. I used:
Holly 2: Resize 60%
Tree 1
Bow 1: Resize 40%
Orn 1: Resize 25%
Box 1: Resize 55%
Box 3: Resize 70%
Orn 2: Resize 25% Free rotate Right 30 degrees
Orn 5: Resize 25% Free rotate 20 degrees right
Orn 4a: Resize 35% Free rotate 40 degrees right
Orn 6a: Resize 20% Free rotate 35 degrees Left
Highlight your white background.
New Raster layer.
Select All.
Copy and paste a paper of choice Into Selection.
Deselect.
Apply the mask.
Merge Group.
Crop your image
Add your copyrights.
Add your name.
Resize all layers 80%.

I hope you enjoyed this tutorial.
I’d love to see your results.
Email me!
Hugs,
Bev

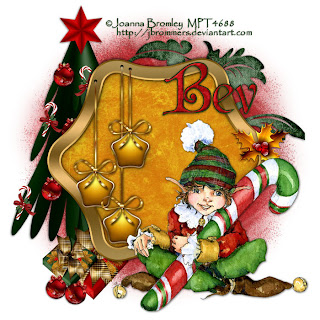
The Whole Elf Experience


Supplies
1 tube of choice - I used the wonderful artwork of Joanna Bromley here
Font of choice - I used Cardinal Alternate here
Weescotlass Mask 119 here
“Holly N Snow” is a PTU tagger size scrap kit created by Deb of Deb’s Designs and can be purchased at Butterfly Blush Designs. You can visit her blog here.
Thank you Deb! Awesome kit as always!!

This tutorial was written assuming you have a working knowledge of PSP.

~♥~ Let’s get started ~♥~
Open up a 700 X 700 transparent image.
Flood fill white.
Copy and paste Stars Hanging 01 as a new layer.
Use your Magic Wand and click inside of it.
(Be sure to click inbetween all the ribbons and inside the blows, too)
Selections/Modify/Expand by 6
New Raster layer below the frame.
Copy and paste a paper of choice Into Selection.
Deselect.

Copy and paste your tube as a new layer.

Add your embellishments. I used:
Holly: Resize 35%
Tree 2
Balls 3: Resize 25% and 80%
Star 2: Resize 25%
Outlaw by Design ft 281: Resize 25% and 80%
Present 1: Resize 30%
Present 2: Resize 40%
Outlaw 3: Resize 80%

Highlight your white background.
New Raster layer.
Select All.
Copy and paste a paper of choice Into Selection.
Deselect.
Apply the mask.
Merge Group.
Add your copyrights.

Add your name.

Resize all layers 80%.
I hope you enjoyed this tutorial.
I’d love to see your results.
Email me!
Hugs,
Bev

Winter Thoughts

Clicking on the image will enlarge to full view.

Supplies
1 tube of choice and 1 image of choice - I used the amazingly beautiful artwork of KatNKDA here
Font of choice - I used OhLara - I’m sorry I couldn’t find a link
Weescotlass Mask 138 here
“Purple Snowflakes” is a PTU tagger size scrap kit created by Tina of Tina’s Magic Scrap World and can be purchased at Exquisite Scraps. You can visit Tina’s blog here.

This tutorial was written assuming you have a working knowledge of PSP.

~♥~ Let’s get started ~♥~
Open up a 700 X 700 transparent image.
Flood fill white.
Copy and paste Frame 3 as a new layer.
Resize 80%
Use your Magic Wand and click inside of it.
Selections/Modify/Expand by 6
New Raster layer below the frame.
Copy and paste a paper of choice Into Selection.
DO NOT DESELECT.
Copy and paste your Image below the frame.
Selections/Modify/Feather
Number of Pixels: 53
OK
Selections/Invert
Tap the delete key until you have a nice feathered look to your image.
Deselect.

Copy and paste your tube as a new layer.

Add your embellishments. I used:
Beaded Ribbon 1: Free rotate right 90 degrees
Butterfly 1: Resize 35% Free rotate right 35 degrees.
Diamond Swirl 2: Resize 80% Free rotate right 35 degrees. Duplicate/Mirror/Flip
Gemstone Snowflake 2: Resize 25% Duplicate Resize 70%

Highlight your white background.
New Raster layer.
Select All.
Copy and paste a paper of choice Into Selection.
Deselect.
Apply the mask.
Image/Resize 110%
Merge Group.

Add your copyrights.

Add your name.
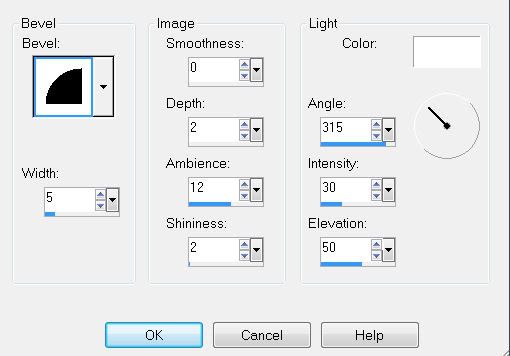
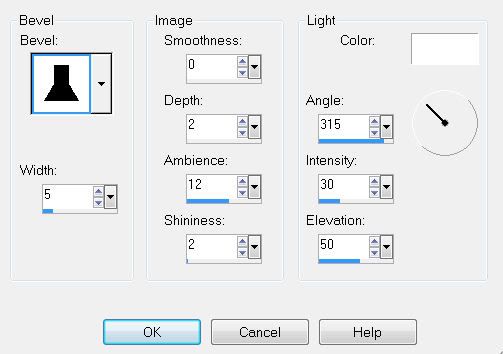
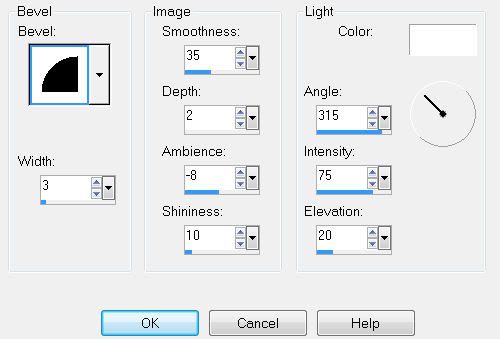
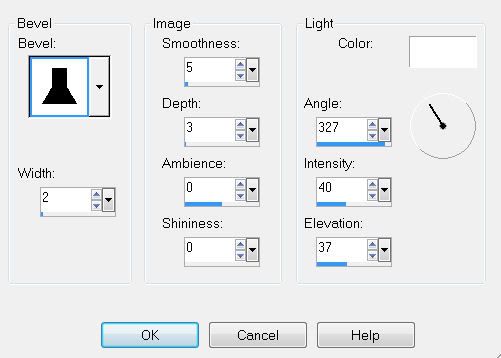
Give it a slight inner bevel:


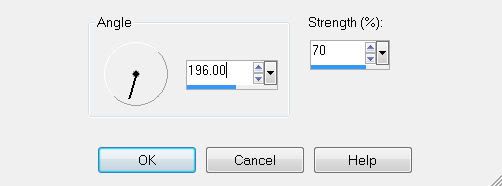
Repeat the bevel.

I hope you enjoyed this tutorial.
I’d love to see your results.
Email me!
Hugs,
Bev

Wednesday, November 25, 2009

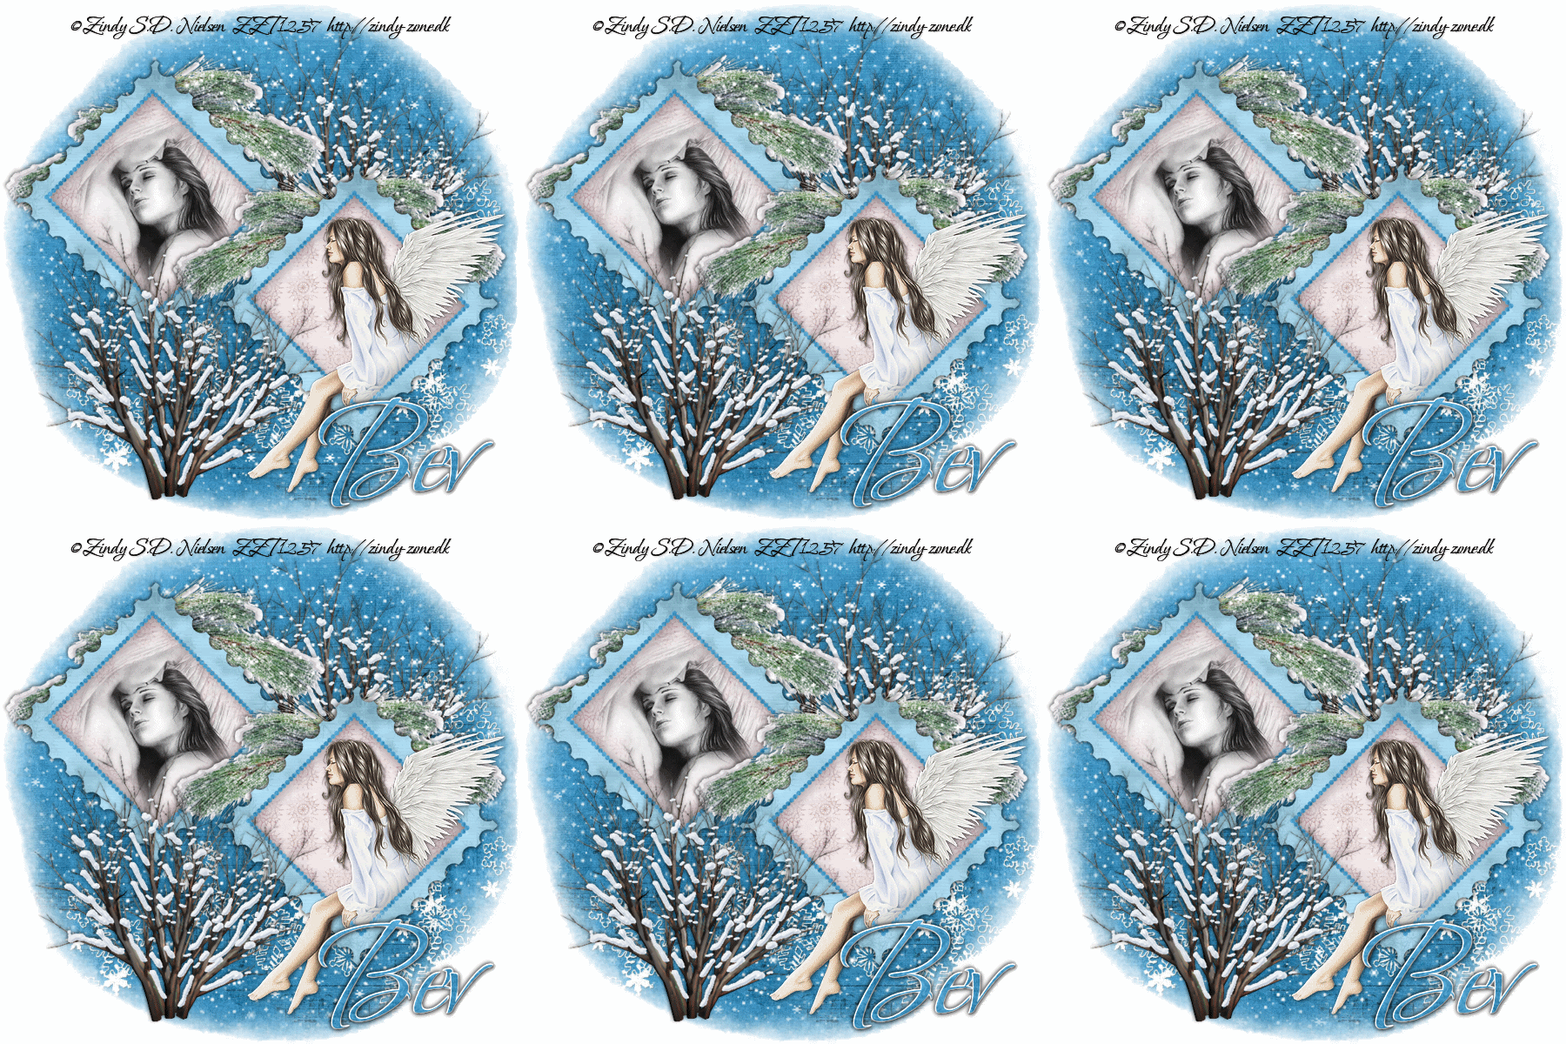
Winter Angel


Supplies
2 tubes of choice - I used the beautiful artwork of Zindy S.D. Nielsen here
Font of choice - I used Bonheur Royale - I'm sorry, I no longer can find a link for this font.
My Template 56 here
Monti Circle Mask here
Snow which I’ve supplied here
Animation Shop
“Winter Angel” is a FTU tagger size scrap kit created by Artmama Scraps and can be found here.
Thank you Artmama for such a beautiful kit! I totally enjoyed it!
Please leave a simple thank you when downloading. It’s a small gesture for hard work given freely.

This tutorial was written assuming you have a working knowledge of PSP.

~♥~ Let’s get started ~♥~

Open up the template.
Shift + D.
Close out the original.
Delete the credit layer words layer.

Highlight Right Stamp Back layer.
Select All/Float/Defloat
New Raster layer.
Copy and paste a paper of choice Into Selection.
Deselect.
Delete the template layer.

Highlight Right Stamp Square layer.
Select All/Float/Defloat
New Raster layer.
Copy and paste a paper of choice Into Selection.
Deselect.
Delete the template layer.

Highlight Right Stamp Frame layer.
Select All/Float/Defloat
New Raster layer.
Copy and paste a paper of choice Into Selection.
Deselect.
Delete the template layer.

Repeat the above steps with Left Stamp Back, Square, and Frame layers.

Highlight Right Stamp Square layer.
Select All/Float/Defloat
Copy and paste your tube as a new layer.
Selections/Invert
Tap the delete key.
Deselect.

Repeat the above step with Left Stamp Square using a different tube.

If you would like the feathered look that I have do the following:
Highlight the square layer.
Select All/Float/Defloat
Copy and paste your tube as a new layer.
Selections/Invert
Selection/Modify/Feather
Number of Pixels: 53
Tap the delete key until you have the desired affect.
Deselect.

Highlight the square layer again.
Select All/Float/Defloat
Selections/Invert
Highlight your feathered tube layer.
Tap the delete key.
The edges should be nice and clean now.

Add your embellishments. I used:
Embell 37: resize 50% Free rotate left 80 degrees
Embell 8: Resize 80%

Highlight your white background.
New Raster layer.
Select All.
Copy and paste a paper of choice Into Selection.
Deselect.
Apply the mask.

Merge Group.

Add your copyrights.

Add your name.

Merge Visible all layers that are BEHIND the frames accept for your mask and white background.

Merge Visible remaining layers accept for your mask and white background.

You should now have 4 layers - 2 of them merged, your mask, and your white background.

Highlight your mask layer.
Open up the snow supplied.
Copy Frame 10 and paste as a new layer on your working canvas.
Rename Snow 10
Go back to your snow.
Copy Frame 9 and paste as a new layer on your working canvas.
Rename Snow 9
Continue this until you have all 10 snow layers copied and pasted onto your working canvas.

Highlight your mask layer.
Select All/Float/Defloat
Selections/Invert
Highlight each of the snow layers and tap the delete key.
Deselect.

Be sure all snow layers are closed out accept keep Snow 1 open.

Edit/Copy Merged.

~Time to Animate~

Carry into Animation Shop.
Edit/Paste/As New Animation
Go back into PSP.
Close out Snow 1.
Open up Snow 2.
Copy/Merge

Carry into AS.
Edit/Paste/After Current Frame.

Back Into PSP.
Close out Snow 2.
Open up Snow 3.
Copy/Merge

Carry into AS.
Edit/Paste/After Current Frame.

Back Into PSP.
Close out Snow 3.
Open up Snow 4.
Copy/Merge

Carry into AS.
Edit/Paste/After Current Frame.

Back Into PSP.
Close out Snow 4.
Open up Snow 5.
Copy/Merge

Carry into AS.
Edit/Paste/After Current Frame.

Back Into PSP.
Close out Snow 4.
Open up Snow 5.
Copy/Merge

Carry into AS.
Edit/Paste/After Current Frame.

Back Into PSP.
Close out Snow 5.
Open up Snow 6.
Copy/Merge

Carry into AS.
Edit/Paste/After Current Frame.

Back Into PSP.
Close out Snow 6.
Open up Snow 7.
Copy/Merge

Carry into AS.
Edit/Paste/After Current Frame.

Back Into PSP.
Close out Snow 7.
Open up Snow 8.
Copy/Merge

Carry into AS.
Edit/Paste/After Current Frame.

Back Into PSP.
Close out Snow 8.
Open up Snow 9.
Copy/Merge

Carry into AS.
Edit/Paste/After Current Frame.

Back Into PSP.
Close out Snow 9.
Open up Snow 10.
Copy/Merge

Carry into AS.
Edit/Paste/After Current Frame.

View your animation and save if your like it.

I hope you enjoyed this tutorial.
I’d love to see your results.
Email me!
Hugs,
Bev

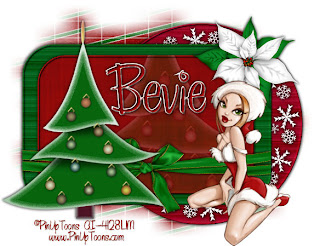
Simple Christmas


Clicking on the image will enlarge to full view.

Supplies
1 tube of choice - I used the wonderful artwork of PinUpToons here
Font of choice - I used Chicken Basket here
Missy Template 74 here
Weescotlass Template 84 here
“Christmas” is a FTU tagger size scrap kit created by Blue Dream Designs and can be found here.
Please leave a simple thank you when downloading. It’s a small gesture for hard work given freely.
This tutorial was written assuming you have a working knowledge of PSP.

~♥~ Let’s get started ~♥~

Open up the template.
Shift + D.
Close out the original.
Delete the following layers:
Credit
Tree 2
Tree 1
Base
Highlight the Background layer.
Image/Canvas Size
700 x 350
OK
Flood fill white
Highlight Circle layer.
Select All/Float/Defloat
New Raster layer.
Copy and paste a paper of choice Into Selection.
Deselect.
Delete the template layer.
Highlight Rectangle 1 layer.
Select All/Float/Defloat
New Raster layer.
Copy and paste a paper of choice Into Selection.
Deselect.
Delete the template layer.
Give it an inner bevel:
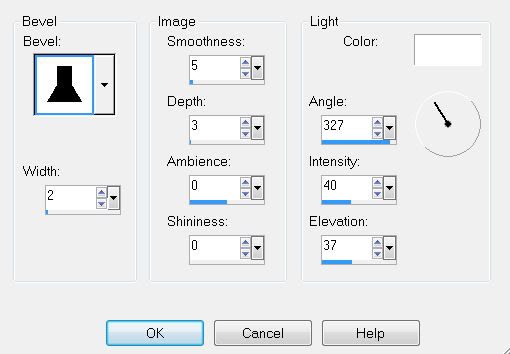

Highlight Rectangle 2 layer.
Select All/Float/Defloat
New Raster layer.
Copy and paste a paper of choice Into Selection.
DO NOT DESELECT
Copy and paste Tree element as a new layer.
Move into position over Rectangle 2 layer.
Selections/Invert
Tap the delete key.
Lower the Opacity to about 22 or so.
Deselect
Merge Visible the Rectangle and Tree layer.
Delete the template layer.
Give it the same inner bevel.

Copy and paste Ribbon Bow 1 as a new layer.
Resize 50%
Copy and paste Tree as a new layer.
Resize 85%
Move into position at the left side of your canvas.
See mine for reference.
Copy and paste flower 2 as a new layer.
Resize 40%.
Highlight your white background.
New Raster layer.
Select All.
Copy and paste a paper of choice Into Selection.
Deselect.
Apply the mask.
Resize 110%
Merge Group.
Add your copyrights.

Add your name.
I hope you enjoyed this tutorial.
I’d love to see your results.
Email me!
Hugs,
Bev


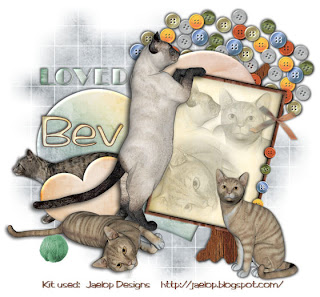
Purr-fect

Clicking on the image will enlarge to full view.

Supplies
Font of choice - I used Arctic 2 here
Dezigns by Ali Template 17 here
Weescotlass Mask 84 here
“Cute Cat” is a FTU full size scrap kit created by Jaelop Designs and can be found here.
Please leave a simple thank you when downloading. It’s a small gesture for hard work given freely.
This tutorial was written assuming you have a working knowledge of PSP.

~♥~ Let’s get started ~♥~

Open up the template.
Shift + D.
Close out the original.
Delete the credit layer words layer.
Resize all layers 85%
Image/Canvas Size
700 x 600
New Raster Layer
Send to bottom
Flood fill white.

Highlight Large Heart layer.
Select All/Float/Defloat
New Raster layer.
Copy and paste a paper of choice Into Selection.
Deselect.
Delete the template layer.
Give it an inner bevel:


Highlight Small Heart layer.
Select All/Float/Defloat
New Raster layer.
Copy and paste a paper of choice Into Selection.
Deselect.
Delete the template layer.
Give it the same inner bevel.

Highlight Rectangle Frame layer.
Select All/Float/Defloat
New Raster layer.
Copy and paste a paper of choice Into Selection.
Deselect.
Delete the template layer.
Give it an inner bevel:


Highlight Rectangle Frame Back layer.
Select All/Float/Defloat
Copy and paste your tube as a new layer.
Selections/Invert
Tap the delete key.
Deselect.
Highlight Wordart layer.
Select All/Float/Defloat
New Raster Layer.
Copy and paste a paper of choice Into Selection.
Deselect.
Delete the template layer.
Now we’re going to give the cat elements a feathered look before moving them beneath the frame in the layers pallet.
Copy and paste Element 4 as a new layer.
Resize 35%
Using your Freehand Selection tool, make a circle around the cat’s head. (The circle does not have to be neat!!)
Selections/Modify/Feather
Number of Pixels:
53
OK
Selections/Invert
Tap the delete key until you have a nice feathered look.
Move it beneath the frame and into position.
If any overhangs the frame don’t worry - we’ll take care of that later.

Repeat the above step with Elements 3 and 5 -
Resizing both to 40%

Once you’ve feathered the cats, merge visible the 3 elements.
Change the Properties to Lumanance Legacy.

Highlight the Frame Back.
Select All/Float/Defloat
Selections/Invert
Highlight the merged cat layer
Tap the delete key.
Deselect.
The edges of the frame should have a nice clean look now.
Highlight the Word Art layer.
Select All/Float/Defloat
New Raster layer.
Copy and paste a paper of choice Into Selection.
Deselect.
Delete the template layer.
Give it the same inner bevel you used for the hearts.

Add your embellishments. I used:
Elements 18, 19, 20, & 21: Resize 25% and 50%
Element 39: Resize 25% and 40%
Element 40: Resize 25% and 50% Free rotate Right 10 degrees
Element 8: Resize 30%
Element 6: Resize 25%
Element 3: Resize 25%
Element 5: Resize 35%
Element 4: Resize 25%

Highlight your white background.
New Raster layer.
Select All.
Copy and paste a paper of choice Into Selection.
Deselect.
Apply the mask.
Resize 110%
Merge Group.

Add your copyrights.
If you only used the elements of the kit please place credit for the designer on your tag.

Add your name.

Resize all layers 80%.

I hope you enjoyed this tutorial.
I’d love to see your results.
Email me!
Hugs,
Bev
 

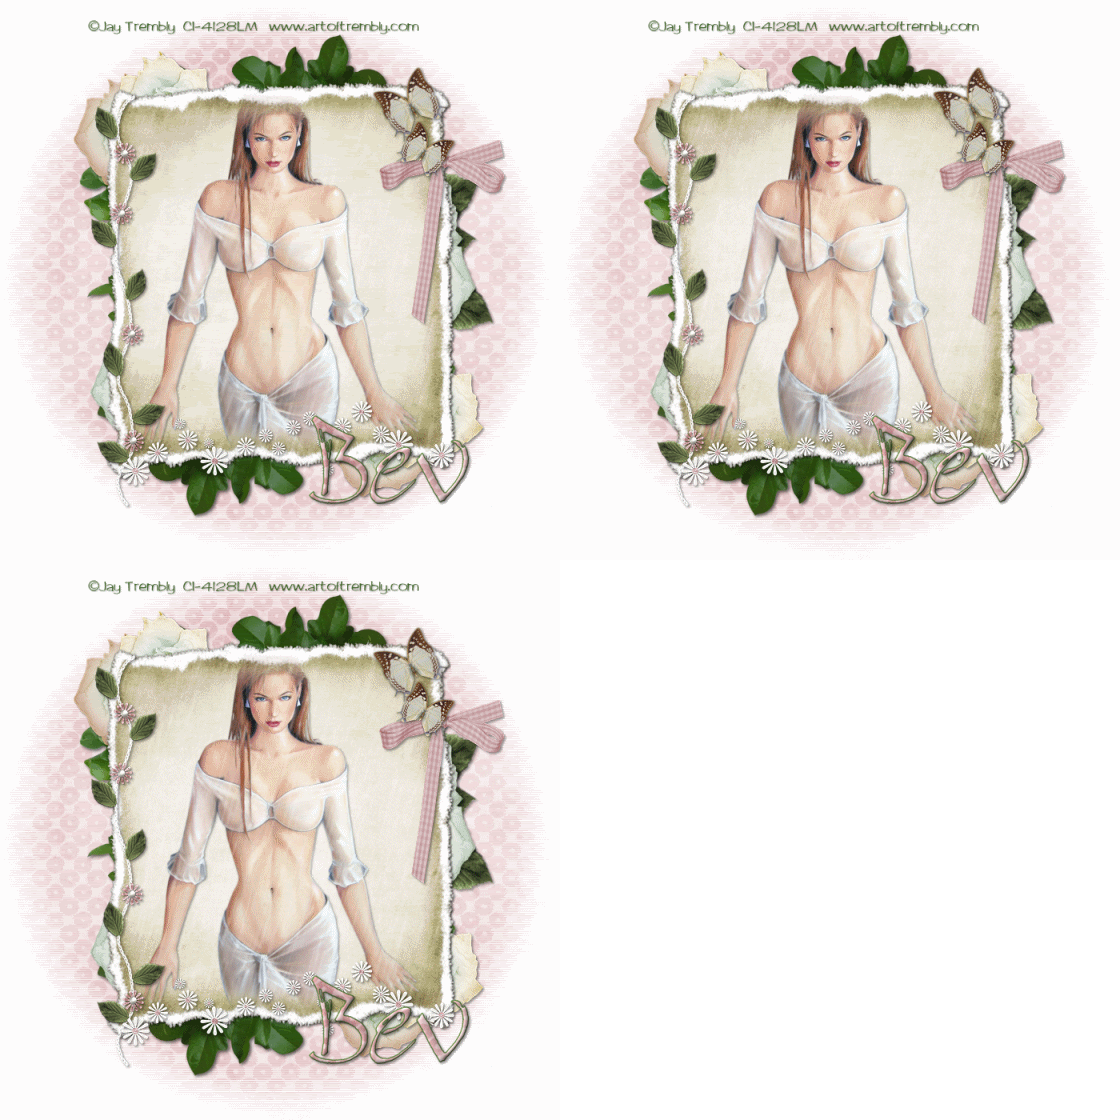
Naive Seduction


Supplies

1 tube of choice - I used the beautiful artwork of Jay Trembly here
Font of choice - I used Bambino here
Creative Desires Mask 31 here - If you know who this mask belong to please email me so that I can give proper credit. Thank you.
VanDerLee Snowflakes
Animation Shop
“Thanks Mom” is a FTU full size scrap kit created by Jaelop Designs and can be found here.
Please leave a simple thank you when downloading. It’s a small gesture for hard work given freely.
This tutorial was written assuming you have a working knowledge of PSP.

~♥~ Let’s get started ~♥~

Open up a 700 x 700 transparent image.
Flood fill white.

Copy and paste 15 as a new layer.
Resize 25% and 85%

Copy and paste your tube as a new layer.
Move into position.

Highlight 15.
Select All/Float/Defloat
Selections/Modify/Feather
Number of Pixels:
53
OK
Selections/Invert
Highlight your tube layer.
Tap the delete key until you have a nice feathered look.
Deselect.

Merge Visible your tube and 15.

Create 3 new Raster layers above the merged layer.
Rename them Rain 1, 2, and 3.
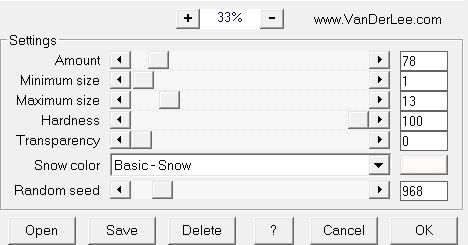
Highlight Rain 1 and apply Vander Lee - Snowflakes Effect:

Adjust/Blur/Motion Blur:


Highlight Rain 2 layer.
Repeat the above 2 steps accept when applying the Snowflakes effect move the random seed button a bit.

Highlight Rain 3 layer.
Repeat the above step.

Highlight your merged layer.
Select All/Float/Defloat
Selections/Invert
Highlight each of the rain layers and tap the delete key.
Deselect.

Add your embellishments. I used:
19, 20 & 21: Resize 25% and 60%
1: Resize 50%
55: Resize 25% and 60% Free rotate Right 120 degrees
52: Resize 25% and 60%
5: Resize 25% and 50% Free rotate Left 30 degrees. Duplciate/Mirror/Resize 80%
8: Resize 25% and 50%
53: Resize 25% and erase the flowers you don’t want.

Highlight your white background.
New Raster layer.
Select All.
Copy and paste a paper of choice Into Selection.
Deselect.
Apply the mask.
Merge Group.
Duplicate/Merge down
Duplicate

Add your copyrights.

Add your name.

~Time to Animate~

Be sure Rain layers 2 & 3 are closed.
Copy Merge.

Carry into Animation Shop.
Edit/Paste/As New Animation

Go back into PSP.
Close out Rain 1.
Open up Rain 2.
Copy/Merge

Carry into AS.
Edit/Paste/After Current Frame.

Back Into PSP.
Close out Rain 2.
Open up Rain 3.
Copy/Merge

Carry into AS.
Edit/Paste/After Current Frame.

View your animation.
If you’re satisfied then save.

I hope you enjoyed this tutorial.
I’d love to see your results.
Email me!
Hugs,
Bev


In Waiting

Clicking on the image will enlarge to full view.

Supplies
1 tube of choice - I used the beautiful artwork of Barbara Jensen here
Font of choice - Impact (came with my pc) and Al Sandra here
“Lazy Dayz” is a FTU tagger size scrap kit created by Urban Fairytales and can be found here.
Xenofex 1: Oragami
Please leave a simple thank you when downloading. It’s a small gesture for hard work given freely.

This tutorial was written assuming you have a working knowledge of PSP.

~♥~ Let’s get started ~♥~

Open up a 700 x 700 transparent image.
Flood fill white.
Copy and paste Stamp Frame as a new layer.
Resize 85%
Click inside with your Magic Wand.
Selections/Modify/Expand by 6
New Raster layer below the frame.
Copy and paste a paper of choice Into Selection.
Deselect.
Copy and paste your tube as a new layer.
Add your embellishments. I used:
Leave Strokes: Resize 40%
Leaves: Resize 80% Free rotate left 30 degrees
Glitter Bird Gold: Resize 50%
Using the Impact Font type out your name.
Use your Pick Tool to stretch it so that it’s slightly longer than the stamp frame.
Use the Al Sandra font to type your name again.

Use your Pick Tool to stretch it slightly.
Add your copyrights.
Close out your white background and Merge Visible all layers.
Duplicate
Adjust/Blur/Gaussian Blur
Radius: 20
OK
Apply Xenofex 1: Origami
Default Settings
OK

Open up your white canvas.
Crop your image.
Resize all layers 80%.
I hope you enjoyed this tutorial.
I’d love to see your results.
Email me!
Hugs,
Bev

Grunge Love

Clicking on the image will enlarge to full view.

Supplies
2 tubes of choice - I used the beautiful artwork of Zindy S.D. Nielsen here
Font of choice - I used Hand Script LCase here
Blissfully Beth’s Template 90 here
Becky Mask 22 here
“Pastel Grunge” is a FTU tagger size scrap kit created by Pink Poet Scraps and can be found here.
Please leave a simple thank you when downloading. It’s a small gesture for hard work given freely.
This tutorial was written assuming you have a working knowledge of PSP.

~♥~ Let’s get started ~♥~

Open up the template.
Shift + D.
Close out the original.
Delete the credit layer words layer.
Resize all layers 110%
Image/Canvas Size
700 x 600
Flood fill Raster 1 layer white.

Highlight Line 1 layer.
Select All/Float/Defloat
New Raster layer.
Copy and paste a paper of choice Into Selection.
Deselect.
Delete the template layer.

Repeat the above step with Line 2 layer.

Highlight 1 layer.
Select All/Float/Defloat
New Raster layer.
Copy and paste a paper of choice Into Selection.
Copy and paste your tube as a new layer.
Resize as needed.
Selections/Invert
Tap the delete key.
Deselect.
Delete the template layer.
Merge visible the tube and paper.
Highlight 4 layer.
Select All/Float/Defloat
New Raster layer.
Copy and paste the same paper as you used before Into Selection.
Deselect.
Highlight your tube layer.
Duplicate/Mirror
Free rotate left 2 degrees.
Copy
Now delete that layer.
(I know! It sounds nuts, but trust me. Just delete the layer…lol)
Highlight 4 layer.
Select All/Float/Defloat
New Raster layer.
Paste Into Selection.
Deselect.
Delete the template layer.
Change the Properties to Multiply.
Merge Visible the tube and paper.
Highlight 3 layer.
Select All/Float/Defloat
New Raster layer.
Copy and paste a paper of choice Into Selection.
Copy and paste your tube as a new layer.
Resize as needed.
Selections/Invert
Tap the delete key.
Deselect.
Delete the template layer.
Merge Visible the tube and paper.
Highlight 2 layer.
Select All/Float/Defloat
New Raster layer.
Copy and paste the same paper as you used before Into Selection.
Deselect.
Highlight your tube layer from 3 layer.
Duplicate/Mirror
Free rotate right 5 degrees.
Copy
Now delete that layer.
(Yup, we‘re about to do this step again…lol)
Highlight 2 layer.
Select All/Float/Defloat
New Raster layer.
Paste Into Selection.
Deselect.
Delete the template layer.
Change the Properties to Multiply.
Merge Visible the tube and paper.

To each Merged Visible layer:
Highlight the layer
Give it an inner bevel:


Add your embellishments. I used:
Flower: Resize 40%
Flowers 1: Resize 40%
Flower 3: Resize 40%
Butterfly: Resize 30%
Bird: Resize 50%
Star Bling: Resize 35%

Crop your image -
Leaving some room at the top and bottom.
Highlight your white background.
New Raster layer.
Select All.
Copy and paste a paper of choice Into Selection.
Deselect.
Copy and paste Mesh as a new layer above the paper.
Merge Down.
Apply the mask.
Merge Group.

Add your copyrights.
Add your name.
Give it the same inner bevel.

I hope you enjoyed this tutorial.
I’d love to see your results.
Email me!
Hugs,
Bev


Honeysuckle Rose

Clicking on the image will enlarge to full view.

Supplies
1 tube of choice - I used the beautiful artwork of Jennifer Janesko here
Font of choice - I used Aquarelle here
Weescotlass Mask 8 here
“Honeysuckle Rose” is a FTU full size scrap kit created by Sabre and can be found here.
Please leave a simple thank you when downloading. It’s a small gesture for hard work given freely.

This tutorial was written assuming you have a working knowledge of PSP.
~♥~ Let’s get started ~♥~

This will be a super quick tutorial with beautiful results.

Open up a 700 x 700 transparent image.
Flood fill white.
Copy and paste Frame as a new layer.
Resize 80%
Click inside with your Magic Wand.
Selections/Modify/Expand by 6
Copy and paste a paper of choice below the frame.
Selections/Invert
Tap the delete key.
DO NOT DESELECT.

Copy and paste your tube below the frame.
Tap the delete key.
Deselect.
Add your embellishments. I used:
With Bird 1: Resize 55%
Rose 6: Resize 70%
Leaf: Resize 60%
Rose 4: Resize

Highlight your white background.
New Raster layer.
Select All.
Copy and paste a paper of choice Into Selection.
Deselect.
Apply the mask.
Merge Group.
Add your copyrights.
Add your name.
Resize all layers 80%

I hope you enjoyed this tutorial.
I’d love to see your results.
Email me!
Hugs,
Bev


Country Picnic


Clicking on the image will enlarge to full view.
1 tube of choice - I used the wonderful artwork of Dean Yealge here
Font of choice - I used Whipper Basic here
Jbs2designs Template 67 here
Weescotlass Mask 138 here
“My Kitchen #2” is a PTU tagger size scrap kit created by Wilma of Wilma4ever and can be purchased here. You can visit her blog here.
Thank you, Wilma for such a wonderful kit!

This tutorial was written assuming you have a working knowledge of PSP.

~♥~ Let’s get started ~♥~

Open up the template.
Shift + D.
Close out the original.
Delete the credit layer.
Image/Canvas Size
700 x 700
New Raster layer.
Flood fill white.
Send to bottom.
Highlight Bottom Rectangle layer.
Select All/Float/Defloat
New Raster layer.
Copy and paste a paper of choice Into Selection.
Deselect.
Delete the template layer.
Repeat the above step with Top Rectangle layer.

Copy and paste Ribbon 8 as a new layer.
Resize 25% and 80%
Move into position over the top Rectangle.
(See my tag for reference)
Duplicate and move lower over the rectangle.

Merge Visible the two ribbon layers.

Highlight the Top Rectangle layer.
Select All/Float/Defloat
Selections/Invert
Highlight the merged ribbon layer.
Tap the delete key.
Deselect.
Duplicate/Mirror
Move into position over the bottom Rectangle layer.
Highlight the Circle layer.
Select All/Float/Defloat
New Raster layer.
Copy and paste a paper of choice Into Selection.
Deselect.
Delete the template layer.
Highlight the Scallop Frame layer.
Select All/Float/Defloat
New Raster layer.
Copy and paste a paper of choice Into Selection.
Deselect.
Delete the template layer.
Add your embellishments. I used:
Bow 1: Resize 40%
Picnic Basket 1: Resize 50%
Honey Pot: Resize 25% & 85%
Orange 1: Resize 25% & 50%
Leaf 1: Resize 50%
Copy and paste your tube as a new layer.
Crop your image -
Leaving some room at the top and bottom.
Highlight your white background.
New Raster layer.
Select All.
Copy and paste a paper of choice Into Selection.
Deselect.
Apply the mask.
Resize 120%
Merge Group.
Add your copyrights.
Add your name.
Give it an inner bevel:


I hope you enjoyed this tutorial.
I’d love to see your results.
Email me!
Hugs,
Bev


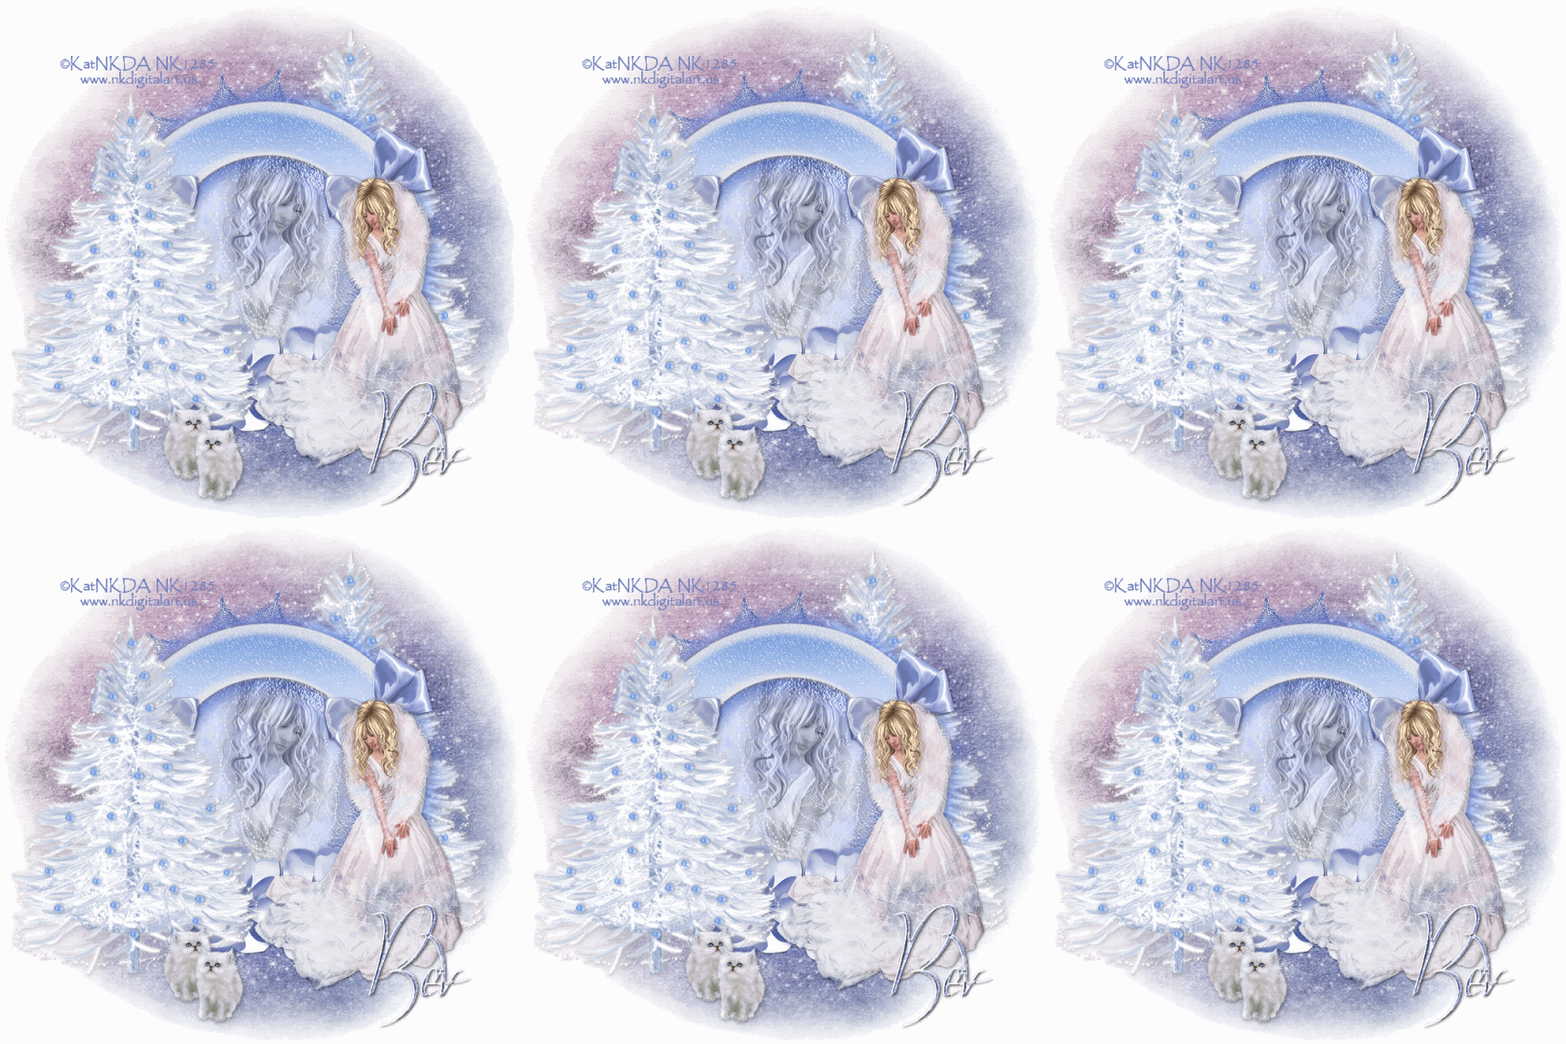
Ice Princess


Supplies
1 tube of choice - I used the amazingly beautiful artwork of KatNKDA here
Font of choice - I used OhLara - I'm sorry, I wasn't able to find a link
Monti Circular Mask here
Snow - which I’ve supplied here
Animation Shop
“Ice Princess” is a PTU full size scrap kit created by Kat of KatNKDA and can be purchased at her store NK Art Shop. You can visit her blog here.
Your talent is truly amazing, Kat!

This tutorial was written assuming you have a working knowledge of PSP.

~♥~ Let’s get started ~♥~

Open up a 700 x 700 transparent image.
Flood fill white.

Copy and paste Element 8 new layer.
Resize 50%
Use your Freehand Selection Tool and outline the inside of the circle.
New Raster layer below the frame.
Copy and paste a paper of choice Into Selection.
DO NOT DESELECT.

Copy and paste your tube below the frame.
(If you’re using the same tube as I used then resize it 25%)
Selections/Invert
Tap the delete key.
Deselect.
Change the Opacity of the tube to Luminance Legacy.

Copy and paste your tube as a new layer.
I used Kat’s tube - Crystal: Resized it 25% and 50%
I also used the kitten tube, Snowflake: Resized it 25% and 40%

Add your embellishments. I used:
Element 23: Resize 35% (Place behind the frame)
Paste Element 23 again: Resize 35% and 80% (Place in front of the frame)
Element 62: Resize 25%
Element 63: Resize 25%
Element 59: Resize 25% Mirror
Element 39: Resize 40%

Highlight your white background.
New Raster layer.
Select All.
Copy and paste a paper of choice Into Selection.
Deselect.
Apply the mask.
Merge Group.

Add your copyrights.

Add your name.

Highlight your mask layer.
Open up the snow supplied.
Copy Frame 10 and paste as a new layer on your working canvas.
Rename Snow 10.

Go back to your snow.
Copy Frame 9 and paste as a new layer on your working canvas.
Rename Snow 9

Continue this until you have all 10 snow layers copied and pasted onto your working canvas.

Highlight your mask layer.
Select All/Float/Defloat
Selections/Invert
Highlight each of the snow layers and tap the delete key.
Deselect.

Be sure all snow layers are closed out accept keep Snow 1 open.
Edit/Copy Merged.

~Time to Animate~

Carry into Animation Shop.
Edit/Paste/As New Animation

Go back into PSP.
Close out Snow 1.
Open up Snow 2.
Copy/Merge

Carry into AS.
Edit/Paste/After Current Frame.

Back Into PSP.
Close out Snow 2.
Open up Snow 3.
Copy/Merge

Carry into AS.
Edit/Paste/After Current Frame.

Back Into PSP.
Close out Snow 3.
Open up Snow 4.
Copy/Merge.

Carry into AS.
Edit/Paste/After Current Frame.

Back Into PSP.
Close out Snow 4.
Open up Snow 5.
Copy/Merge.

Carry into AS.
Edit/Paste/After Current Frame.
Back Into PSP.
Close out Snow 4.
Open up Snow 5.
Copy/Merge.

Carry into AS.
Edit/Paste/After Current Frame.

Back Into PSP.
Close out Snow 5.
Open up Snow 6.
Copy/Merge.

Carry into AS.
Edit/Paste/After Current Frame.

Back Into PSP.
Close out Snow 6.
Open up Snow 7.
Copy/Merge.

Carry into AS.
Edit/Paste/After Current Frame.

Back Into PSP.
Close out Snow 7.
Open up Snow 8.
Copy/Merge

Carry into AS.
Edit/Paste/After Current Frame.

Back Into PSP.
Close out Snow 8.
Open up Snow 9.
Copy/Merge

Carry into AS.
Edit/Paste/After Current Frame.

Back Into PSP.
Close out Snow 9.
Open up Snow 10.
Copy/Merge.

Carry into AS.
Edit/Paste/After Current Frame.

View your animation and save if your like it.

I hope you enjoyed this tutorial.
I’d love to see your results.
Email me!
Hugs,
Bev