Saturday, May 28, 2011

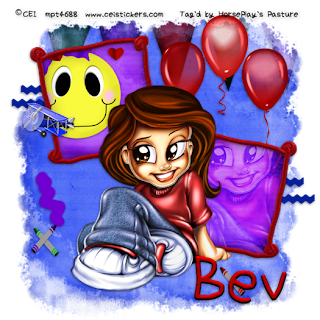
For the Kids


Supplies

1 tube of choice - I used the artwork of Half Pints which can be purchased from MPT. You must have a license to use.

Font of choice - I used Childish here

Becky mask 22 here

“Things for Kids ” is a full size scrap kit created by Lori of P4DSDesigns and can be purchased from Lollipops n Gumdrops. You can visit her blog here. Thank you Lori for a super fun kit!

This tutorial was written assuming you have a working knowledge of PSP.

~♥~ Let’s get started ~♥~

Open a 700 x 700 blank canvas.
Flood fill white.

Copy and paste Red Paint Frame as a new layer.
Resize 25% and 60%
Free rotate Left 10 degrees.
Duplicate/Mirror

Copy and paste your tube as a new layer.

Move the frames and tube into their positions - see my tag for reference.

Highlight the top frame.
Click inside of it with your Magic Wand.
Selections/Modify/Expand by 4.
New Raster layer below the frame.
Copy and paste Paper 13 Into Selection.
Copy and paste Smile Face as a new layer above the paper.
Resize 25% and 605
Move into position.
Selections/Invert
Tap the delete key.
Deselect.

Highlight the bottom frame.
Click inside of it with your magic Wand.
Selections/Modify/Expand by 4.
New Raster layer below the frame.
Copy and paste Paper 13 into Selection.
Duplicate your tube.
Move beneath the frame in your layers pallet.
Selections/Invert
Tap the delete key.
Deselect.
Change the Properties to Soft Light.

Add your embellishments. I used:
Ric Rac 4: Resize 25% and 30%/Duplicate 3 times
Airplane: Resize 25% and 30%
Color blot Purple: Resize 25% and 40%
Balloons 3: Resize 25%
Each of the crayons: Resize 25% and 25%

Highlight your white canvas.
New Raster layer.
Select All.
Copy and paste Paper 10 Into Selection.
Deselect.
Apply the mask.
Merge Group.

Copy and paste Banner Flag as a new layer.
Resize 25%
Move into position just above the mask in your layers pallet.
Highlight the mask layer.
Select All/Float/Defloat
Selections/Invert
Highlight the Flag layer.
Tap the delete key.
Deselect.
Duplicate/Change the Properties to Multiply.

Add your copyrights.

Add your name.
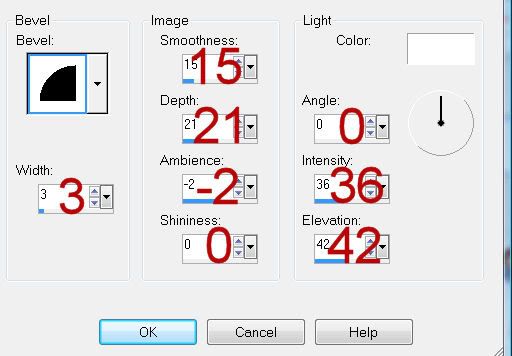
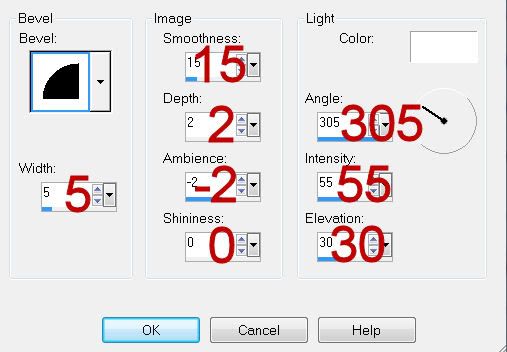
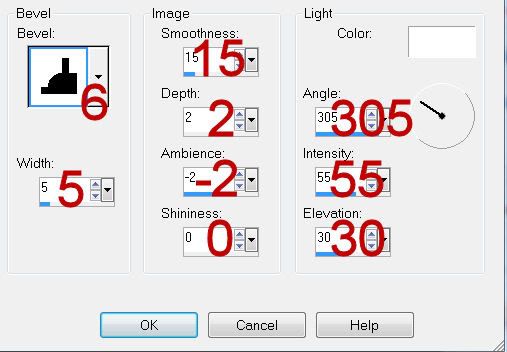
Give it a slight Inner Bevel:

Resize all layers 80%.

I hope you enjoyed this tutorial.
I’d love to see your results and show it off in my gallery.
Email me!
Hugs,
Bev

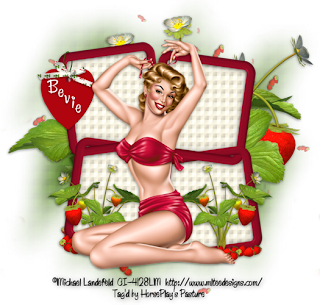
Strawberry Love


Supplies

1 tube of choice - I used the artwork of Michael Landefeld which can now be purchased from CDO. You must have a license to use.

Font of choice - I used Chicken Basket - a pay font

Dee’s Sign Post mask 1 here

Mura’s Meister - Copies

“Strawberry Love ” is a full size size scrap kit created by Karen of Sweet Occasion Designs and can be purchased from Lollipops n Gumdrops. You can visit her blog here. Thank you Karen for such a brilliant kit!

This tutorial was written assuming you have a working knowledge of PSP.

Mura's Meister - Copies

~♥~ Let’s get started ~♥~

Open a 700 x 700 blank canvas.
Flood fill white.

Copy and paste Frame 2 as a new layer.
Resize 40%
Click inside of each square.
Selections/Modify/Expand by 4.
New Raster layer below the frame.
Copy and paste Paper 13 Into Selection.
Deselect.

Copy and paste your tube as a new layer.

Add your embellishments. I used:
From Strawberry Love 3 Folder -
Jaraber 15: Resize 25% - position behind the frames and to the right. Duplicate/move to the left.
Jaraber 14: Resize 25% and 40%
Jaraber 24: Resize 25% and 25% and 40%. Duplicate as many times as you like.
Tag 2: Resize 25% and 40%
Small Bow 6: Resize 25% and 40%

Highlight your white canvas.
New Raster layer.
Select All.
Copy and paste Paper 16 Into Selection.
Deselect.
Apply the mask.
Resize 110%
Merge Group.

Duplicate one of the strawberries.
Apply Mura's Meister - Copes:
Set to Wallpaper (Prospective)
Default Settings.
OK
Erase the strawberries you don't want.

Add your copyrights.

Add your name.

Resize all layers 80%.

I hope you enjoyed this tutorial.
I’d love to see your results and show it off in my gallery.
Email me!
Hugs,
Bev
Friday, May 27, 2011

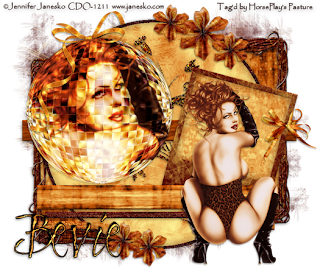
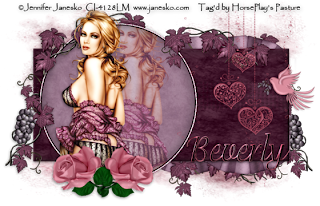
Lessons of Love


Supplies

1 tube of choice - I used the artwork of Jennifer Janesko which can now be purchased from CDO. You must have a license to use.

Font of choice - I used Adorable here

Gem mask 161 here

Creative by Nature template 42 here

“Lessons of Love ” is a PTU tagger size scrap kit created by Cindy of Puddicat Creations and can be purchased from TKO Scraps. You can visit her blog here. Thank you Cindy for an amazing kit!

This tutorial was written assuming you have a working knowledge of PSP.

~♥~ Let’s get started ~♥~

Open up the template.
Shift + D.
Close out the original.
Delete the top 4 layers, Copy of Raster 4, and Raster 4 layer.
Image/Canvas Size:
700 x 450
Highlight Raster 1 layer and flood fill white.

Highlight Raster 2 layer.
Click on it with your Magic Wand.
New Raster layer.
Copy and paste Paper 13 Into Selection.
Deselect.
Delete the template layer.
Give it a slight Inner Bevel:


In your Color Pallet:
Foreground: #967389

Highlight Raster 3 layer.
Use your Target Tool to change the color of your foreground.

Highlight Copy of Vector 1 layer.
Click on it with your Magic Wand.
New Raster layer.
Copy and paste Paper 16 Into Selection.
Copy and paste your tube as a new layer.
Position it just slight off center in front of the circle.
Duplicate
Move this tube layer to the right just a bit
In your layers pallet move it below the original.
Change the Properties to Soft light.
Selections/Invert
Tap the delete key.
Deselect.
Delete the template layer.

Copy and paste Japanese Fan 2 as a new layer.
Resize 25%
Position behind the rectangle - see my tag for reference.
Duplicate
Move this one to the right.
Use your Rectangle Tool and section off what overhangs the rectangle.
Tap the delete key.
Deselect.
To each fan layer:
Duplicate/Flip

Add your embellishments. I used:
Flower 1: Resize 25%/Flip/Duplicate
Grapes 1: Resize 60%/Duplicate/Mirror/Duplicate as you like to decorate
Bling 1: Resize 70%
Bird 1: Resize 25% and 80%

Highlight your white canvas.
New Raster layer.
Select All.
Copy and paste Paper 12 Into Selection.
Deselect.
Apply the mask.
Merge Group.

Highlight the white canvas again.
Select All.
Highlight the Bling 1 layer.
Selections/Invert
Selections/Modify/Inside Outside Feather:
Number of Pixels: 43
OK
Tap the delete key until you have a nice feathered look to the top of the bling.
Deselect.

Add your copyrights.

Add your name:
Color Pallet:
Foreground: Pattern/Set to Paper 12 from the kit
Background: #000000
Stroke: 1.00
Type your name.
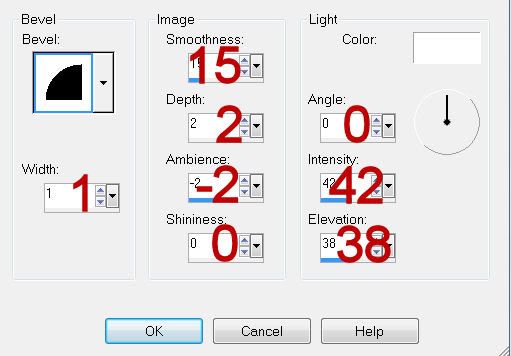
Give it a slight Inner Bevel:


Resize all layers 80%.

I hope you enjoyed this tutorial.
I’d love to see your results and show it off in my gallery.
Email me!
Hugs,
Bev
Thursday, May 26, 2011

Fairy Flutters


Supplies

Font of choice - I used Oh Lara - a pay font.

My mask 1 here

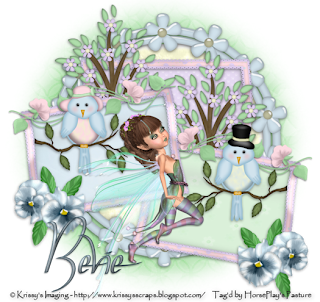
“Fairy Flutters ” is a PTU tagger size scrap kit created by Joy of Mystic Creations and can be purchased from Heartbeatz Creationz. You can visit her blog here. Thank you Joy for a truly sweet kit!!

This tutorial was written assuming you have a working knowledge of PSP.

~♥~ Let’s get started ~♥~

Open up a 700 x 700 blank canvas.
Flood fill white.

Copy and paste Glass Flower Frame as a new layer.
Resize 70%
Click inside the frame with your Magic Wand.
Selections/Modify/Expand by 10.
New Raster layer below the frame.
Copy and paste Paper 10 Into Selection.
Deselect.
Merge Visible.

Copy and paste Wavy Frame as a new layer.
Resize 50%
Free rotate Left 90 degrees.
Use your Freehand Selection Tool and outline the frame keeping the dotted line within the center of the frame sides.
New Raster layer below the frame.
Copy and paste Paper 8 Into Selection.
Deselect.
Merge Visible the frame and paper.

Copy and paste Wavy Frame again.
Resize 45%
Free rotate Right 80 degrees
Duplicate/Mirror
It is alright if either of these frames aren’t in their exact position.

Highlight the frame on the left.
As before, use your Freehand Selection Tool and outline the frame.
New Raster layer below the frame.
Copy and paste Paper 7 Into Selection.
Deselect.
Merge Visible the frame and paper.

Highlight the frame on the left.
Repeat the above step accept use Paper 9

Now you can move all of your merged layers into their exact positions.

Add your embellishments. I used:
Tree 1: Duplicate/Mirror
Pansy Vine 1: Resize 85%/Free rotate Right 10 degrees/Duplicate/Mirror
Pansies 2: Resize 40%/Duplicate/Mirror
Lady Bird: Resize 50%
Man Bird: Resize 50%/Mirror
Poser 2

Highlight your white canvas.
New Raster layer.
Select All.
Copy and paste Paper 4 Into Selection.
Deselect.
Apply the mask.
Merge Group.
I had to move my mask up slightly on the canvas and then crop my image.
Duplicate the mask layer.
Change the Properties to Multiply.

Add your copyrights.

Add your name:
Color Pallet:
Foreground: #202020
Background: #bac7cf
Stroke: 1.50
Type your name.
Give it a slight Inner Bevel:


Resize all layers 80%.

I hope you enjoyed this tutorial.
I’d love to see your results and show it off in my gallery.
Email me!
Hugs,
Bev
Grunge and Glitter is having a sale!

Hi Peeps,

I don't normally advertise on my tutorial blog, but a designer is in serious need of your help. Grunge and Glitter has her entire store up for sale for only $25. Head on over to her blog here and check it out. For a very worthy cause you'll walk away with a real bang for your buck!

Hugs,
Bev

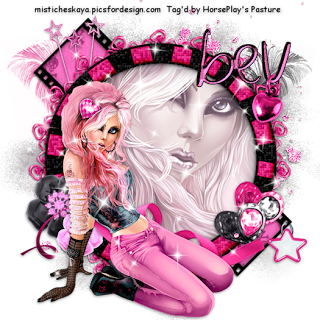
Pink Passion


Supplies

1 tube of choice and 1 close up image - I used the artwork of Mistecheskaya can be purchased from PicsForDesign. You can generate your own license to use.

Font of choice - I used CSDesign here

Insatiable Dreams Mask 81 here

“Pimp My Swag ” is a FTU tagger size scrap kit created by Vaybs and can be downloaded from her blog here. Thank you Vaybs for this more than generous share! You’re a gem!

This tutorial was written assuming you have a working knowledge of PSP.

~♥~ Let’s get started ~♥~

Open up a 700 x 700 blank canvas.
Flood fill white.

Copy and paste 36 as a new layer.
Click inside of it with your Magic Wand.
Selections/Modify/Expand by 4.
New Raster layer below the frame.
Copy and paste your close up image as a new layer below the frame.
Selections/Invert
Tap the delete key.
Deselect.

Close out your white canvas.
Merge visible.
Reopen your canvas.

Copy and paste 37 as a new layer.
Free rotate Left 45 degrees.
Click inside each frame.
Selections/Modify/Expand by 4.
New Raster layer below the frames.
Copy and paste Paper 9 Into Selection.
Deselect.
Merge Visible the frame and paper.
Move this layer below the other merged layer.

Copy and paste your tube as a new layer.

Add your embellishments. I used:
53
61: Resize 60%
59: Resize 60% and 70%
54: Resize 40%/Free rotate Right 20 degrees
55: Resize 40%/Free rotate Left 20 degrees
52: Resize 70%
20: Resize 60%
71: Resize 85%/Free rotate Right 100 degrees
70: Free rotate Right 100 degrees/Mirror85%
12: Resize
35
40

Highlight your white canvas.
New Raster layer.
Select All.
Copy and paste Paper 12 Into Selection.
Deselect.
Apply the mask.
Merge Group.

Add your copyrights.

Add your name:
Color Pallet:
Foreground: #000000
Background: any pink shade from the kit
Stroke: 1.50
Type your name.

Type your name.
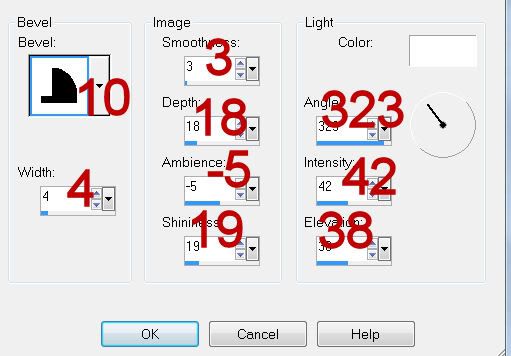
Give it a slight Inner Bevel:


Copy and paste Element 9 as a new layer.
Resize 70%
Hang it from your name.

Resize all layers 80%.

I hope you enjoyed this tutorial.
I’d love to see your results and show it off in my gallery.
Email me!
Hugs,
Bev
Tuesday, May 24, 2011

Rusted Beauty


Supplies

1 tube of choice - I used the artwork of Jennifer which can be purchased from CDO. You must have a license to use.

Font of choice - I used Clive Barker here

Weescotlass Mask 297 here

Divine Intentionz Template 355 here

Xerox - Porcelain

“Rusted Boots ” is a tagger size scrap kit created by Terry of Treasures by Terry and can be purchased from Butterfly Blush Designs. You can visit her blog here. Thank you Terry for a most brilliant kit that really brings out the beauty in rust!

This tutorial was written assuming you have a working knowledge of PSP.

~♥~ Let’s get started ~♥~

Open up the template.
Shift + D.
Close out the original.
Delete the top 2 layers and Transparent Circle Edge layer.
Image/Canvas Size:
700 x 600
Ok.
Flood fill the background layer white.

Highlight Shape 1 layer.
Click on it with your Magic Wand.
New Raster layer.
Copy and paste Frame 6 Into Selection.
Deselect.
Delete the template layer.
In your layers pallet bring the frame up to the top (so you can see it better to work on).
Use your Freehand Selection Tool and outline the frame -
Reason for this is because there are very tiny gaps in the vine you don’t want to miss:


New Raster layer below the frame.
Copy and paste Paper 14 Into Selection.
Deselect.
In your layers pallet move the frame and paper just above the background layer.

Highlight Shape 2 layer.
Repeat the above step.

Highlight Circle Background layer.
Click on it with your Magic Wand.
New Raster layer.
Copy and paste Paper 11 Into Selection.
Adjust/Add Remove Noise/Add Noise:
Gaussian and Monochrome checked
Noise: 53%
OK
Deselect.
Delete the template layer.

Highlight Thin Rectangle 4 layer.
Click on it with your Magic Wand.
New Raster layer.
Copy and paste Paper 8 Into Selection.
Deselect.
Delete the template layer.
Give it a slight Inner Bevel:


Apply the same Noise effect.

Highlight Circle layer.
Click on it with your Magic Wand.
New Raster layer.
Copy and paste Paper 1 Into Selection.
Deselect.
Delete the template layer.

Highlight Thin Rectangle 2 layer.
Click on it with your Magic Wand.
New Raster layer.
Copy and paste Paper 6 Into Selection.
Deselect.
Delete the template layer.
Give it the same slight Inner Bevel.

Highlight Polaroid layer.
Click on the white area with your Magic Wand.
New Raster layer.
Copy and paste Paper 23 Into Selection.
Deselect.
Give it the same slight Inner Bevel.

Highlight Polaroid layer again.
Click on the black area with your Magic Wand.
New Raster layer above the Polaroid paper layer.
Copy and paste Paper 16 Into Selection.
Deselect.
Delete the Polaroid template layer.

Highlight Small Circle layer.
Click on it with your Magic Wand.
New Raster layer.
Copy and paste Ball 2 Into Selection.
Copy and paste your tube as a new layer.
Resize larger and position over the ball.
Selections/Invert
Tap the delete key.
Deselect.
Delete the template layer.
Apply Xero-Porcelain to the tube layer.
Use default settings accept move the blue channel down to 0.
Change the Properties to Hard Light.

Highlight Thin Rectangle 3 layer.
Click on it with your Magic Wand.
New Raster layer.
Copy and paste Paper 21 Into Selection.
Deselect.
Delete the template layer.
Give it the same slight Inner Bevel.
Apply the same noise effect.

Highlight Thin Rectangle layer.
Click on it with your Magic Wand.
New Raster layer.
Copy and paste Paper 14 Into Selection.
Deselect.
Delete the template layer.
Give it the same slight Inner Bevel.

Add your embellishments. I used:
Doodle 2: Resize 75%
Bow 3: Resize 30%
Flower 1: Resize 40%/Duplicate/Resize 70%/Duplicate 3 more times.
Bow 5: Resize 50%/Mirror

Highlight your white canvas.
New Raster layer.
Select All.
Copy and paste 21 Into Selection.
Deselect.
Apply the mask.
Merge Group.

Add your copyrights.

Add your name:
Color Pallet:
Foreground: #1d0d0a
Background: Pattern/Paper 16 from the kit
Stroke: 1.50
Type your name.

Type your name.
Give it a slight Inner Bevel:


Resize all layers 80%.

I hope you enjoyed this tutorial.
I’d love to see your results and show it off in my gallery.
Email me!
Hugs,
Bev
Sunday, May 22, 2011

Amazing news to share

I don't know if any of you knew I attempted to sell scraps under the name of Southern Whispers Designs. It's been pointed out to me that I should stick with the name everyone is already familiar with. I took that good advice to heart and dumped the Southern Whispers name and am now creating under the name of HorsePlay's Pasture Designs. The new name feels right and so fitting for my obsession and love for the horse♥ ♥

I do hope you'll drop by and pay me a visit and quite often! You'll find all the latest awesome deals and sales that are going on in the 2 stores I now sell at - Lollipops n Gumdrops and TKO Scraps.

Hugs,
Bev