Saturday, February 21, 2009

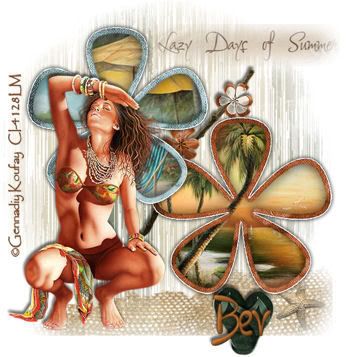
Dreaming of the Tropics

Photobucket
Supplies Needed

1 Tube of choice – I'm using the artwork of Gennadiy Kauffay
which you can purchase here
2 tropical images of choice.
Font of choice - I'm using Boomerang here
Weescotlass Mask 16 here
"Summer Daze" a PTU Scrap kit by Designs by Helly which can be found at Cotton Candy Kreations.

This tutorial was written assuming you have knowledge of PSP.

~♥~ Let’s get started ~♥~

Open a 600 x 600 image. Flood fill white.

Copy and paste Rope Flower 2 as a new layer. Resize 50%. Select/Select All/ Float/Defloat/Modify/Contract by 10.
Copy and paste the image as a new layer and position where you like over the flower. Select/Invert and tap the delete key.

Select/Invert. New Raster layer.
Effects/3D/Cutout with these settings:
V & H: 5
Opacity: 35
Blurt: 25
Color: black
Repeat accept change V & H to -5.

Close out your white canvas and merge visible. Open your white canvas back up.

Copy and paste Roper Flower as a new layer and repeat the above steps with your other image.

Copy and paste the Branch as a new layer. Resize 60%. Free rotate left 60 degrees. Position behind the flowers. See my tag for reference.

Copy and paste your tube as a new layer. Position where you like.

Copy and paste the Net as a new layer. Resize 40%. Mirror, Flip. Position near the bottom of your canvas. Use your Freehand Selection and go around the entire net. Selections/Modify/Feather. Change number of pixels to 52. Ok. Then tap your delete key until the net is feathered to your liking. Deselect.

Copy and paste one of the Journaling elements as a new layer. Resize 60%. Repeat the same process to feather it. Position where you like.

Copy and paste the Rock as a new layer. Resize 25%. Free rotate right 20 degrees. Position near the bottom of your image.

Copy and paste a Flip Flop of choice as a new layer. Resize 20% and again 90%. Duplicate/Mirror. Free rotate one 20 degrees left, the other 20 degrees right. Overlap them at the heels. Merge down. You can position them behind your name after you add it.

Add your copyrights.

Add your name. Position your flip flops.

Highlight your white canvas. New Raster Layer. Select All. Paste a paper of choice Into Selection. I used Paper 9. Deselect. Apply your mask. Merge Group. If you used the same mask as I did, resize 120%. If you used the same paper as I did, duplicate, merge down.

Crop your image if you need to and save your new tag!

I hope you enjoyed this tutorial.
I would love to see your results.
Email me!

Hugs,
Bev

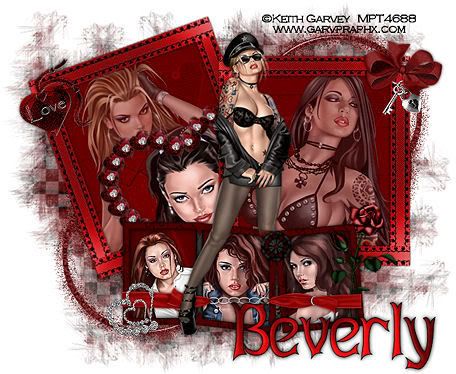
Who Do You Want?

Photobucket
Supplies Needed

7 tubes of choice – 3 of them close up images - I'm using the artwork of Keith Garvey which you can purchase here
Font of choice - I used Abagail Jackson, but for some reason
I can't find it on any font site today! Pontifica Demo font will work just a nice.
Weescotlass Mask 297 here
Greg’s Factory Output Vol. II (Optional)
"A Day for Romance" PTU kit by Southern Scrapz which can be found here.

This tutorial was written assuming you have working knowledge of PSP.

~♥~ Let’s get started ~♥~

Open a 750 X 700 transparent canvas. Flood fill white.

Copy and paste ADRele 16 (red frame) as a new layer. Duplicate and then hide the duplicate layer. Highlight the original frame layer and click inside with your magic wand. Selections/Modify/Expand by 6.

Copy and Paste a paper of choice beneath the frame. Invert/Delete.

Copy and paste a close up image of choice beneath the frame. Hit the delete key. Deselect. Close out your white canvas and merge visible. Resize 60%. Free rotate left 20 degrees. Close that layer out.

Open up the Duplicate frame layer and repeat the above steps accept don’t rotate.

Copy and paste a heart frame of choice and repeat the same steps as you did for the first frame and this time free rotate it left 20 degrees and then position it between the two frames. See my tag for reference.

Copy and paste ADRele 58 (triple frame) as a new layer. Resize 60%. Use your magic wand and click inside each frame.

Copy and paste a paper beneath the triple frame. Invert/delete. Copy and paste 3 images – one into each of the frames. Close out your 3 large frame layers and your white canvas. Merge visible. Now move all your merged frame layers into their final places. See my tag for reference.

Copy and paste ADRele 1 (silver heart lock and key) as a new layer. Resize 40%. Move to the top right corner of your large right frame.

Copy and paste ADRele 49 (Bow) as a new layer. Resize 35% and position it over the heart lock and key.

Copy and paste ADRele 47 (red heart with Love on it) as a new layer. Resize 40%. Free rotate left 20 degrees and position on the left side of the large left frame.

Copy and paste ADRele 28 (belt/ribbon) as a new layer. Resize 60% and then use your pick tool to resize to exact, position the belt/ribbon near the bottom of the triple frame.

Copy and paste ADRele 3 (silver heart) as a new layer. Resize 50% and position near the bottom left of the triple frame.

Copy and paste ADRele 19 (rose) as a new layer. Resize 40% and position behind the belt/ribbon layer and move toward the right side of the frame.

Copy and paste ADRele 75 as a new layer just above your white canvas layer. Position near bottom left of your image. Duplicate and move so that it’s near the top right of your image. See my tag for reference.
Copy and paste your last tube as a new layer. Position where you like.

Highlight you white canvas. New Raster Layer. Select All. Copy and paste a paper of choice Into Selection. Apply your mask. Merge Group.

Add all your copyrights.

Add your name.
I used these settings with the font Abagail Jackson:
Foreground: black
Background: a4090b
Stroke: 1
The size is up to you.

After you’ve added your name (make sure it’s a Raster Layer)
Select All/Float/Defloat/Modify/Contract by 1.

Apply the following plug in:
Greg’s Factory Output Vol. II – Pool Shadow
Apply the default settings.
Deselect.

Apply a bevel:
Width: 20
Smoothness: 17
Depth: 3
Ambience: 0
Shininess: 14
Color: white
Angle: 248
Intensity: 28
Elevation 63

Apply a drop shadow. Crop your image and resize all layers if you like and your tag is finished.

I hope you enjoyed this tutorial as much as I had fun creating it.
I would love to see your results.
Email me!

Hugs,
Bev
Friday, February 20, 2009

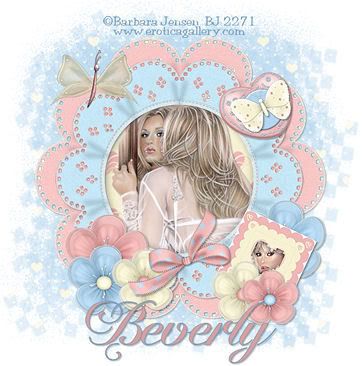
Tender Beauty

Photobucket
Supplies Needed

1 Tube of choice – I'm using the artwork of Barbera Jensen
which you can purchase here
Font of choice - I used Chateau but can't seem to find the font.
Look on Ellie's Treaures site....tons of beautiful fonts to choose from!
Mask of Choice
"Butterfly Blush" a taggers scrap kit by Butterfly Blush Designs which can be found at Paradise 4 Scrappers.
I enjoyed this kit tremendously with all it’s delicacy.

This tutorial was written assuming you have knowledge of PSP.

~♥~ Let’s get started ~♥~

Open a 700 x 700 image. Flood fill white.

Copy and paste Frame 3 as a new layer.

Copy and paste Frame 4 as a new layer. Resize 85%.

Click inside Frame 4. Selections/Modify/Expand by 6. Copy and paste a paper of choice below the frame. Invert/delete.

Copy and paste your tube as a new layer. Hit the delete key once you have it positioned. Deselect.

Copy and paste Oragans Flower 2 as a new layer. Position near the bottom left of your frame.

Copy and paste Organs Flower 1 as a new layer. Resize 80%. Move into position in front of the other flower.

Copy and paste Organs Flower 3. Resize 70%. Move into position in front of the other flowers.

Copy and paste Organs Flower 1 as a new layer. Move to the bottom right of your frame.

Copy and paste Stamp 3 as a new layer. Use your magic wand and click inside the heart. Copy and Paste Into Selection your tube. Deselect. Free Rotate right 25 degrees. Resize 60% and move in front of the flower at the bottom right of your frame.

Duplicate Organs Flower 1 and move it so that it’s positioned in front of the stamp. Duplicate Organs Flower 2. Resize 70% and position it also in front of the stamp near the other flower.

Copy and paste Bow 2 as a new layer. Position at the bottom center of your frame.

Copy and paste Heart Button 2 as a new layer. Move near the top right of your frame.

Copy and paste Butterfly 11 as a new layer. Free rotate left 25 degrees. Resize 50% and position over the Heart Button.

Copy and paste Butterfly 5 as a new layer. Mirror. Resize 70% and position near the top left of your frame.

Highlight your white canvas. New Raster layer. Select All. Copy and paste into selection a paper of choice. Deselect. Apply your mask. Merge Group.

Add your copyrights.

Add your name. You can give it a slight bevel if you like and then crop your image.

I hope you enjoyed this tutorial.
I would love to see your results.
Email me!

Hugs,
Bev
Monday, February 16, 2009

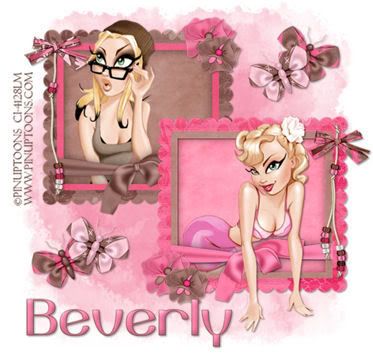
Opposite Delights

Photobucket
Supplies Needed

2 Tubes of choice – I'm using the artwork of PinUpToons
which you can purchase here
Font of choice - I'm using Yiggivoo1 here
Becky Mask 22
"Mocha Berry" a PTU scrap kit by Twinky Dezignes which can be found here.
Thank you so much Twinky for such a wonderful kit!

This tutorial was written assuming you have knowledge of PSP.

~♥~ Let’s get started ~♥~

Open a 650 x 650 image. Flood fill white.

Copy and paste the brown Ribbon Wrapped Frame as a new layer. Use your magic wand and click inside. Be sure to click beneath the ribbon as well. Selections/Modify/Expand by 5. Selections/Invert.

Copy and paste a paper of choice below the frame. Hit the delete key.

Copy and paste a tube of choice. Hit the delete key. Deselect.

Close out your white background and merge visible. Resize 75%. Move the merged layer toward the upper left corner of your canvas.

Repeat the above steps with the pink Ribbon Wrapped Frame and then position near the bottom right corner of your canvas.

Copy and paste a Bead String of choice as a new layer. Resize 60% and position on the side of one of your frames. Repeat with the other bead string and position on the other frame.

Copy and paste a Satin Flower as a new layer. Resize 30% and position at the corner of one of your frames.

Copy and paste the other Satin Flower as a new layer. Resize 25% and position near the other flower.

Repeat the above 2 steps but reverse the colors and move into position on the other frame.

Copy and paste butterflies of choice, resizing 25%, and free rotating 25 degrees either left or right. Whichever you prefer. Move into position.

Highlight your white canvas. New Raster Layer. Select All. Copy and paste a paper of choice into selection. Deselect. Add your mask. Merge group.

Add your copyrights.

Add your name and use a light bevel. Crop your image.

I hope you enjoyed this tutorial.
I would love to see your results.
Email me!

Hugs,
Bev