Saturday, August 7, 2010

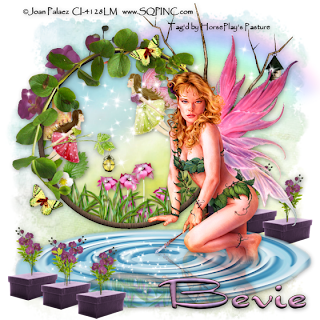
Fascination of the Fairy


Clicking on the image will allow you to see it in full view.

Supplies

1 tube of your choice - I used the beautiful artwork of Joan Palaez at CILM
Font of Choice - I used Dragonfly
Becky Mask 22 here
“Fairytale” is a PTU scrap kit created by
Laney of Laney’s Scrappy Moments and can be purchased at Butterfly Blush Designs. You can visit her blog here.
Thank you Laney for such a beautiful kit!

~♥~ Let’s get started ~♥~

Open up a 700 X 700 blank canvas.
Flood fill white.

Copy and paste Frame 1 as a new layer.
Resize 80%
Move into position slightly toward the left of your canvas.
Copy and paste your tube as a new layer.
Copy and paste Element 30 as a new layer.
Move these 3 elements into their exact position now otherwise the reflection into the water won’t be correct.

Highlight the frame.
Click inside with your Magic Wand.
Selections/Modify/Expand by 6.
New Raster layer below the frame.
Copy and paste a paper of choice Into Selection.
Deselect.

Now you’re going to add embellishments to go inside the frame.
Note: You can allow them to stick out from the sides of the frame. We’ll take care of that later.
I used:
Element 25: Resize 35%
Element 26: Resize 40%
Element 24: Resize 40%/Duplciate/Mirror
Element 19: Resize 35%/Flip/Free rotate right 20 degrees
Element 28: Resize 25%
Element 1: Resize 25%/duplicate and mirror as many times as you like.

Highlight the frame layer.
Click inside of it with your Magic Wand.
Selections/Modify/Expand by 6.
Selections/Invert
Highlight each embellishment layer and tap the delete key.
Deselect.

Now you need to add embellishments to go outside of the frame.
I used:
Element 21: Resize 80%
Element 34: Mirror
Element 23: Resize 25% and 50%/Free rotate left 35 degrees

Close out your white background and your tube layer.
Merge visible.
Reopen all layers.
Duplicate your merged layer.
Flip/Move it into position so it looks to be the reflection in the water.
Highlight your water layer.
Use your Magic Wand and click anywhere outside of the water.
Highlight “reflection” layer and tap the delete key.
Change the Properties to Multiply.
Lower the Opacity to about 40.

Now you need to assemble the flower boxes:
I used:
Element 33: Resize 60%
Element 34: Resize 25%
Element 12: Resize 25% and 80%
Merge Visible all elements that make the window boxes.
Duplicate and move it into position behind your tube.

The last 2 elements I used to finish off the tag is:
Element 27
Element 40
Element 28: Resize 25% and 60%

Highlight your white background.
Select All
New Raster layer.
Copy and paste a of choice Into Selection.
Deselect.
Apply the mask.
Merge Group.
Duplicate

Add your credits.

Add your name.
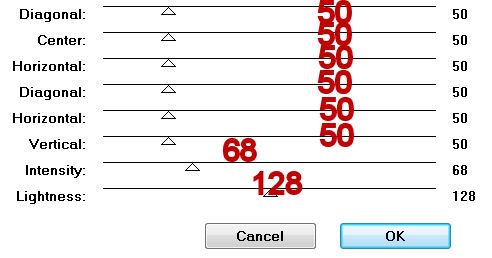
Give it a slight inner bevel:
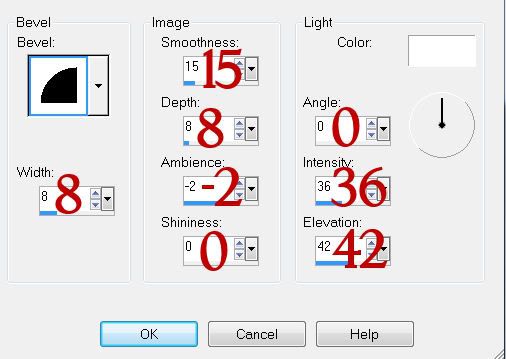


Resize all layers 85%.

I hope you enjoyed this tutorial.
I’d love to see your results and show it off in my gallery.
Email me!
Hugs,
Bev

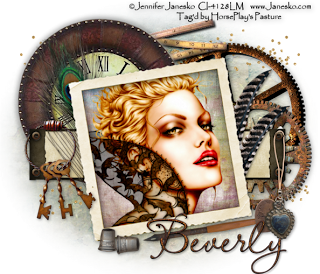
Old Time Memories


Supplies

1 tube of your choice - I used the beautiful artwork of Jennifer Janesko at CILM
Font of Choice - I used LavishlyYoursROB
Artmama Studios Mask 6 here
“Steampunk Sally” is a PTU scrap kit created by
Artmama Made and can be purchased at Exquisite Scraps. You can visit her blog here.
Thank you Artmama for such a beautiful kit! Your talent is amazing!

~♥~ Let’s get started ~♥~

Open up a 700 X 700 blank canvas.
Flood fill white.

Copy and paste Embelli 15 as a new layer.
Resize 65%
Click inside with your Magic Wand.
Selections/Modify/Expand by 6.
New Raster layer below the frame.
Copy and paste a paper of choice Into Selection.
Copy and paste your tube below he frame.
Selection/Invert
Tap the delete key.
Deselect.

Close out your white background.
Merge Visible.
Reopen the white background.

Copy and paste Embelli 9 as a new layer.
Position it behind the merged frame layer and to the left.
Duplicate/Mirror
Merge Down.
If you need to, center it on your canvas behind the frame.

Add your embellishments. I used:
Embellie 32
Embellie 3: Resize 50%
Embellie 8
Embellie 11: Resize 80%
Embellie 24: Resize 60%
Embellie 30: Resize 80%
Embellie 16: Resize 60%
Embellie 31: Free rotate left 10 degrees
Embellie 10: Resize 70%/Mirror
Embellie 20: Resize 40%/Duplicate/Free rotate right 85 degrees
Embellie 45

Highlight your white background.
Select All
New Raster layer.
Copy and paste a of choice Into Selection.
Deselect.
Apply the mask - be sure Invert Data Mask is checked.
Merge Group.

Add your credits.

Add your name.
Give it a slight inner bevel:


Resize all layers 85%.

I hope you enjoyed this tutorial.
I’d love to see your results and show it off in my gallery.
Email me!
Hugs,
Bev
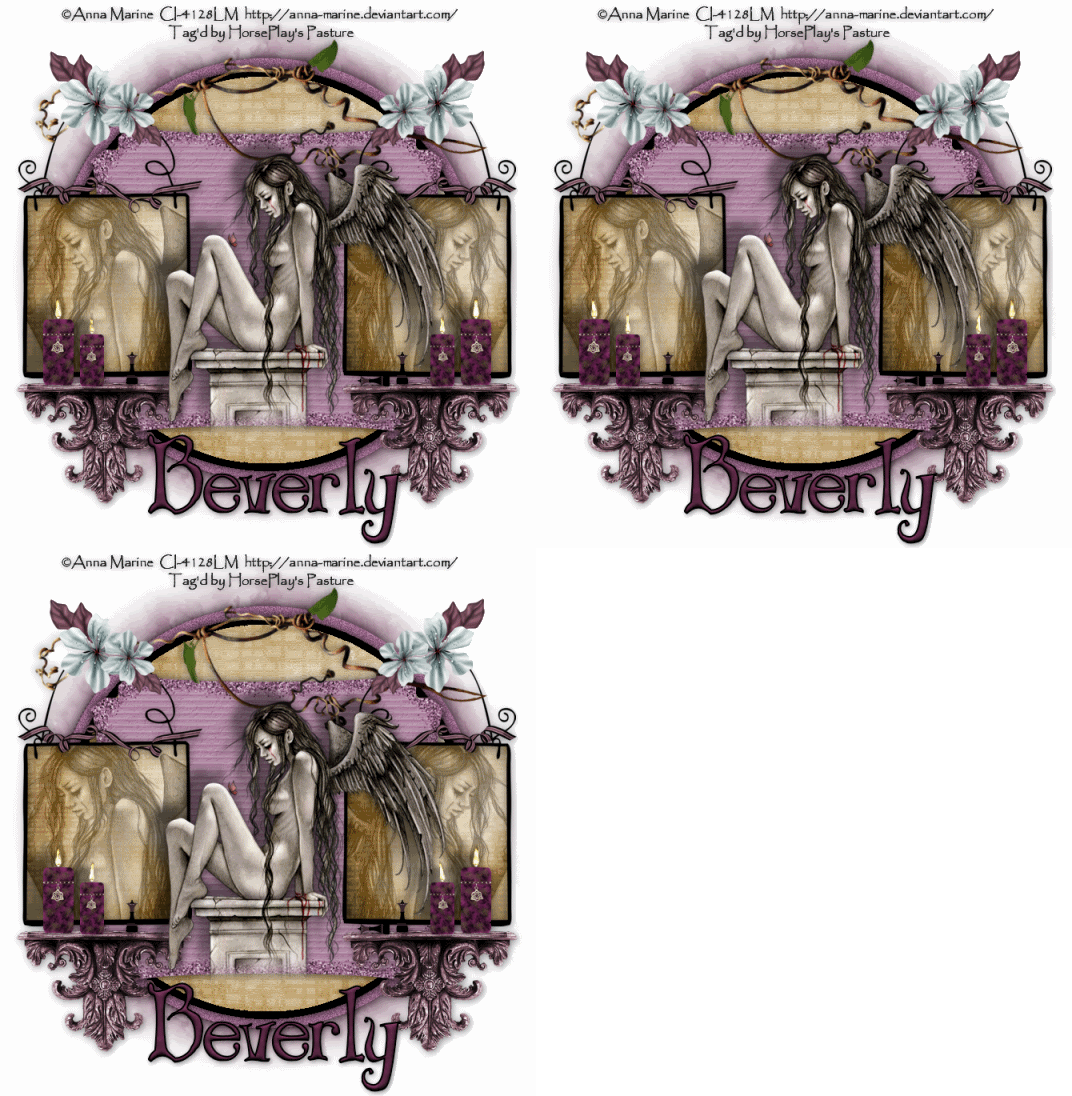
Vindictive Pleasure


Supplies

1 tube of your choice - I used the beautiful artwork of Anna Marine at CILM
Font of Choice - I used Bibliotheque here
Weescotlass Mask 286 here
Eyecandy 5: Nature - Fire
Animation Shop
“Vindictive Pleasures” is a PTU scrap kit created by
Jessica of Gothic Inspirations and can be purchased at Scraps with Attitude. You can visit her blog here.
Thank you Jessica for another stunning Goth kit!

~♥~ Let’s get started ~♥~

Open up a 700 X 700 blank canvas.
Flood fill white.

In your color pallet:
Foreground - Null
Background: 9f6d8f (or whatever color you prefer)

Make your Ellipse Tool active, set on Circle
Create a Circle 525 X 525
Convert to Raster Layer.
Click on it with you Magic Wand.
New Raster layer.
Flood fill black
Deselect
Resize 95%
Highlight the lavendar circle layer.
Adjust/Add Remove Noise/Add Noise
Uniform and Monochrome checked
25%
OK

Highlight the Black Circle layer.
Click on it with your magic Wand.
Selections/Modify/Contract by 10
New Raster layer.
Copy and paste Paper 17 Into Selection
Deselect.

Copy and paste Parchment Tab as a new layer.
Use your Target Tool and change it to the lavender color - or whatever color you prefer.
Center it over the paper circle layer.

Copy and Paste Frame 1 as a new layer.
Resize 50%
Move into position at the left side of your canvas.
Duplicate/Mirror

Highlight the left frame.
Click inside with your Magic Wand.
Selections/Modify/Expand by 3
New Raster layer below the frame.
Copy and paste Paper 17 Into Selection.
Copy and paste your tube as a new layer below the frame.
Selections/Invert
Tap the delete key.
Change the Properties to Luminance Legacy.
Lower the Opacity to about 51 or so.

Repeat the above step with the frame on the right.

Copy and paste your tube as a new layer.
Give your tube an exaggerated drop shadow.

Copy and paste Candle as a new layer
Resize 25% and 70%
Duplicate/Mirror
Duplicate/Resize 80%
Duplicate/Mirror
Move the candles into exact position.
Merge Visible all candle layers.
Give the merged candle layer a drop shadow (NOT EXAGGERATED - WE’LL DO THAT LATER) and be sure “Shadow on new layer” is checked.
Use your Freehand Selection Tool - zoom in - and section out the drop shadow from the tops of the candles and up. (You don’t want any darkness or shadows higher than the candle tops)
Be sure the shadow layer is highlighted and tap the delete key.
Deselect.
Merge Visible the candle layer and its drop shadow.
Now you can go ahead and give it the same exaggerated drop shadow you did with your tube.

Create 3 new layers above the candle layer.
Rename them Flame 1, 2, and 3.
Highlight the candle layer.
Using your Freehand Selection Tool - zoom in - carefully trace around the flame of each candle.

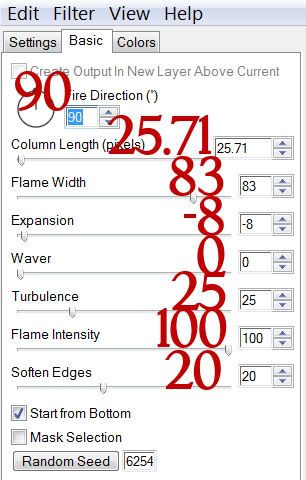
Highlight Flame 1 layer and apply Eyecandy 5: Nature - Fire
On the Settings Tab:
Small, Candle

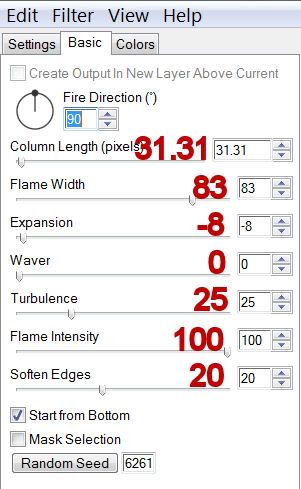
Basic Tab:


OK.

Highlight Flame 2 layer.
Apply the same fire effect accept hit the Random Seed button once.
OK

Highlight Flame 3 layer.
Repeat the above step.

Be sure Flame 2 and 3 layers are closed out.

Add your embellishments. I used:
Shelf: Resize 50%
Chess Piece: Resize 25% and 25%/Duplicate/Mirror. Duplicate/Free rotate left 90 degrees
Twig: Resize 80%/Free rotate left 10 degrees
Ribbon 2: Resize 30%
Flower 2: Resize 25%/Duplicate/Mirror
Flower 2 again: Resize 25% and 80%/Flip/Mirror/Duplicate

Highlight your white background.
Select All
New Raster layer.
Copy and paste a of choice Into Selection.
Deselect.
Apply the mask.
Merge Group.
Resize 96%

Add your credits.

Add your name.
Give it a slight inner bevel:


Copy Merge

~Time to Animate~

Open up Animation Shop.
Edit/Paste/As New Animation.

Back in PSP.
Close out Flame 1.
Open up Flame 2.
Copy Merge

Carry into AS.
Edit/Paste/After Current Frame.

Back in PSP.
Close out Flame 2.
Open up Flame 3.
Copy Merge.

Carry into AS.
Edit/Paste/After Current Frame.

Ctrl + A to highlight all frames.
Animation/Frame Properties
Display Time: 23
OK

Animation/Resize Animation
Percentage of Original checked
Width x Height: 80
OK

View your Animation.
If you’re happy then save.

I hope you enjoyed this tutorial.
I’d love to see your results and show it off in my gallery.
Email me!
Hugs,
Bev
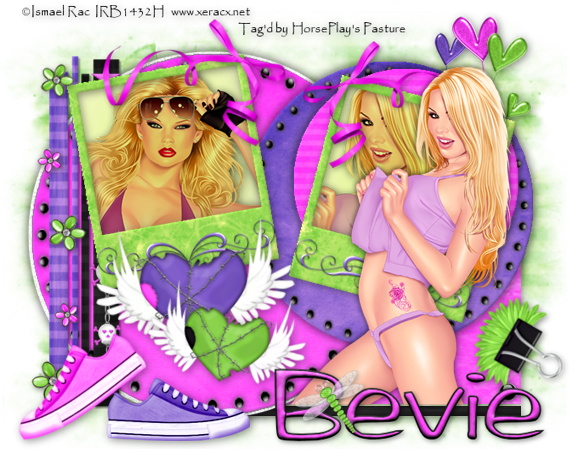
Friday, August 6, 2010

Check Me Out


Supplies

2 tubes of your choice - I used the awesome artwork of Ismael Rac at his site here
Font of Choice - I used Arctic 2 here
Gem Mask 22 here
Divine Intentionz Template 352 here
Mura Meister - Copies
“Emolicious” is a PTU tagger size scrap kit created by Nikki of Creative Intensionz and can be purchased from her store Twilight Scraps. You can visit her blog here.
Thank you Nikki for such a fun kit! I really had a lot of fun with this one!!

This tutorial was written assuming you have a working knowledge of PSP.

~♥~ Let’s get started ~♥~

Open up the template.
Shift +D.
Close out the Original.
Resize all layers 90%
Image/Canvas Size
700 X 600
OK
Open up the white background layer and flood fill white.
Delete the credit layer and word art layer.

Highlight Square Shape layer.
Click on it with your Magic Wand.
New Raster layer.
Copy and paste a paper of choice Into Selection.
Deselect.
Delete the template layer.
Give it a slight inner bevel:


Highlight Raster 1 layer.
Repeat the above step.

Highlight Large Circle layer.
Repeat the above step accept DO NOT DELETE THE TEMPLATE LAYER. Just close it out for now.

Highlight Thin Rectangle 2 layer.
Merge Down.
Both pink rectangle layers should be on the same layer.
Click on both with your Magic Wand.
New Raster layer.
Copy and paste a paper of choice Into Selection.
Deselect.
Delete the template layer.
Give it the same slight inner bevel.

Highlight Thin Rectangle 4 layer.
Merge down.
Both black rectangle layers should be on the same layer.
Repeat the above step.

Highlight Med Circle layer.
Click on it with your Magic Wand.
New Raster layer.
Copy and paste a paper of choice Into Selection.
Deselect.
Give it the same slight inner bevel.
DO NOT DELETE THE TEMPLATE LAYER. Instead just close it out.

Highlight Small Circle layer.
Click on it with your Magic Wand.
New Raster layer.
Copy and paste a paper of choice Into Selection.
Deselect.
Delete the template layer.
Give it the same slight inner bevel.

Highlight Polaroid 1 by Missy layer.
Click on the white area with your Magic Wand.
New Raster layer.
Copy and paste a paper of choice Into Selection.
Deselect.
Give it the same slight inner bevel.
Delete the template layer.

Click inside frame with your Magic Wand.
Selections/Modify/Expand by 3
New Raster layer below the frame.
Flood fill with a gradient of choice.
Copy and paste your tube as a new layer below the frame.
Selections/Invert
Tap the delete key.
Change the Properties to Multiply.
Deselect.


Highlight Polaroid 2 by Missy layer.
Repeat the above 2 steps using a different tube.

Copy and paste the same tube you used in Polaroid 1 as a new layer.

Copy and paste Glass Brad 1 as a new layer.
Resize 25% and 30%
Apply Mura Meister Copies:


Edit/Copy
Highlight the Large Circle template layer.
Click on it with your Magic Wand.
Highlight the paper of the template layer.
New Raster layer.
Selections/Modify/Contract by 5
Edit/Paste Into Selection
Deselect.
Delete the Original Glass Brad 1 ring layer and the template layer.

Copy and paste Glass Brad 1 again.
Resize 25% and 30%
Apply Mura Meister Copies: same settings
Edit/Copy
Highlight the Med Circle template layer.
Click on it with your magic wand.
Highlight the paper of the template layer.
New Raster layer.
Selections/Modify/Contract by 5
Edit/Paste Into Selection
Deselect.
Delete the Original Glass Brad 1 ring layer and the template layer.

Copy and paste Doodle 2 as a new layer.
Resize 25% & 60%
Duplicate/Mirror
Bring both of them together
Merge Down
Free rotate left 10 degrees - move it into position at the bottom of the left Polaroid frame.
Duplicate/Mirror/Free rotate right 5 degrees - move into position at he bottom of the right Polaroid frame.

Add your embellishments. I used:
Wired Hearts 3: Resize 35%/Free rotate right 10 degrees
Wired Hearts 1: Resize 40%/Mirror
Wired Hearts 2: Resize 30%
Mini Flower 2: Resize 30%
Mini Flower 4: Resize 50%/Duplciate/Resize 90%/Duplicate/Resize 90%
Barbed Wire Heart 1: Resize 50%/Free rotate left 5 degrees
Barbed Wire Heart 2: Resize 40%/Free rotate right 10 degrees
Skull Chain 1: Resize 80%
Bow Ribbon 1: Resize 40%/Duplicate/Mirror
Binder Clip 3: Resize 50%/Free rotate right 120 degrees
Shoe 1: Resize 50%/Mirror/Free rotate left 35 degrees
Shoe 2: Resize 50%
Dragonfly 3: Resize 30%

Crop you image slightly.

Highlight your white canvas.
New Raster layer.
Select All
Copy and paste a paper of choice Into Selection.
Deselect.
Apply the mask.
Merge Group.
Use your Pick Tool to pull it out just a tad.

Add your credits.

Add your name.
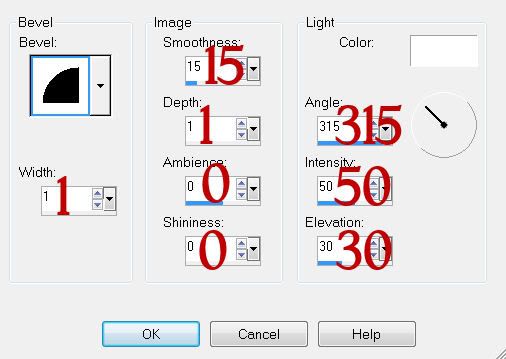
Give it a slight Inner Bevel:


Resize all layers 85%.

I hope you enjoyed this tutorial.
I’d love to see your results and show it off in my gallery.
Email me!
Hugs,
Bev
Wednesday, August 4, 2010

Colors of Fall


Supplies

3 tubes of your choice - I used the wonderful artwork of PinUpToons at CILM
Font of Choice - I used Enter Sansman here
Becky Mask 22 here
Filters Unlimited 2.0 - Optional
DSB Flux - Bright Noise - Optional
“Colors of Fall” is a PTU tagger size scrap kit created by Jen of Sleek n Sassy Designz and can be purchased from her store Scrappin‘ Dollars. You can visit her blog here.
Thank you Jen for such a festive kit to jump start the autumn season!

This tutorial was written assuming you have a working knowledge of PSP.

~♥~ Let’s get started ~♥~

Open up a 700 X 700 blank canvas.
Flood fill white.

Copy and paste Ivy 2 as a new layer.
Resize 80%
Move into position at the left side of your canvas - see my tag for reference.

Copy and paste Frame 1 as a new layer.
Resize 45%/Rename Frame 1
Duplicate
Resize 90%/Mirror/Rename Frame 2
Duplicate
Resize 90%/Mirror/Rename Frame 3

Highlight Frame 1 - Free rotate right 30 degrees
Highlight Frame 2 - Free rotate left 45 degrees
Highlight Frame 3 - Free rotate right 60 degrees

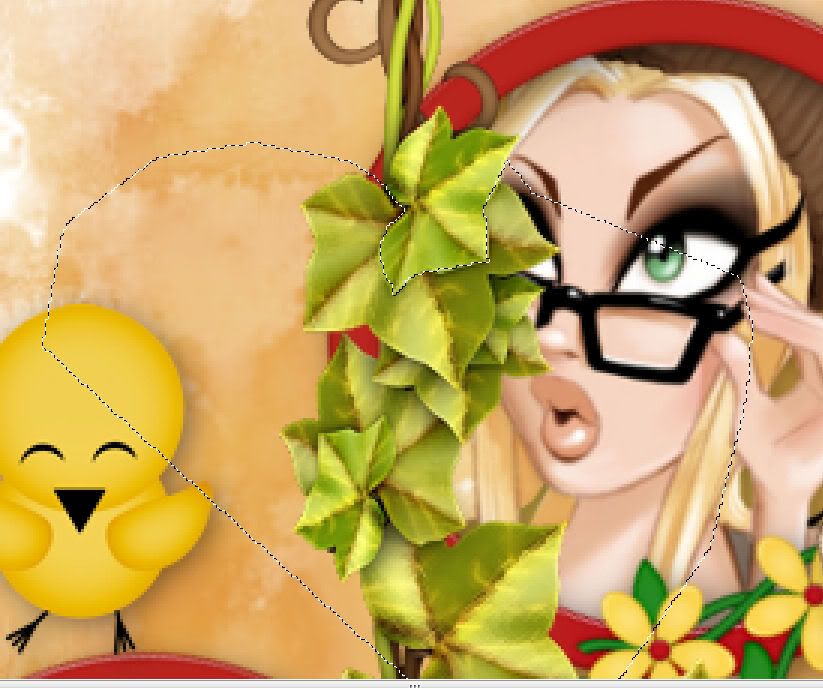
Very Important - you must move your Ivy and frames into the exact position where you want them now because later on we’re going to be duplicating the Ivy and erasing areas to give the effect the frames are hung from the vine - and that can’t be done if the frames, papers, and tubes are merged. So before you go any further in this tutorial be sure the vine and frames are exactly where you want them.


Highlight Frame 1.
Use your Freehand Selection Tool and outline the frame.
New Raster layer below the frame.
Copy and paste a gradient of your choice Into Selection.
Copy and paste a tube below the frame.
Selections/Invert
Tap the delete key.
Deselect.

Repeat the above step with Frame 2 and Frame 3 - using a different tube in each frame.

Highlight your vine layer.
Duplicate
Move the duplicated layer to the top of your layers pallet.
Using your Freehand Selection Tool section out the area of the vine you don’t want.


Tap the delete key.
Deselect.

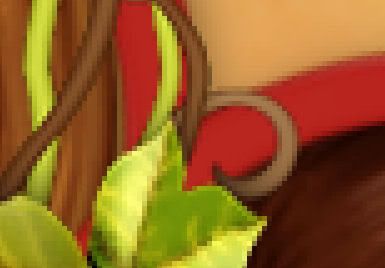
I’m a stickler for detail and I’ve zoomed in on the very smallest of the frames and saw the tiny spec of the hook that I didn’t want on the tag so I used my Eraser Tool to erase it.


Add your embellishments. I used:
Leaves 1, 2, 3, 4, and 5: Resize 25% and 60%/duplicate, free rotate, flip ones that you want. You can also lower the Opacity on some as well.
Fall Tag: Resize 40%
Owl 1: Resize 20% and 70%
Snail 1 & 2: Resize 25%
Dragonfly: Resize 40%/Free rotate left 25 degrees

Highlight your white canvas.
New Raster layer.
Select All
Copy and paste Paper 8 Into Selection.
Deselect.
Adjust/Blur/Gaussian Blur:
Radius: 10
OK
Copy and Paste Sun as a new layer above the paper.
Resize 50% - Move into position.
Merge Down.
Apply the mask.
Merge Group.
For an added touch I applied Filter’s Unlimited 2.0:
Paper Textures
Canvas, Fine
Default settings

Add your credits.

Add your name.
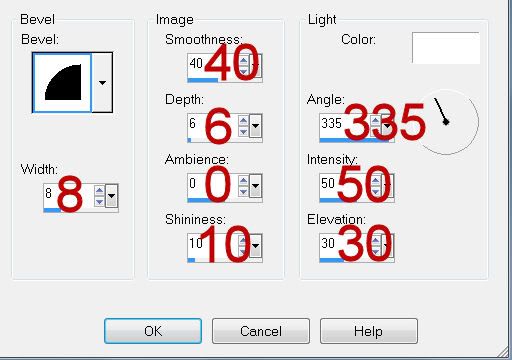
Give it a slight Inner Bevel:


Add your name again in a different color.
Give it the same inner bevel and offset it slightly from the other.

To the name that’s at the top in your layers pallet Apply DSB Flux - Bright Noise:
Intensity: 17
Mix checked.
OK

Resize all layers 85%.

I hope you enjoyed this tutorial.
I’d love to see your results and show it off in my gallery.
Email me!
Hugs,
Bev
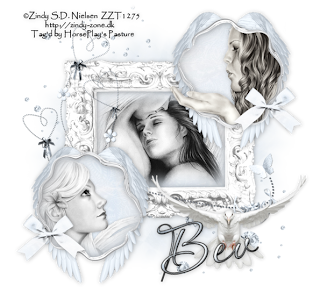
Wings of an Angel


Supplies

3 tubes of your choice - I used the wonderful artwork of Zindy S.D. Nielsen here
Font of Choice - I used Aquarelle here
Weescotlass Mask 138 here
“Wings of an Angel” is a PTU tagger size scrap kit created by Dee of Scraps by Dmg and can be purchased at The North Wing. You can visit her blog here.
Thank you Dee for this stunningly beautiful kit. You named it perfectly!

This tutorial was written assuming you have a working knowledge of PSP.

~♥~ Let’s get started ~♥~

Open up a 700 X 700 blank canvas.
Flood fill white.

Copy and paste Frame 7 as a new layer.
Resize 70%
Us your Magic Wand and click inside of it.
Selections/Modify/Expand by 6.
New Raster layer below the frame.
Copy and paste a paper of choice Into Selection.
Copy and paste your tube as a new layer.
Selections/Modify/Feather
Number of Pixels:
43
OK
Tap the delete key until you have a nice feathered effect to the tube.
Deselect.

Close out your white canvas.
Merge Visible.
Reopen your white canvas.

Copy and paste Frame 4 as a new layer.
Resize 40%
Position at the top right of the merged layer.
Duplicate/Mirror/Flip
Position at the bottom left corner of the merged layer.

Highlight the top right Frame.
Using your Freehand Selection Tool outline the frame - there is a gap in the frame but that’s ok…just connect the line when outlining.
New Raster layer below the frame.
Copy and paste a paper of choice Into Selection.
Copy and paste your tube as a new layer.
Selections/Invert
Tap the delete key
Selections/Modify/Feather
Number of Pixels:
43
OK
Tap the delete key until you have a nice feathered effect to the tube.
Deselect.

Close out your white canvas and merged layer.
Merge Visible.
Reopen all layer.

Highlight the bottom frame.
Repeat the above steps using a different tube.

Add your embellishments. I used:
Doodle 2: Resize 85%
Doodle 3: Resize 85%
Dove: Resize 85%
Bow 1: Resize 25%
Angle Wings 2: Resize 50%
Diamond Rain 2: Resize 70%

Highlight your white canvas.
New Raster layer.
Select All
Copy and paste a paper of choice Into Selection.
Deselect.
Apply the mask.
Resize 105%
Merge Group.

Add your credits.

Add your name.
Free rotate left 10 degrees
Give it a slight Inner Bevel:


Resize all layers 85%.

I hope you enjoyed this tutorial.
I’d love to see your results and show it off in my gallery.
Email me!
Hugs,
Bev
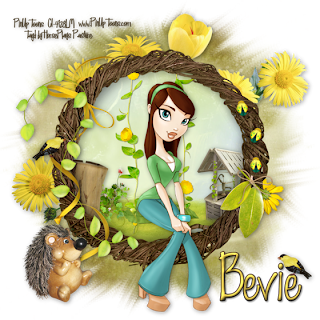
Mello Afternoon


Supplies

1 tube of choice - I used the wonderful artwork of PinUpToons at CILM
Font of Choice - I used Fabulous 50’s here
Weescotlass Mask 241 here
“Yellow and Mellow” is a PTU tagger size scrap kit created by Cindy of Puddicat Creations Scraps and can be purchased at Aussie Scrap Designs. You can visit her blog here.
Thank you Cindy for such an adorable kit!

This tutorial was written assuming you have working knowledge of PSP.

~♥~ Let’s get started ~♥~

Open up a 700 x 700 blank canvas.
Flood fill white.

Copy and paste Frame 2 as a new layer.
Resize 70%
Click inside of it with your Magic Wand.
Selections/Modify/Expand by 6.
New Raster layer below the frame.
Copy and paste a paper of choice Into Selection.
Deselect.

We’re going to add the embellishments that belong inside the frame. See my tag for reference as to where they go. Parts of the elements will be sticking out from behind the frame…it’s ok…we’ll take care of that in a bit.

Graas 1
Well: Resize 30%
Tree Stumps: Resize 70%/Mirror
Swing: Resize 70%

Highlight the frame.
Click inside of it with your Magic Wand.
Selections/Modify/Expand by 6.
Highlight each of the element layers and tap the delete key.
Deselect.

Copy and paste your tube as a new layer.

Add your embellishments. I used:
Ladybug 1: Resize 25% and 50% - duplicate as many times as you like and use your Pick Tool to turn this way and that.
Animal 1: Resize 50%
Leaves 5: Resize 60%
Flower 9: Resize 25% and 60%
Flower 7: (move behind the frame)
Flower 10: Resize 60%/Mirror
Ribbon 1: Free rotate left 90 degrees
Bird 1: Resize 25% and 60%

Add your copyrights.

Add your name.
Give it a slight inner bevel:


Resize all layers 80%.

I hope you enjoyed this tutorial.
I’d love to see your results and show them off in my gallery.
Email me!
Hugs,
Bev

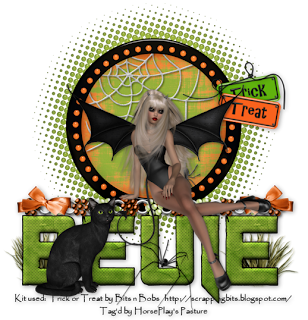
Trick or Treat


Supplies

Font of Choice - I used Origicide here
Becky Mask 9 here
“Trick or Treat” is a PTU tagger size scrap kit created by Julie of Bits n Bobs and can be purchased at Exquisite Scraps. You can visit her blog here.
Thank you Julie for such a fun kit to kick off the upcoming holiday season!

This tutorial was written assuming you have working knowledge of PSP.

~♥~ Let’s get started ~♥~

Open up a 700 x 700 blank canvas.
Flood fill white.

Copy and paste Element 61 as a new layer.
Click inside of it with your Magic Wand.
Selections/Modify/Expand by 6.
New Raster layer below the frame.
Copy and paste a paper of choice Into Selection.
Copy and paste Element 7 as a new layer above the paper.
Resize 60%
Selections/Invert
Tap the delete key.
Deselect.

Type your name out.
Give it a slight inner bevel:


Add your embellishments. I used:
Element 14: Resize 80%
Element 34: Resize 25%
Element 2 & 3: Resize 40% Free rotate 8 degrees
Element 70: Resize 40%
Element 58: Resize 30%
Element 72: Resize 35%
Element 65: Resize 40%

Add your copyrights.

Resize all layers 80%.

I hope you enjoyed this tutorial.
I’d love to see your results and show them off in my gallery.
Email me!
Hugs,
Bev

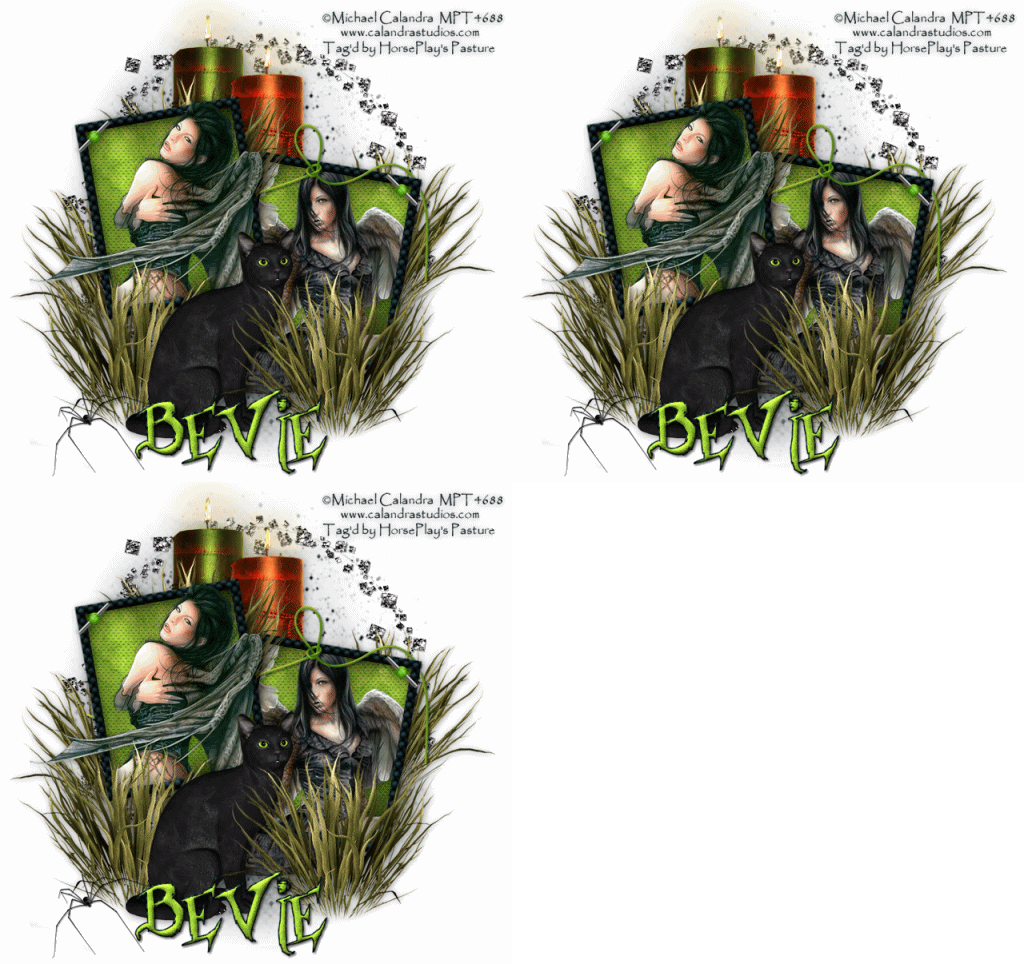
Waiting for Halloween


Supplies

2 tubes of choice - I’m using the artwork of Michael Calandra which you can purchase at MPT
Font of Choice - I used Borracho & Loko
Becky Mask 9 here
Greg’s Factory Output Vol. II - Pool Shadow
Eyecandy 5: Nature - Fire
Animation Shop
“Trick or Treat” is a PTU tagger size scrap kit created by Julie of Bits n Bobs and can be purchased at Exquisite Scraps. You can visit her blog here.
Thank you Julie for such a fun kit to kick off the upcoming holiday season!

This tutorial was written assuming you have working knowledge of PSP.

~♥~ Let’s get started ~♥~

Open up a 700 x 700 blank canvas.
Flood fill white.

In your color pallet:
Foreground: Null
Background: Set to pattern/Paper 10
Angle: 0
Scale: 25

Make your Rectangle Tool active and draw out a rectangle 200 X 250.
Convert to Raster lawyer.
Click anywhere outside of the rectangle with your Magic Wand.
Selections/Invert
Selections/Modify/Contract by 12.
Tap the delete key.
Deselect.
Free rotate left 10 degrees.
Duplicate/Mirror

Move the “frames” into postion -
See my tag for reference.

Highlight the left frame.
Click inside of it with your Magic Wand.
Selections/Modify/Expand by 3.
New Raster layer below the frame.
Copy and paste Paper 6 Into Selection.
Apply Greg’s Factory Output Vol. II - Pool Shadow:


Copy and paste your tube as a new layer below the frame.
Selections/Invert
Tap the delete key.
Deselect.
Give the frame a slight inner bevel:


Merge Visible the frame, tube, and paper.

Highlight the bottom frame.
Repeat the above steps using a different tube.

Copy and paste Elements 14 & 15 as a new layers.
Resize each 50%
Move into position - see my tag as reference.
Give each a drop shadow but be sure “Shadow on new Layer” is checked.
Use your eraser tool and erase the shadow that’s where the flame is.
Merge each candle down with it’s own shadow layer.
Now Merge Visible the two candle layers.

Using your Freehand Selection Tool outline the flame of each candle.
Create 3 Raster layers above the candle.
Rename them Flame 1, 2, and 3.
Highlight Flame 1 and apply Eyecandy 5: Nature - Fire
On the Settings Tab:
Small, candle

On the Basics Tab:


Highlight Flame 2 layer.
Apply the flame effect again accept hit the random seed button once.

Highlight Flame 3 layer.
Repeat the above step.

Close out Flame 2 and Flame 3 layers.

Add your embellishments. I used:
Element 65: Resize 65%
Element 24
Element 70: Resize 50%
Element 48: Resize 80% Free rotate left 45 degrees/Duplicate/Mirror
Element 60: Resize 60%
Element 72: Resize 25%/Mirror

Highlight your white canvas.
New Raster Layer
Select All
Copy and paste a paper of choice Into Selection.
Deselect.
Apply the mask.
Merge Group.

Add your copyrights.

Add your name.
Give it the same slight inner bevel.
Apply a touch of Noise.

Resize all layers 80%.

Copy Merge.

~Time to Animate~

Edit/Paste/As New Animation

Back in PSP.
Close out Flame 1.
Open up Flame 2.
Copy Merge

Carry into AS
Edit/Paste/After Current Frame

Back in PSP
Close out Flame 2.
Open up Flame 3.
Copy Merge

Carry into AS
Edit/Paste/After Current Frame.

Ctrl + A to highlight all the frames.
Animation/Frame Properties
Change the number to 21
OK

Animation/Resize Animation
Percentage of Original checked
Width X Height: 80
OK

View your animation.
If you’re happy then save.

I’d love to see your results.
Email me!
Hugs,
Bev