Saturday, October 1, 2011

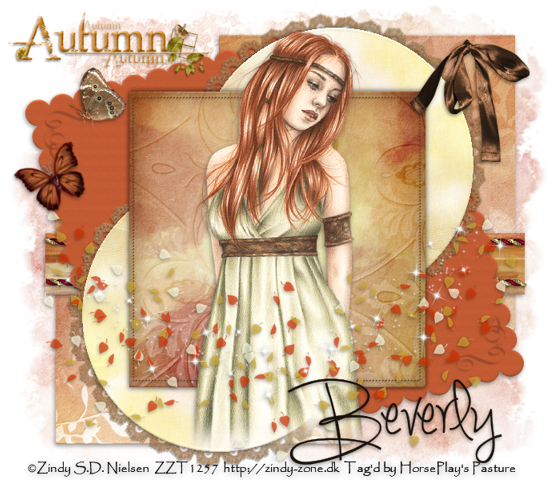
Memories of the Season


Supplies

1 tube of choice -  I used the artwork of Zindy S.D. Nielsen and can be purchased from her store Zindy Zone Shop.  You must have a license to use.

Font of choice - I used Simply Glorious here

Becky Mask 22 here

Divine Intentionz Template 378 here

“Shades of Autumn” is a scrap kit created by Lynne of Baby Cakes Scraps and can be purchased from Heartbeatz Creationz. You can visit her blog here.
Thank you Lynne for such a beautiful autumn kit!

This tutorial was written assuming you have a working knowledge of PSP.

~♥~ Let’s get started ~♥~

Open up the template.
Shift + D.
Close out the original.
Delete the top 4 layers.
Image/Canvas Size
700 x 600
OK
Highlight and open Background layer.
Flood fill white.

Highlight Square 4 layer.
Click on it with your Magic Wand.
New Raster layer.
Copy and paste Paper 5 Into Selection.
Deselect.
Delete the template layer.
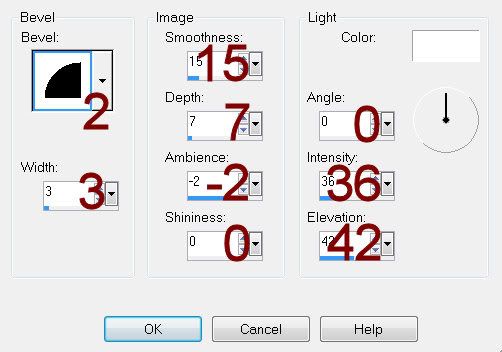
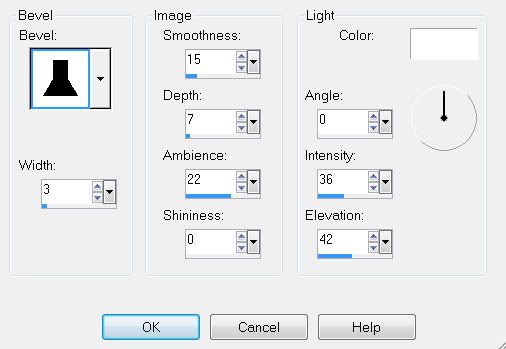
Give it a slight Inner Bevel:


Highlight Square 5 layer.
Repeat the above step.

Highlight Thin Rectangle layer.
Click on it with your Magic Wand.
New Raster layer.
Copy and paste Paper 8 Into Selection.
Deselect.
Delete the template layer.
Give it a slight Inner Bevel:
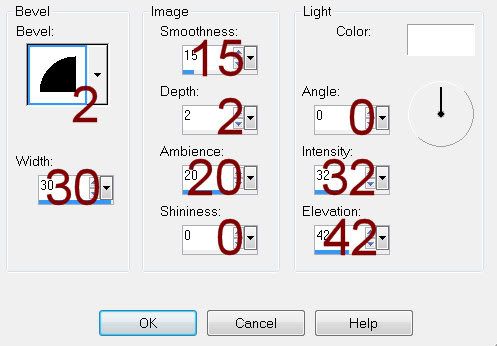

Highlight Square 1 layer.
Copy and paste Paper 2 as a new layer.
Resize 80%
Move into position over the template layer.
Delete the template layer.
Give it a slight Inner Bevel:

Duplicate
Move into position over Square 2 layer.
Delete the template layer.

Open up Paper 7.
Copy.

Make your working canvas active.
Highlight Circle 1 layer.
Click on it with your Magic Wand.
New Raster layer.
Paste Paper 7 Into Selection.
Deselect.
Delete the template layer.
Give it a slight Inner Bevel:


Make Paper 7 active.
Flip
Mirror
Copy

Make your working canvas active.
Highlight Circle 2 layer.
Click on it with your Magic Wand.
Paste the paper Into Selection.
Deselect.
Give it the same slight Inner Bevel.

Highlight Square 3 layer.
Click on it with your Magic Wand.
New Raster layer.
Copy and paste Paper 6 Into Selection.
Deselect.
Delete the template layer.
Give it the same slight Inner Bevel.

Highlight Dotted Square layer.
Select All/Float/Defloat
New Raster layer.
Flood fill with #60412c
Deselect.
Delete the template layer.

Copy and paste your tube as a new layer.

Copy and paste Fan as a new layer.
Resize 98%
Flip
Duplicate/Flip/Free rotate Left 30 degrees
Move both fans into position below the bottom circle paper so that the lace is circled around the paper.  Use your Eraser tool to erase the lace parts that overlap.
Merge Visible both frans.
Duplicate/Mirror/Flip
Move into position behind the top circle paper.

Add your embellishments.  I used:
Silk Bow:  Resize 40%/Mirror/Use the Target Tool to change to a color if you want it to match your tube.
Word Art:  Resize 25%
Scatters:  Resize 50%
Butterfly 2:  Resize 25% and 50%/Free rotate Left 30 degrees
Butterfly 3:  Resize 25% and 50%
Rope:  Use your Pick Tool to pull the side in to be flush with the rectangle paper.  Duplicate/Mirror

Highlight your white canvas.
New Raster layer.
Select All.
Copy and paste Paper 2 Into Selection.
Deselect.
Apply the mask.
Merge Group.

Add your copyrights.

Add your name.

Resize all layers 80%.

I hope you enjoyed this tutorial.
I’d love to see your results and show it off in my gallery.
Email me!
Hugs,
Bev

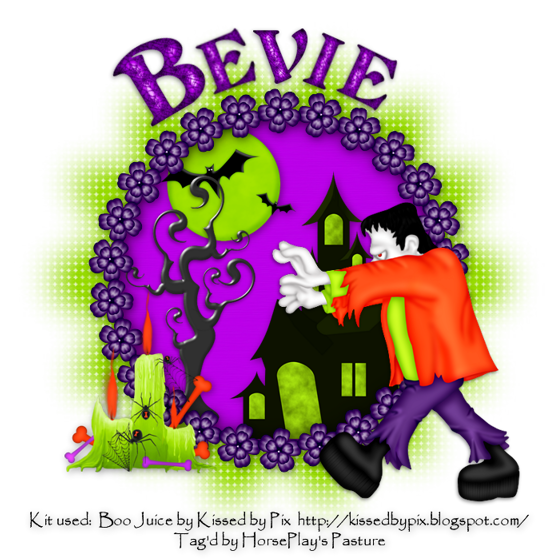
Boo Juice 3


Supplies

Font used is included in the collaboration by Kissed by Pix here

Dee’s Sign Post Mask 25 here

“Boo Juice” is a scrap kit created by Pixie of KissedbyPixie and is part of a collaboration that can be purchased at Exquisite Scraps.  You can visit her blog here
Thank you Pix for your fabulous portion!

This tutorial was written assuming you have a working knowledge of PSP.

~♥~ Let’s get started ~♥~

Open up a 700 x 700 blank canvas.
Flood fill white.

Copy and paste Flower Frame 4 as a new layer.
Click inside of it with your Magic Wand.
Selections/Modify/Expand by 4.
New Raster layer below the frame.
Copy and paste Crepe Paper 4 Into Selection.
Deselect.

Add the following elements below the frame and move into position - see my tag for reference..  Don’t worry about what overhangs the frame.  We’ll clean that up in a bit.
Bat Moon 2:  Resize 25%
Haunted House 2:  Resize 70%
Spooky Tree 3;  Resize 70%

Highlight the paper layer.
Click anywhere outside of it with your Magic Wand.
Highlight each element layer and tap the delete key.
Deselect.

Add your elements.  I used:
Candle Set:  Resize 50%
Frankie:  Resize 80%

Highlight your white canvas.
New Raster layer.
Select All.
Copy and paste Crepe Paper 3 Into Selection.
Deselect.
Apply the mask.
Resize 110%
Merge Group.

Add your copyrights.

Add your name.
Use the Alpha’s in KBP_BooJuiceAlphasPU
The first letter of your name resize 25%
All the rest of the letters in your name resize 25% and 70%
Use your Pick Tool and turn each one so that it rounds the frame.

Resize all layers 80%.

I hope you enjoyed this tutorial.
I’d love to see your results and show it off in my gallery.
Email me!
Hugs,
Bev 
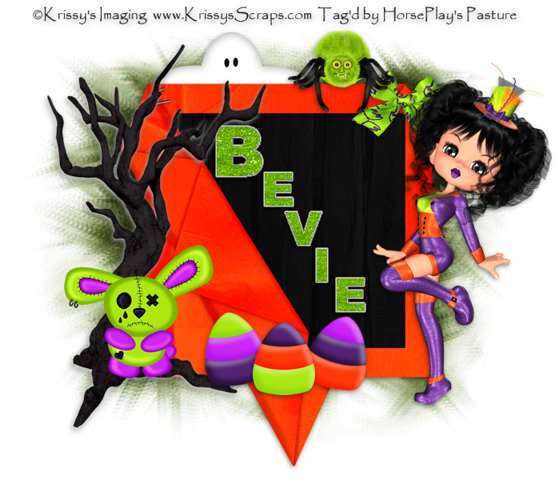
Boo Juice 4


Supplies

Poser used is Boo Juice Sassy created by Krissy’s Imaging and can be purchased from Exquisite Scraps


Alpha used is by Krissy’s Scraps and is included in the Collaboration.

Weescotlass Mask 249 here

Plug Ins:
Eyecandy 3.1 - Glow

“Boo Juice” is a scrap kit created by Krissy of Krissy’s Scraps and is part of a collaboration that can be purchased at her store Exquisite Scraps.  You can visit her blog here.
Thank you Krissy for your fantastic portion!

This tutorial was written assuming you have a working knowledge of PSP.

~♥~ Let’s get started ~♥~

Open up a 700 x 700 blank canvas.
Flood fill white.

Copy and paste Folded Paper Frame 3 as a new layer.
Resize 60%
Click inside of it with your Magic Wand.
Selections/Modify/Expand by 4.
New Raster layer below the frame.
Copy and paste Paper 1 Into Selection.
Deselect.

Add your elements.  I used:
Ghost 1:  Resize 40%
Spider 1:  Resize 40%
Candy Corn 2: Resize 35%
Candy corn 4:  Resize 35%/Free rotate Left 10 degrees
Candy Corn 3:  Resize 35%/Free rotate Right 15 degrees
Spooky Tree 1:  Resize 80%/Give it a white drop shadow before giving it a black drop shadow.
Sandy Bunny 1: Resize 45%
Bow 4:  Resize 30%
Choose a poser from the folder Krissy’s Imaging-Boo Juice- Sassy-CU  Resize 25%

Crop your Image.

Highlight your white canvas.
New Raster layer.
Select All.
Copy and paste Paper 4 Into Selection.
New Raster layer.
Copy and paste Paper 7 Into Selection
Deselect.
Apply the mask to each paper layer and merging the group of each.

Add your copyrights.

Add your name.
Use the Alpha’s in the folder KS Boo Juice glitter Alphas - PU
The first letter of the name resize 15%
All other letters in the name resize 10%
Arrange them diagonally - see my tag for reference.
Merge Visible all letters.
Adjust/Sharpen/Sharpen
Apply Eyecandy 3.1 - Glow:
Width: 3
Opacity: 100
Opacity Drop Off:  Fat
Color: White
OK

Resize all layers 80%.

I hope you enjoyed this tutorial.
I’d love to see your results and show it off in my gallery.
Email me!
Hugs,
Bev
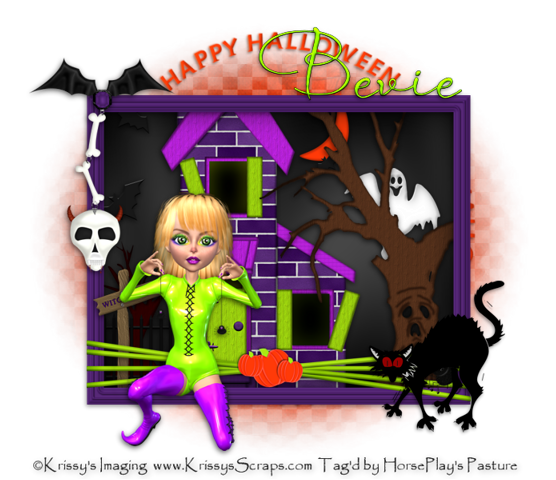
Boo Juice 5


Supplies

Poser used Boo Juice Mavka created by Krissy’s Imaging and can be purchased from Exquisite Scraps


Font of choice - I used SNF Infinity Bold - a pay font.  Aquarelle will work just as well here

Weescotlass Mask 208 here

Plug Ins:
Greg’s Factory Output Vol. II - Pool Shadow

“Boo Juice” is a scrap kit created by Joy of Mystic Creations and is part of a collaboration that can be purchased at Exquisite Scraps.  You can visit her blog here
Thank you Joy for your fun portion!

This tutorial was written assuming you have a working knowledge of PSP.

~♥~ Let’s get started ~♥~

Open up a 700 x 700 blank canvas.
Flood fill white.

Copy and paste Wrap Frame as a new layer.
Resize 60%
Make your Selection Tool active set on Rectangle and section out the frame opening.
New Raster layer below the frame.
Flood fill with #202020
Apply Greg’s Factory Output Vol. II - Pool Shadow:
Use Default Settings.
Deselect.

Add the following elements below the frame.  Move them into position - see my tag for reference.  Don’t worry about what overhangs the frame.  We’ll clean that up in a bit.
Haunted House:  Resize 70%
Ghost 2:  Resize 30%
Haunted Tree:  Resize 70%
Sing Post:  Resize 30%

Highlight the black flood fill layer.
Click anywhere outside of it with your Magic Wand.
Highlight each element layer and tap the delete key.
Deselect.

Add your elements.  I used:
Word Art 1:  Resize 80%/Free rotate Left 45 degrees
Cat 2:  Resize 50%
Vamp Dangle:  Resize 70%
In folder Krissys Imaging - Boo Juice - CU - Choose a poser:  Resize 25% and 80%

Crop your Image.

Highlight your white canvas.
New Raster layer.
Select All.
Copy and paste Paper 4 Into Selection.
Deselect.
Apply the mask.
Merge Group

Add your copyrights.

Add your name.
Give it a slight Inner Bevel:


Resize all layers 80%.

I hope you enjoyed this tutorial.
I’d love to see your results and show it off in my gallery.
Email me!
Hugs,
Bev 
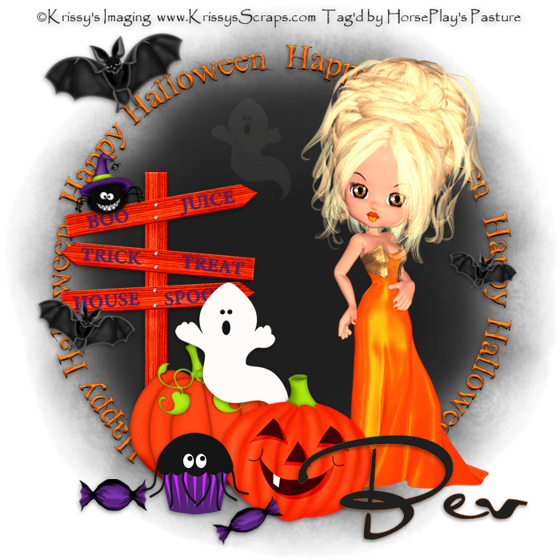
Boo Juice 8


Supplies

Poser used is by Krissy’s Imaging.  You can visit her blog here.

Font of choice - I Wilderness here and Al Sandra here

Monti Circular Mask here

“Boo Juice” is a scrap kit created by Michelle of Shells Scraps and is part of a collaboration that can be purchased at Exquisite Scraps.  You can visit her blog here
Thank you Michelle for your fantastic portion!

This tutorial was written assuming you have a working knowledge of PSP.

~♥~ Let’s get started ~♥~

Open up a 700 x 700 blank canvas.
Flood fill white.

New Raster layer.
Flood fill with #202020
Apply the Mask.
Merge Group.

Color Pallet:
Foreground:  #000000
Background:  Null

Make your Preset Shape Tool active set on Circle.
Set the Width at 2.
Draw out a circle that goes just beyond the darkest coloring of the mask.  If it’s too large or too small just resize accordingly. 
Objects/Align/Center in Canvas

Color Pallet:
Foreground:  #ff630a
Background:  #000000
Stroke: .3

Make your Text Tool active.
Move your cursor along the top center of the circular line until you see a Rocking A. 
Click your mouse.
A Text box will open.
Type the words “Happy Halloween”
Highlight the words in the text box
Right click/Copy
Click your mouse at the end of the words (to remove the highlight)
Ctrl + V
Your words should appear again in the text box.
Keep pasting the words again until they have come full circle on your canvas.
Apply.
In your layer’s pallet Click on the plus sign.
Close out the New Ellipse layer.
Right Click Vector 1 layer.
Convert to Raster layer.
Give the words an Inner Bevel:


Add your elements.  I used:
Choose a poser of your choice from the poser folder:  Resize 90%
Sign:  Resize 60%
Pumpkin 1:  Resize 50%
Pumpkin 2:  Resize 50%
Halloween cupcake 1:  Resize 30%
Spider 1;  Resize 25%/Free rotate Left 10 degrees
Bat 3:  Resize 40%/Free rotate Left 15 degrees/Duplicate/Mirror/Resize 70%/Duplciate/Mirror/Resize 70%
Ghost 1:  Resize 40%/Duplicate/Resize 70%/Lower the Opacity to 6
Bon Bon 1:  Resize 30%/Free rotate left 25 degrees
Bon Bon 2:  Resize 30%

Add your copyrights.

Add your name.
Resize all layers 80%.

I hope you enjoyed this tutorial.
I’d love to see your results and show it off in my gallery.
Email me!
Hugs,
Bev 
Boo Juice 7


Supplies

Font of choice - I used SNF Infinity Bold - a pay font.  Aquarelle will work just as well here

Mask 71 here

Toxic Desires Template 98 here

Plugs Ins:
Eyecandy 3.1 - Glow

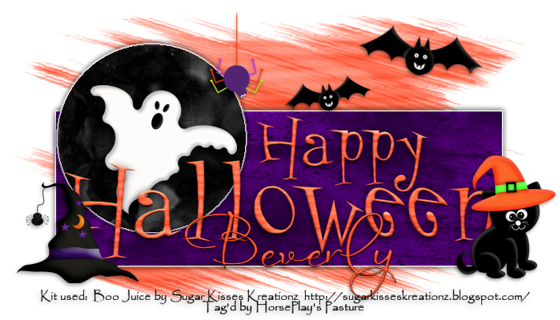
“Boo Juice” is a scrap kit created by Natalie of Sweet Kisses Kreationz and is part of a collaboration that can be purchased at Exquisite Scraps.  You can visit her blog here
Thank you Natalie for your fun portion!

This tutorial was written assuming you have a working knowledge of PSP.

~♥~ Let’s get started ~♥~

Open up the template.
Shift + D.
Close out the Original.
Image/Canvas Size:
700 x 400
OK
Delete the following layers:
Credits, Stars 3, 2, 1, and Bats layers.

Highlight Rectangle layer.
Click on it with your Magic Wand.
New Raster layer.
Copy and paste Paper 6 Into Selection.
Deselect.
Delete the template layer.
Apply Eyecandy 3.1 - Glow:
Width: 3
Opacity: 100
Opacity Drop Off:  Fat
Color: White
OK

Highlight Circle layer.
Click on it with your Magic Wand.
New Raster layer.
Copy and paste Paper 5 Into Selection.
Deselect.
Delete the template layer.
Give it the same Glow effect.

Highlight Word Art layer.
Select All/Float/Defloat
New Raster layer.
Copy and paste Paper 3 Into Selection.
Deselect.
Delete the template layer.
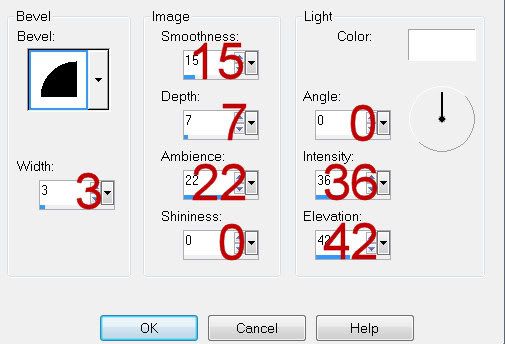
Give it a slight Inner Bevel:


Add your elements.  I used:
Ghost 1:  Resize 35%
Witch Hat 1:  Resize 35%
Witchy Cat 1:  Resize 40%/Mirror
Spider On Web:  Resize 35%
Bat 2:  Resize 35%/Free rotate Right 10 degrees/Duplicate/Mirror/Resize 70%

Highlight your white canvas.
New Raster layer.
Select All.
Copy and paste Paper 3 Into Selection.
Deselect.
Apply the mask.
Resize 110%
Merge Group.

Add your copyrights.

Add your name.
Give it the same slight Inner Bevel.

Resize all layers 80%.

I hope you enjoyed this tutorial.
I’d love to see your results and show it off in my gallery.
Email me!
Hugs,
Bev 

Boo Juice 6


Supplies

Font of choice - I used FP Third Hand here

Monti Circular Mask here

Toxic Desires Template 85 here

Plugs Ins:
Eyecandy 3.1 - Glow

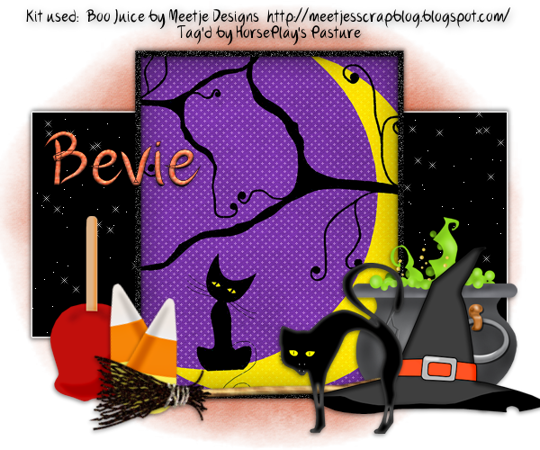
“Boo Juice” is a scrap kit created by Maria of Meetje Designs and is part of a collaboration that can be purchased at Exquisite Scraps.  You can visit her blog here
Thank you Maria for your fun portion!

This tutorial was written assuming you have a working knowledge of PSP.

~♥~ Let’s get started ~♥~

Open up the template.
Shift + D.
Close out the Original.
Delete the top 3 layers.

Highlight Rectangle layer.
Apply Eyecandy 3.1 - Glow:
Width: 3
Opacity: 100
Opacity Drop Off:  Fat
Color: White
OK

Highlight Frame Back.
Click anywhere outside of it with your Magic Wand.
Copy and paste Paper 5 as a new layer.
Resize 50%
Tap the delete key.
Deselect.

Highlight Frame layer.
Adjust/Add Remove Noise/Add Noise:
Monochrome and Gaussian checked
Noise: 73%
OK

Add your elements.  I used:
4:  Resize 60%
1:  Resize 60%
8:  Resize 50%
7:  Resize 50%/Mirror
3:  Resize 50%/Free rotate Left 10 degrees/Duplicate/Mirror
5:  Resize 70%/Free rotate Left 120 degrees

Highlight your white canvas.
New Raster layer.
Select All.
Copy and paste Paper 1 Into Selection.
Deselect.
Apply the mask.
Merge Group.
Duplicate

Add your copyrights.

Add your name.
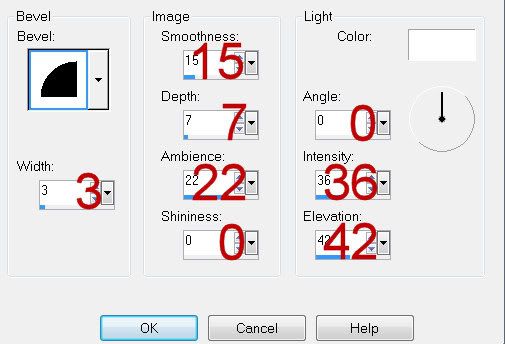
Give it a slight Inner Bevel:


Resize all layers 80%.

I hope you enjoyed this tutorial.
I’d love to see your results and show it off in my gallery.
Email me!
Hugs,
Bev
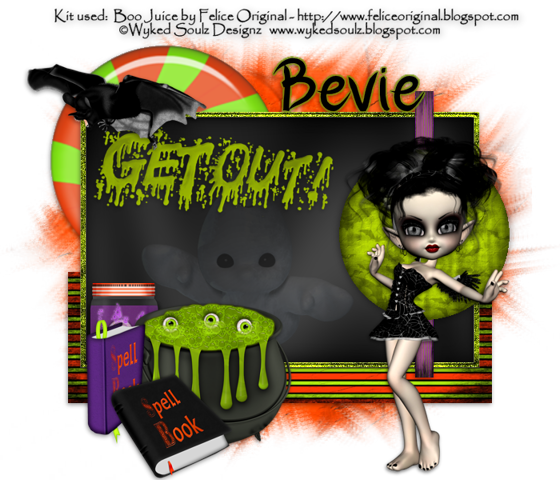
Boo Juice 2


Supplies

Font of choice - I used FP Third Hand here

Weescotlass Mask 241 here

Creative by Nature Template 72 here

Plugs Ins:
Eyecandy 3.1 - Glow
Greg’s Factory Output Vol. II - Pool Shadow

“Boo Juice” is a scrap kit created by Felice of Felice Originals and is part of a collaboration that can be purchased at Exquisite Scraps.  You can visit her blog here
Thank you Felice for your awesome portion!

This tutorial was written assuming you have a working knowledge of PSP.

~♥~ Let’s get started ~♥~

Open up the template.
Shift + D.
Close out the original.
Image/Canvas Size:
700 x 600
New Raster layer.
Send to bottom.
Flood fill white.
Delete the top 3 layers and Raster 6 layer.

Highlight Raster 5 layer.
Click on it with your Magic Wand.
New Raster layer.
Copy and paste FO Stripe Vertical Paper Into Selection.
Deselect.
Delete the template layer.

Highlight Raster 3 layer.
Click on it with your Magic Wand.
New Raster layer.
Copy and paste FO Candy 1 Into Selection.
Deselect.
Delete the template layer.

Highlight Raster 2 layer.
Click on it with your Magic Wand.
New Raster layer.
Flood fill with #202020
Apply Greg’s Factory Output Vol. II - Pool Shadow:
Use Default Settings.
Deselect.
Delete the template layer.

Highlight Copy of Vector 1 layer.
Click on it with your Magic Wand.
New Raster layer.
Copy and paste FO Bats Paper Into Selection.
Deselect.
Delete the template layer.
Give it a slight Inner Bevel:

Adjust/Add Remove Noise/Add Noise:
Monochrome and Gaussian checked
Noise: 53%
OK

Highlight Raster 7 layer.
Click on it with your Magic Wand.
New Raster layer.
Copy and paste FO Stripe Horizontal Paper Into Selection.
Deselect.
Delete the template layer.

Highlight Raster 4 layer.
Click on it with your Magic Wand.
New Raster layer.
Copy and paste FO Bats Paper Into Selection.
Deselect.
Delete the template layer.

Add your elements.  I used:
Hallows Eve Sprite:  Resize 70%
Ghost 2:  Resize 50%/Change the Properties to Overlay/Lower Opacity to about 34
Get Out:  Resize 50%
Vampire Bat:  Resize 50%
Eyeball Jar:  Resize 40%
Caldron and Brew:  Resize 50%
Spell Books:  Resize 50%

Highlight your white canvas.
New Raster layer.
Select All.
Copy and paste Candy Corn Paper Into Selection.
Deselect.
Apply the mask.
Merge Group.

Add your copyrights.

Add your name.
Apply Eyecandy 3.1 Glow:
Width: 3
Opacity: 100
Opacity Drop Off:  Fat
Color: #76990d
OK

Resize all layers 80%.

I hope you enjoyed this tutorial.
I’d love to see your results and show it off in my gallery.
Email me!
Hugs,
Bev 
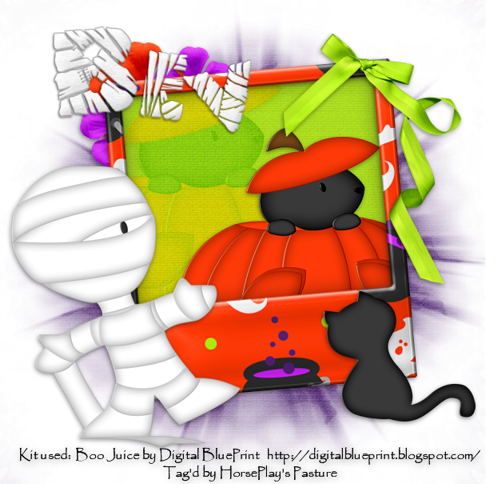
Boo Juice 1


Supplies

Gem Mask 71 here

“Boo Juice” is a scrap kit created by Pia of Digital BluePrint and is part of a collaboration that can be purchased at Exquisite Scraps.  You can visit her blog here
Thank you Pia for your fantastic portion!

This tutorial was written assuming you have a working knowledge of PSP.

~♥~ Let’s get started ~♥~

Open up a 700 x 700 blank canvas.
Flood fill white.

Copy and paste Frame as a new layer.
Resize 50%
Free rotate Left 5 degrees.
Click inside of it with your Magic Wand.
Selections/Modify/Expand by 4.
New Raster layer below the frame.
Copy and paste Lime Paper Into Selection.
Copy and paste Pumpkin as a new layer below the frame.
Resize 120%
Move toward the upper left corner.
Change the Properties to Soft Light.
Selections/Invert
Tap the delete key.
Copy and paste Pumpkin again.
Move toward the bottom right corner a little.
Tap the delete key.
Deselect.

Add your elements.  I used:
Ribbon 2:  Resize 65%
Mummy:  Resize 80%
Black Cat:  Resize 50%
Flower 1:  Resize 40%
Flower 2:  Resize 30%/Duplicate

Crop your image leaving a little room around all the edges.

Highlight your white canvas.
New Raster layer.
Select All.
Copy and paste Purple Paper Into Selection.
Deselect.
Apply the mask.
Resize 105%
Merge Group.

Add your copyrights.

Add your name.
Use the Alpha’s that came with the kit - I just loved these!!
The first letter of the name resize 40%
All other letters in the name resize 30%
Use your Pick Tool to turn the letters this way and that.

Resize all layers 80%.

I hope you enjoyed this tutorial.
I’d love to see your results and show it off in my gallery.
Email me!
Hugs,
Bev
 

Wednesday, September 28, 2011

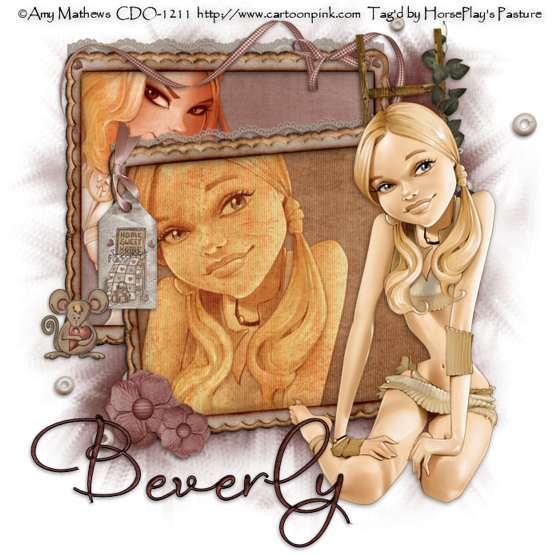
Home Grown Love

 
Supplies

1 tube of choice and 2 close up images - I used the beautiful artwork of Amy Mathews which can be purchased from CDO.  You must have a license to use. 

Font of choice - I used SNF Infinity Bold - a pay font.  Aquarelle should work just as nice and can be found here

Weescotlass Mask 249 here

“Home Grown Love” is a full size scrap kit created by Brenda of CuddleBeez Scraps and can be purchased from Lollipops n Gumdrops.  You can visit her blog here
Thank you Brenda for a very pretty kit!

This tutorial was written assuming you have a working knowledge of PSP.

~♥~ Let’s get started ~♥~

Open up a 700 x 700 blank canvas.
Flood fill white.

Copy and paste Square Frame as a new layer.
Resize 25%
Free rotate Left 5 degrees.
Click inside of it with your Magic Wand.
Selections/Modify/Expand by 4.
New Raster layer below the frame.
Copy and paste Paper 8 Into Selection.
Duplicate/Change the Properties to Multiply.
Copy and paste a close up image below the frame.
Move into position.
Selections/Invert
Tap the delete key.
Deselect.
Change the Properties of the tube to Overlay.
Lower the Opacity to about 73.
Close out the white background.
Merge Visible.
Reopen the white background.

Copy and paste Square Frame again as a new layer.
Resize 25%
Move into position behind the merged layer - see my tag for reference.
Click inside of it with your Magic Wand.
Selections/Modify/Expand by 4.
New Raster layer below the frame.
Copy and paste your other close up image as a new layer below the frame.
Selections/Invert
Tap the delete key.
Deselect.
Change the Properties of the tube to Overlay.
Highlight the frame layer.
Merge Down.
Merge Down again.
The frame, tube, and paper should all be on the same layer.

You can move both merged layers into better position if you need to.

Add your elements.  I used:
Bead Scatter:  Resize 25%/Duplicate
Ladder:  Resize 25% and 70%
Curly Ribbon 1:  Resize 25% and 60%
Looped Ribbon:  Resize 25% and 50%
Hshtag:  Resize 25% and 50%
Chip Board Mouse:  Resize 25%, 70%, and 70%
Flower 2:  Resize 25% and 75%/Duplicate/Flip/Resize 70%
Lace:  Resize 25% and 60%/Flip/Use Pick Tool to pull the side in so that it’s the same width as the frame.  Duplicate/Free rotate Left 5 degrees.

Highlight your white canvas.
New Raster layer.
Select All.
Copy and paste Paper 9 Into Selection.
Deselect.
Apply the mask.
Resize 110%
Use your Pick Tool to pull the top up slightly.
Merge Group.

Crop your image.

Add your copyrights.

Add your name.
Color Pallet:
Foreground:  #000000
Background:  Pattern/Paper 9
Stroke: 1

Type your name.
Give it a slight Inner Bevel:

Resize all layers 80%.

I hope you enjoyed this tutorial.
I’d love to see your results and show it off in my gallery.
Email me!
Hugs,
Bev 
Monday, September 26, 2011

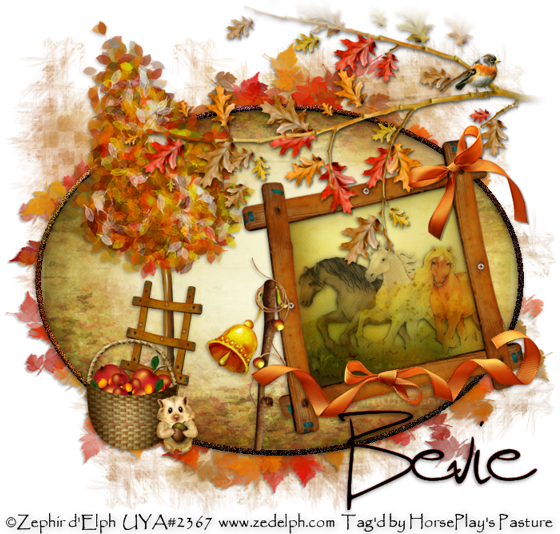
Autumn Harvest


Supplies

1 tube of choice - I used the beautiful artwork of Zephir d’Elph which can be purchased from Up Your Art.  You must have a license to use.

Font of choice - I used Scotosaurus here

Weescotlass Mask 297 here

Plugs Ins:
Xerox - Porcelain

“Autumn Harvest” is scrap kit available in both full and tagger size, created by Kesha of KnCScrapz and can be purchased from her store Lollipops n Gumdrops.  You can visit her blog here
Thank you Kesha for such a festive kit!

This tutorial was written assuming you have a working knowledge of PSP.

~♥~ Let’s get started ~♥~

Open up a 700 x 700 blank canvas.
Flood fill white.

Make you Selection Tool active set on Ellipse.
Make a 600 x 450 ellipse.
New Raster layer.
Copy and paste Paper 2 Into Selection.
New Raster layer.
Copy and paste Paper 6 Into Selection.
Selections/Modify/Contract by 7.
Tap the delete key.
Deselect.
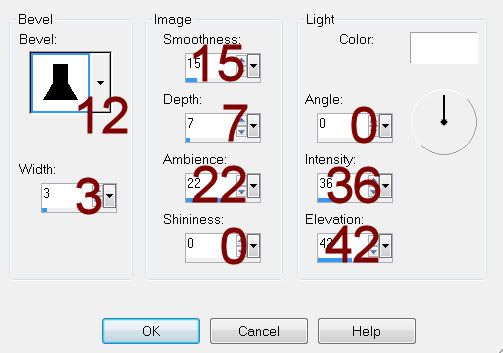
Give it a slight Inner Bevel:


Adjust/Add Remove Noise/Add Noise
Monochrome and Gaussian checked
Noise: 43%
OK

Copy and paste Frame 1 as a new layer.
Resize 35%
Mirror
Free rotate Left 10 degrees
Click inside the frame with your Magic Wand.
Selections/Modify/Expand by 4.
New Raster layer below the frame.
Copy and paste Paper 9 Into Selection.
Copy and paste your tube below the frame.
Selections/Invert
Tap the delete key.
Deselect.
Change the Properties of the tube layer to Luminance (Legacy)

Be sure the tube layer is highlighted.
Merge Down.
The tube and paper should be on one layer now.
Apply Xerox - Porcelain:
Use default settings accept move the blue channel button to 0.

Add your elements.  I used:
Wreath:  Use your Pick tool to pull the sides out.
Bow 1:  Resize 25% and 80%
Tree:  Resize 50%
Bell:  Resize 35%
Ladder:  Resize 25%/Mirror
Basket:  Resize 25%
Element 2:  Resize 25% and 50%
Bird:  Resize 25% and 50%
Ribbon Bow 2:  Resize 30%
Branch:  Resize 60%/Mirror
To feather the branch:
Use your Freehand Selection Tool and surround the branch - letting the dotted line touch the areas of the branch you want feathered.
Selections/Modify/Inside Outside Feather:
Both checked
Feather amount: 43
OK
Selections/Invert
Be sure the branch layer is highlighted and tap the delete key until you have the feathered look you want.
Deselect.

Highlight your white canvas.
New Raster layer.
Select All.
Copy and paste Paper 7 Into Selection.
Deselect.
Apply the mask.
Use your Pick Tool to pull the sides out slightly.
Merge Group.

Crop your image.

Add your copyrights.

Add your name.

Resize all layers 80%.

I hope you enjoyed this tutorial.
I’d love to see your results and show it off in my gallery.
Email me!
Hugs,
Bev
Sunday, September 25, 2011

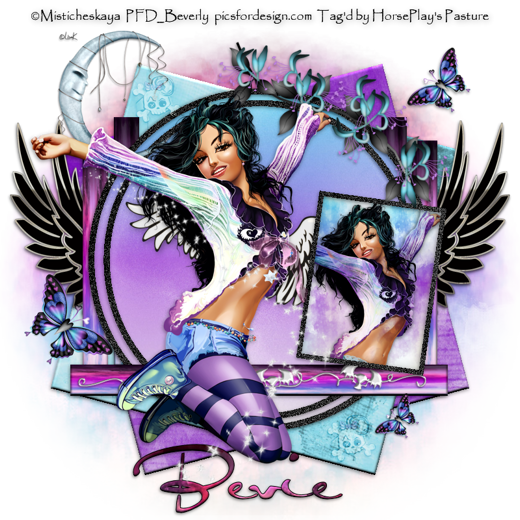
Emo Angel


Supplies

1 tube of choice - I used the artwork of Misticheskaya which can be purchased from Pics for Design.  You must generate a license to use.

Font of choice - I used Al Sandra here

Weescotlass Mask 208 here

Deb & Alisha template 4 here at Creative Misfits.  The group of templates can be found under “Collab Templates” dated Sept. 13, 2011.

“Emo Angel” is a scrap kit created by Dianna of Digicats (& Dogs) and can be purchased from Butterfly Blush Designs.  You can visit her blog here
Thank you Dianna for a really awesome Emo kit!

This tutorial was written assuming you have a working knowledge of PSP.

~♥~ Let’s get started ~♥~

Open up the template
Shift + D.
Close out the original.
Delete the top layer, Raster 7, and Raster 6.
New Raster layer.
Send to bottom.
Flood fill white.

Highlight Raster 9 layer.
Click on it with your Magic Wand.
New Raster layer.
Copy and paste Paper 2 Into Selection.
Deselect.
Delete the template layer.
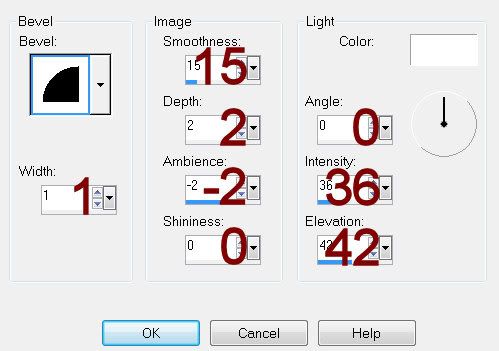
Give it a slight Inner Bevel:


Highlight Copy of Raster 9 layer.
Click on it with your Magic Wand.
New Raster layer.
Copy and paste Paper 1 Into Selection.
Deselect.
Delete the template layer.
Give it the same slight Inner Bevel

Highlight Raster 5 layer.
Click on it with your Magic Wand.
New Raster layer.
Copy and paste Paper 15 Into Selection.
Deselect.
Delete the template layer.
Give it the same slight Inner Bevel.

Repeat the above step with the following layers:
Both Copy of Raster 5 layers and Copy (2) of Raster 5 layer.

Highlight Raster 2 layer.
Click on it with your Magic Wand.
New Raster layer.
Copy and paste Paper 19 Into Selection.
Deselect.
Delete the template layer.

Highlight Raster 3 layer.
Click on it with your Magic Wand.
New Raster layer.
Copy and paste Paper 4 Into Selection.
Deselect.
Delete the template layer.
Adjust/Add Remove Noise/Add Noise
Monochrome and Gaussian checked
Noise: 53%
OK

Highlight Raster 1 layer and Copy of Vector 1 layer.
Repeat the above step.

Highlight Raster 4 layer.
Click on it with your Magic Wand.
New Raster layer.
Copy and paste Paper 15 Into Selection.
Deselect.
Delete the template layer.
Give it the same slight Inner Bevel.

Highlight Raster 8 layer.
Click on it with your Magic Wand.
New Raster layer.
Copy and paste Paper 14 Into Selection.
Copy and paste your tube as a new layer.
Position over the paper.
Selections/Invert
Tap the delete key.
Deselect.
Delete the template layer.
Change the Properties of the tube layer to Multiply.

Copy and paste your tube as a new layer.
Position in front of the large Circle.

Add your elements.  I used:
Heart Wings
Dark Wings:  Resize 60%/Duplicate/Mirror
Flower 1:  Resize 60%
Fairy Moon:  Resize 50%
Butterfly 1:  Resize 35%/Duplicate/Mirror/Resize 70%/Duplicate/Resize 70%
Glitter Trail 1:  Resize 90%
Skull Ring:  Resize 25%/Change the Properties to Soft Light/Duplicate
Skull Doodle:  Resize 90%

Highlight your white canvas.
New Raster layer.
Select All.
Copy and paste Paper 13 Into Selection.
Deselect.
Apply the mask.
Use your Pick Tool to pull the sides out
Merge Group.
Duplicate

Add your copyrights.

Add your name.
Give it the same slight Inner Bevel.

Resize all layers 65%.

I hope you enjoyed this tutorial.
I’d love to see your results and show it off in my gallery.
Email me!
Hugs,
Bev
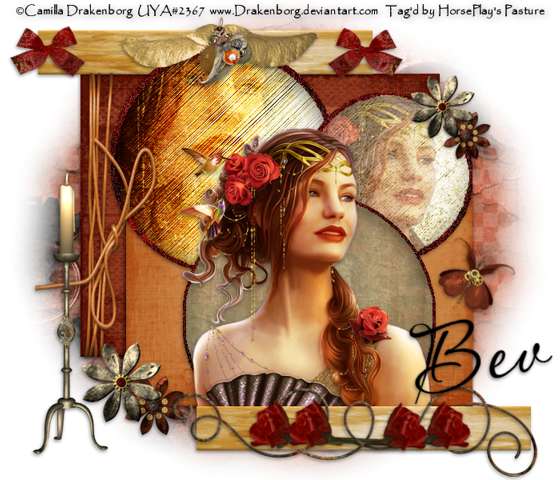
Once Upon a Time


Supplies

1 tube of choice - I used the stunning artwork of Camilla Drakenborg which can be purchased from Up Your Art.  You must have a license to use.

Font of choice - I used Aquarelle here

Weescotlass Mask 362 here

Artmama’s template 23 here

“Steamy Kind of Love” is a scrap kit created by Jo of A Taggers Scrap  and can be purchased from Twilight Scraps.  You can visit her blog here
Thank you Jo for such a classy and elegant kit!

This tutorial was written assuming you have a working knowledge of PSP.

~♥~ Let’s get started ~♥~

Open up the template
Shift + D.
Close out the original.
Delete top 6 layers and Dots layer.
Image/Canvas Size:
700 x 600
OK
Highlight Background layer and flood fill white.

Highlight Left Rectangle layer.
Click on it with your Magic Wand.
New Raster layer.
Copy and paste Paper 2 Into Selection.
Deselect.
Delete the template layer.
Give it a slight Inner Bevel:


Highlight Right Rectangle layer.
Click on it with your Magic Wand.
New Raster layer.
Copy and paste Paper 1 Into Selection.
Deselect.
Delete the template layer.
Give it the same slight Inner Bevel

Highlight Top Rectangle layer.
Click on it with your Magic Wand.
New Raster layer.
Copy and paste Paper 12 Into Selection.
Deselect.
Delete the template layer.
Give it the same slight Inner Bevel.

Highlight Bottom Rectangle layer.
Repeat the above step.

Highlight Left Glitter layer.
Click anywhere outside of it with your Magic Wand.
Selections/Invert
New Raster layer.
Copy and paste Paper 11 Into Selection.
Deselect.
Delete the template layer.
Adjust/Add Remove Noise/Add Noise
Monochrome and Gaussian checked
Noise: 43%
OK

Repeat the above step with:
Right Glitter layer
Center Glitter layer.

Highlight Left Circle layer.
Click anywhere outside of it with your Magic Wand.
Copy and paste Paper 8 as a new layer.
Move into a position you like.
Tap the delete key.
Copy and paste your tube as a new layer.
Move into position over the circle - see my tag for reference.
Tap the delete key.
Deselect.
Delete the template layer.
Change the Properties to Overlay.

Highlight Right Circle layer.
Click anywhere outside of it with your Magic Wand.
Copy and paste Paper 8 as a new layer.
Tap the delete key.
Copy and paste your tube.
Move into position over the circle.
Tap the delete key.
Deselect.
Delete the template layer.
Lower the Opacity of the tube to about 48.

Highlight Center Circle layer.
Click on it with your Magic Wand.
New Raster layer.
Copy and paste Paper 3 Into Selection.
Deselect.
Delete the template layer.

Copy and paste your tube as a new layer.
Position in front of the Center Circle.

Add your elements.  I used:
Bow 5:  Resize 30%/Duplicate/Mirror
Winged Heart:  Resize 50%
Leather Tie 5: Resize 40%/Use your Pick Tool to stretch the length of the rectangle.
Rose 1:  Resize 50%/Free rotate Left 85 degrees/Duplicate/Duplicate and mirror both rose layers.
Wire:  Resize 65%
Flower 4:  Resize 40%/Duplciate/Resize 80%
Flower 2:  Resize 30%/Duplciate/Resize 80%
Candelabra 2;  Resize 60%
Butterfly 2:  Resize 30%/Free rotate Right 30 degrees

Highlight your white canvas.
New Raster layer.
Select All.
Copy and paste Paper 14 Into Selection.
Deselect.
Apply the mask.
Use your Pick Tool to pull the top and bottom out
Merge Group.

Add your copyrights.

Add your name.
Free rotate Left 10 degrees

Resize all layers 80%.

I hope you enjoyed this tutorial.
I’d love to see your results and show it off in my gallery.
Email me!
Hugs,
Bev