Saturday, July 4, 2009

Classic Beauty

Clicking on the image will enlarge to full view.

Supplies
1 tube of choice - I’m using the artwork of Ray Leaning which you can purchase here
Font of Choice - Aquarelle here
Weescotlass Mask 297 here
Weescotlass Frame Template 1 here
Eyecandy 5: Impact - Gradient Glow
“Black, White and Classy” is a PTU tagger size scrap kit created by Cindy of Scrappin’ with Lil Ole Me and can be purchased here. You can visit her blog here.
Thank you so much for this classy, beautiful kit, Cindy!

This tutorial was written assuming you have working knowledge of PSP.
~♥~ Let’s get started ~♥~

Open up a 700 X 700 blank canvas.
Flood fill white.

Copy Raster 2 of the frame template and as a new layer on your canvas.
Use your Magic Wand and click inside of it.
Selections/Modify/Expand by 8.

Copy and paste a paper of choice below the frame.
Resize the paper 60%,
Selections/Invert
Hit the delete key.
Deselect.

Copy Raster 3 of the frame template and as a new layer on your canvas.
Use your Magic Wand and click inside of it.
Selections/Modify/Expand by 8.

New Raster layer below the frame.
Copy and paste a paper of choice Into Selection.
Deselect.

Give both frames a heavy drop shadow.

Close out your white canvas.
Merge Visible.
Move the merged layer toward the top portion of your canvas.

Copy and paste your tube as a new layer.

Copy and paste the Heart as a new layer.
Resize 10%.
Apply Eyecandy 5: Impact - Gradient Glow
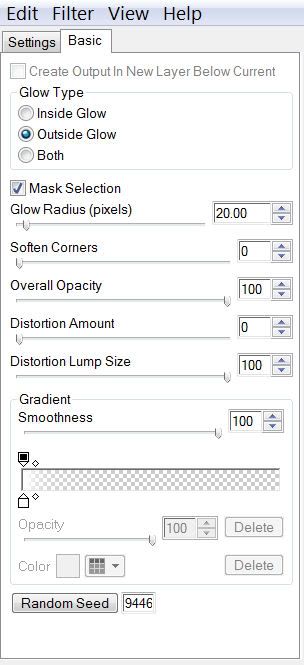
Apply it once again.
Add heavy drop shadow.

Duplicate the hearts two more times for a total of three and move into position.

Copy and paste Bead Rope 3 as a new layer.
Resize 50%

Copy and paste the Envelope as a new layer.
Resize 40%
Free rotate right 25 degrees.

Copy and paste Butterflies 1 & 2 as new layers.
Resize each 25% and 80%.

Highlight your white canvas.
New Raster Layer.
Select All.
Copy and paste a paper of choice Into Selection.
Deselect.
Apply the mask.
Merge Group.

Add your copyrights.

Add your name.
Give it the same Gradient Glow as before.
 
Resize all layers 85%.

I hope you enjoyed this tutorial.
I’d love to see your results and show it off in my Show Arena.
Email me!
Hugs,
Bev

Summer Breezes

Clicking on the image will enlarge to full view.

Supplies
1 tube of choice - I’m using the artwork of Keith Garvey which you can purchase here
Font of Choice - NewYorkDeco Heavy here
Weescotlass Mask 259 here
DSB Flux - Bright Noise
Animation Shop
“Beyond Paradise” is a freebie tagger size scrap kit created by Swheat Creations and can be found here.
When downloading please leave a thank you. It’s a small gesture for hard work given freely.

This tutorial was written assuming you have working knowledge of PSP.
~♥~ Let’s get started ~♥~

Open up a 700 X 700 blank canvas.
Flood fill white.

Copy and paste Frame 4 as a new layer.
Resize 60%.

Use your Magic Wand and click inside of it.
Selections/Modify/Expand by 4.
Copy and paste a paper of choice below the frame.
Selections/Invert
Hit the delete key.
Deselect.

Copy and paste your tube as a new layer.

Copy and paste flower 5 as a new layer.
Resize 30%

Copy and paste Flower 8 as a new layer.
Resize 25%

Copy and paste the left flip flop as a new layer.
Resize 25%.
Duplicate/Mirror.
Move them into position.

Highlight your white canvas.
New Raster layer.
Select All.
Copy and paste a paper of choice Into Selection.
Apply the mask.
Merge Group.

Add your copyrights.

Add your name.
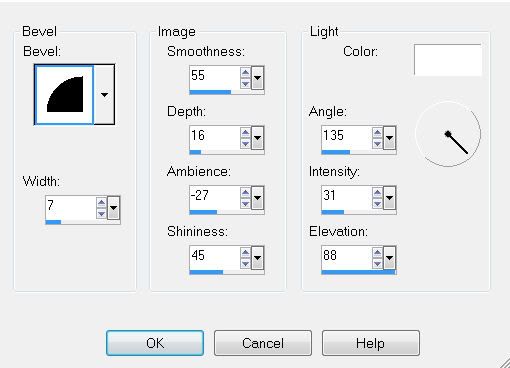
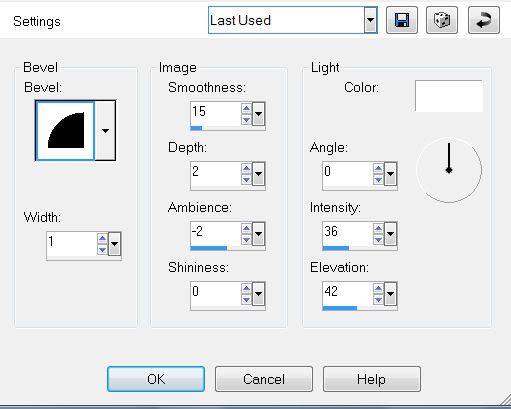
Give it a slight inner bevel:


Duplicate twice for a total of three times.

Rename each layer “Name 1, Name 2, and Name 3”

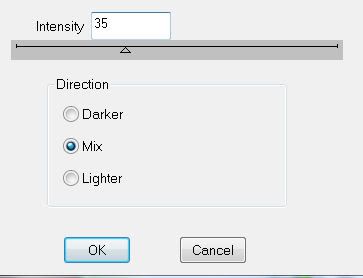
Highlight Name 1 and apply the DSB Flux/Bright Noise:


Highlight Name 2 and apply the DSB Flux accept hit the mix button twice.

Highlight Name 3 and apply the DSB Flux accept hit the mix button three times.

Close out Name 2 and Name 3 layers.

Crop your image.

Resize all layers 85%

Time to Aminate:
Copy Merge and carry into Animation Shop.
Edit/Paste/As New Animation.

Go back into PSP.
Close out Name 1 and open up Name 2.
Copy Merge.

Carry into AS.
Edit/Paste/After Current Frame

Go back into PSP.
Close out Name 2 and open up Name 3.
Copy Merge.
Carry into AS.

Edit/Paste/After Current Frame.

View your animation.
If you’re happy with it then save.

I hope you enjoyed this tutorial.
I’d love to see your results and show it off in my Show Arena.
Email me!
Hugs,
Bev

Path to Paradise

Clicking on the image will enlarge to full view.

Supplies
1 tube of choice - I’m using the artwork of Jay Trembly which you can purchase here
Font of Choice - Black Chancery here
Weescotlass Mask 348 here
Dezings by Ali Template #79 here
Eyecandy 5: Impact - Gradient Glow here Optional
Xenofex 1.0 - Shower Door (This plugin is to create the “mask“. You don’t have to have it. Instead, you can use any mask of your choice.)
Greg’s Output Factory Vol II - Pool Shadow (Optional)
“Rainbow Island” is a PTU tagger size scrap kit created by Patty of Honored Scraps and can be purchased here. You can visit her blog here.
Thank you Patty for this fabulous kit!

This tutorial was written assuming you have working knowledge of PSP.
~♥~ Let’s get started ~♥~

Open up the template.
Shift + D and close out the original.
Delete the copyright layer.
New Raster Layer/Send to Bottom
Image/Canvas size
700 X 700
Flood Fill white.

Highlight the Circle layer.
Select All/Float/Defloat
New Raster layer.
Flood Fill Black.
DO NOT DESELECT YET!

Copy and paste the Rainbow as a new layer.
Position over the circle.
Selections/Invert
Hit the delete key.
Deselect.
Delete the template layer.

Highlight the black circle layer.
Apply the Eyecandy 5 Impact - Gradient Glow:


Give it a heavy drop shadow.

Merge visible Shape 2, 3, and 4 Layers.
Select All/Float/Defloat
Copy and paste a paper of choice as a new layer.
Selections/Invert
Hit the delete key.
Deselect.
Delete the template layer.

Apply the Gradient Glow the same as before.
Give it a heavy drop shadow.

Highlight Shape 1 layer.
Select All/Float/Defloat
Copy and paste a paper of choice as a new layer.
Selections/Invert
Hit the delete key.
Deselect.
Delete the template layer.

Highlight the frame layer.
Select All/Float/Defloat
New Raster Layer.
Flood Fill Black
Deselect.
Give it the same Gradient Glow as before.
Give it a heavy drop shadow.

Add your embellishments. I used:
Bow 1: Resize 25%. Free rotate left 25 degrees. Duplicate/Mirror
Flower 1 & 3: Resize 25% and 90%

Close out your white background and Merge Visible.
Duplicate.

Reopen your white canvas.
Highlight the Original.
Adjust/Blur/Gaussian blur:
Radius: 20
Apply the Xenofex 1.0 - Shower Door using the default settings.
IF YOU DON'T HAVE THE PLUG IN then don’t duplicate.
Instead create a new Raster layer.
Select All
Copy and paste a paper of choice Into Selection.
Deselect.
Aply a mask of your choice.
Merge Group.

Now we’re going to apply WSL Mask 348.
New Raster Layer.
Copy and paste a paper of choice Into Selection.
Deselect.
Apply the mask.
Merge Group.
Resize 97%.
Copy and paste Butterfly 1 as a new layer.
Resize 25%
Copy and paste Butterfly 2 as a new layer.
Resize 25% and 90%.

Add your copyrights.

Add your name.
For mine I did the following:
After I typed my name (stroke set at 1, created a gradient for the fill) and turned it into a Raster Layer:
Select All/Float/Defloat
Selections/Modify/Contract by 2.
Applied Greg’s Factory Outlet Vol. II - Pool Shadow using default settings.
Gave it a slight inner bevel:


Deselect.

Give it the same Gradient Glow as before.
Gave it a drop shadow.

Crop your image.

Resize all layers 85%.

I hope you enjoyed this tutorial.
I’d love to see your results.
Email me!
Hugs,
Bev

Friday, July 3, 2009

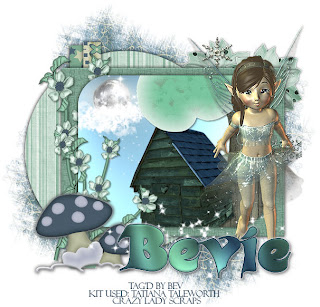
After Midnight


Clicking on the image will enlarge to full view.

Supplies
Font of Choice - Candles here
Weescotlass Mask 167 here
Divine Intentionz Template 53 here
Eyecandy 5: Impact - Gradient Glow (Optional)
Filters Unlimited (Optional)
Greg’s Factory Output Vol. II - Pool Shadow (Optional)
“Tatiana Taleworth” is a PTU tagger size scrap kit created by Lori of Crazy Lady Scraps and can be purchased here. You can visit her blog here.
Thank you Lori for this brilliant kit!

This tutorial was written assuming you have working knowledge of PSP.
~♥~ Let’s get started ~♥~

Open up the template.
Shift + D and close out the original.
Delete the copyright and flower layers.
Image/Canvas Size
700 x 700
Flood fill white.

Highlight the Circle layer.
Select All/Float/Defloat
Copy and paste a paper of choice.
Selections/Invert.
Hit the delete key.
Delete the template layer.

Repeat the above step with Thin Rectangle Layers 1 & 2.

Highlight Rectangle layer.
New Raster Layer.
Flood fill with a dark color chosen from the paper you used on the circle layer.
Deselelect.
Give it a texture. I used
Filters Unlimited/Paper Texture
Papyrus - default settings.
Delete the template layer.
 
Highlight the Rounded Rectangle layer.
Select All/Float/Defloat
New Raster Layer.
Flood fill with a light color from the Circle layer paper.
Apply Greg’s Factory Output Vol. II - Pool Shadow default settings.
DO NOT DESELECT

Copy and paste the tree as a new layer.
Resize 70% and move into position.

Copy and paste the House as a new layer.
Resize 40% and move into postion.

Copy and paste the Night Sky as a new layer.
Resize 40% and move into position.

After you have the above 3 elements exactly where you want them, highlight each one and tap the delete key.
Deselect.

Add your embellishments. I used:
Flower Branch: Resize 70%
Snowflakes 2 & 3: Resize 20%
Mushrooms: Resize 30%
Flower 2: Resize 20%
Stars: Resize 50%
Crystal Fae 1: Resize 80%

Highlight your white canvas.
New Raster Layer.
Select All.
Copy and paste a paper of choice Into Selection.
Deselect.
Apply the mask.
Merge Group.

Add your copyrights.

Add your name.
I used Greg’s Factory Output Vol. II Pool Shadow same as before.
Also gave it and the mushrooms a gradient glow using Eyecandy 5 Impact:


Crop and save your tag.

I hope you enjoyed this tutorial.
I’d love to see your results.
Email me!
Hugs,
Bev

Wednesday, July 1, 2009

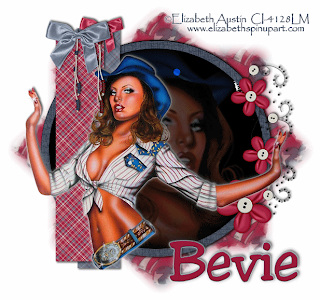
Independance Day

Clickong on the image above will enlarge to full view.
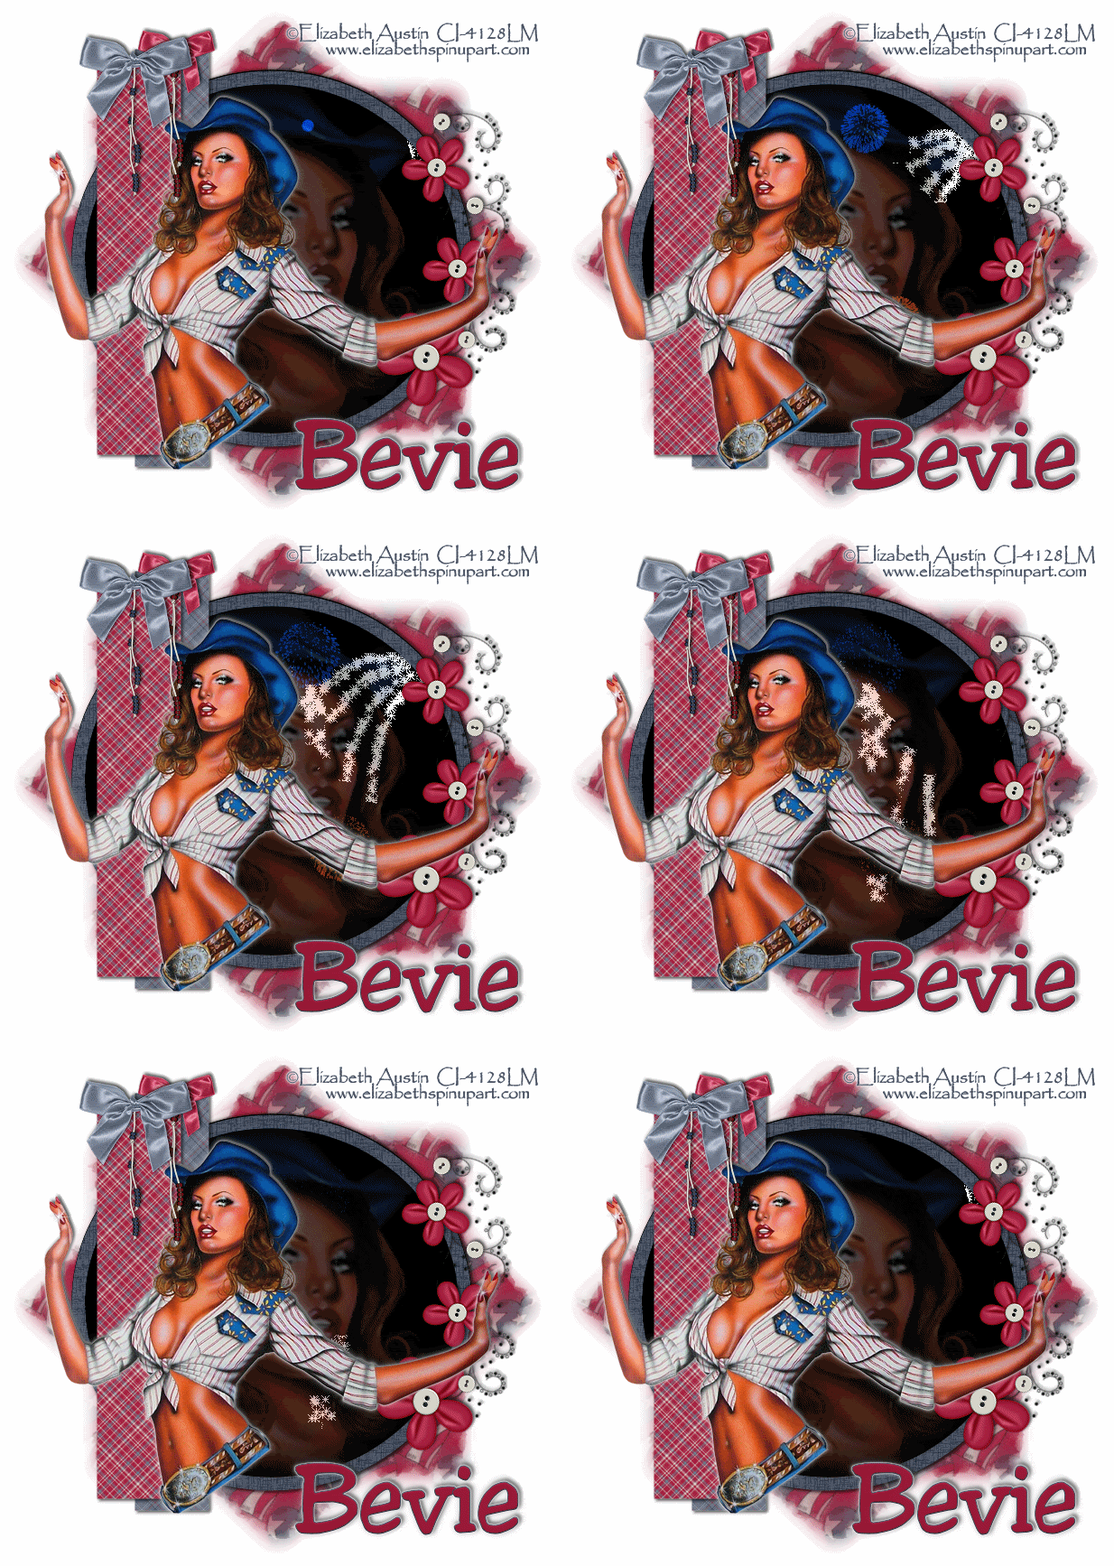
The image below shows the animation.


Supplies
1 tube of choice (and one close up image if you choose) - I’m using the artwork of Elizabeth Austin which you can purchase here
Font of Choice - Jester here
Weescotlass Mask 129here
Dezings by Ali Template #4 here
Eyecandy 5: Impact - Gradient Glow here Optional
Filters Unlimited 2 - Optional
Animated Fireworks which I supplied here
“Americana” is a tagger size scrap kit created by Julie of Bits ’n Bobs. It’s FTU right now, so better hurry and grab while you can! You can donwload it from her blog here.
Thank you Julie for this awesome kit! You rock, Chickadee!

This tutorial was written assuming you have working knowledge of PSP.

~♥~ Let’s get started ~♥~

Open up the template.
Shift + D and close out the original.
Delete the copyright layer.

Highlight Raster 1.
Select All/Float/Defloat
Copy and paste a paper of choice (I chose to use a plain color from one of the papers, created a new raster layer and flood filled. I then gave it a texture using default settings of the Japanese Paper texture in Filters Unlimited 2.).
If you chose to use a paper then Selections/Invert.
Hit the delete key.
DO NOT DESELECT!

Selections/Modify/Contract by 15.
Hit the delete key.
You should now be able to see the black circle within what you just made a frame.
DON’T DELESECT YET!

Selections/Modify/Expand by 3
Copy and paste your close up image as a new layer.
(I just used my tube and enlarged quite a bit)
Selections/Invert
Hit the delete key.
Selections/Modify/Feather
Number of Pixels: 53
Tap the delete key until you have a nice feathered look.
Lower the opacity to about 34

Lookin’ good?
Ok, wipe the sweat from your brow…it wasn’t that bad, was it?
hehehe

Highlight Raster 3.
Select All/Float/Defloat
Copy and paste a paper of choice as a new layer.
Selections/Invert
Hit the delete key.
Delete the template layer.

Repeat with Raster 2.

Add your embellishments. I used:
Bead Bow 1: Resize 40%
Bead Bow 2: Resize 40%
Flower Spray 2: Resize 50%, Mirror, use your Pick tool to turn and align with side of circle.

Add your tube and give it a Gradient Glow as follows:

Highlight your white canvas.
New Raster Layer.
Select All.
Copy and paste a paper of choice Into Selection.
Deselect.
Apply the mask.
Merge Group.
Resize 110%.

Add your copyrights.

Add your name.
I gave mine the same gradient glow and a drop shadow.

Time to Animate -
And I promise this won’t be hard at all to do!!

In PSP close out every layer accept for your white canvas, the mask layer, and the black circle.
Copy Merge and carry into Animation Shop.

In AS Edit/Paste/As New Animation
Ctrl + L - tap the L key until you have a total of 22 frames.

Open up the animated fireworks that I supplied.
We’ll start with the Red Fireworks first.
Ctrl + A to highlight all the frames.
Edit/Copy

Now highlight the 22 frames.
Ctrl + A to highlight all of them.
Ctrl + E and position the fireworks where you like.

Repeat the above steps with the other 2 remaining fireworks.

Go back into PSP.
Starting at the very bottom layer (your white canvas) click on the eye beside every single layer.
What you’re doing is closing out the ones you had open and opening up the ones you had closed.
Copy Merge and carry into AS.

In AS click on the folder icon at the top of your screen (It looks like 3 folders with the corners bent down)
Highlight the 22 frames where you just added your fireworks.
Ctrl + A to be sure all frames are highlighted
Ctl + E and position the merged image from PSP over the circle.
Click your mouse when it’s where you like.

Animation/Frame Properties
Change the number to 12

Save your tag.

I hope you enjoyed this tutorial.
I’d love to see your results.
Email me!
Hugs,
Bev

Tuesday, June 30, 2009

In the Movies

Clicking on the image will enlarge to full view.

Supplies
8 tubes of choice - I’m using the artwork of PinUpToons which you can purchase here
Font of Choice - Atlantis Medium here
Weescotlass Mask 133 here
Chica’s Template 7 here
Eyecandy 5: Impact - Gradient Glow
Xerox - Porcelain here
“Sailboats” is a tagger size scrap kit created by Julie of Bits ’n Bobs and can be purchased here. You can visit her blog here.
Thank you Julie for this amazing kit! I fell in love with the rich colors in it!

This tutorial was written assuming you have working knowledge of PSP.

~♥~ Let’s get started ~♥~

Open up the template.
Shift + D and close out the original.
New Raster layer. Send to bottom.
Flood fill white.
Delete the copyright layer, all heart layers, and the doodle layer.

Highlight the Circle Frame layer.
Select All/Float/Defloat
Copy and paste a paper of choice.
Selections/Invert.
Hit the delete key.
Delete the template layer.
.
Repeat the above step with the following layers:
Frames 1, 2, and 3
Squares 1, 2, and 3
Be sure to rename each layer the same as the template before you delete the template layer.

Highlight Frame 3.
Click inside with your Magic Wand.
Selections/Modify/Expand by 3
Copy and paste a tube below the frame.
Selections/Invert
Hit the delete key.

Repeat the above step with the other 2 frames.

Highlight the Film Back layer.
Select All/Float/Defloat
Copy and paste a paper of choice as a new layer.
Selections/Invert
Hit the delete key.
Delete the template layer.

Highlight the Film Strip layer.
Using your Magic Wand, click inside the top square.
Selections/Modify/Expand by 2
Copy and paste a tube of choice blow the strip.
Selections/Invert
Hit the delete key.

Repeat the above step with the remaining squares. Once you’ve got a tube in each strip square then close out all layers accept for the tubdes you have in the strip.
Merge Visible.
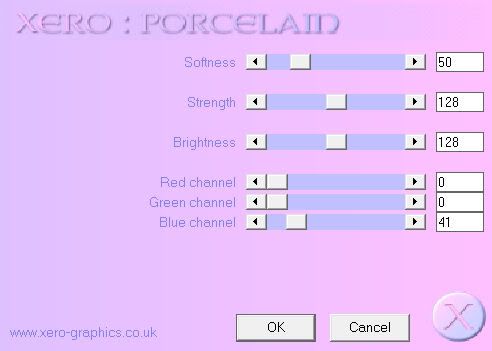
Apply Xero-Porcelain with the following settings:


Reopen all the layers.

Add your embellishments. I used:
Bead Dangles 2: Resize 60%
Cherry Blosson 2: Resize 90%
Cherry Blossom 3: Resize 70%
Cherry Blossom 1: Resize 80%
Flower 2: Resize 30%
Flower 1: Resize 20%
Leaves: Free rotate left 35 degrees
Element 2

Highlight Wordart 1 layer.
Select All/Float/Defloat
Copy and paste a paper of choice as a new layer.
Selections/Invert
Hit the delete key.
Deselect.
Delete the template layer.

Add a Gradient Glow as follows:


Highlight your white canvas.
New Raster Layer.
Select All.
Copy and paste a paper of choice Into Selection.
Deselect.
Apply the mask.
Merge Group.
Use your Pick Tool to enlarge the mask just a little.

Add your copyrights.

Add your name.

Resize all layers 85%.

I hope you enjoyed this tutorial.
I’d love to see your results.
Email me!
Hugs,
Bev

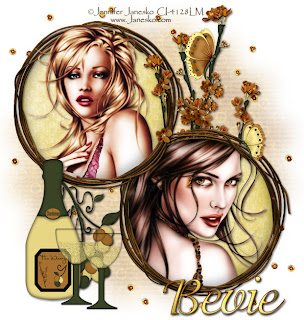
Country Club Brunch

Clicking on the image will enlarge to full view.

Supplies
2 tubes of choice - I’m using the artwork of Jennifer Janesko which you can purchase here
Font of Choice - Adorable here
Weescotlass Mask 33 here
“The Winery Collection - Chardonnay” is a tagger size scrap kit created by Ivory’s Designz and can be purchased here. You can visit her blog here.
Thank you Ivory for such an amazing kit!

This tutorial was written assuming you have working knowledge of PSP.

~♥~ Let’s get started ~♥~

Open up a 700 X 700 blank canvas.
Flood fill white.

Copy and paste Frame 2 as a new layer.
Use your Magic Wand and click inside of it.
Selections/Modify/Expand by 3.
Copy and paste a paper of choice below the frame.
Selections/Invert
Hit the delete key.

Copy and paste your tube as a new layer below the frame.
Deselect.

So you don’t have to go through copying and pasting everything again, duplicate the frame and paper layer.
Close out the duplicated layers and white canvas.
Merge visible.

Close out your merged frame layer and reopen your white canvas, duplicated frame and paper layers.

Use your Magic Wand and click inside the frame.
Selections/Modify/Expand by 3.
Copy and paste your other tube below the frame.
Selections/Invert
Hit the delete key.
Deselect.
Close out your white canvas.
Merge visible.

Reopen all layers and move both of the merged frames into position on your canvas.

Add your embellishments. I used:
Branch 1: Resize 70%
Bottle: Resize 50%
Glass: Resize 25%
Grapevine: Resize 40%
Butterfly 2: Resize 40%
Butterfly 1: Resize 30%
Sequins Scatter 2: Resize 70%

To the champagne glasses, I outlined the champagne using the Freehand Selection tool and added some noise:
Gaussian and Monochrome checked
Noise: 30%

Highlight your white canvas.
New Raster Layer.
Select All.
Copy and paste a paper of choice Into Selection.
Deselect.
Apply the mask.
Merge Group.

Add your copyrights.

Add your name.

Resize all layers 85%.

I hope you enjoyed this tutorial.
I’d love to see your results.
Email me!
Hugs,
Bev


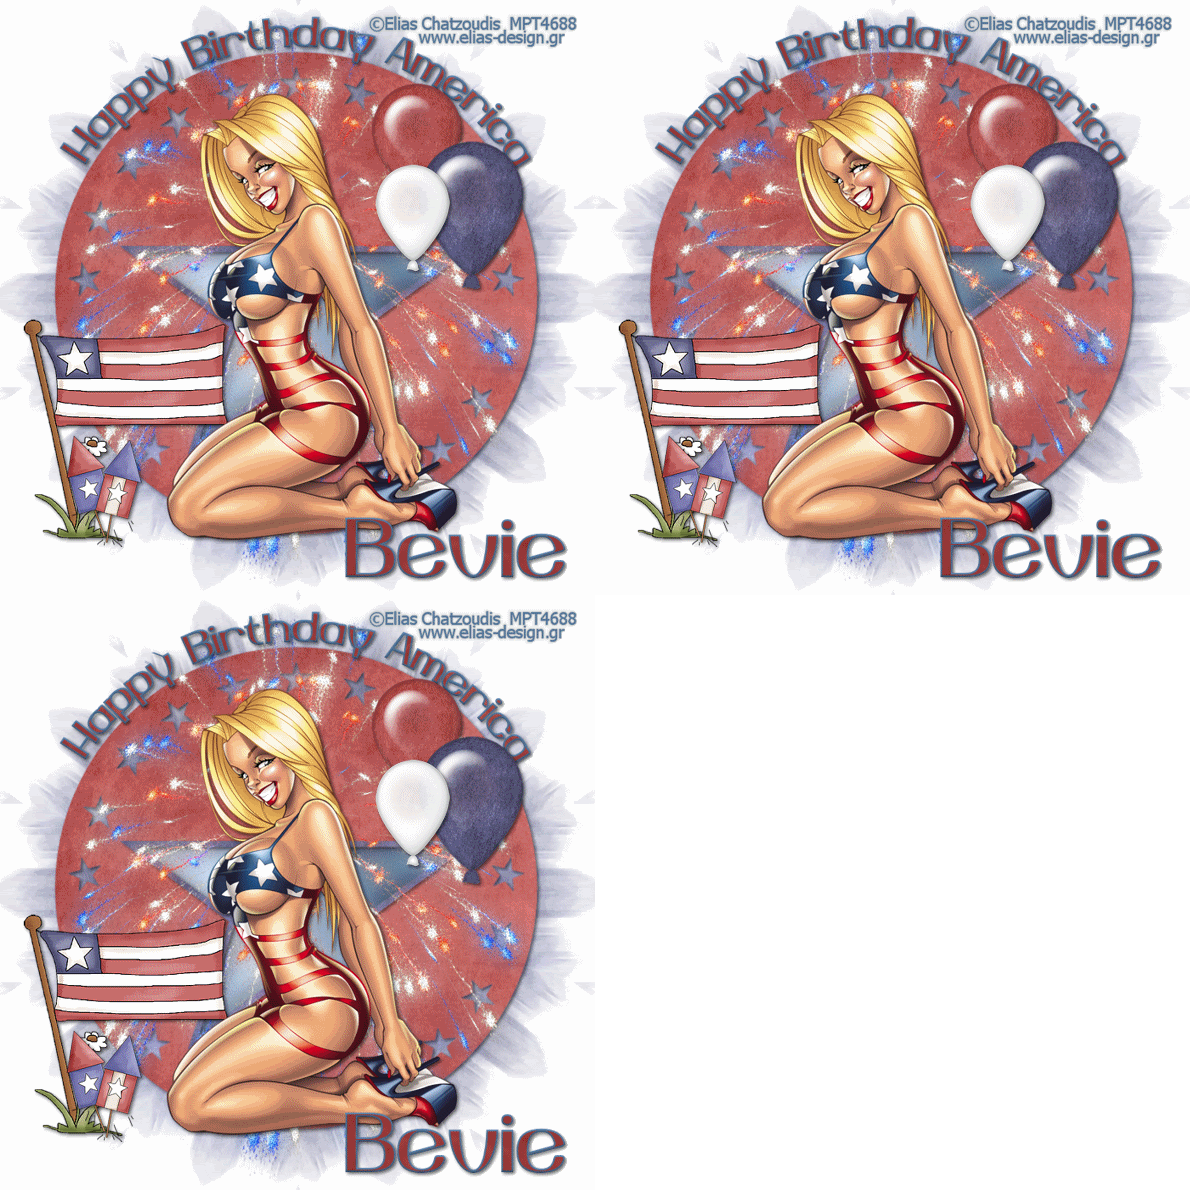
Happy Birthday America


Clicking on the above image will enlarge to full view.
Image below shows the animation.


Clicking on the image will enlarge to full view.


Supplies
1 tube of choice - I’m using the artwork of Elias Chatzoudis which you can purchase here
Font of Choice - Yiggivoo here
Weescotlass Mask 259 here
Divine Intentionz Template #213 here
DSB Flux - Bright Noise Animation Shop
“Happy birthday America” is a PTU tagger size scrap kit created by Designs by Denise and can be purchased here. You can visit her blog here.
Thank you so much Denise for this terrific birthday kit!!


This tutorial was written assuming you have working knowledge of PSP.


~♥~ Let’s get started ~♥~


Open up the template.
Shift + D and close out the original.
Delete the copyright layer.
Resize all layers 130%
Change canvas size to 700 X 700
Flood fill white.


Highlight the Circle layer.
Select All/Float/Defloat
Copy and paste a paper of choice as new layer.
Selections/Invert
Hit the delete key.
Deselect.
Delete the template layer.


Repeat the above step with the Star Frame and Star Background layers.


Now we’re going to write Happy Birthday America at the top of the circle.

Choose black for your foreground color in your color pallet. Stroke Width set at 2. Close out the background color.

Using your Ellipse Tool, make a circle bigger than the circle on your canvas.

Don’t worry if it’s much too big…you can always resize and make it smaller.

Objects/Align/Center in Canvas.

Choose the colors you want for your font.

Click on your text tool and move your cursor over the top part of the circle you just drew. When you see a Rocking A, click the mouse. A text box will appear.

Type Happy Birthday America.

In your layers pallet, click on the + sign next to Happy Birthday America.

Click on the eye on the New Ellipse layer.

Right click on the Vector Layer.

Convert to Raster layer.


Copy and paste Fireworks as a new layer.
Duplicate 2 times for a total of 3 and rename Fireworks 1, 2, and 3.
Highlight Fireworks 1.
Apply DSB Flux - Bright Noise:
Intensity 39
Mix button checked
OK


Highlight Fireworks 2 and apply the DSB Flux again accept this time hit the mix button twice. Do the same for Fireworks 3 accept hit the mix button three times.
Close out Fireworks 2 & 3.


Copy and paste your tube as a new layer.


Add your embellishments. I used:
Balloons: Resized from 35% down to 25%
Rockets: Resize 35%
Flag: 40%


Highlight your white canvas.
New Raster Layer.
Select All.
Copy and paste a paper of choice Into Selection.
Deselect.
Apply the mask.
Merge Group.


Add your copyrights.


Add your name.


Resize all layers 85%.


Moving onto the animation.
Copy Merge and carry into Animation Shop.
Edit/Paste/As New Animation.


Back into PSP.
Close out Fireworks 1 and open up Fireworks 2.
Copy Merge and carry into Animation Shop.
Edit/Paste/After Current Frame.


Back into PSP.
Close out Fireworks 2 and open up Fireworks 3.
Copy Merge and carry into Animation Shop.
Edit/Paste/After Current Frame.


View your animation. If you’re happy with it then save.


I hope you enjoyed this tutorial.
I’d love to see your results.
Email me!

Hugs,

Bev
 

Monday, June 29, 2009

Balloons and Butterflies

Clicking on the image will enlarge to full view.

Supplies
1 tube of choice - I’m using the artwork of Elias Chatzoudis which you can purchase here
Font of Choice - Komika Boogie here
Zuzanna Mask 7 here
DSB Flux - Bright Noise (Optional)
Eyecandy 5 Impact: Gradient Glow (Optional)
“Hannah Jolie” is a PTU tagger size scrap kit created by Tina’s Magical ScrapWorld and can be purchased here. You can visit her blog here.
Tina, thank you very much for this kit. It’s absolutely beautiful!

This tutorial was written assuming you have working knowledge of PSP.

~♥~ Let’s get started ~♥~

Open up a 700 X 700 blank canvas.
Flood fill white.

Copy and paste Circle Frame 1 as a new layer.
Resize 70%
Use your Magic Wand and click inside of it.
Selections/Modify/Expand by 4.
Copy and paste a paper of choice below the frame.
Selections/Invert
Hit the delete key.
Deselect.

Copy and paste your tube as a new layer outside of the circle.

Apply the DSB Flux Bright Noise to the frame:
Intensity: 48
Mix checked
OK

Add your embellishments. I used:
Balloon 1: Resize 70%
Balloon 2: Resize 80%
Cute Bow 1: Resize 30%
Butterfly 2: Resize 30%. Free Rotate left 20 degrees
Butterfly 1: Resize 30% & 70%. Free rotate right 20 degrees
(I applied the DSB Flux to both the butterflies)
Dummy Charm 1: Resize 50%

Highlight your white canvas.
New Raster Layer.
Select All.
Copy and paste a paper of choice Into Selection.
Deselect.
Apply the mask.
Merge Group.

Add your copyrights.

Add your name.
Apply the DSB Flux once again.
Apply Eyecandy 5: Impact - Gradient Glow using these settings:

Crop your image.

Resize all layers 85%.

I hope you enjoyed this tutorial.
I’d love to see your results.
Email me!
Hugs,
Bev