Saturday, April 9, 2011

Ahoy the Beauty


Supplies

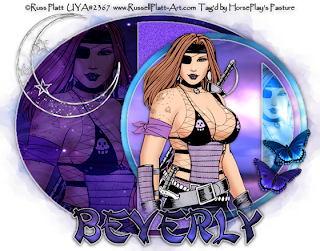
1 tube of choice - I used the awesome artwork of Russ Platt which can be purchased from Up Your Art. You must have a license to use.
Font of Choice - I used Deng Thick here
Gem Mask 57 here - or you can use the one I made with the mask that I’ve supplied here
Divine Intentionz Template 264 here
DSB flux - Bright Noise
Eyecandy 3.1 - glow
Xenofex 1.0 - Shower Door (You won’t need if you use the mask I’ve provided)
“Moonlight Dreams” is a PTU art kit created by Kat of KatNKDA and can be purchased from her store NK Art Shop. You can visit her blog here.
Such a beautiful and rich kit, Kat!

This tutorial was written assuming you have a working knowledge of PSP.

~♥~ Let’s get started ~♥~

Open up the template.
Shift + D.
Close out the original.
Delete the top 9 layers.
Highlight the background layer.
Open it up.
Image/Canvas Size:
700 x 550
OK
Flood fill white.

Highlight Oval layer.
Click on it with your Magic Wand.
New Raster layer.
Copy and paste Paper 32 Into Selection.
Copy and paste your tube as a new layer.
Move into position over the paper - see my tag for reference.
Selections/Invert
Tap the delete key.
Change the Properties to Soft Light.
Deselect.
Delete the template layer.

Highlight the paper layer.
Apply Eyecandy 3.1 - Glow
Width: 3
Opacity: 100
Opacity Dropoff: Fat
Color: White
OK

Highlight Glittered Oval Half layer.
Click outside of it with your Magic Wand.
Copy and paste Paper 22 as a new layer.
Move into a position you like over the template layer.
Tap the delete key.
Deselect.
Apply DSB Flux - Bright Noise:
Intensity: 29
Mix checked
OK
Apply Eyecandy 3.1 Glow - same settings

Highlight Circle 1 layer.
Click on it with your Magic Wand.
New Raster layer.
Copy and paste Paper 40 Into Selection.
Deselect.
Delete the template layer.

Highlight Circle 2 layer.
Click on it with your Magic Wand.
New Raster layer.
Copy and Paste Paper 14 Into Selection.
Deselect.
Delete the template layer.
Apply the same glow effect.
Highlight Shape layer.
Click on it with your Magic Wand.
New Raster layer.
Copy and paste Paper 40 Into Selection.
Paste your tube as a new layer.
Move into position over the paper.
Selections/Invert
Tap the delete key.
Deselect.
Delete the template layer.
Change the Properties to Soft Light.
Give the paper layer the same Glow Effect.

Copy and paste your tube as a new layer.

Add your embellishments. I used:
Element 59: Resize 25% and 40%/Flip/Free rotate Right 90 degrees
Element 6: Resize 25%, 25%, and 70%/Mirror
Element 7: Resize 25%, 25%, and 70%

Apply the mask that I’ve provided or if you choose to make your own:
Highlight your white canvas.
New Raster layer.
Select All.
Copy and paste Paper 39 Into Selection.
Apply the mask
Merge Group.
New Raster layer.
Copy and paste Paper 37 Into Selection.
Apply the mask.
Merge Group.
Deselect.
Use your Pick Tool on each mask layer and pull the sides out slightly.
Highlight the mask layer just above the white canvas.
Adjust/Blur/Gaussian blur:
Radius: 20
Apply Xenofext 1.0 - Shower Door:
Default settings.
OK
Highlight the other mask layer.
Apply the same shower door effect.

Add your copyrights.

Add your name.
Choose your colors but be sure to have stroke set at 2.
Type your name.
Convert to Raster layer.
Select All/Float/Defloat
Selections/Modify/Contract by 2.
Give it a slight Inner Bevel:
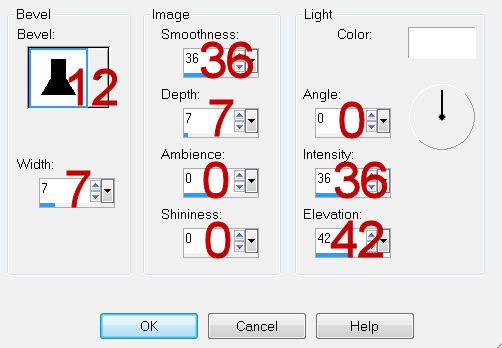
Deselect.
Apply the same glow effect.

Resize all layers 80%.

I hope you enjoyed this tutorial.
I’d love to see your results and show it off in my gallery.
Email me!
Hugs,
Bev

Friday, April 8, 2011

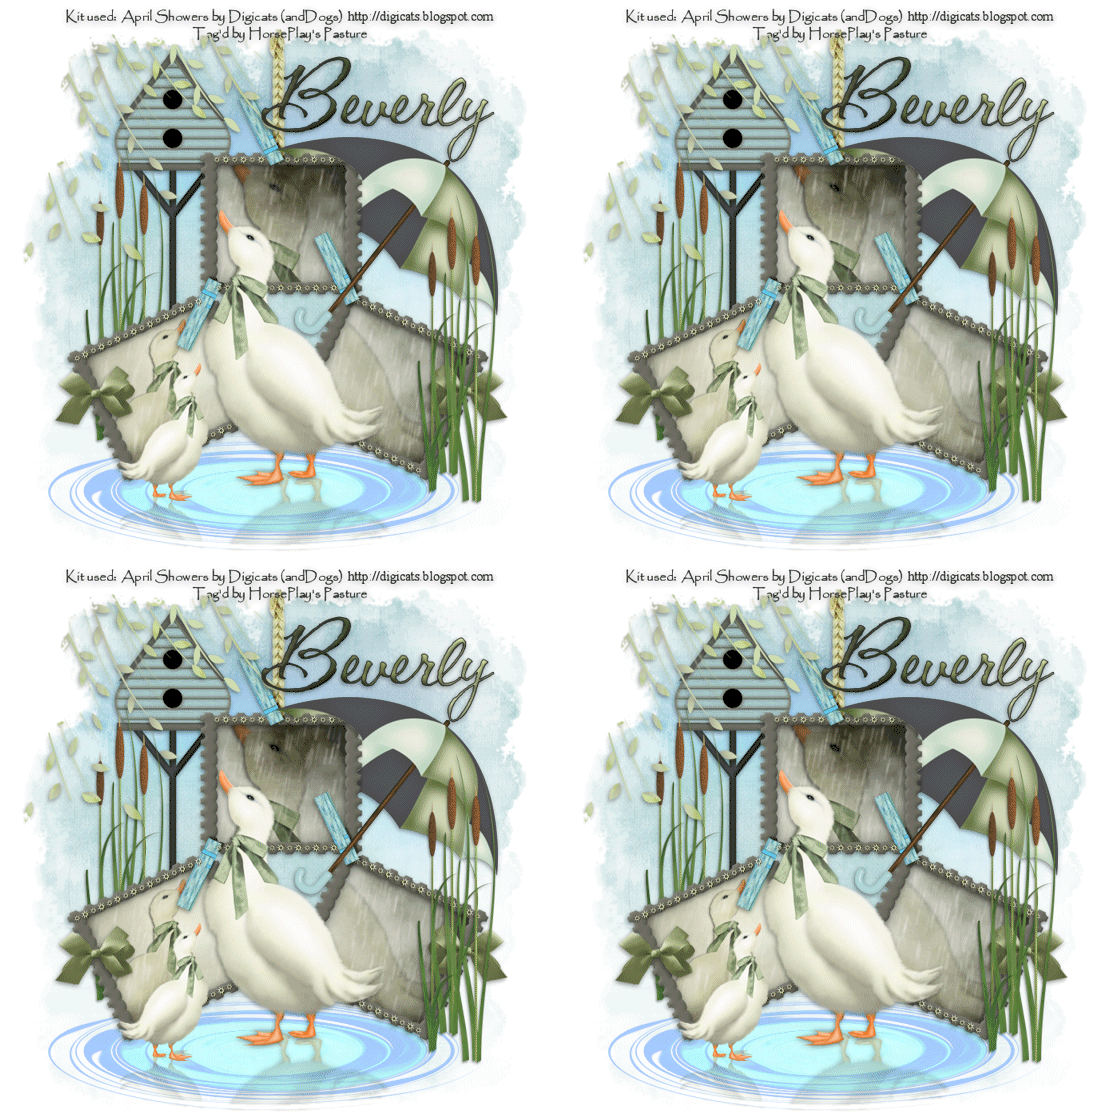
April Showers


Supplies

Font of Choice - I used CAC Shishoni here
Becky Mask 22 here
VanDerLee Snowflakes
Animation Shop
“April Showers” is a PTU tagger size scrap kit created by Dianna of Digicats (and Dogs) and can be purchased from Butterfly Blush Designs. You can visit her blog here.
Thank you Dianna, this kit is amazing!!

This tutorial was written assuming you have a working knowledge of PSP.

~♥~ Let’s get started ~♥~

Open up a 700 x 700 blank canvas.
Flood fill white.

Copy and paste Frame 4 as a new layer.
Resize 80%

Copy and paste Border as a new layer.
Resize 45%
Adjust/Sharpen
Position over the top of the top frame.
Erase whatever overhangs.
Duplicate/Flip
Position at the bottom of the top frame.
Highlight the original border layer.
Duplicate/Free rotate Left 25 degrees/Duplicate
Position over the top of the bottom left frame.
Duplicate/Mirror/Position over the top of the right frame.
Mirror the other duplicated layer and position at the bottom of the right frame.

Close out your white canvas.
Merge Visible.
Reopen your white canvas.
Click inside of each frame with your Magic Wand.
New Raster layer below the frame.
Copy and paste Paper 2 Into Selection.
Copy and paste Goose below the frame - move into position - see my tag for reference.
Selections/Invert
Tap the delete key.
Deselect.
Paste the goose again below the frame.
Resize 45%.Mirror
Move into position.
Highlight the paper layer.
Click anywhere outside of it with your Magic Wand.
Highlight the small goose layer.
Tap the delete key.
Change the Properties of both goose layers to Multiply.
Selection/Invert

Now we’re going to add the rain layers.
Highlight the layer that’s just below the frame layer.
Create 4 new Raster layers.
Rename them Rain 1, 2, 3, and 4.
Highlight Rain 1 layer.
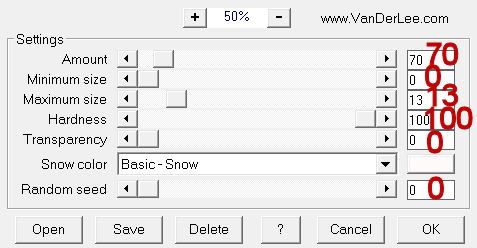
Apply VanDerLee Snowflakes:
Match your settings to mine:

OK
Highlight Rain 2 layer.
Apply the same snowflake effect accept move the Random Seed button to the right a bit.
Highlight Rain 3 layer.
Apply the same snowflake effect accept move the Random Seed button to the right a bit.
Highlight Rain 4 layer.
Apply the same snowflake effect accept move the Random Seed button to the right a bit.
Continue to keep it selected.

Highlight Rain 1 layer.
Adjust/Blur/Motion Blur:
Angle: 191
Strength: 40
OK

Repeat the above step with Rain 2, 3, and 4 layers.
Deselect.
Close out Rain 2, 3, and 4.

Copy and paste Puddle as a new layer.
Move into position - see my tag for reference.

Copy and paste Goose as a new layer.
Resize 70%
Paste goose again.
Resize 35%/Mirror
Move both geese into exact position - see my tag for reference.
Merge Visible both geese layers.
Duplicate/Flip
Move the duplicated layer below the original layer in your layers pallet and position just below the geese feet so that it looks like their image in the puddle.
Change the Properties to Multiply.
Lower the Opacity to about 38.
Highlight the puddle layer.
Click anywhere outside of it with your Magic Wand.
Highlight the mirrored image of the geese and tap the delete key.
Deselect.

I hope I didn’t lose you at all through this tutorial!
I tried to make it as painless as possible and I promise you the worst is over!

Add your embellishments. I used:
Birdhouse: Resize 70%
Cattails: Duplicate
Umbrella 1: Resize 70%
Bow 3; Resize 25%/Duplicate/Mirror

Highlight your white canvas.
New Raster layer.
Select All.
Copy and paste Paper 11 Into Selection.
Deselect.
Copy and paste Aurora as a new layer just above the paper.
Merge Down.
Apply the mask.
Merge Group.

Copy and paste Leaves as a new layer.
Mirror
Position at the top of your layers pallet.
Highlight the mask layer.
Click anywhere outside of it with your Magic Wand.
Highlight the leaves layer.
Tap the delete key.
Deselect.

Add your copyrights.

Add your name.
Give it a slight Inner Bevel:


Resize all layers 80%.

Copy Merge

~Time to Animate~

Open up Animation Shop.
Edit/Paste/As New Animation.

Back in PSP.
Close out Rain 1.
Open up Rain 2.
Copy Merge.

Carry into AS.
Edit/Paste/After Current Frame.

Back in PSP.
Close out Rain 2.
Open up Rain 3.
Copy Merge.

Back in AS.
Edit/Paste/After Current Frame.

Back in PSP.
Close out Rain 3.
Open up Rain 4.
Copy Merge.

Back in AS.
Edit/Paste/After Current Frame.

View your animation.
If you’re happy then save.

I hope you enjoyed this tutorial.
I’d love to see your results and show it off in my gallery.
Email me!
Hugs,
Bev
Pieces of April


Supplies

1 tube of choice - I used the artwork of Carrie Hall and can be purchased from Up Your Art. You must have a license to use.
Font of Choice - I used Aquarelle here
Amy and Leah mask 2 here
“Pieces of April” is a FTU tagger size scrap kit created by Jessica of Gothic Inspirations and can be downloaded from her blog here. Please leave a thank you when downloading. It’s a small gesture for hard work given freely.
Thank you Jess. You know how much I love your pretties!

This tutorial was written assuming you have a working knowledge of PSP.

~♥~ Let’s get started ~♥~

Open up a 700 x 700 blank canvas.
Flood fill white.

Copy and paste Frame as a new layer.
Resize 65%
Click inside of it with your Magic Wand. Be sure to click inside the little slits on each side as well.
Selections/Modify/Expand by 6.
New Raster layer below the frame.
Copy and paste Paper 3 Into Selection.
Copy and paste your tube as a new layer below the frame.
Change the Properties to Soft Light and move toward the upper left corner.
Selections/Invert
Tap the delete key.
Deselect.

Copy and paste your tube as a new layer.
Position in front of the frame.

Add your embellishments. I used:
Ribbon Wrap: Resize 52%
Foliage: Resize 70%/Position at right side of frame.
Foliage again: Resize 65%/Flip/Mirror/Position behind the right side of the frame.
Bling: Resize 70%

Highlight your white background.
New Raster layer.
Select All.
Copy and paste Paper 1 Into Selection.
Deselect.
Apply the mask.
Merge Group.
Duplicate

Add your copyrights.

Add your name.
Give it a slight Inner Bevel:


Resize all layers 85%.

I hope you enjoyed this tutorial.
I’d love to see your results and show it off in my gallery.
Email me!
Hugs,
Bev

Thursday, April 7, 2011

Simply Easter


Supplies

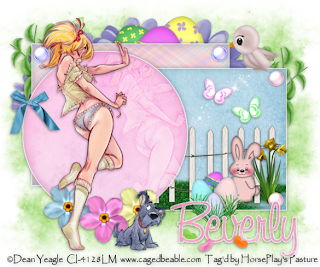
1 tube of choice - I used the artwork of Dean Yeagle and can be purchased from CDO. You must have a license to use.
Font of Choice - I used Kayleigh here
Gem mask 22 here
Eyecandy 3.1 - Glow
“Simply Easter” is a tagger size scrap kit created by me, Southern Whispers Designs and can be purchased from Lollipops n Gumdrops.
You can visit my scrap blog here.

This tutorial was written assuming you have a working knowledge of PSP.

~♥~ Let’s get started ~♥~

Open up a 700 x 700 blank canvas.
Flood fill white.

Make your Selection Tool active set on Circle.
New Raster layer.
Make a circle approximately 350 x 350 pixels.
Copy and paste Paper 7 Into Selection.
Deselect.
Rename this layer P1
Close this layer out for now.

Make your Selection Tool set on Rectangle.
New Raster layer.
Make a rectangle approximately 425 x 300 pixels.
Copy and paste Paper 11 Into Selection.
Rename this layer P2
New Raster layer.
Copy and paste 6 as a new layer.
Resize 70%
Selections/Invert
Tap the delete key.
Deselect.
Rename this layer P3.

Reopen the circle layer.
Move all 3 paper layers into position - see my tag for reference.

Highlight P3 layer.
Copy and paste Grass 2 as a new layer.
Resize 70%
Move into position.
Highlight the paper layer.
Click anywhere outside of it with your Magic Wand.
Highlight the grass layer.
Tap the delete key.
Deselect.
Merge Down.
Apply Eyecandy 3.1 - Glow:
Width: 3
Opacity: 100
Opacity Dropoff: Fat
Color: White
OK

Copy and paste your tube.
Move into position before the circle layer.
Duplicate/Move this tube slightly to the right and down.
Change the Properties to Soft Light.
Highlight the circle paper layer.
Click anywhere outside of it with your Magic Wand.
Highlight the duplicated tube layer.
Tap the delete key.
Deselect.
Merge down.
Apply the same glow effect.

Highlight P2 layer.
Apply the same glow effect.

Add your embellishments. I used:
Fence: Resize 60%
Flowers 1, 3, and 4: Resize 40%
Egg 3: Resize 60%/Free rotate Left 25 degrees
Egg 1 & 2: Resize 60%/Free rotate Right 25 degrees
Daisy 4: Duplicate as you like
Butterfly 1: Resize 25% and 70%/Free rotate Right 25 degrees
Butterfly 2: Resize 25% and 70%/Free rotate Left 25 degrees
Bunny 3: Resize 30%
Grass Eggs: resize 70%
Egg 2: Resize 25%
Bird 1: Resize 25%/Mirror
Brad 1: Resize 25% and 40%/Duplicate
Brad 3: Resize 25% and 40%/Duplicate
Sparkle White
Bow 4: Resize 25%
Jellybeans of your choice: Resize 25%
Foliage Leaves: Duplicate/Mirror

Highlight your white background.
New Raster layer.
Select All.
Copy and paste Paper 4 Into Selection.
Deselect.
Apply the mask.
Merge Group.
Duplicate
Change the Properties to Multiply.

Add your copyrights.

Add your name.
Give the same glow effect.

Resize all layers 85%.

I hope you enjoyed this tutorial.
I’d love to see your results and show it off in my gallery.
Email me!
Hugs,
Bev
Tuesday, April 5, 2011

Voyager - See the World


Supplies

1 tube of choice - I used the artwork of Dave Nestler and can be purchased from CDO. You must have a license to use.
Font of Choice - I used Jellyka Castle’s Queen here
Weescotlass mask 297 here
“Now Voyager” is a tagger size scrap kit created by Lady Noelle Buttons & Bows Scraps and can be purchased from Aussie Scrap Designs. You can visit her blog here.
Thank you so much Noelle for a unique and wonderful kit! I so loved this!!

This tutorial was written assuming you have a working knowledge of PSP.

~♥~ Let’s get started ~♥~

Open up a 700 x 700 blank canvas.
Flood fill white.

Copy and paste Frame 1 as a new layer.
Resize 50%
Free rotate Right 5 degres
Duplicate
Move both frames into position - see my tag for reference.
TIP: I copied and pasted my tube in front of the frames and then positioned the frames into the exact position.

Highlight the top frame.
Click inside of it with your Magic Wand.
Selections/Modify/Expand by 6.
New Raster layer below the frame.
Copy and paste Paper 4 Into Selection.
Deselect.

Highlight the bottom frame.
Repeat the above step.

If you haven’t already copied and pasted your tube, do so now.
Duplicate.
Position this tube below the upper frame.
Change the Properties to Soft Light.
Highlight the paper layer below the tube.
Click anywhere outside of it with your Magic Wand.
Highlight the tube layer.
Tap the delete key.
Deselect.

Duplicate your original tube and repeat the above step with the bottom frame.

Add your embellishments. I used:
Ivy: Resize 50%/Mirror
Luggage 02
Coffee
Hat 01: Resize 85%/Free rotate right 55 degrees
Binoculars: Resize 50%
Flower 04: Resize 25%/Duplicate
Flower 3: Resize 25% and 70%/Flip/Duplciate
Pocket Watch: Resize 60%/Free rotate Left 15 degrees

Highlight your white background.
New Raster layer.
Select All.
Copy and paste Paper 8 Into Selection.
Deselect.
Apply the mask.
Merge Group.

Add your copyrights.

Add your name.

Resize all layers 85%.

I hope you enjoyed this tutorial.
I’d love to see your results and show it off in my gallery.
Email me!
Hugs,
Bev

Emerald Dreams


Supplies

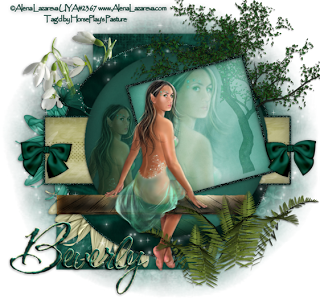
1 tube of choice - I used the beautiful artwork of Alena Lazareva and can be purchased from Up Your Art. You must have a license to use.
Font of Choice - I used CAC Shishoni Brush here
Monti Circular mask here
Divine Intentionz Template 313 here
“Emerald Dreams” is a tagger size scrap kit created by Shellez Creations and can be purchased from Aussie Scrap Designs. You can visit her blog here.
Thank you so much Shelle for an amazingly beautiful kit!

This tutorial was written assuming you have a working knowledge of PSP.

~♥~ Let’s get started ~♥~

Open up the template.
Shift + D.
Close out the original.
Delete the top 2 layers, Small Circle 1 layer, and Small Circle 2 layer.
Highlight the Background layer.
Image/Canvas Size
750 x 700
Flood fill white.
If you do my tutorials regularly please pay attention that the canvas width is 750 rather than my usual width of 700. I needed the extra space for the bow…lol

First we’re going to add papers to all the template layers and then go back to add the tube and elements.

Highlight Square 1 layer.
Click on it with your Magic Wand.
New Raster layer.
Copy and paste Paper 2 Into Selection.
Deselect.
Delete the template layer.

Highlight Square 2 layer.
Repeat the above step.

Highlight Glittered Circle.
Click anywhere outside of it with your Magic Wand.
Selections/Invert
New Raster layer.
Copy and paste Paper 10 Into Selection.
Adjust/Add Remove Noise/Add Noise:
Uniform and Monochrom checked
Noise: 89%
OK
Deselect.
Delete the template layer.

Repeat the above step with the following layers:
Glittered Rectangle and Frame

Highlight Large Circle 1 layer.
Click on it with your Magic Wand.
New Raster layer.
Copy and pate Paper 10 Into Selection.
Deselect.
Delete the template layer.

Highlight Rectangle layer.
Click on it with your Magic Wand.
New Raster layer.
Copy and paste Paper 3 Into Selection.
Deselect.
Delete the template layer.

Highlight Large Circle 2 layer.
Click on it with your Magic Wand.
New Raster layer.
Copy and paste Paper 9 Into Selection.
Deselect.
Close out the template layer for now.

Highlight Background Frame layer.
Click on it with your Magic Wand.
New Raster layer.
Copy and paste Paper 8 Into Selection.
Deselect.
Close out the template layer for now.

Copy and paste your tube as a new layer.
Move it into the exact position.

Paste your tube again.
Move it just above the Frame Background paper layer.
Resize larger if you like.
Change the Properties to Soft Light.
I realize the tube is hanging over the edges of the paper. That’s OK. We’re not going to do any more with this tube for now.

Copy and paste Element 20 as a new layer.
Mirror
Move into position just above the background frame paper layer.
Change the Properties to Soft Light.
You can move the tube that’s just above the tree into a better position if you choose.
Once you have both the tube and tree into exact position, duplicate the tree.
Move the duplicate tree layer just above the Large Circle 2 paper layer.
Change the Properties to Normal.
Highlight the tube layer that’s just above the tree layer.
Click anywhere outside of it.
Selections/Invert
Highlight the tree layer that’s just below the tube layer and tap the delete key.
Deselect.
Highlight the Frame Background paper layer.
Click anywhere outside of it with your Magic Wand.
Highlight the tube layer that’s just above the paper layer and tap the delete key.
Highlight the tree layer that’s just above the paper layer and tap the delete key.
Deselect.
Delete the frame background template layer.
Use your Eraser Tool to erase the base of the tree layers if you don’t want it to be seen.

Paste your tube again.
This time move it just above the Large Circle 2 paper layer.
Resize it a bit smaller if you choose.
Move into exact position.
Change the Properties to Soft Light.
Highlight the Large Circle 2 Template layer.
Click anywhere outside of it with your Magic Wand.
Highlight the tube layer and tap the delete key.
Deselect.
Delete the template layer.

Add your embellishments. I used:
Element 5: Resize 65%
Element 6: Resize 55%
Element 12: Resize 25%/Duplicate/Mirror
Element 24: Resize 50%/Duplicate/Resize 90%
Element 21
Element 4: Resize 25%
Element 19: Duplicate/Mirror

Highlight your white background.
New Raster layer.
Select All.
Copy and paste Paper 2 Into Selection.
Apply the mask.
Merge Group.
Duplicate

Add your copyrights.

Add your name.
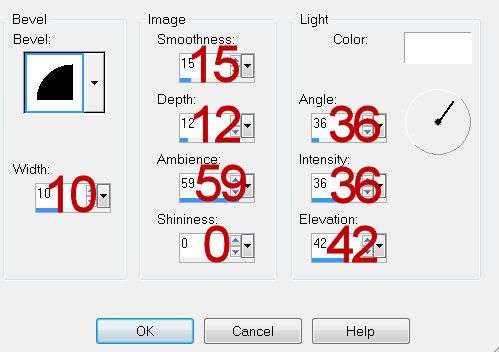
Give it a slight Inner Bevel:


Resize all layers 75%.

I hope you enjoyed this tutorial.
I’d love to see your results and show it off in my gallery.
Email me!
Hugs,
Bev