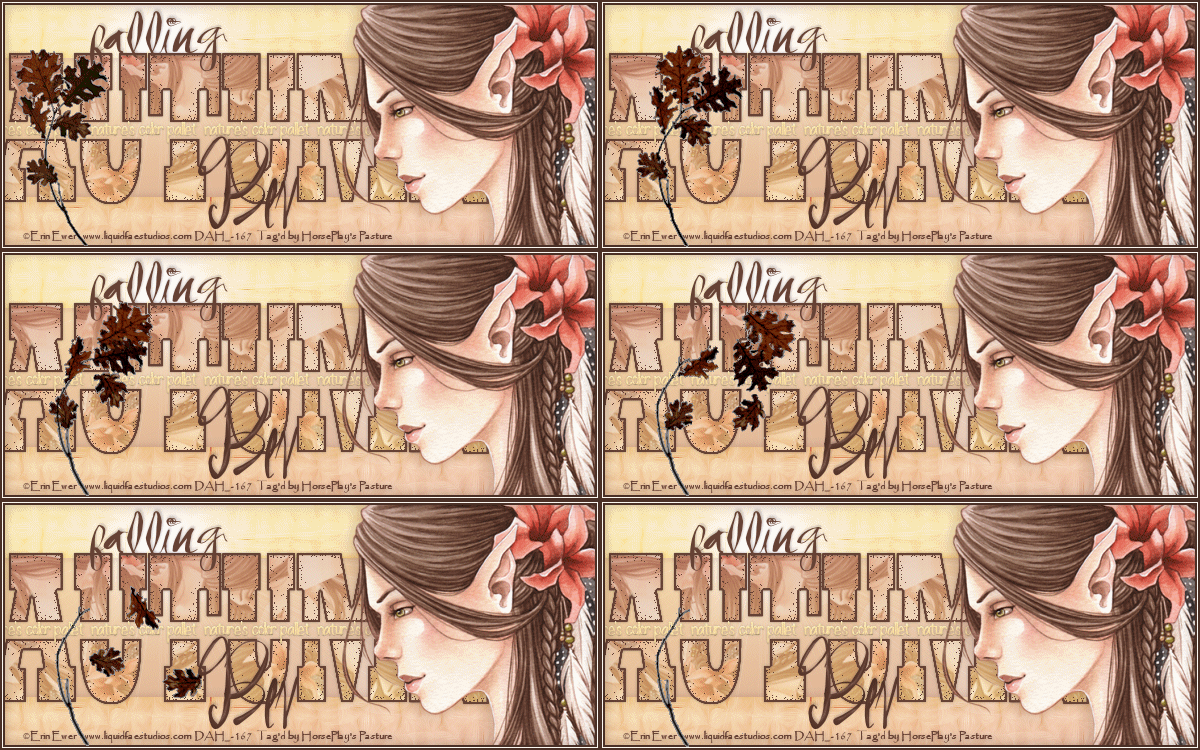
Saturday, October 3, 2015

Autumn Lights


Supplies Needed

1 tube of choice – I used the beautiful artwork of Erin Ewer which can be purchased Digital Art Heaven.  You must have a license to use.

Font of choice – I used:
Rockwell Extra Bold – no link found, but there is one that came with my PSP program that will work just as nice - Kozuka Mincho Pr6N H
Matilda – mine is a pay font, but this one will work just as nice here
Event Shark here

Plug Ins used:
Eyecandy 5: Textures – Swirl
Penta.com – Dot and Cross

Animated Leaves can be found here

Animation Shop

This tutorial was written assuming you have a working knowledge of PSP. 

~~ Let’s get started ~~

Open up a 600 x 250 blank canvas.
Flood fill white.

Color Pallet:
Foreground: #d19f90 
Background: #fce1a7
Set the foreground to Gradient:
Style: Linear
Angle: 348
Repeat: 0

New Raster layer.
Flood fill with your gradient.
Duplicate
On the duplicate layer:
Effects/Texture Effects/Weave –
Match your settings to mine:

OK
Apply  Penta.com – Dot and Cross:
Amount: 72
Cross Distance: 10
Cross Width: 2
OK

Apply Eyecandy 5 – Texture: Swirl
Use Default settingsl
OK
Make your Selection Tool active set on Rectangle.
View/Rulers (to turn your Ruler on)
You want to section out the entire area of your tag from 50 down to 200
Tap the delete key.
Deselect.
View/Rulers (to shut the ruler off)
Give this layer a drop shadow.

Copy and paste your tube to the right side of your canvas.
If you’re using the same tube as I did, resize 60%

Highlight the layer below your tube layer.

Color Pallet:
Foreground and Background: #684134
Using either the Rockwell Extra Bold or Kozuka Mincho Pr6N H font -
Type out the word “AUTUMN” in all caps – Use the nodes to stretch the word so that it fits about like mine does – see tag for reference.
Convert to raster layer.
Make your Selection Tool active set on Rectangle.
Section out a small width straight across the word.
Tap the delete key.
Deselect.
Select All/Float/Defloat
Selections/Modify/Contract by 2.

Color Pallet:
Foreground: #d19f90 
Background: #fce1a7
Set the foreground to Gradient:
Style: Linear
Angle: 348
Repeat: 0
Invert checked

New Raster layer above the brown Autumn word layer.
Flood fill with the gradient.
Deselect.

Copy and paste your tube as a new layer.
If you’re using the same tube as I did, resize 40%
Apply Mura’s Meister – Copies
Choose Wallpaper/Rotate
OK
Close this layer out.

Highlight the word gradient Autumn layer.
Select All/Float/Defloat
Highlight the Wallpaper layer.
Right click on it in your layers pallet.
Choose “Promote Section to Layer”
Move the promoted section just above the gradient Autumn layer.
Change the Properties to Soft Light.
Duplicate
Change the Properties to Multiply and lower the Opacity to about 20.
New Raster layer.
Effects/3D Effects/Cutout:
Vertical and Horizontal: 0
Opacity: 54
Blur: 24.64
Color: #664136
OK
Change the Properties to Dissolve
Deselect

Color Pallet:
Foreground: Close it out
Background: #fce1a7

Using the font, Matilda –
Type out the words (in all small letters) “nature’s color pallet” enough times that it goes across the entire length of the tag between the word Autumn.
Give it a slight Inner bevel:

Give it a drop shadow.

Color Pallet:
Foreground: #4a3027
Background: #684134

Using the font, Event Shark:
Type out the word “falling” in small letters.
Move into position – see my tag for reference.

Type out your name.
Give it a slight Inner Bevel:

Highlight the gradient layer that’s just above your white background.
Effects/Illumination Effects/Sunburst:
The default settings ended up placing the light exactly where I wanted!
You can play around with the horizontal and vertical settings if you need to -

Add your copyrights.

New Raster layer at the very top of your layers pallet:
Select All.
Flood fill with #4a3027
Selections/Modify/Contract by 2
Flood will with #fdf9ef
Selections/Modify/Contract by 1
Flood fill with #4a3027
Selections/Modify/Contract by 2.
Tap the delete key.
Deselect.

Copy Merged.

To make an avatar:
Create a new 125 x 125 canvas.
Paste your merged tag as a new layer.
Resize 80% and move into a position you like.
New Raster layer at the top.
Flood fill with #4a3027
Selections/Modify/Contract by 2
Deselect.
Type your Initial using the same colors you did for your name.
Give it the same Inner Bevel, too.

If you don’t want to animate then save your tag now. 

If you are animating then Copy Merged.

~Time to Animate~

Edit/Paste/As New Animation.
Ctrl + Shift + Tap the letter “L” on your key board until you have 11 frames.

Open up the animation.
Ctl + A (to highlight all the frames)
Copy

Make your working frames active.
Ctrl + A to highlight all the frames.
Ctrl + E – move the branch into exact position and click your mouse.
Click on Frame 1 and 11 to highlight just those 2 frames.
Animation/Frame Properties:
Change the Display time to 300
OK

View your animation.
If you’re happy then save.
   
I’d love to see your results.
Email me!
Hugs,
Bev

Thursday, October 1, 2015

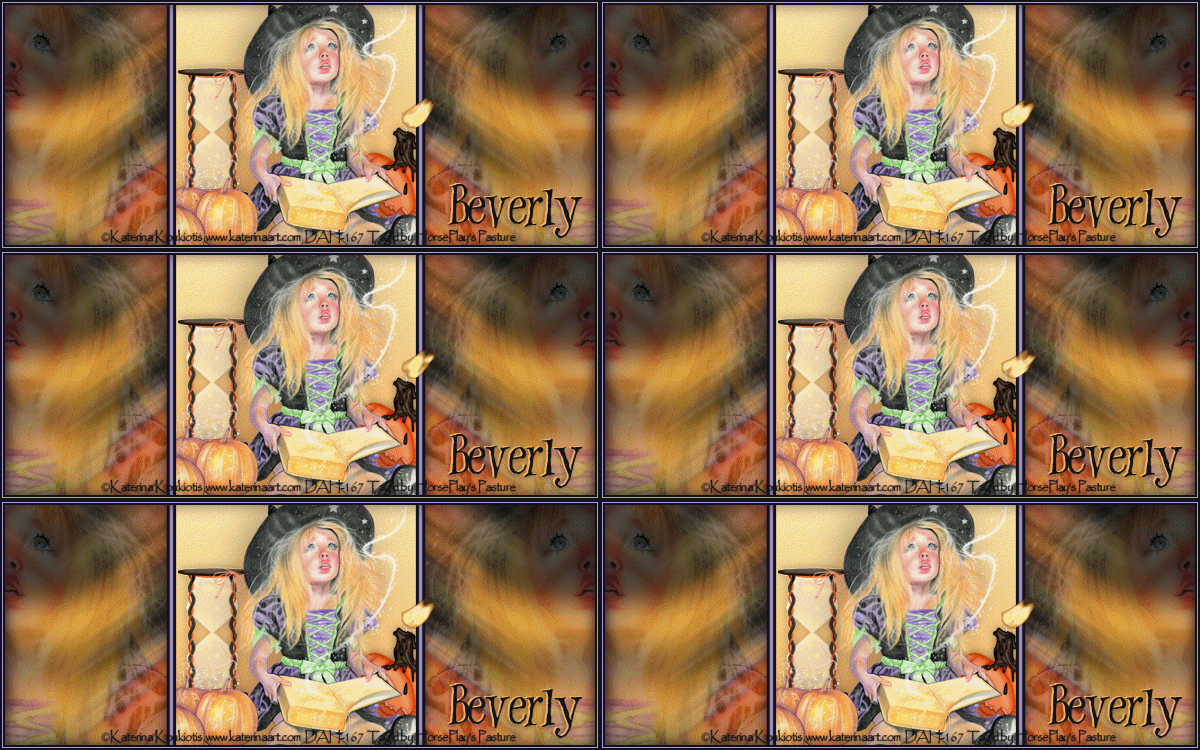
Magic


 photo Magic Beverly_zpszdpiwawl.gif

Supplies Needed

1 tube of choice – I used the beautiful artwork of Katerina Koukiatis which can be purchased DigitalArt Heaven.  You must have a license to use.

Font of choice – I used Witches Magic here

Plug Ins used:
Greg’s Factory Output Vol. II – Pool Shadow
Eyecandy 5: Nature – Fire

Animation Shop

My supplies here
They are to be used for this tutorial only

This tutorial was written assuming you have a working knowledge of PSP. 

~~ Let’s get started ~~

Open up a 600 x 250 blank canvas.
Flood fill white.

Copy and paste your tube as a new layer.
If you’re using the same tube as I did, resize 40%
Apply Mura’s Meister – Copies:
Set on Wallpaper (Rotate) –
Use default settings.  If you see holes in the “wallpaper” that your tube will make then adjust the “Number”.
OK
Adjust/Blur/Motion Blur:
Angle: 55
Strength: 100
OK
Give the Motion Blur effects 3 more times.

Duplicate the layer.
Make your Selection Tool active set on Rectangle.
Section off the entire right side.
Selection/Modify/Inside Outside Feather:
Both checked
Feather amount: 30
OK
Tap the delete key.
Deselect.
Mirror
Merge Down.
Rename “Merged Layer”
You should have something like this:

Duplicate the Merged layer.
Change the Properties to Multiply.
Lower the Opacity to about 53.

Copy and paste your tube as a new layer.
Make sure it’s centered.
Make your Selection Tool active set on Rectangle.
Section out the area behind your tube:

Color Pallet:
Foreground: #f7b15b
Background: #f6e8ad
Set your foreground color on gradient –
Style: Linear
Angle & Repeats: 0
OK

New Raster layer below your tube.
Flood fill with the gradient.
Adjust/Add Remove Noise/Add Noise:
Uniform & Monochrome checked:
Noise: 3
OK
Deselect.

Copy and paste your tube as a new layer just over Merged Layer.
Move into position at either side of your canvas.
Change the Properties to Soft Light.
Apply Xero – Porcelain effect:
Use Default settings

Color Pallet:
Foreground: #111418
Background: #b599df

Make the very top layer of your layers pallet active.
Make your Pen Tool active set on “Draw Lines and Polylines”.
Set the width to 10.
Draw a line, from top to bottom, where the edge of the gradient background of your tube meets the motion blurred background.
Duplicate the layer.
Make your Target Tool active and right click on it to change the color to Purple.
Tap the letter K on your keyboard to active the Pick Tool and push the side in so the purple line turns thinner.
Center this strip over the black strip.
Merge Down.
Duplicate/Mirror

Add the couple of elements supplied.

Select All.
New Raster layer.
Flood Fill with #111418
Contract by 2.
Tap the delete key.
Flood fill with #b599df
Contract by 1
Tap the delete key.
Flood fill with #111418
Contract by 2.
Tap the delete key.
Deselect.

Add your copyrights.

Color Pallet:
Close out the foreground

Add your name.
Type your name using #111418
Convert to Raster layer.
Type your name using #f5b163
Be sure the darker color is over the lighter color.
Move the darker color slightly to the right.
Merge Visible both name layers.

If you don’t want to animate then save your tag.

If you do want to animate:
Highlight the candle layer.
Make your Freehand Selection tool active, set on Freehand.
Section around the flame.
Tap the delete key.
Do not Deselect.

Make 4 new Raster layers.
Rename them Flame 1, Flame 2, Flame 3, and Flame 4.

Highlight F;ame 1.
Apply Eyecandy 5 – Fire:
Settings Tab:
Small, Candy

Basic Tab:

Colors Tab:

OK

Close out Flame 1 layer.
Open Flame 2.
Apply same fire effect accept hit the random seed button once.

Deselect when you’re done repeating the above steps with Flame 3 and Flame 4 layers.


Close out all flame layers accept for Flame 1.

Copy Merge.

~Time to Animate~

Carry into Animation Shop.
Edit/Paste/As New Animation

Back in PSP.
Close out Flame 1.
Open up Flame 2.
Copy Merged.

Carry into AS
Edit/Paste/After Current Frame.

Back in PSP.
Close out Flame 2.
Open up Flame 3.
Copy Merged.

Carry into AS
Edit/Paste/After Current Frame.

Back in PSP.
Close out Flame 3.
Open up Flame 4.
Copy Merged.

Carry into AS
Edit/Paste/After Current Frame.

Ctrl+ A to highlight all frames.
Animation/Frame Properties:
Change display time to 20
OK

View your animation.
If you’re happy then save.

Resize all layers 85%.
   
I’d love to see your results.
Email me!
Hugs,
Bev

Wednesday, September 30, 2015

Trapped


Supplies Needed

1 tube of choice – I used the gorgeous artwork of Janna Prosvirina which can be purchased from Digital Art Heaven here

Font of choice – I used Witches Magic here

Weescotlass mask 297 here

Animation Shop

Plug Ins used:
Greg’s Factory Output Vol. II – Pool Shadow
Alien Skin Xenofex 2 - Lightning

“King of Thrones” is a PTU tagger size scrap kit created by Jessica of Gothic Inspirations and can be purchased from her store here.  Her sampler kit is also included in this purchase.  You can visit her blog here
  
This tutorial was written assuming you have working knowledge of PSP. 

~~ Let’s get started ~~

Open up an 800 x 700 canvas.
Flood fill white.
So sorry this one is so large – the tag got away from me as I was creating it!

Before we begin, some of the elements were taken from the Sampler kit.
Any elements that were used from the Sampler kit will be noted as such.  Otherwise, all elements will be from the full kit.

Copy and paste Brushed Circle as a new layer.
Resize 85%
Make your Selection Tool active set on Point to Point.
Trace around the circle, staying along the center.
New Raster layer below the circle.
(from the Sampler kit) Copy and paste Paper 5 Into Selection.
Deselect.
Give the brushed Circle a drop shadow.
Close out your white background.
Merge Visible.
Reopen your background.
Resize the merged layer 80%
Duplicate/Resize 80%
Move all 3 layers into position – see my tag for reference.

Copy and paste (from the full kit, Word Arts & Frame folder) Frame 6 as a new layer.
Resize 45%
Duplicate and Resize 85%
Duplicate
Move the frames into position – they don’t have to be exact at this time.

Copy and paste (from the sampler kit - from the Frames & WA folder) Frame 1 as a new layer.
Resize 40%
Click inside of it with your Magic Wand.
Selections/Modify/Expand by 4.
New Raster layer below the frame.
Copy and paste Paper 3 Into Selection.
Deselect.
Highlight the frame layer.
Merge Down.
Duplicate this merged layer.

Move all elements on your canvas into their exact position – see my tag for reference.
Be sure to notice that the largest of the square shaped frames should be at the very top of your layers pallet.

To each of the square shaped frames:
Highlight the frame.
Click inside of it with your Magic Wand.
Selections/Modify/Expand by 4.
New Raster layer below the frame.
Copy and paste (from the Sampler kit) Paper 1 Into Selection.
Deselect.

Once you have worked all 3 frames:
Merge all 3 paper layers so they’re all on the same layer.
Duplicate 4x’s for a total of 5 merged paper layers.
Rename them L1, L2, L3, L4, and L5.

Highlight L 2 layer.
Apply Alien Skin – Xenofex – Lightning.
Use default settings.
Click the random seed button until you have a lightning bolt you like.
OK
(lightning will be beyond the paper – it’s OK, we’ll clean it up in a bit.

Repeat the above step with L3, L4, and L5.

Highlight L1 layer.
Click anywhere outside of it with your Magic Wand
Highlight L2 and tap the delete key
Repeat the above step with L3, L4, and L5.
Deselect.

Close out all Lightning layers accept for L1.

Copy and paste your tube as a new layer.
If you’re using the same tube as I did, resize 90%.

Open up the Looking Ball element.
Shift +D.
Close out the original.
Copy and paste your tube as a new layer over the globe.
Change the Properties of your tube to Soft Light.
Give your tube a drop shadow and be sure it’s in exact position.
Make your Freehand Selection Tool set on Freehand or Point to Point – whoever is easiest for you to use.
Section around the white part of the globe.  It doesn’t have to be exact, but make sure you don’t go outside of the element.
Selections/Invert
Highlight the tube layer.
Tap the delete key.
Selections/Modify/Inside Outside Feather:
Both checked
Feather amount: 30
Tap the delete key until you have the feathered effect you like.
Deselect.
Merge Visible.
Copy.
Paste as a new layer on your working canvas.
Resize 45%

Add your elements.  I used:
Sm Bow 1 – Resize 40%/Duplicate/Resize 70%
Sm Sword – Resize 35%
Crows:  Resize 60%/Duplicate/Erase what you don’t want
Foliage:  Duplicate twice/mirror one of them/Erase what shows below the frames
Feather:  Duplicate/Mirror
Ivy 1:  Resize 50%/Duplicate/Mirror
Ground:  Duplicate as many times as you like
Doodle
Flower:  Resize 15%/Duplicate/Resize 70%/Duplicate both flowers as many times as you like/mirror some of them.
Tag 2:  Resize 55%/Free rotate Right 90 degrees

Highlight your white background.
New Raster layer.
Select All.
Copy and Paste Paper 6 Into Selection.
Deselect.
Apply the mask.
Merge Group.

Add your copyrights.

Add your name.
Color Pallet:
Foreground: #000000
Background: Close it out

Make your Pen Tool active set on Freehand.
Draw a line that runs along the side of the name tag:


Color Pallet:
Foreground: #000000
Background: #2f4065
Make your Text Tool active and set the stroke to 1.0
Move your mouse near the center of the line you drew.  When a Rocking A appears, click your mouse.
Type your name in the font box.
OK
In your layers pallet click on the + sign.
Close out the New Ellipse (of Path) layer.
Right click on Vector 1 layer and choose “Convert to Raster Layer”.
Give your name a slight Inner Bevel:

Select All/Float/Defloat
Apply Greg’s Factory Output Vol. II – Pool Shadow:
Use Default Settings
OK
Deselect.

If you don’t want to animate your tag you can save now.
If you want to animate then Copy Merged.

~Time to Animate~

Edit/Paste as New Animation

Back in PSP.
Close out L 1.
Open up L 2.
Copy Merged.

Carry Into AS.
Edit/Paste/After Current Frame.

Back in PSP.
Close out L 2.
Open up L 3.
Copy Merged.

Carry Into AS.
Edit/Paste/After Current Frame.

Back in PSP.
Close out L 3.
Open up L 4.
Copy Merged.

Carry into AS.
Edit/Paste/After Current Frame.

Back in PSP.
Close out L 4.
Open up L 5.
Copy Merged.

Carry into AS.
Edit/Paste/After Current Frame.

Shift + A (to highlight all the frames)
Animation/Frame Properties
Change the display time to 35
OK

Click on Frame 1.
Animation/Frame Properties
Change the display time to 120
OK

View your animation.
If you’re happy then resize:
Animation/Resize Animation:
Pixel Size checked
Width: 600
OK

Save your animation.

I hope you enjoyed this tutorial.   
I’d love to see your results.
Email me!
Hugs,
Bev