Saturday, October 2, 2010

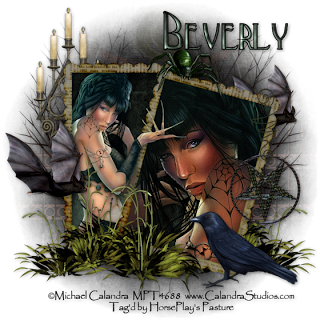
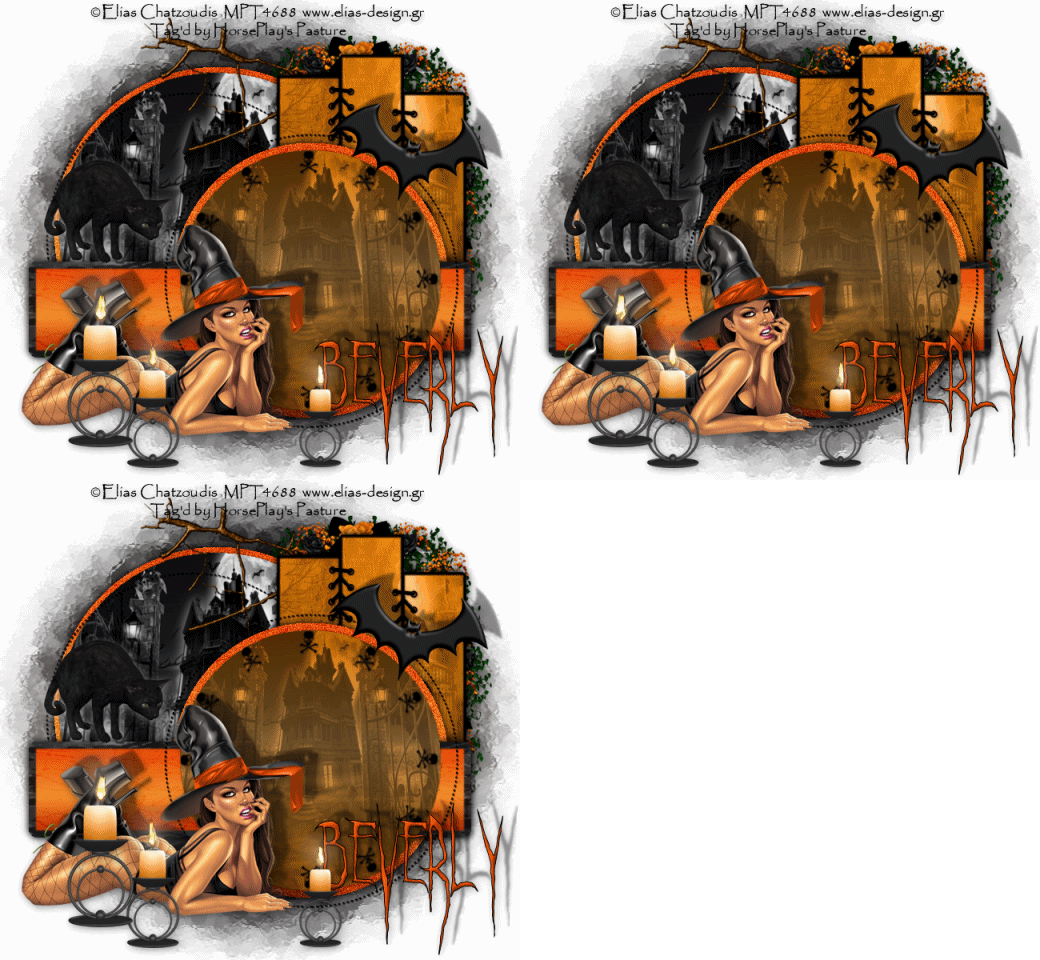
Cemetery Nights


Supplies

1 tube of your choice and 1 close up - I used the artwork of Michael Calandra at MPT
Font of Choice - I used Black Adder II here
Monti Circular Mask here
Greg’s Factory Output Vol. II - Pool Shadow
“Cemetery Nights” is a PTU tagger size scrap kit created by Jessica of Gothic Inspirations and can be purchased from her store Gothic Inspirations. You can visit her blog here.
Thank you Jessica for another wicked kit!

This tutorial was written assuming you have a working knowledge of PSP.

~♥~ Let’s get started ~♥~

Open up a blank 700 x 700 canvas.
Flood fill white.

Copy and paste Frame 2 as a new layer.
Resize 50%
Free rotate left 90 degrees - Rename Frame 1
Duplicate/Free rotate right 15 degrees - Rename Frame 2
Move them into position - see my tag for reference.

Highlight Frame 1.
Click inside with your Magic Wand.
Selections/Modify/Expand by 4.
New Raster layer below the frame.
Copy and Paper 9 Into Selection.
Copy and paste your tube as a new layer.
Selections/Invert
Tap the delete key.
Deselect for now.

Highlight Frame 2.
Click inside with your Magic Wand.
Selections/Modify/Expand by 4.
New Raster layer.
Make Paper 9 active
Flip
Make your working canvas active.
Paste Into Selection.
Copy and paste your close up image as a new layer.
Move into position.
Selections/Invert
Tap the delete key.
Deselect.
Change the Properties to Lighten.
Duplicate/Change the Properties to Multiply.

Add your embellishments. I used:
Grass: Resize 60%/Duplicate and position behind the frame
Candles: Position behind the frame/Erase the part of the base that shows
Bush: Resize 70%/Duplicate/Mirror
Charm: Resize 60%
Spider: Resize 30%
Bat 1: Resize 40%/Duplicate/Resize 80%
Crow 1: Resize 50%/Mirror

Highlight your white background.
Select All.
Copy and paste Paper 2 Into Selection.
Deselect.
Copy and paste Fence as a new layer.
Resize 80%/Duplicate/Mirror
Merge Down - both fence layers should be on one layer.
Merge Down.
Merged Fence layer and the paper should now be on one layer.
Apply the mask.
Merge Group.

Copy and paste Witch as a new layer just above the paper - see my tag for reference…if you look at my tag closely you’ll see a faint image of this element (behind the frames)
Apply the mask to this element layer.
Merge Group.
Lower the Opacity to about 28 or so.

Add your credits.

Add your name.
Choose your foreground and background colors. I used:
Foreground: Pattern/Paper 2
Background: Pattern/Paper 9
Stroke: 2
Type out your name.
Convert to Raster layer.
Selections/Modify/Contract by 2
Apply Greg’s Factory Output Vol. II - Pool Shadow
Default Settings.
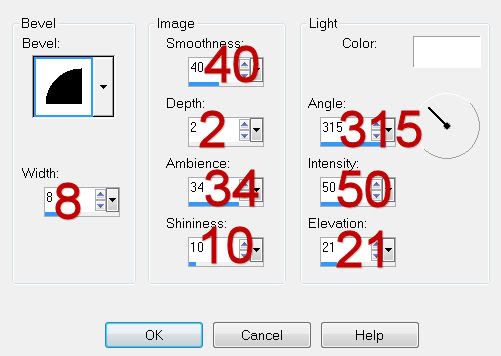
Give it an inner bevel:
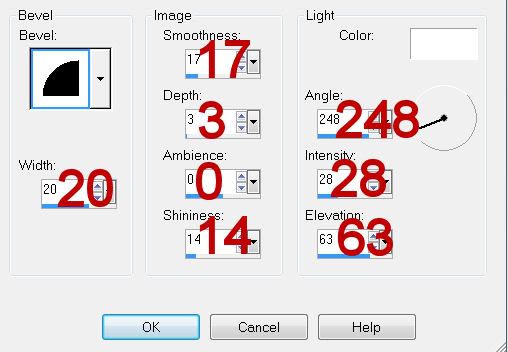

Deselect.

Resize all layers 80%.

I hope you enjoyed this tutorial.
I’d love to see your results and show it off in my gallery.
Email me!
Hugs,
Bev

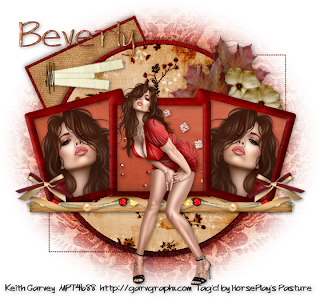
Shorter Days, Longer Nights


Supplies

1 tube of your choice - I used the artwork of Keith Garvey which can be purchased at MPT
Font of Choice - I used Just Act Casual here
Toxic Desirez Template 133 here
Creative Desires Mask 31 here- if you know who the author of this mask is please email me….thanks!
Xerox - Porcelain
“The Days Grow Short” is a FTU tagger size scrap kit created by Artmama Made and can be found on her blog here.
Please leave a thank you when downloading as it’s a small gesture for hard work given freely.

This tutorial was written assuming you have a working knowledge of PSP.

~♥~ Let’s get started ~♥~

Open up the template.
Shift + D.
Close out the original.
Image/Canvas Size
700 X 650
Highlight Raster 7 layer.
Flood fill white.
Delete the top 6 layers and Pixel Words layer.

Highlight Glittered Square layer.
Use your Magic Wand and click on it.
Copy and paste Paper 4 Into Selection.
Deselect.
Delete the template layer.
Adjust/Add Remove Nosie/Add Nosie:
Gaussian and Monochrom checked
Noise: 33%
OK

Highlight Black Circle layer.
Repeat the above step.

Highlight Frames layer.
Click on it with your Magic Wand.
New Raster layer.
Copy and paste the same paper (4) Into Selection.
Deselect.
Delete the template layer.
Give it a slight inner bevel:


Add Noise effect.

Highlight Pink Circle layer.
Click on it with your Magic Wand.
New Raster layer.
Copy and paste Paper 1 Into Selection.
Deselect.
Delete the template layer.

Highlight Frames Back layer.
Click on it with your Magic Wand.
New Raster layer.
Copy and paste Paper 6 Into Selection.
Deselect.
Copy and paste your tube as a new layer.
Move into position under either side of the frame.
Duplicate/Mirror
Copy and paste Embellie 17 as a new layer - position in the center frame.
Highlight the template layer.
Click anywhere outside of the template.
Highlight each of the tube layers and embellie layer and tap the delete key.
Deselect.
Delete the template layer.
To each tube layer apply Xero -Porcelain:
Default Settings accept move the Blue Channel all the way to 0.

Highlight Rectangle layer.
Click on it with your Magic Wand.
New Raster layer.
Copy and paste Paper 7 Into Selection.
Deselect.
Delete the template layer.

Highlight Square layer.
Click on it with your Magic Wand.
New Raster layer.
Copy and paste Paper 9 as a new layer.
Tap the delete key.
Deselect.
Delete the template layer.

Highlight Dotted Rectangles layer.
Select All/Float/Defloat
New Raster layer.
Copy and paste Paper 4 Into Selection.
Deselect.
Delete the template layer.

Copy and paste Embellie 2 s a new layer.
Resize 50%
Duplicate/Mirror
Move them both together so that it makes the length of the thin rectangle.
Use your Eraser Tool and erase the overlap.
Merge down.

Copy and paste your tube as a new layer.

Add your embellishments. I used:
Embellie 3: Resize 50%
Embellie 15: Resize 50%
Embellie 21: Resize 60%/Duplciate/Mirror
Embellie 13: Resize 40%

Highlight your white background.
Select All.
Copy and paste Paper 2 Into Selection.
Deselect.
Apply the mask.
Merge Group.

Add your credits.

Add your name.

Resize all layers 80%.

I hope you enjoyed this tutorial.
I’d love to see your results and show it off in my gallery.
Email me!
Hugs,
Bev
Friday, October 1, 2010

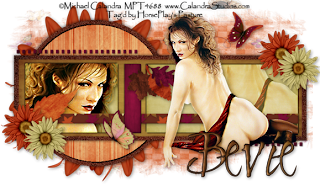
Bountiful Season


Clicking on the image will allow you to enlarge for bigger view.

Supplies

1 tube of your choice - I used the artwork of Michael Calandra and can be purchased at MPT
Font of Choice - I used Clive Barker here
Elegant Inspirations Template 17 here
Weescotlass Mask 297 here
“October Fall” is a FTU tagger size scrap kit created by Twinky Dezines and can be found on her blog here
.Please leave a thank you when downloading as it’s a small gesture for hard work given freely.

This tutorial was written assuming you have a working knowledge of PSP.

~♥~ Let’s get started ~♥~

Open up the template.
Shift + D.
Close out the original.
Image/Canvas Size
750 X 425
Highlight the blank layer.
Flood fill white.
Delete the top 5 layers and Leaf 4 layer.

Highlight Black Circle layer.
Use your Magic Wand and click on it.
Copy and paste Paper 6 Into Selection.
Deselect.
Delete the template layer.
Adjust/Add Remove Nosie/Add Nosie:
Gaussian and Monochrom checked
Noise: 33%
OK

Highlight Rectangle 1 layer.
Repeat the above step.

Highlight White Circle layer.
Click on it with your Magic Wand.
New Raster layer.
Copy and paste Paper 4 Into Selection.
Deselect.
Delete the template layer.

Highlight Rectangle 2 layer.
Click on it with your Magic Wand.
New Raster layer.
Copy and paste Paper 9 Into Selection.
Deselect.
Delete the template layer.

Highlight Rectangle 3 layer.
Click on it with your Magic Wand.
New Raster layer.
Copy and paste Paper 10 Into Selection.
Copy and paste your tube as a new layer - Resize so the head and neck fills the area.
Move into position over the paper.
Selections/Invert
Tap the delete key.
Deselect.
Delete the template layer.
Change the Properties to Overly.
Duplicate
Change the Properties to Multiply.

Highlight Rectangle 4 layer.
Click on it with your Magic Wand.
New Raster layer.
Copy and paste Paper 10 Into Selection.
Deselect.
Close out the template layer for now.

Highlight Strip 1 layer.
Click on it with your Magic Wand.
Copy and paste Paper 2 as a new layer.
Move to the left a bit.
Duplicate and move to the right…trying your best to match the pattern up.
Merge Down.
Selections/Invert
Tap the delete key.
Deselect.
Delete the template layer.
Give it a slight inner bevel:


Copy and paste Strip 2 as a new layer.
Click on it with your Magic Wand.
New Raster layer.
Copy and paste Paper 8 Into Selection.
Deselect.
Delete the template layer.
Give it the same inner bevel.

Highlight Dotted Line 2 layer.
Merge Down.
Both dotted line templates should be on the same layer.
Select All/Float/Defloat
New Raster layer.
Copy and paste Paper 8 Into Selection.
Deselect.
Delete the template layer.
Give it the same inner bevel.

Copy and paste your tube as a new layer.
Move into exact position.
Duplicate - move this tube layer just above the rectangle paper.
Move into position.
Highlight the template layer.
Click anywhere outside of it with your Magic Wand.
Highlight the duplicated tube layer and tap the delete key.
Deselect.
Delete the template layer.
Change the Properties to Overly.
Duplicate
Change the Properties to Multiply

Add your embellishments. I used:
Leaf 7: Resize 25%/Mirror/Free rotate right 40 degrees
Leaf 3: Resize 25% and 60%/Flip/Mirror
Leaf 7: Resize 25% and 60%/Flip/Free rotate right 70 degrees
Leaf 6: Resize 25% and 60%
Flower 3: Resize 90% -Place behind the circle
Flower 3: Resize 25%
Flower 4: Resize 25% and 80%
Pretty Butterfly 2: Resize 25% and 805
Pretty Butterfly 2: Resize 25% and 80%

Crop your image.

Highlight your white background.
Select All.
Copy and paste Paper 5 Into Selection.
Deselect.
Apply the mask.
Use your Pick Tool to pull the side of the mask out on all 4 sides.
Merge Group.

Add your credits.

Add your name.
Convert to Raster layer.
Select All/Float/Defloat
Selections/Modify/Contract by 1
Give it an inner bevel:


Repeat the inner bevel 2 more times.
Deselect.

Resize all layers 80%.

I hope you enjoyed this tutorial.
I’d love to see your results and show it off in my gallery.
Email me!
Hugs,
Bev
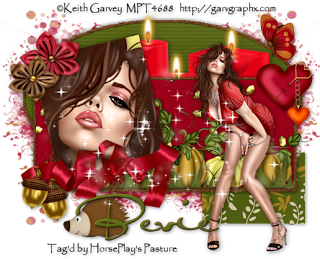
Almost Another Season


Clicking on the image will allow you to enlarge for bigger view.

Supplies

1 tube of your choice and 1 close up image - I used the artwork of Keith Garvey and can be purchased at MPT
Font of Choice - I used Al Sandra here
Scrap Rebellion Template 36 here
Vix Mask 431 here
Filters Unlimited 2.0 - Optional
“A Touch of Autumn” is a PTU tagger size scrap kit created by Tina’s Magical Scraps and can be purchased at Scrappin‘ Warehouse. You can visit her blog here.
Thank you Tina for such a stunning seasonal kit!

This tutorial was written assuming you have a working knowledge of PSP.

~♥~ Let’s get started ~♥~

Open up the template.
Shift + D.
Close out the original.
Resize all layers 90%
Image/Canvas Size
700 X 550
Highlight the background layer.
Flood fill white.
Delete the top 7 layers.

Highlight Pink Square layer.
Use your Magic Wand and click on it.
Copy and paste Paper 20 as a new layer.
Resize 80%
Move into position.
Selections/Invert
Tap the delete key.
Deselect.
Delete the template layer.

Highlight Pink Oval layer.
Click on it with your Magic Wand.
New Raster layer.
Copy and paste Paper 24 Into Selection.
Deselect.
Delete the template layer.
Adjust/Add Remove Noise/Add Noise
Monochrome and Gaussian checked
Nosie: 33%
OK

Highlight 2 Tone Back layer.
Repeat the above step but only close the template layer out.

Highlight Black Oval layer.
Click on it with your Magic Wand.
New Raster layer.
Copy and paste Paper 7 Into Selection.
Apply Filters Unlimited 2.0 -
Paper Textures/Striped Paper, Course
Intensity: 29
Lightness: 87
Deselect.
Delete the template layer.
TIP: If you don’t have Filters Unlimited 2.0 then try this:
Effects/Texture Effects/Blinds
Width: 8
Opacity: 10
Color: white
Horizontal checked
OK

Highlight Black Rectangle layer.
Click on it with your Magic Wand.
New Raster layer.
Flood fill with #af0b2e.
Apply Filters Unlimited 2.0 -
Paper Textures/Mineral Paper, Sandstone:
Intensity: 57
Lightness: 62
Deselect.
Delete the template layer.
TIP: If you don’t have Filters Unlimited 2.0 then try this -
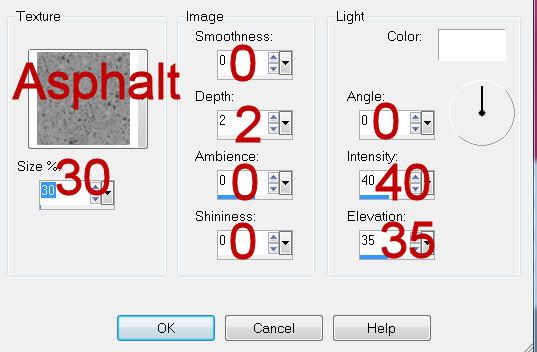
Effects/Texture Effects/Texture:


Highlight Blue Square layer.
Click on it with your Magic Wand.
New Raster layer.
Copy and paste Paper 8 Into Selection.
Copy and paste your close up image as a new layer.
Move into position over the paper.
Selections/Invert
Tap the delete key.
Deselect.
Delete the template layer.

Copy and paste your tube as a new layer.

Copy, paste, and move into position the following elements as new layers just above the red rectangle layer - don’t worry about what overhangs. We’ll take care of that in a bit. You can use my tag as reference:
Diamond Splash 3: Resize 80%
Grass 1: Resize 85%
Pumpkin Patch 2 layers: Resize each element 50%
Highlight the template layer.
Click anywhere outside of it.
Highlight whatever elements that overhang the paper layer and tap the delete key.
Deselect.
Delete the template layer.

Add your embellishments. I used:
Pin Heart: Resize 40%
Fabric flower 1: Resize 30%
Fabric flower 2; Resize 25%/Mirror
Glitter Butterfly 1: Resize 25%
Candle Arrangement 1: Resize 80%
Folded Ribbon: Resize 80%
Acorn: Resize 40%/Free rotate left 10 degrees/Duplicate/Mirror
Hedgehog 1: Resize 40%
Sparkles 2: Resize 80%

Crop your image.

Highlight your white background.
Select All.
Copy and paste a paper of choice Into Selection.
Deselect.
Apply the mask.
Resize 10%
Merge Group.
Move it up slightly on your canvas.

Add your credits.

Add your name.
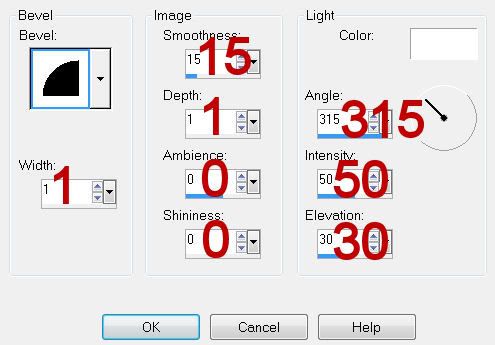
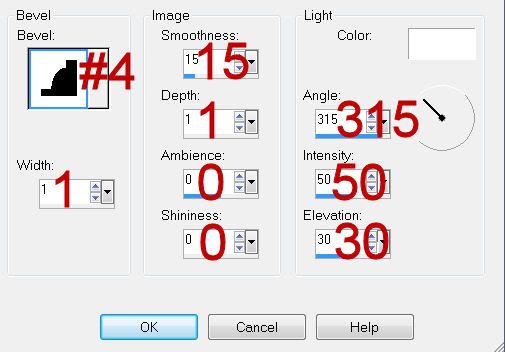
Give it an inner bevel:


Repeat the inner bevel 2 more times.

Resize all layers 80%.

I hope you enjoyed this tutorial.
I’d love to see your results and show it off in my gallery.
Email me!
Hugs,
Bev
Wednesday, September 29, 2010

Naughty Pumpkin


Supplies

1 tube of your choice - I used the artwork of Elias Chatzoudis and can be purchased at MPT
Font of Choice - I used Ghastly Panic here
Denz Designs Template 156 here
Vix Mask 451 here
Mura Meister - Copies
Eyecandy 5: Nature - Fire
Animation Shop
“Naughty Pumpkin” is a PTU tagger size scrap kit created by Treasure by Terry and can be purchased at Butterfly Blush Designs. You can visit her blog here.
Thank you Terry for such a fabulous kit!

This tutorial was written assuming you have a working knowledge of PSP.

~♥~ Let’s get started ~♥~

Open up the template.
Shift + D.
Close out the original.
Resize all layers 110%
Image/Canvas Size
650 X 600
Highlight the background layer.
Flood fill white.
Delete the credit layer, black hearts, and red hearts layers.

Highlight Black Circle with Gradient Glow layer.
Use your Magic Wand and click on it.
New Raster layer.
Copy and paste Paper 1 Into Selection
Deselect.
Delete the template layer.
Adjust/Add Remove Noise/Add Noise:
Gaussian and Monochrome checked
Noise: 33%
OK

Highlight White Circle with Gradient Glow layer.
Repeat the above step using the same paper.

Highlight Black Circle layer.
Click on it with your Magic Wand.
New Raster layer.
Copy and paste Paper 6 Into Selection.
Deselect.
Delete the template layer.

Highlight Dotted Outline 2 layer.
Select All/Float/Defloat
New Raster layer.
Flood fill with the color black.
Deselect.
Delete the template layer.

Highlight Dotted Outline 1 layer.
Repeat the above step using the same color.

Highlight 3 Black Strips with Gradient Glow layer.
Click on it with your Magic Wand.
New Raster layer.
Flood fill with the color black.
Deselect.
Delete the template layer.

Highlight 3 Black Strips layer.
Click on each one with your Magic Wand.
New Raster layer.
Copy and paste Paper 9 Into Selection.
Deselect.
Delete the template layer.

Highlight Red Strip with Gradient Glow layer.
Click on it with your Magic Wand.
New Raster layer.
Copy and paste Paper 3 Into Selection.
Deselect.
Delete the template layer.

Highlight Red Strip layer.
Click on it with your Magic Wand.
New Raster layer.
Copy and paste Paper 1 Into Selection.
Deselect.
Delete the template layer.

Highlight White Circle layer.
Click on it with your Magic Wand.
New Raster layer.
Copy and paste Paper 5 Into Selection.
Deselect.
Delete the template layer.

Copy and paste Skull 2 as a new layer.
Resize25% and 50%
Apply Mura Meister - copies:
Change it to Encircle - use default settings.
OK
Copy
Highlight the front circle paper.
Click on it with our Magic Wand.
New Raster layer.
Paste Into Selection.
Deselect.
Resize 97%.
You can delete the original circle of skulls layer.

Copy and paste your tube as a new layer.
Give it an exaggerated drop shadow.

Add your embellishments. I used:
Cat 1: Resize 50%/Give white drop shadow/Give black exaggerated drop shadow on a layer of its own
Arch: Resize 90%
Laces 1: Resize 50%
Branch 2: Resize 85%
Bat: Resize 60%

Candles 4:
Resize 60%
Duplicate/Resize 80%
You should now have 3 candles.
Give each a drop shadow on a layer of its own.
Use your eraser tool and erase the drop shadow the flames of each candle.
Merge Visible all candles and their shadows.
Duplicate twice for a total of 3 candle layers.
Rename them C1, C2, and C3.

Zoom in and use your Freehand Selection Tool to outline the flame of each candle.

Highlight C1 layer.
Apply Eyecandy 5 - Nature: Fire

Settings Tab:
Choose: Small, Candle

On the Basic Tab:
Default Settings accept change the Column Length to 35.00
OK

Highlight C2 layer.
Apply fire affect again accept hit the random seed button once.

Highlight C3 layer.
Repeat the above step.

Close out C2 and C3 layers.

Highlight your white background.
Select All.
Copy and paste a paper of choice Into Selection.
Deselect.
Apply the mask.
Merge Group.

Add your credits.

Add your name (be sure it’s below the candles in your layers pallet)
Give it an inner bevel:


Repeat the inner bevel.
Give it a black drop shadow.
Give it the same exaggerated drop shadow you used on the cat on a layer of its own.

Resize all layers 80%.

Copy Merge

~Time to Animate~

Edit/Paste/As New Animation

Back in PSP.
Close out C1 layer.
Open up C2 layer.
Copy Merge.

Carry into AS.
Edit/Paste/After Current Frame.

Back in PSP.
Close out C2 layer.
Open up C3 layer.
Copy Merge

Carry Into AS
Edit/Paste/After Current Frame.

Ctrl + A - to highlight all frames.
Animation/Frame Properties:
Change the Display time to 21
OK

View your Animation.
If you’re happy then save.

I hope you enjoyed this tutorial.
I’d love to see your results and show it off in my gallery.
Email me!
Hugs,
Bev
Tuesday, September 28, 2010

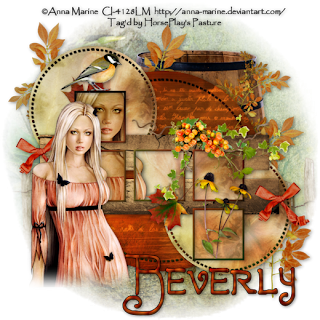
Forever Fall


Clicking on the image will allow you to enlarge for bigger view.

Supplies

1 tube of choice - I’m using the artwork of Anna Marine at CILM
Font of Choice - I’m using Fortunaschwein here
Monti Circular Mask here
Denz Designz Template 158 here
“Forever Fall” is a PTU tagger size scrap kit created by Jessica of Gothic Inspirations and can be purchased at her store Gothic Inspirations. You can visit her blog here.

This tutorial was written assuming you have a working knowledge of PSP.

~♥~ Let’s get started ~♥~

Open up the template.
Shift +D.
Close out the original.
Delete the top credit layer and Girlz Girlz Girlz layer.
Image/Canvas Size
650 X 650
Highlight DDD layer and flood fill white.

Highlight Black Circle layer.
Click on it with your Magic Wand.
New Raster layer.
Copy and paste Paper 5 Into Selection.
Deselect.
Delete the template layer.

Highlight White Dotted Lines layer.
Select All/Float/Defloat
New Raster layer.
Copy and paste Paper 8 Into Selection.
Deselect.
Delete the template layer.

Highlight Bottom Dotted Circle layer.
Merge Down.
Both dotted circle layers should be on one layer now.
Repeat the above step.

Highlight Top Pink Circle layer.
Click on it with your Magic Wand.
New Raster layer.
Copy and paste Paper 2 Into Selection.
Deselect.
Delete the template layer.

Highlight Bottom Pink Circle layer.
Repeat the above step.

Highlight 2 Gray Strips layer.
Click on them with your Magic Wand.
New Raster layer.
Copy and paste Paper 1 Into Selection.
Deselect.
Delete the template layer.
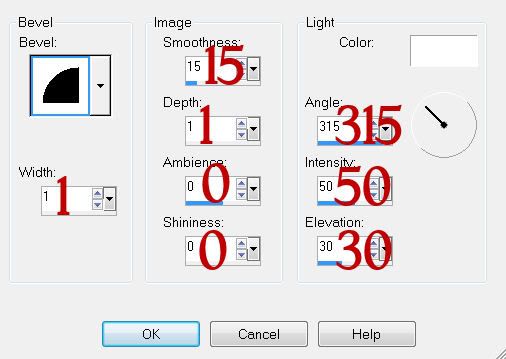
Give it a slight inner bevel:

INSERT PIC HERE

Highlight 4 Frames Back layer.
Click on each square with your Magic Wand.
New Rater layer.
Copy and paste Paper 2 Into Selection.
Deselect.
Delete the template layer.

Highlight 4 Frames layer.
Select All/Float/Defloat
New Raster layer.
Copy and paste Paper 8 Into Selection.
Deselect.
Delete the template layer.

Copy and paste your tube as a new layer.
Paste your tube again and keep it larger than the other.
Move it below the frames - see my tag for reference.
Highlight the paper frame backs layer.
Click anywhere outside of them with your Magic Wand.
Highlight the tube layer that’s below the frames.
Tap the delete key.
Deselect.
Change the Properties to Multiply
Duplicate
Change the Properties to Soft Light.

Add your embellishments. I used:
Bird: Resize 25%
Barrel: Resize 60%
Leaves
Golden Grapes: Resize 50%
Bow 2: Resize 25% and 90%
Cornflower: Resize 40%
Leaf 1: Resize 25%
Leaf 2: Resize 25% and 90%

Highlight your white background.
New Raster layer.
Select All.
Copy and paste Paper 10 Into Selection.
Copy and paste Fence as a new layer above the paper.
Move it down slightly on your canvas so the bottom of the fence is even with the bottom of the circle.
Merge Down.
Apply the mask.
Merge Group.
Duplicate.

Add your copyrights.

Add your name.
Convert to Raster layer.
Select All/Float/Defloat
Selections/Modify/Contract by 1
Give it a slight inner bevel:


I hope you enjoyed this tutorial.
I’d love to see your results and show it off in my gallery.
Email me!
Hugs,
Bev
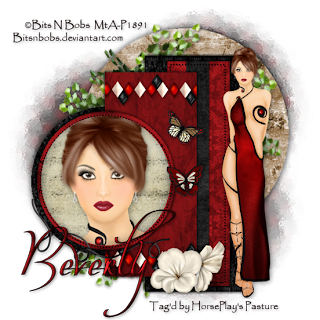
Class


Clicking on the image will allow you to enlarge for bigger view.

Supplies

1 tube of your choice - I used the beautiful artwork of Bits N Bobs and can be purchased at Mistaken Art
Font of Choice - I used Oh Lara - a pay font
Divine Intentionz Template 233 here
Vix Mark 452 here
Greg’s Factory Output Vol. II - Pool Shadow
“Intensity” is a PTU tagger size scrap kit created by Artmama Made and can be purchased at Exquisite Scraps.
You can visit Bits N Bobs blog here.

This tutorial was written assuming you have a working knowledge of PSP.

~♥~ Let’s get started ~♥~

Open up the template.
Shift + D.
Close out the original.
Image/Canvas Size:
650 x 650
OK
Flood fill the background layer white.

Highlight Large Circle layer.
Click on it with your Magic Wand.
New Raster layer.
Copy and paste Paper 4 Into Selection.
Deselect.
Delete the template layer.

Highlight Circle 1 layer.
Click on it with your Magic Wand.
New Raster layer.
Copy and paste Paper 9 Into Selection.
Deselect.
Delete the template layer.

Highlight Rectangle 1 layer.
Repeat the above step using the same paper.

Highlight Rectangle 2 layer.
Click on it with your Magic Wand.
Copy and paste Paper 11 as a new layer.
Resize 35% - move into position so that the red stripes are on the edges. If not then the paper will blend in with the rectangle below it.
Selections/Invert
Tap the delete key.
Deselect.
Delete the template layer.

Highlight Dotted Rectangle layer.
Select All/Float/Defloat
New Raster layer.
Copy and paste Paper 9 Into Selection.
Deselect.
Delete the template layer.

Highlight Dotted Circle layer.
Repeat the above step using the same paper.

Highlight Rectangle 3 layer.
Click on it with your Magic Wand.
New Raster layer.
Copy and paste Paper 6 Into Selection.
Deselect.
Delete the template layer.

Highlight Circle 2 layer.
Click on it with your Magic Wand.
New Raster layer.
Copy and paste Paper 3 Into Selection.
Deselect.
Delete the template layer.

Highlight Circle 3 layer.
Click on it with your Magic Wand.
New Raster layer.
Copy and paste Paper 7 Into Selection.
Copy and paste the head shot of the tube as a new layer.
Resize as you like.
Selections/Invert
Tap the delete key.
Deselect.
Delete the template layer.

Copy and paste your tube as a new layer.

Copy and paste embellie 27 as a new layer.
Resize 40%
Move into position at the top of the rectangle that’s just below the circle layer.
Highlight the rectangle paper layer.
Click anywhere outside of the paper.
Highlight the embellie layer.
Tap the delete key.
Deselect.
Duplicate/Flip

Add your embellishments. I used:
Embellie 12/Duplciate/Mirror/Free rotate left 30 degrees/Duplicate
Embellie 18: Resize 40%
Embellie 7: Resize 40%
Embellie 6: Resize 40%/Mirror/Flip
Embellie 39 & 40: Resize 25%

Highlight your white background.
Select All.
Copy and paste a paper of choice Into Selection.
Deselect.
Apply the mask.
Mirror
Merge Group.

Add your credits.

Add your name.
Convert to Raster layer.
Select All/Float/Defloat
Selections/Modify/contract by 1
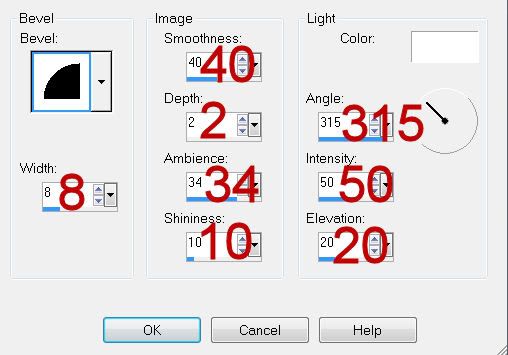
Give it an inner bevel:


Repeat the inner bevel.

Apply Greg’s Factory Output Vol. II - Pool Shadow
Default Settings.
Deselect.

Resize all layers 85%.

I hope you enjoyed this tutorial.
I’d love to see your results and show it off in my gallery.
Email me!
Hugs,
Bev
Monday, September 27, 2010

More than Just Delightful


Clicking on the image will allow you to enlarge for bigger view.

Supplies

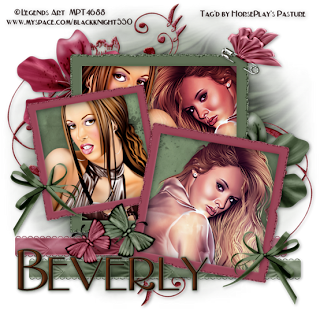
2 tubes of your choice - I used the artwork of Legends Art and can be purchased at MPT
Font of Choice - I used Nadall here
Mask here - If you know who this mask belongs to please email me so that I can give proper credit. Thank you.
Eyecandy 4000 - Gradient Glow
“Delightful” is a PTU tagger size scrap kit created by Treasures by Terry and can be purchased at Butterfly Blush Designs. You can visit her blog here.
Thank you Terry for yet another stunning kit!

This tutorial was written assuming you have a working knowledge of PSP.

~♥~ Let’s get started ~♥~

Open up a 700 X 700 blank canvas.
Flood fill white.

Copy and paste Frame 4 as a new layer.
Resize 90%.

Copy and paste Frame 3 as a new layer.
Resize 60%
Free rotate left 10 degrees.

Copy and pates Frame 3 again.
Resize 70%
Free rotate right 10 degrees.

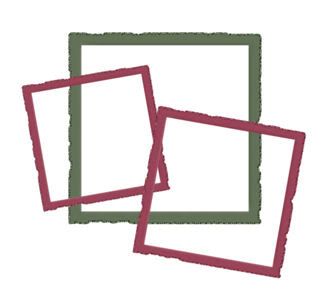
Move all 3 frame into position on your canvas:


Highlight the green frame.
Click inside of it with your Magic Wand.
Selections/Modify/Expand by 6.
New Raster layer below the frame.
Copy and paste a paper of choice Into Selection.
Copy and paste both of your tubes as new layers below the frame.
Selections/Invert
Tap the delete key on each tube.
Deselect.
Change the Properties on each tube to Screen.
Duplicate each tube and change the Properties to Multiply.

Highlight the pink frame on the left.
Click inside of it with your Magic Wand.
Selections/Modify/Expand by 4.
New Raster layer below the frame.
Copy and paste a paper of choice Into Selection.
Copy and paste a tube below the frame.
Selections/Invert
Tap the delete key.
Deselect.

Highlight the frame on the right.
Repeat the above step.

Add your embellishments. I used:
Doodle 1: Resize 85%
Pin 1: Resize 85%
Bow 3: Resize 50%
Flower 1 & 2: Resize 90%
Ribbon 3 & 4
Butterfly 3: Resize 35%
Butterfly 4: Resize 30%/Mirror

Highlight your white background.
Select All.
Copy and paste a paper of choice Into Selection.
Deselect.
Apply the mask.
Merge Group.

Add your credits.

Add your name.
Give it an inner bevel:


Repeat the inner bevel.
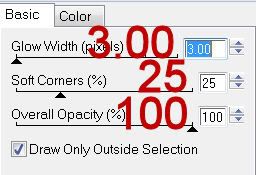
Apply Eyecandy 4000 - Gradient Glow:


Color Tab:
Change the color to #627158

Resize all layers 80%.

I hope you enjoyed this tutorial.
I’d love to see your results and show it off in my gallery.
Email me!
Hugs,
Bev
Sunday, September 26, 2010

Feels Like Today


Clicking on the image will allow you to enlarge for bigger view.

Supplies

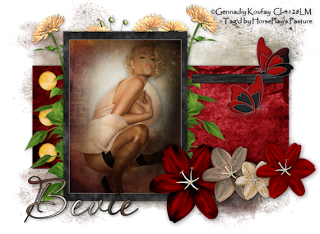
1 tube of your choice - I used the artwork of Gennadiy Koufay and can be purchased at CILM
Font of Choice - I used Aquarelle here
Gem Mask 161 here
Elegant Inspirations Template 2 here
Eyecandy 4000 - Gradient Glow
“Feels Like Today” is a PTU tagger size scrap kit created by Sweet Cravings Scraps and can be purchased at TKO Scraps. You can visit her blog here.
Thank you Kara. Your talent is amazing and shines through in this kit that holds endless possibilities!!

This tutorial was written assuming you have a working knowledge of PSP.

~♥~ Let’s get started ~♥~

Open up the template.
Shift + D.
Close out the original.
Resize all layers 130%.
Delete the info layer, leaf 1, and leaf 2 layer.

Highlight Back Rectangle layer.
Click on it with your Magic Wand.
New Raster layer.
Copy and paste Paper 7 Into Selection.
Deselect.
Delete the template layer.

Highlight Rectangle 1 layer.
Click on it with your Magic Wand.
New Raster layer.
Copy and paste Paper 4 Into Selection.
Deselect.
Delete the template layer.

Highlight Rectangle layer.
Repeat the above step using the same paper.

Highlight Rectangle 2 layer.
Click on it with your Magic Wand.
New Raster layer.
Copy and paste Paper 22 Into Selection.
Copy and paste your tube as a new layer - move into position over the paper.
Selections/Invert
Tap the delete key.
Change the Properties to Multiply.
Deselect.
Delete the template layer.
Apply Eyecandy 4000 - Gradient Glow to the paper layer:


Color Tab:
Change the color to #d8d4c9

Give the rectangle a heavy drop shadow:
1, 1, 90, 3

And again:
-1, -1. 90, 3

Highlight 3 Circle layer.
New Raster layer.
Highlight the template layer again.
Use your Magic Wand and click on the top circle.
Highlight the new layer.
Copy and paste Sunny Moon Into Selection.
Deselect.

Repeat the above step with the remaining 2 circles.
Once you have the moon copied into each circle then delete the template layer.

Highlight Circle 1 layer.
Copy and paste Flower 6 as a new layer.
Resize 35%
Position it over the circle template.
Delete the template layer.

Repeat the above step with the remaining 3 circle template layers:
Flower 4: Resize 25%
Flower 3: Resize 25% and 70%
Flower 5: Resize 25%

Add your embellishments. I used:
Butterfly 4: Resize 25% and 70%
Butterfly 3: Resize 25% and 70%/Mirror
Flower 1: Resize 80%/Free rotate right 5 degrees/Duplicate/Mirror
Flower Doodle 3: Resize 40%

Highlight your white background.
Select All.
Copy and paste a paper of choice Into Selection.
Deselect.
Apply the mask.
Merge Group.
Duplicate.

Add your credits.

Add your name.
Apply Eyecandy 4000 - Gradient Glow:
Same settings.

Resize all layers 85%.

I hope you enjoyed this tutorial.
I’d love to see your results and show it off in my gallery.
Email me!
Hugs,
Bev