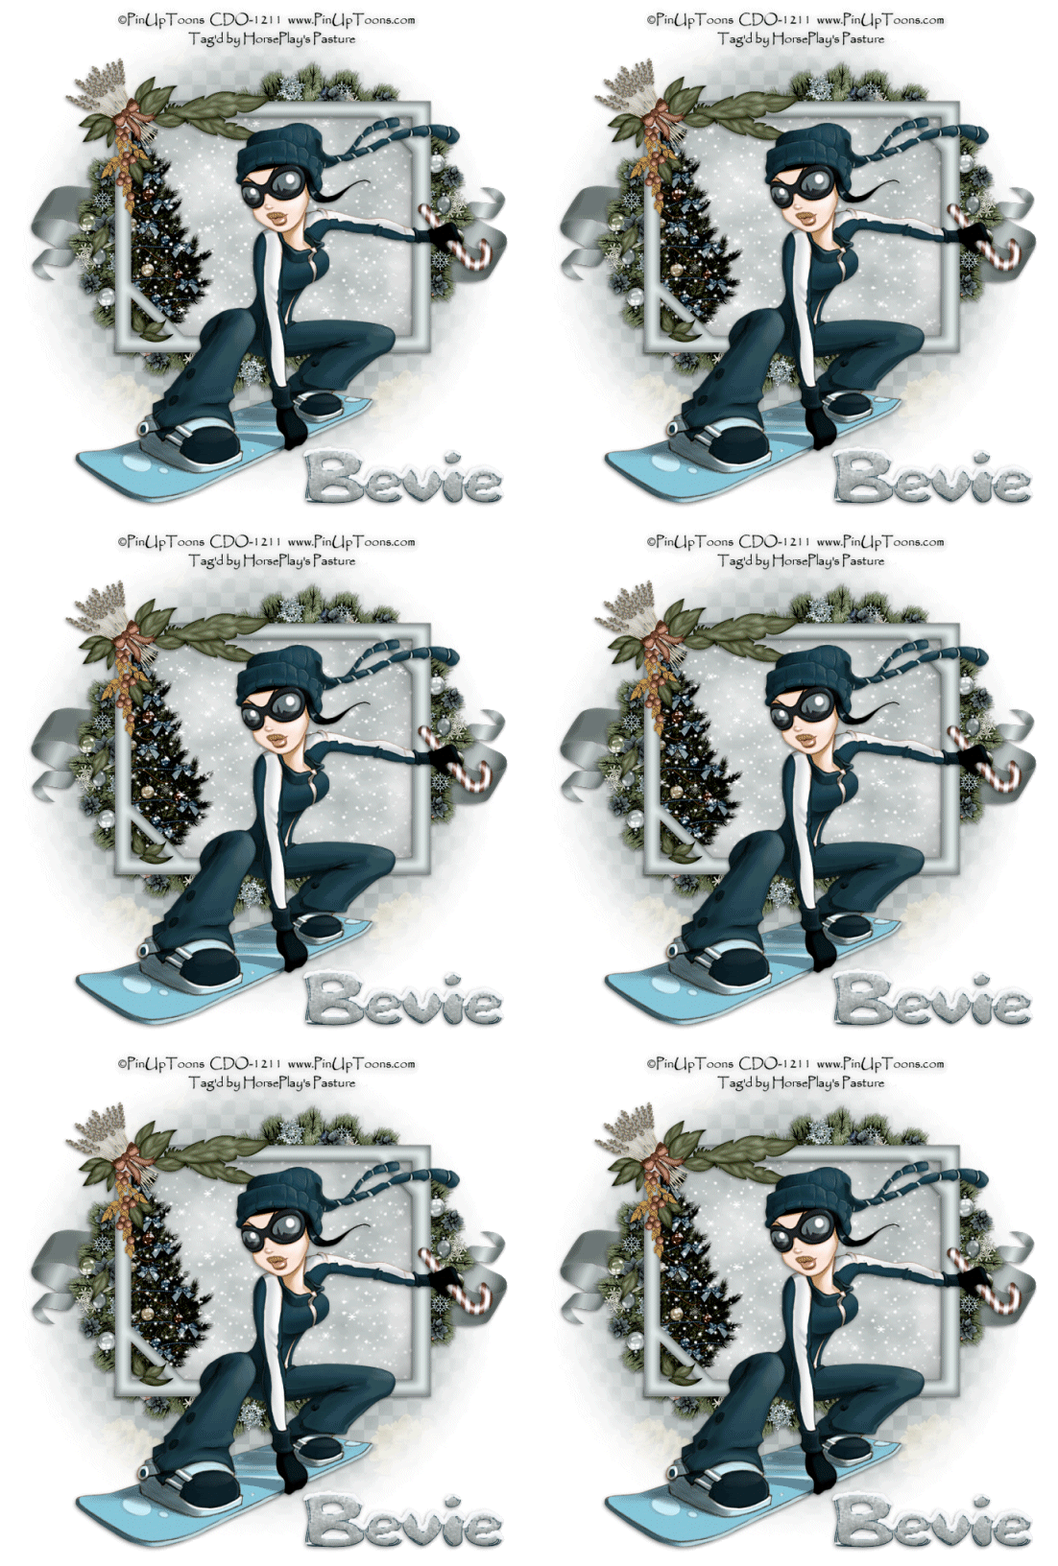
Saturday, November 5, 2011

A Christmas Wish 9


Supplies

1 tube of choice - I used the wonderful artwork of PinUpToons which can be purchased from CDO. You must have a license to use.

Font of choice - I used Bubble 1 here. Just some FYI, when I downloaded this font it was a Binery file. I had to run as administrator and it was automatically installed into my PSP program. Just thought I’d let you know because downloading from that site never used to be like that.

Weescotlass Mask 208 here

Animation Shop

Snow which I supply here. The snow is to be used only for this tutorial. If you would like to use it for anything else please ask.

Plug Ins:
Mura’s Meister - Cloud
Eyecandy 5 - Nature: Snowdrift

“A Christmas Wish” is a tagger size scrap kit created by Shelle of Shellez Creations. This portion is part of a huge mega collab to help a fellow designer in her time of need. It can be purchased from TKO Scraps. You can visit Shelle’s blog here.
Thank you Shelle for your fantastic portion.

This tutorial was written assuming you have a working knowledge of PSP.

~♥~ Let’s get started ~♥~

Open up a 700 x 700 blank canvas.
Flood fill white.

Color Pallet:
Foreground: #ffffff
Background: #a8b1b0

Copy and paste element 17 as a new layer.
Resize 85%
Use your Freehand Selection Tool and outline the frame.
New Raster layer below the frame.
Apply Mura’s Meister - Cloud
You should now have a cloud layer below the frame.
Copy and paste Element 7 as a new layer below the frame.
Move into a position you like.
Selections/Invert
Tap the delete key.
Deselect.

Copy and paste your tube as a new layer.

Add your elements. I used:
Element 4
Element 8: Duplicate/Move both into position and erase what you don’t want seen.
Element 14: Resize 25%/Free rotate Left 40 degrees/Flip/Mirror

Highlight your white canvas.
New Raster layer.
Select All.
Copy and paste Paper 6 Into Selection.
Deselect.
Apply the mask.
Merge Group.

Add your copyrights.

Add your name.
Color Pallet:
Foreground: #1d414f
Background: #a8b1b0
Stroke: 1
Type your name.
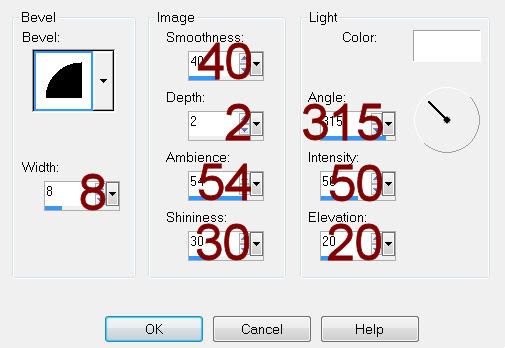
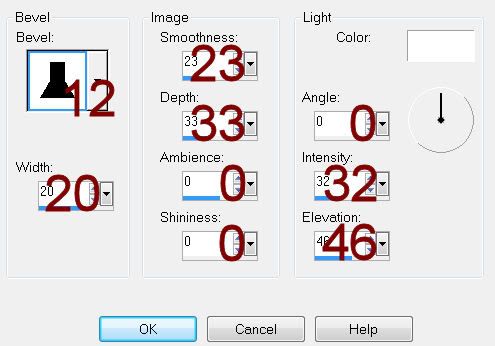
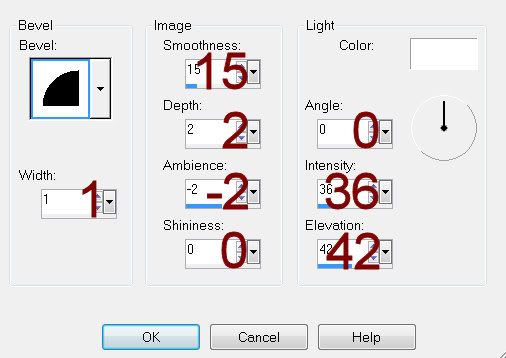
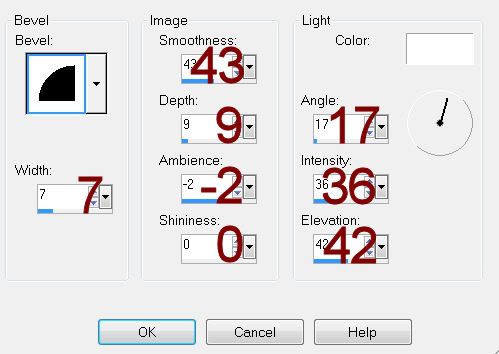
Give it a slight Inner Bevel:

Apply Eyecandy 5: Nature - Snowdrift.
On the Settings Tab choose: Small, First Flakes
Use Default Settings
OK

Open up the snow that I provided.
Open up all layers.
Highlight Frame 1 layer.
Copy.

Highlight your working canvas.
Highlight the layer just below the frame.
Paste - your snow layer should appear.
Rename it S1 (short for Snow 1)
Don’t worry about what overhangs the frame. We’ll clean that up in a bit.

Highlight the animated snow layers.
Highlight Frame 2.
Copy

Highlight your working canvas.
Paste
Rename S2.

Continue to copy and paste all 10 snow layers onto your working canvas.

Once you have all snow layers copied and renamed on your working canvas highlight the Mura Meister Cloud layer.
Click anywhere outside of it with your Magic Wand.
Highlight each snow layer and tap the delete key.
Deselect.

Keep S1 layer open and close out all other snow layers.
Copy Merge.

Time to Animate:

Open up Animation Shop
Edit/Paste/As New Animation

Back in PSP.
Close out S1.
Open up S2.
Copy Merge

Back in AS.
Edit/Paste/After Current Frame.

Back in PSP.
Close out S2.
Open up S3.
Copy Merge

Back in AS.
Edit/Paste/After Current Frame.

Back in PSP.
Close out S3.
Open up S4.
Copy Merge

Back in AS.
Edit/Paste/After Current Frame.

Back in PSP.
Close out S4.
Open up S5.
Copy Merge

Back in AS.
Edit/Paste/After Current Frame.

Back in PSP.
Close out S5.
Open up S6.
Copy Merge

Back in AS.
Edit/Paste/After Current Frame.

Back in PSP.
Close out S6.
Open up S7.
Copy Merge

Back in AS.
Edit/Paste/After Current Frame.

Back in PSP.
Close out S7.
Open up S8.
Copy Merge

Back in AS.
Edit/Paste/After Current Frame.

Back in PSP.
Close out S8.
Open up S9.
Copy Merge

Back in AS.
Edit/Paste/After Current Frame.

Back in PSP.
Close out S9.
Open up S10.
Copy Merge

Back in AS.
Edit/Paste/After Current Frame.

Animation/Resize Animation:
Percentage of Original checked
Width x Height: 80
OK

View your animation.
If you’re happy with it then save.

Resize all layers 80%.

I hope you enjoyed this tutorial.
I’d love to see your results.
Email me!
Hugs,
Bev

A Christmas Wish 8


Supplies

Font of choice - I used LDGregarious - a pay font. Childish should work just as well here.

Weescotlass Mask 297 here

Creative by Nature Template 41 here

Plug Ins:
Eye candy 3.1 - Glow

“A Christmas Wish” is a tagger size scrap kit created by Sandra of S.G. Rowe Designs. This portion is part of a huge mega collab to help a fellow designer in her time of need. It can be purchased from TKO Scraps. You can visit Sandra’s blog here.
Thank you Sandra for your fantastic portion.

This tutorial was written assuming you have a working knowledge of PSP.

~♥~ Let’s get started ~♥~

Open up the template.
Shift + D.
Close out the original.
Image/Canvas size:
700 x 600
OK
Highlight Raster 1.
Flood fill white.
Delete the top 3 layers.

Highlight Raster 2 layer.
Click anywhere outside of it with your Magic Wand.
Selections/Invert
New Raster layer.
Copy and paste Paper 8 Into Selection.
Deselect.
Delete the template layer.
Adjust/Add Remove Noise/Add Noise:
Gaussian and Monochrome checked.
Noise: 33%
OK

Highlight Copy of Vector 1 layer.
Click anywhere outside of it with your Magic Wand.
Copy and paste Paper 5 as a new layer.
Resize 65%
Tap the delete key.
Deselect.
Delete the template layer.

Highlight Raster 3 layer.
Click anywhere outside of it with your Magic Wand.
Selection/Invert
New Raster layer.
Copy and paste Paper 9 Into Selection.
Deselect.
Delete the template layer.
Give it the same Noise effect.

Highlight Copy of Vector 1 layer (large pink circle)
Click on it with your Magic Wand.
New Raster layer.
Copy and paste Paper 11 Into Selection.
Deselect.
Delete the template layer.

Highlight Copy of Vector 1 layer (black square).
Click on it with your Magic Wand.
New Raster layer.
Copy and paste Paper 12 Into Selection.
Deselect.
Delete the template layer.

Highlight the other Copy of Vector 1 layer.
Repeat the above step.

Highlight Raster 5 layer.
Select All/Float/Defloat
New Raster layer.
Copy and paste Paper 10 Into Selection.
Deselect.
Delete the template layer.
Give it the same Noise effect.
Give it a slight Inner Bevel:


Highlight Copy (2) of Vector 1 layer.
Repeat the above step.

Copy and paste Cutie 02 as a new layer.
Resize 50%
Position above the left square frame.
Duplicate/Move below the frame.
Highlight the paper layer.
Click anywhere outside of it with your Magic Wand.
Highlight the duplicated cutie layer.
Tap the delete key.
Deselect.
Highlight the cutie that’s above the frame.
Use your Eraser Tool and erase whatever you don’t want to overhang the frame.

Copy and paste Cutie 01 as a new layer.
Mirror
Resize 50%
Repeat the above step.

Add your elements. I used:
Ornament 05: Resize 70%/Change the Properties to Overlay/Lower the Opacity to about 63
Bow 02: Resize 25% and 80%/Duplicate/Mirror
Tree 01: Resize 70%
Gift 01: Resize 25%
Gift 02: Resize 25% and 80%
Cutie 03: Resize 25%
Ornament 03: Resize 25% and 80%
Candy 04: Resize 25%/Free rotate Left 10 degrees
Candy 01: Resize 25%/Free rotate Right 10 degrees

Highlight your white canvas.
New Raster layer.
Select All.
Copy and paste Paper 14 Into Selection.
Deselect.
Apply the mask.
Merge Group.

Add your copyrights.

Add your name.
Apply Eyecandy 3.1 - Glow
Width: 3
Opacity: 100%
Opacity Drop off: Fat
Color: White
OK

Resize all layers 80%.

I hope you enjoyed this tutorial.
I’d love to see your results.
Email me!
Hugs,
Bev
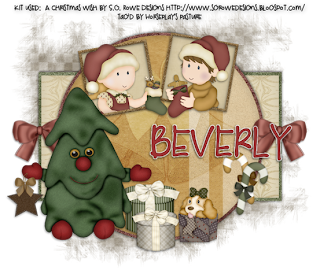
A Christmas Wish 7


Supplies

1 tube of choice - I used the wonderful artwork of PinUpToons which can be purchased from CDO.  You must have a license to use.

Font of choice - I used Bubble 1 here.  Just some FYI, when I downloaded this font it was a Binery file.  I had to run as administrator and it was automatically installed into my PSP program.  Just thought I’d let you know because downloading from that site never used to be like that.

Weescotlass Mask 208 here

Plug Ins:
Mura’s Meister - Cloud
Eyecandy 5 - Nature:  Snowdrift

“A Christmas Wish” is a tagger size scrap kit created by Conchi of DNScraps.  This portion is part of a huge mega collab to help a fellow designer in her time of need.  It  can be purchased from TKO Scraps.   You can visit Conchi’s blog here.
Thank you Conchi for your fantastic portion.

This tutorial was written assuming you have a working knowledge of PSP.

~♥~ Let’s get started ~♥~

Open up a 700 x 700 blank canvas.
Flood fill white.

Color Pallet:
Foreground:  #ffffff
Background:  #bfc1c2

Copy and paste Cluster Frame as a new layer.
Resize 85%
Click inside of it with your Magic Wand - be sure to click in the spaces below the ribbon.
New Raster layer below the frame.
Apply Mura’s Meister - Cloud
You should now have a cloud layer below the frame.
Copy and paste Tree as a new layer below the frame.
Resize 70%
Selections/Invert
Tap the delete key.
Deselect.

Close out the white background layer.
Merge Visible.
Reopen the background layer.

Copy and paste your tube as a new layer.

Add your elements.  I used:
Tag 2:  Resize 60%
Tag:  Resize 60%/Duplicate
Flower 4:  Resize 40%/Duplciate/Flip/Resize 70%
Pearls:  Resize 80%/Duplicate
Puppy:  Resize 45%

Crop your image.

Highlight your white canvas.
New Raster layer.
Select All.
Copy and paste Paper 10 Into Selection.
Deselect.
Apply the mask.
Move up slightly on your canvas to center better.
Merge Group.

Add your copyrights.

Add your name.
Color Pallet:
Foreground:  #4e504f
Background:  bfc1c2
Stroke: 2
Type your name.
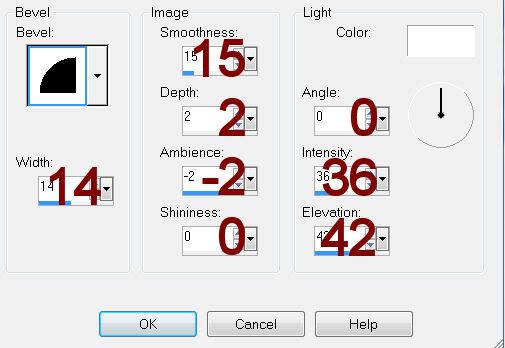
Give it a slight Inner Bevel:


Apply Eyecandy 5: Nature - Snowdrift.
On the Settings Tab choose: Small, First Flakes
Use Default Settings
OK

Resize all layers 80%.

I hope you enjoyed this tutorial.
I’d love to see your results.
Email me!
Hugs,
Bev

Friday, November 4, 2011

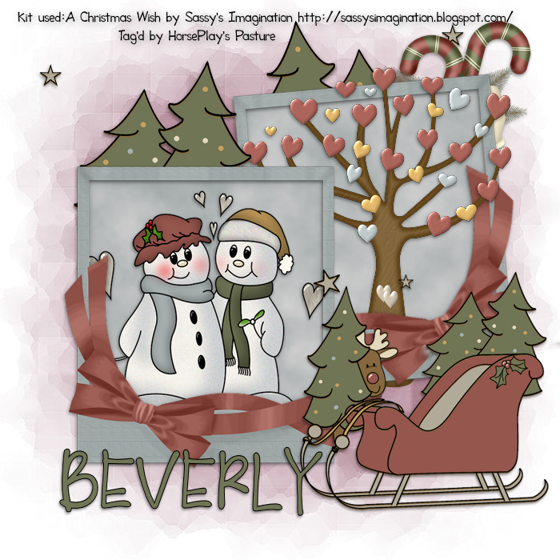
A Christmas Wish 6


Supplies

Font of choice - I used LD Gregarious which is a pay font

My Mask 27 here

Plug Ins:
Mura’s Meister - Cloud

“A Christmas Wish” is a tagger size scrap kit created by Darlene of Sassy‘s Imagination.  This portion is part of a huge mega collab to help a fellow designer in her time of need.  It  can be purchased from TKO Scraps.   You can visit Darlene’s blog here.
Thank you Darlene for your fantastic portion.

This tutorial was written assuming you have a working knowledge of PSP.

~♥~ Let’s get started ~♥~

Open up a 700 x 700 blank canvas.
Flood fill white.

Color Pallet:
Foreground:  #c1c3c3
Background:  #e0e4e5

Copy and paste Wrapped Frame as a new layer.
Resize 85%
Mirror
Click inside of it with your Magic Wand.
New Raster layer below the frame.
Apply Mura’s Meister - Cloud
You should now have a cloud layer below the frame.
Copy and paste Snow In Love as a new layer below the frame.
Resize 70%
Selections/Invert
Tap the delete key.
Deselect.

Close out the white background layer.
Merge Visible.
Reopen the background layer.

Copy and paste Wrapped Frame again.
Resize 85%
Free rotate Left 5 degrees.
Move the Merged layer and the Wrapped frame layer into position - see my tag for reference.
Highlight the Wrapped frame layer.
Click inside of it with your Magic Wand.
Selections/Modify/Expand by 4.
New Raster layer below the frame.
Apply Mura’s Meister - Cloud.
Copy and paste Heart Tree as a new layer below the frame.
Move into position/Duplicate
Move the duplicate layer above the frame.
Selections/Invert
Highlight the tree layer below the frame.
Tap the delete key.
Deselect.
Highlight the tree above the frame.
Use your Eraser Tool and erase what you don’t want outside of the frame.

Copy and paste Charlie and Sleigh as a new layer.
Resize 70%
Position in front of both of the frames.
Duplicate/Move behind the frame and erase any portion of the sleigh that sticks out from behind the frame.
Duplicate/Mirror

Copy and paste Candy Cane as a new layer.
Resize 55%
Mirror

Highlight your white canvas.
New Raster layer.
Select All.
Copy and paste Paper 2 Into Selection.
Deselect.
Apply the mask.
Resize 110%
Merge Group.

Add your copyrights.

Add your name.

Resize all layers 80%.

I hope you enjoyed this tutorial.
I’d love to see your results.
Email me!
Hugs,
Bev 
A Christmas Wish 5


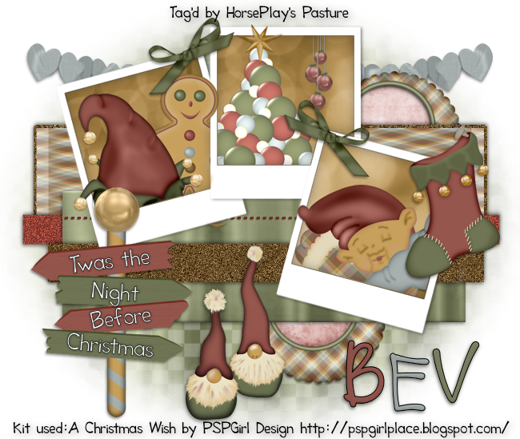
Supplies

Font of choice - I used Tooney Loons here and LD Gregarious which is a pay font

Weescotlass Mask 208 here

Dee and Kandi’s collab template here - you can find it under August 25, 2011.  There are 4 templates in the download.  This tutorial uses kkdeecollab2.

“A Christmas Wish” is a tagger size scrap kit created by Lis of PSPGirl Design.  This portion is part of a huge mega collab to help a fellow designer in her time of need.  It  can be purchased from TKO Scraps.   You can visit Lis’ blog here.
Thank you Lis for your fantastic portion!

This tutorial was written assuming you have a working knowledge of PSP.

~♥~ Let’s get started ~♥~

Open up the template.
Shift +D.
Close out the original.
Delete the top 8 layers.

Highlight Blue Circle layer.
Click on it with your Magic Wand.
New Raster layer.
Copy and paste Ele25 Into Selection.
Deselect.
Delete the template layer.
Click inside the frame with your Magic Wand.
Selections/Modify/Expand by 4.
New Raster layer below the frame.
Copy and paste Paper 4 Into Selection.
Deselect.

Highlight Pink Circle layer.
Repeat the above step.

Highlight White Rectangle layer.
Click on it with your Magic Wand.
New Raster layer.
Copy and paste Paper 6 Into Selection.
Adjust/Add Remove Noise/Add Noise:
Gaussian and Monochrome checked.
Noise: 33%
OK
Deselect.
Delete the template layer.

Highlight Pink Rectangle layer.
Click on it with your Magic Wand.
New Raster layer.
Copy and paste Paper 1 Into Selection.
Deselect.
Delete the template layer.

Highlight Blue Glitter Bar.
In your color pallet change the Foreground color to #6f3027.
Make your Target Tool active and change the color of the glitter bar.

Highlight Black Rectangle layer.
Click on it with your Magic Wand.
New Raster layer.
Copy and paste paper 5 Into Selection.
Deselect.
Delete the template layer.
Give it a slight Inner Bevel:


Make a new canvas - any size.
Flood fill with your foreground color.
Copy.
Close this canvas out as you won’t be needing it any more.

Highlight Dotted Line layer.
Click anywhere outside of it with your Magic Wand.
Selections/Invert
New Raster layer.
Paste Into Selection - you should now have your foreground color in the dots.
Deselect.
Delete the template layer.

Highlight Pink Bar layer.
Click on it with your Magic Wand.
New Raster layer.
Copy and paste Paper 6 Into Selection.
Give it the same noise effect.
Deselect.
Delete the template layer.

Highlight Photos layer.
Use your Magic Wand and click on each Black square.
Copy and paste Paper 2 Into Selection.

We’re going to add the elements to each square starting with the far left one.
Open up Ele 17
Shift + D.
Close out the original.
Mirror
Add your drop shadow to it.
Copy
Paste on your working canvas.
Resize 35%
Move into position - Don’t worry about what overhangs.
Open up Ele19
Shift + D.
Close out the original.
Give it a drop shadow.
Copy
Paste on your working canvas position it behind the elf hat - see my tag for reference.
Resize 40%
Make your Eraser Tool active and erase everything you don’t want overhanging the picture square.
You’ll see a bit of the gingerbread man in the middle frame.  So you can erase that go to Selections/Invert.  Erase the gingerbread that’s in the middle frame being careful not to erase any of him from the left frame.
Selections/Invert
Time to move onto the middle frame.

Open up Ele5.
Shift + D.
Close out the original.
Give it a drop shadow.
Copy
Paste on your working canvas.
Resize 40%
Position in the middle frame - see my tag for reference.
Open up Ele8.
Shift + D.
Close out the original.
Give it a drop shadow.
Copy
Paste on your working canvas.
Resize 25%
Move into position - see my tag for reference.
Make your Eraser Tool active and erase the parts of the element you don’t want to overhang the picture.
Selections/Invert
Erase any of the tree that overlaps the left picture frame.
Selections/Invert
Time to move onto the right frame.

Open up Ele20.
Shift + D.
Close out the original.
Give it a drop shadow.
Paste on your canvas.
Resize 50%
Move into position.
Use your Eraser Tool and erase the part of the elf you don’t want to overhang the frame.
Deselect.

Add your elements.  I used:
Ele24:  Resize 50%/Duplicate/Mirror
Ele18:  Resize 40%
Ele30:  Resize 25% and 80%/Duplicate/Mirror
Ele12:  Resize 60%
Ele6:  Resize 40%
Ele7:  Resize 35%

Color Pallet:
Foreground:  #000000
Background:  #eaf6f5
Stroke: 1
Using the Tooney Loons font type the words as you see on my tag - or use your own words.
Before rasterizing each word layer turn it this way or that so that the words slant the same as the boards on the sign.

Highlight your white canvas.
New Raster layer.
Select All.
Copy and paste Paper 5 Into Selection.
Deselect.
Apply the mask.
Resize 115%
Merge Group.

Add your copyrights.

Add your name.
I made each letter a different color.

Resize all layers 80%.

I hope you enjoyed this tutorial.
I’d love to see your results.
Email me!
Hugs,
Bev 
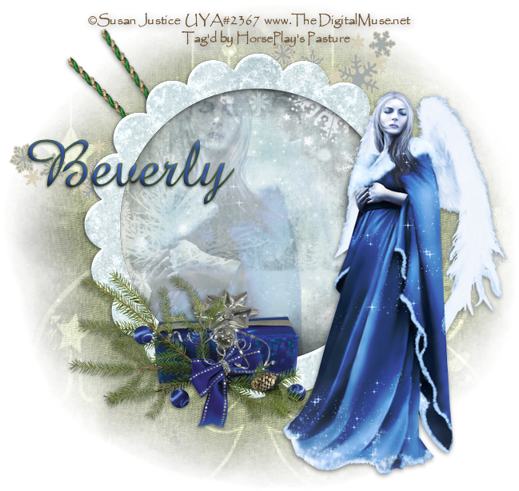
A Christmas Wish 4


Supplies

1 tube of choice - I used the beautiful artwork of Susan Justice which can be purchased from Up Your Art.  You must have a license to use.

Font of choice - I used Amaze Normal here

Monti Circular Mask here

“A Christmas Wish” is a tagger size scrap kit created by Melisa of Ms Witchy Poo Deisgns.  This portion is part of a huge mega collab to help a fellow designer in her time of need.  It  can be purchased from TKO Scraps.   You can visit Melisa’s blog here.
Thank you DeLoris for your terrific portion.

This tutorial was written assuming you have a working knowledge of PSP.

~♥~ Let’s get started ~♥~

Open up a 700 x 700 blank canvas.
Flood fill white.

Copy and paste ele1 as a new layer.
Click inside of it with your Magic Wand.
Selections/Modify/Expand by 4.
New Raster layer below the frame.
Copy and paste Paper 1 Into Selection.
Copy and paste your tube as a new layer below the frame.
Selections/Invert
Tap the delete key.
Deselect.
Change the Properties to Multiply and lower the Opacity to about 30.

Copy and paste your tube as a new layer.
Position outside of the frame.

Add your elements.  I used:
Ele13:  Resize 25%/Duplicate
Ele16:  Free rotate Right 45 degrees/Duplicate/Free rotate right 10 degrees

Crop your Image.

Highlight your white canvas.
New Raster layer.
Select All.
Copy and paste Paper 3 Into Selection.
Deselect.
Apply the mask.
Merge Group.

Add your copyrights.

Add your name:
Color Pallet -
Foreground: #466124
Background: #3c58a9
Stroke: 1.0
Give it a slight Inner Bevel:


Resize all layers 80%.

I hope you enjoyed this tutorial.
I’d love to see your results.
Email me!
Hugs,
Bev 
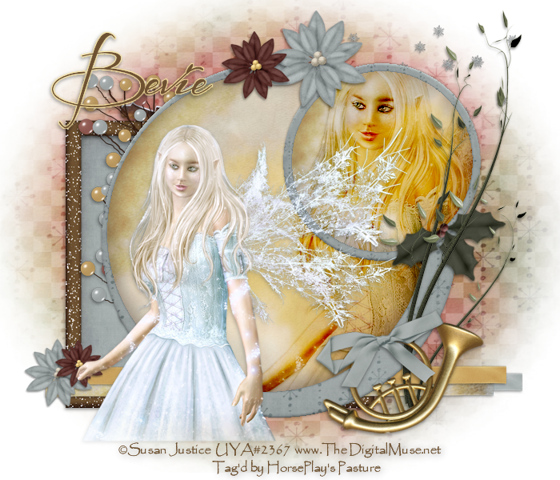
A Christmas Wish 3


Supplies

1 tube of choice - I used the beautiful artwork of Susan Justice which can be purchased from Up Your Art.  You must have a license to use.

Font of choice - I used Before the Rain here

Becky Mask 22 here

Toxic Desirez Template 114 here

Plug Ins:
Eyecandy 3.1 - Glow

“A Christmas Wish” is a tagger size scrap kit created by DeLoris of Del‘s PSP Emporium.  This portion is part of a huge mega collab to help a fellow designer in her time of need.  It  can be purchased from TKO Scraps.   You can visit DeLoris’ blog here.
Thank you DeLoris for your terrific portion.

This tutorial was written assuming you have a working knowledge of PSP.

~♥~ Let’s get started ~♥~

Open up the template.
Shift + D.
Close out the original.
Image/Canvas Size:
700 x 600
OK
Delete the top 2 layers, Thin Rectangle, and Rectangle.

Highlight Purple Circle layer.
Click on it with your Magic Wand.
New Raster layer.
Copy and paste Paper 3-8 Into Selection.
Deselect.
Delete the template layer.
Give it a slight Inner Bevel:


Highlight green Circle layer.
Repeat the above step.

Highlight Lrg White Circle layer.
Click on it with your Magic Wand.
New Raster layer.
Copy and paste Paper 1-3 Into Selection.
Deselect.
Delete the template layer.

Highlight Sm White Circle layer.
Repeat the above step.

Copy and paste your tube as a new layer - this tube you want to move into a position that looks good on both circles - See my tag for reference (it’s the tube that you can see through).
Once you have the tube in a position you like, duplicate.
Change the Properties to Burn.
In your layers pallet you want one tube just above the small round paper layer and the other just above the large round paper layer.

Highlight the small round paper layer.
Click anywhere outside of it with your Magic Wand.
Highlight the tube that’s just above the paper.
Tap the delete key.
Deselect.
Duplicate.

Highlight the large round paper layer.
Repeat the above step.

Copy and paste Frame 2 as a new layer.
Resize 70%
Move into position behind the large circle - see my tag for reference.
Click inside of it with your Magic Wand.
Selections/Modify/Expand by 4.
New Raster layer below the frame.
Copy and paste Paper 3-1 Into Selection.
Deselect.

Copy and paste your tube as a new layer.

Add your elements.  I used:
Holy 1:  Resize 40%/Flip/Free rotate Right 20 degrees
Greenery 1
Snowflake Scatter
Berries Spray
Ribbon 2, 5, and 7:  Resize 70%
French Horn 3:  Resize 70%
Poinsettia 2:  Resize 25%/Duplicate/Resize 70%
Poinsettia 1:  Resize 25% and 70%/Duplicate/Resize 70%

Highlight your white canvas.
New Raster layer.
Select All.
Copy and paste Paper 1-5 Into Selection.
Deselect.
Apply the mask.
Resize 120%
Merge Group.

Add your copyrights.

Add your name:
Color Pallet -
Foreground & Background:  #e7d196
Convert to Raster layer.
Apply Eyecandy 3.1 - Glow:
Width: 3
Opacity: 100
Opacity Drop off:  Medium
Color: #fae5a2
OK

Resize all layers 80%.

I hope you enjoyed this tutorial.
I’d love to see your results.
Email me!
Hugs,
Bev 
A Christmas Wish 2


Supplies

Font of choice - I used Kristen which came with my pc

Becky Mask 22 here

Plug Ins:
Mura Meister - Copies

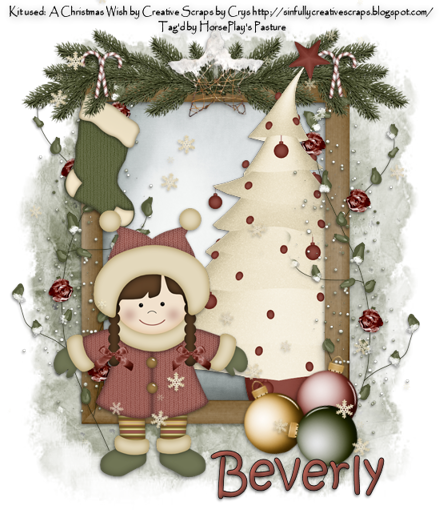
“A Christmas Wish” is a tagger size scrap kit created by Crystal of Creative Scraps by Crys.  This portion is part of a huge mega collab to help a fellow designer in her time of need.  It  can be purchased from TKO Scraps.   You can visit Crystals blog here.
Thank you Chris for your fantastic portion.

This tutorial was written assuming you have a working knowledge of PSP.

~♥~ Let’s get started ~♥~

Open up a 700 x 700 blank canvas.
Flood fill white.

Copy and paste Frame 2 as a new layer.
Resize 70%
Free rotate Left 90 degrees
Click inside of it your Magic Wand.
Selections/Modify/Expand by 4.
New Raster layer below the frame.
Copy and paste Paper 1 Into Selection.
Copy and paste 25 as a new layer below the frame.
Move into position.
Duplicate/Move this tree above the frame in your layers pallet.
Selections/Invert
Highlight the tree layer that’s below the frame.
Tap the delete key.
Deselect.
Highlight the tree that’s above the frame.
Use your Eraser Tool and erase the bottom and right side of the tree.

Add your elements.  I used:
35:  Resize 40%/Duplicate/Mirror
28:  Resize 25% and 50%/Free rotate Left 10 degrees/Duplicate/Mirror/Duplicate and mirror both candy canes.
15:  Resize 25%
1:  Duplicate/Mirror
36:  Resize 35%
13:  Resize 70%
24:  Resize 20%/Free rotate Right 15 degrees
23:  Resize 20%/Free rotate Left 25 degrees
22:  Resize 20%/Free rotate Left 80 degrees

Copy and paste 14 as a new layer.
Resize 25% and 50%
Apply Mura’s Meister - Copies:
Wallpaper (Perspective)
Use Default settings accept change Number to 30.
Ok.

Crop your image.

Highlight your white canvas.
New Raster layer.
Select All.
Copy and paste Paper 5 Into Selection.
Deselect.
Apply the mask.
Merge Group.

Add your copyrights.

Add your name.
Give it a slight Inner Bevel:


Resize all layers 80%.

I hope you enjoyed this tutorial.
I’d love to see your results.
Email me!
Hugs,
Bev 
A Christmas Wish 1


Supplies

Font of choice - I used Tooney Loons here

Becky Mask 9 here

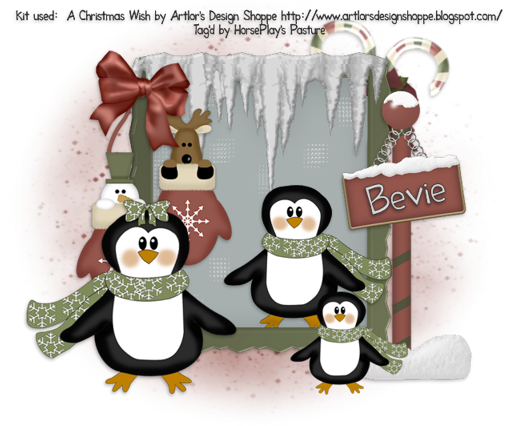
“A Christmas Wish” is a tagger size scrap kit created by Lorraine of Artlor’s Design Shoppe.  This portion is part of a huge mega collab to help a fellow designer in her time of need.  It  can be purchased from TKO Scraps.   You can visit Lorraine’s blog here.
Thank you Lorraine for you adorable portion.

This tutorial was written assuming you have a working knowledge of PSP.

~♥~ Let’s get started ~♥~

Open up a 700 x 700 blank canvas.
Flood fill white.

Copy and paste Frame 2 as a new layer.
Click inside of it your Magic Wand.
Selections/Modify/Expand by 4.
New Raster layer below the frame.
Copy and paste Paper 6 Into Selection.
Deselect.

Add your elements.  I used:
Sign Post:  Resize 80%
Mittens:  Resize 60%
Bow 2: Resize 35%
Candy Cane:  Resize 40%/Free rotate Right 25 degrees/Duplicate/Mirror/Free rotate Right 15 degrees
Penguin 1:  Resize 75%
Penguin 2:  Resize 60%/Mirror/Duplicate/Resize 70%

Crop your image.

Highlight your white canvas.
New Raster layer.
Select All.
Copy and paste Paper 3 Into Selection.
Deselect.
Apply the mask.
Use your Pick Tool to pull the sides out.
Merge Group.

Add your copyrights.

Add your name.
Before making it a raster layer turn it slightly and position over the sign.

Resize all layers 80%.

I hope you enjoyed this tutorial.
I’d love to see your results.
Email me!
Hugs,
Bev
 

Thursday, November 3, 2011

Winter Tenderness


Supplies

1 tube of choice - I used the beautiful artwork of Zindy S. D. Nielsen.  This is one of her free tubes and can be downloaded from her store Zindy Zone Shop.  Thank you so much Zindy!

Font of choice - I used Before the Rain here

Monti Circular Mask here

Snow which I supply here.  This is only to be used for this tutorial.  If you would like to use it for anything else please email and ask. 

Animation Shop

“Winter Tenderness” is a tagger size scrap kit created by Conchi of DNScraps and can be purchased from Twilight Scraps.  You can visit her blog here.
Thank you Conchi for a super beautiful winter kit.

This tutorial was written assuming you have a working knowledge of PSP.

~♥~ Let’s get started ~♥~

Open up a 700 x 700 blank canvas.
Flood fill white.

Copy and paste Framedn as a new layer.
Resize 70%
Click inside of it with your Magic Wand - be sure to click inside the gaps in the ribbon.
Selections/Modify/Expand by 2.
New Raster layer below the frame.
Copy and paste Paper 15 Into Selection.
Deselect.

We’re going to add the elements below the frame.  See my tag for placement.  Don’t worry about what overhangs the frame.  We’ll clean that up in a bit.
Treedn:  Resize 50%/Duplicate/Resize 70%/Duplicate/Resize 80%
Treedn again:  Resize 50% and 60%
Deer 2:  Resize 25%
Deer:  Resize 25% and 70%/Mirror

Highlight the paper layer.
Click anywhere outside of it with your Magic Wand.
Highlight each element that’s below the frame and tap the delete key.
Deselect.

Copy and paste Frame 2 as a new layer.
Resize 60%
Free rotate Left 80 degrees
Position behind the upper right of the frame - see my tag for reference.
Click inside of it with your Magic Wand - be sure to click inside the area of the ribbon also.
Selections/Modify/Expand by 2.
New Raster layer below the frame.
Copy and paste Paper 14 Into Selection.
Deselect.
Merge Visible the frame and paper.
Duplicate
Move lower so that it stick out just a little near the bottom of the round frame.

Copy and paste Balldn as a new layer.
Resize 70%
Use your Eraser Tool and erase the string.
Position behind the round frame at the bottom - see my tag for reference.
Duplicate/Flip/Position at the top of the frame.
Duplicate/Free rotate Right 90 degrees/Position at the left side of the frame.
Duplicate/Mirror/Position at the right side of the frame.

Add your elements.  I used:
Hearts:  Resize 35%
Leafdn:  Resize 40%/Free rotate Left 35 degrees/Duplicate/Mirror/Resize 70%/Duplicate original Leaf/Free rotate Right 35 degrees
Butterfly:  Resize 25%
Glittersdn:  Resize 85%/Free rotate Left 85 degrees/Duplicate/Mirror
Starsdn:  Resize 25% and 70%/Duplicate/Flip
Lights 3:  Resize 65%/Free rotate Left 20 degrees
Lights 3 again:  Resize 65%/Mirror/Flip

Copy and paste your tube as a new layer.

Highlight your white canvas.
New Raster layer.
Select All.
Copy and paste Paper 11 Into Selection.
Deselect.
Apply the mask.
Merge Group.
Duplicate

Add your copyrights.

Add your name.
Color Pallet:
Foreground: #404040
Background:  #bcc7dd
Stroke: .80
Type your name.
Give it a slight Inner Bevel:


Open up the snow that I provided.
Open up all layers.
Highlight Frame 1 layer.
Copy.

Highlight your working canvas.
Highlight the layer just below the frame.
Paste - your snow layer should appear just under the frame. 
Rename it S1 (short for Snow 1)
Don’t worry about what overhangs the frame.  We’ll clean that up in a bit.

Highlight the animated snow layers.
Highlight Frame 2.
Copy

Highlight your working canvas.
Paste
Rename S2.

Continue to copy and paste all 10 snow layers onto your working canvas.

Once you have all snow layers copied and renamed on your working canvas highlight the round paper layer.
Click anywhere outside of it with your Magic Wand.
Highlight each snow layer and tap the delete key.
Deselect.

Keep S1 layer open and close out all other snow layers.
Copy Merge.

Time to Animate:

Open up Animation Shop
Edit/Paste/As New Animation

Back in PSP.
Close out S1.
Open up S2.
Copy Merge

Back in AS.
Edit/Paste/After Current Frame.

Back in PSP.
Close out S2.
Open up S3.
Copy Merge

Back in AS.
Edit/Paste/After Current Frame.

Back in PSP.
Close out S3.
Open up S4.
Copy Merge

Back in AS.
Edit/Paste/After Current Frame.

Back in PSP.
Close out S4.
Open up S5.
Copy Merge

Back in AS.
Edit/Paste/After Current Frame.

Back in PSP.
Close out S5.
Open up S6.
Copy Merge

Back in AS.
Edit/Paste/After Current Frame.

Back in PSP.
Close out S6.
Open up S7.
Copy Merge

Back in AS.
Edit/Paste/After Current Frame.

Back in PSP.
Close out S7.
Open up S8.
Copy Merge

Back in AS.
Edit/Paste/After Current Frame.

Back in PSP.
Close out S8.
Open up S9.
Copy Merge

Back in AS.
Edit/Paste/After Current Frame.

Back in PSP.
Close out S9.
Open up S10.
Copy Merge

Back in AS.
Edit/Paste/After Current Frame.

Animation/Resize Animation:
Percentage of Original checked
Width x Height: 80
OK

View your animation.
If you’re happy with it then save.

I hope you enjoyed this tutorial.
I’d love to see your results.
Email me!
Hugs,
Bev