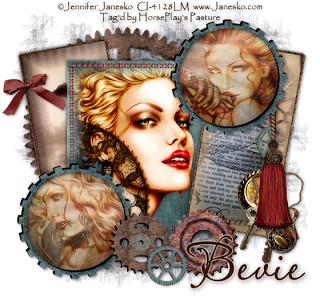
Friday, October 29, 2010

Steampunk


Clicking on the image will allow you to enlarge for bigger view.

Supplies

3 tubes of choice - I used the artwork of Jennifer Janesko at CILM
Font of Choice - I used LavishlyYoursROB
Scrap Rebellion Template 46 here
Weescotlass Mask 297 here
Eyecandy 4000 - Gradient Glow
“Steampunk” is a PTU full size scrap kit created by Lori of P4DSDesigns and can be purchased from Lollipops n Gumdrops. You can visit her blog here.
Thank you Lori for a really amazing kit!

This tutorial was written assuming you have a working knowledge of PSP.

~♥~ Let’s get started ~♥~

Open up the template.
Shift + D.
Close out the original.
Delete the top 3 layers and Frame layer.
Image/Canvas Size:
700 x 650
Open up the background layer and flood fill white.

Highlight Glitter Back 1 layer.
Click on it with your Magic Wand.
New Raster layer.
Copy and paste Paper 4 Into Selection.
Adjust/Add Remove Noise/Add Noise:
Uniform and Monochrome checked
Noise: 60%
OK
Deselect.
Delete the template layer.

Repeat the above step with Glitter Back 2 layer.

Highlight Black Rectangle layer.
Copy and paste Strip Paper as a new layer.
Resize 25% and 50%
Free rotate left 10 degrees.
Highlight Black Rectangle layer.
Click on it with your Magic Wand.
Position the paper over the rectangle so the inner top left corner matches up with the top left corner of the template layer.
Selection/Invert
Tap the delete key.
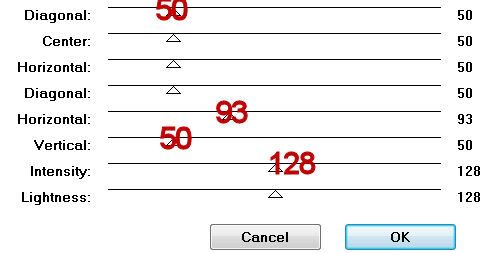
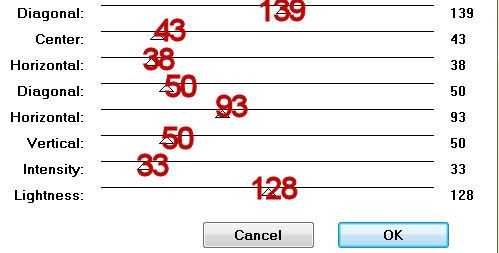
Make your Lighten/Darken tool active and just darken the right side of the paper:
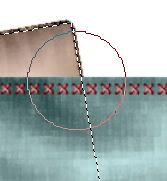
Deselect.
Delete the template layer.

Highlight Square layer.
Click on it with your Magic Wand.
New Raster layer.
Copy and paste Paper 6 Into Selection.
New Raster layer.
Copy and paste Stitching 1 Into Selection.
Copy and paste your tube as a new layer just below the stitching.
Move into position.
Selections/Modify/Feather:
Number of Pixels:
53
OK
Selections/Invert
Tap the delete key a couple of times to get a slight feathered look to the tube.
Deselect.

Highlight Black Rectangle 2 layer.
Copy and paste Drafting Paper as a new layer.
Resize 25% and 70%
Highlight Black Rectangle layer.
Click on it with your Magic Wand.
Move the drafting paper into position.
Selection/Invert
Tap the delete key.
Deselect for now.
Copy and paste Tale of Two Cities as a new layer just above the paper.
Resize 40%
Free rotate right 10 degrees.
Highlight the paper layer.
Click anywhere outside of it with your Magic Wand.
Highlight Tale of Two Cities layer.
Tap the delete key.
Deselect.
Delete the template layer.

Highlight Lower Circle layer.
Click on it with your Magic Wand.
New Raster layer.
Copy and paste Gear 7 Into Selection.
Deselect.
Delete the template layer.
Click inside with your Magic Wand.
Selections/Modify/Expand by 2.
New Raster layer below the gear.
Copy and paste Distressed Paper 2 Into Selection.
Copy and paste your tube as a new layer just above the paper.
Selections/Invert
Tap the delete key.
Deselect.
Change the Properties to Soft Light.

Highlight Upper Circle and repeat the above step using a different tube.

Add your embellishments. I used:
Bow 2: Resize 25% and 40%/Free rotate left 10 degrees
Tassel: Resize 25% and 60%
Keys: Resize 25% and 50%
Gear 3: Resize 25% and 30%
Gear 4: Resize 25% and 80%
Gear 6: Resize 25 and 50%
Gear 2: Resize 25%

Highlight your white background.
New Raster layer.
Select All.
Copy and paste Metal Background Paper Into Selection.
Deselect.
Apply the mask.
Merge Group.

Add your credits.

Add your name.
Apply Eyecandy 4000 - Gradient Glow:
Change Glow width: 3.00
Color: #eedcc9

Resize all layers 80%.

I hope you enjoyed this tutorial.
I’d love to see your results and show it off in my gallery.
Email me!
Hugs,
Bev

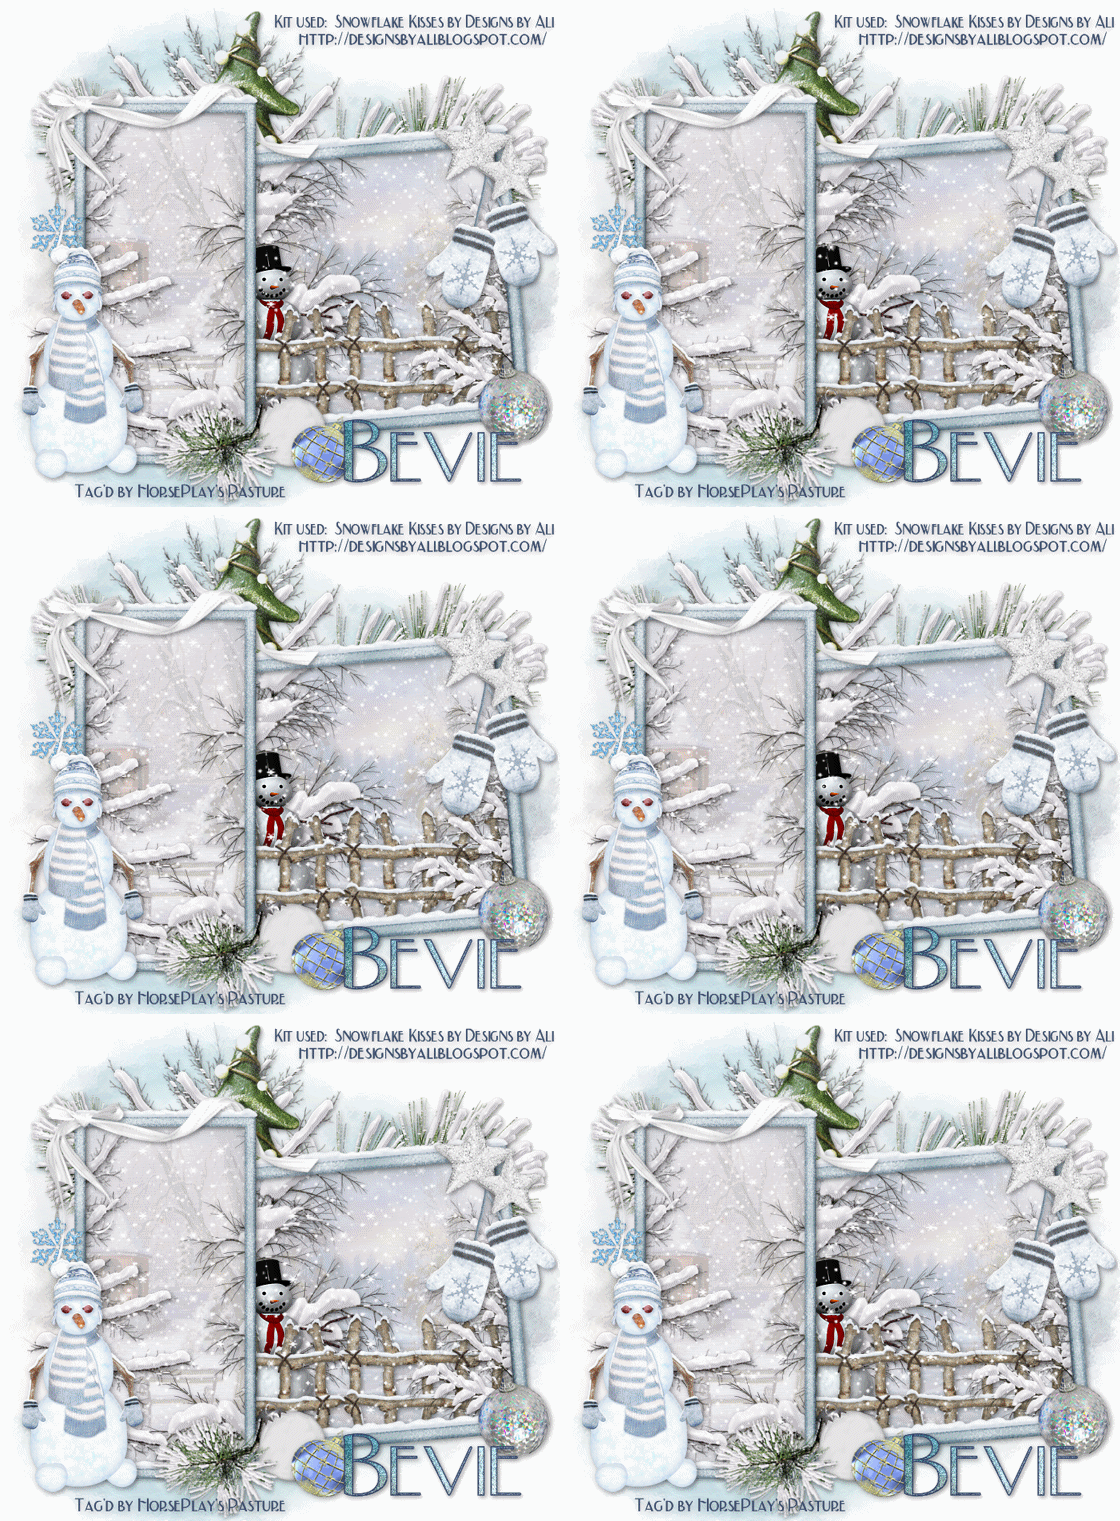
Snowflake Kisses


Supplies

Font of Choice - I used Nadall here
Vix Mask 452 here
Snow Animation here
“Snowflake Kisses” is a PTU tagger size scrap kit created by Ali of Designs by Ali and can be purchased from Scraps with Attitude. You can visit her blog here.
Thank you Ali for a breathtaking wintry kit!

This tutorial was written assuming you have a working knowledge of PSP.

~♥~ Let’s get started ~♥~

Open up a blank 700 x 700 canvas.
Flood fill white.

Copy and paste Frame 2 as a new layer.
Resize 50%
Free rotate left 5 degrees.

Copy and paste Frame 1 as a new layer.
Resize 70%

Move both frames into their exact positions.
See my tag for reference.

Highlight Frame 1 layer.
Click inside of it with your Magic Wand.
Copy and paste Paper 6 as a new layer below the frame.
Resize 55%
Move into position.
Selections/Invert
Tap the delete key.
Copy and paste Trees 4 as a new layer below the frame.
Resize 80% - move into position at the left side of the frame so the branch tips are showing - see my tag for reference.
Tap the delete key.
Copy and paste Trees 3 as a new layer below the frame.
Move into position at the right side of the frame so just the branch tips are showing - see my tag for reference.
Tap the delete key.
Deselect.

Open up the animated snow that I provided.
Highlight Frame 1.
Copy
Make your working canvas active.
In your layers pallet highlight the layer that’s just below Frame 1.
Paste - your snow layer should now be just below the frame.
Rename Snow 1
Make the animated snow layers active.
Highlight Frame 2.
Copy.
Make your working canvas active.
Paste - Rename Snow 2. This layer should be just above Snow 1 layer.

Repeat the above step until you have all 10 snow layers pasted beneath the frame.
Highlight the paper layer that belongs to Frame 1.
Click anywhere outside of it with your Magic Wand.
Highlight each of the snow layers and tap the delete key.
Deselect.
Close out all snow layers accept for Snow 1.

Highlight Frame 2 layer.
Click inside of it with your Magic Wand.
Copy and paste Paper 7 as a new layer just below the frame.
Resize 45%
Move into exact position.
Selections/Invert
Tap the delete key.
Copy and paste Trees 3 as a new layer.
Move it into position so the branch peek out from behind the other frame.
Tap the delete key.
Paste the tree again.
Resize 55% - move into position at the right side of the frame so that the branch tips can be seen - see my tag for reference.
Tap the delete key.
Copy and paste Snowman 1 as a new layer just below the frame.
Resize 25% - move into position where you like.
Copy and paste Fence 2 as a new layer just below the frame.
Resize 25%/Duplicate
Position both fence layers so that it looks to be one fence.
Highlight each fence layer and tap the delete key.
Deselect.

You need to apply the snowflake layers in the same manner as you did in Frame 1.
Refer back to the directions.

Add your embellishments. I used:
Mittens 1: Resize 25%
Ribbon 1: Resize 40%/Mirror/Free rotate Left 20 degrees
Silver Star 1: Resize 25% and 50%/Duplicate/Mirror/Resize 80%
Charm 2: Resize 30%
Bauble 3: Resize 25% and 70%/Free rotate left 30 degrees
Bauble 2: Resize 25%/Free rotate right 30 degrees
Bauble 1: Resize 25% and 80%/Mirror
Snow Covered Pine: Resize 25% and 70%/Mirror/Flip/Free rotate Right 40 degrees
Christmas Tree 1: Resize 40%
Trees 4: Resize 70%
Snow Covered Pine 2: Resize 50% (place behind the frame)/Duplicate/Mirror/Resize 50%

Highlight your white background.
New Raster layer.
Copy and paste Paper 16 Into Selection.
Deselect.
Apply the mask.
Merge Group.
Duplicate/Flip
Highlight the original mask.
Duplicate/Move to the right a bit.

Add your credits.

Add your name.

Resize all layers 80%.

Be sure you have both Snow 1 layers open. All other snow layers closed out.
Copy Merge.

~Time to Animate~

Open up Animation Shop
Edit/Paste/As New Animation

Go back into PSP.
Close out both Snow 1 layers.
Open up both Snow 2 layers.
Copy Merge.

Carry into AS
Edit/Paste/After Current Frame.

Back into PSP.
Close out both Snow 2 layers.
Open up both Snow 3 layers.
Copy Merge.

Carry into AS.
Edit/Paste/After Current Frame.

Continue copying the snow layers, carrying and pasting them into AS.
Once you’ve done this to all 10 snow layers view your image.
If you’re happy with it then save.

I hope you enjoyed this tutorial.
I’d love to see your results and show it off in my gallery.
Email me!
Hugs,
Bev
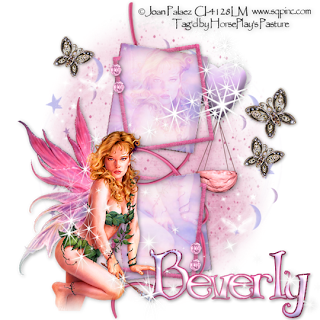
Thursday, October 28, 2010

Faries and Fantasies


Clicking on the image will allow you to enlarge for bigger view.

Supplies:

1 tube of choice - I used the artwork of Joan Paleaz at CILM
Font of Choice - I used Bibliotheque here
My Template 88 here
Becky Mask 9 here
“The Kingdom of Fairies and Fantasies” is a PTU tagger size scrap kit created by Conchi Dnscraps and can be purchased from Lollipops n Gumdrops. You can visit her blog here.
Thank you Conchi for such a magical kit!

This tutorial was written assuming you have a working knowledge of PSP.

~♥~ Let’s get started ~♥~

Open up the template.
Shift + D.
Close out the original.
Delete the top 3 layers and Wire layer.

Highlight Top Square layer.
Click on it with your Magic Wand.
New Raster layer.
Copy and paste Paper 2 Into Selection.
Deselect.
Delete the template layer.

Highlight Top Frame layer.
Click on it with your Magic Wand.
Copy and paste Paper 24 as a new layer.
Selection/Invert
Tap the delete key.
Deselect.
Delete the template layer.
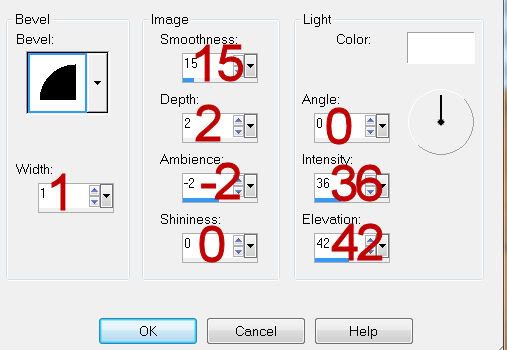
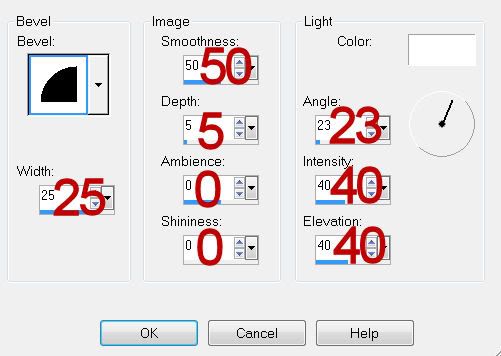
Give it a slight inner bevel:


Repeat the above 2 steps with Bottom Square and Bottom Frame layers.

Copy and paste your tube as a new layer.
Resize so it’s large enough to cover both the top and bottom squares.
Move it into exact position over the top square.
Duplicate - move this tube layer just above the bottom square in your layers pallet.

Highlight the top square paper.
Click anywhere outside of it with your Magic Wand.
Highlight the tube layer just above the paper.
Tap the delete key.
Deselect.

Repeat the above step with the bottom square and tube layer.

Copy and paste your tube as a new layer.
Position it wherever you like outside of the frames.

Because the element names are so long just look at the ends of the element names for the elements as they’re listed in this tutorial. Thanks…saves on a lot of typing on my end and reading on your end J

Copy and paste Rope as a new layer.
Resize 80%
Move into position so that it‘s above both of the frames in your layers pallet.
Duplicate - move it so that it’s below both of the squares in your layers pallet.
Highlight the rope above the frames and use your Eraser Tool to erase what you don’t want to be seen above the frames.

Normally I like to apply the mask last in my tutorials, but because some of the elements white we’ll go ahead and add the mask now:
Highlight your white background.
New Raster layer.
Select All.
Copy and paste a paper of choice Into Selection.
Deselect.
Apply the mask.
Merge Group.

Add your embellishments. I used:
ButterfliesPapallions: Resize 80%
Diamond: Resize 25% and 25%/Duplciate 3x’s
Balloon: Resize 35%
Butterflyes: Resize 25% and 50%/Duplciate/Resize 80%/Mirror/Duplicate
Magicc 2
Sparkles 2: Resize 80%

Add your credits.

Add your name.
Give it the same inner bevel.

Resize all layers 90%.

I hope you enjoyed this tutorial.
I’d love to see your results and show it off in my gallery.
Email me!
Hugs,
Bev
Monday, October 25, 2010

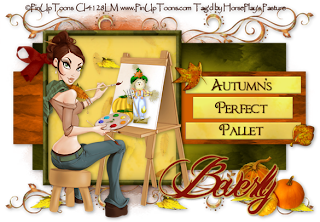
Autumn's Perfect Pallet


Clicking on the image will allow you to enlarge for bigger view.

Supplies

1 tube of choice - I used the artwork of PinUpToons at CILM
Font of Choice - I used Chocolate Box here and Billy Argel here
Essence of Creativity Twilight Template 3 here
Greg’s Factory Output Vol. II - Pool Shadow
Mura’s Meister - Copies
Eyecandy 4000 - Gradient Glow
Vix Mask 452 here
“Happy Autumn” is a PTU tagger size scrap kit created by Sweet Occasions Designs and can be purchased from Lollipops n Gumdrops. You can visit her blog here.
Thank you Karen for a very beautiful kit!

This tutorial was written assuming you have a working knowledge of PSP.

~♥~ Let’s get started ~♥~

Open up the template.
Shift + D.
Close out the original.
Delete the top 2 layers, Circle 1 & 2 layers.
Image/Canvas Size:
650 x 450
OK
If your background layer doesn‘t stay white then flood fill white.

Highlight Large Rectangle layer.
Click on it with your Magic Wand.
New Raster layer.
Copy and paste Paper 4 Into Selection.
Apply Greg’s Factory Output Vol. II - Pool Shadow:

Deselect.
Delete the template layer.

Highlight Rectangle 1 layer.
Click on it with your Magic Wand.
New Raster layer.
Copy and paste Paper 2 Into Selection.
Deselect.
Delete the template layer.

Highlight Slats layer.
Click on each one with your Magic Wand.
Copy and paste Paper 6 as a new layer.
Resize 50% - Move into position
Selections/Invert
Tap the delete key.
Deselect.
Delete the template layer.
Apply Greg's Factory Output Vol. II - Pool Shadow:


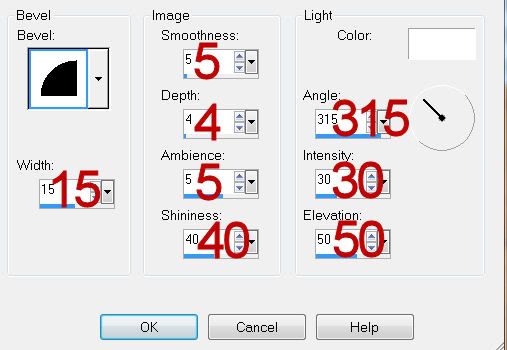
Give it a slight inner bevel:


Highlight Background layer (the square template layer)
Click on it with your Magic Wand.
Paste Paper 6 again.
Resize 50% - Move into position.
Selections/Invert
Tap the delete key.
Deselect.
Delete the template layer.

Highlight Frame layer.
Click on it with your Magic Wand.
New Raster layer.
Copy and paste Paper 4 Into Selection.
Deselect.
Delete the template layer.
Give it a slight inner bevel:


Copy and paste Leaf 3 as a new layer.
Resize 25% and 70%
Copy and paste Leaf 5 as a new layer.
25% and 70%
Position them with about ¾ of an inch between them and move one slightly higher than the other.
Merge down so both leaves are on the same layer.
Apply Mura’s Meister - Copies:
Wallpaper (prospective)
Default settings.
OK.
Move this into position just below the frame.
Highlight the paper just below and click anywhere outside of it with your Magic Wand.
Highlight the prospective layer.
Tap the delete key.
Deselect.

Using the Chocolate Box font - type out the words
Autumns Perfect Pallet
Each words goes on it’s own layer.
Position the words over the slats.

Copy and paste your tube as a new layer.
If you’re using the same tube I did then copy and paste Image 4 as a new layer.
Resize 25% and 50%
Move into position over the easel.
Lower the Opacity until you can see through it and see your tube just fine.
Use your Freehand Selection Tool and outline the area that covers up the scarecrow image.
Highlight the Scarecrow layer.
Tap the delete key.
Deselect.
Open up the Opacity to 100%.

Add your embellishments. I used:
Wishingonastarr007: Resize 25% and 70%
Leave 3 Scraps and Tubes: Resize 25%
Leave 5 Scraps and Tubes: Resize 25%
Bow 6: Resize 25%
Leaf 3 & 4: Resize 25% and 70%
Delicate Fall Ornament Scraps and Tubes: Resize 60%

Highlight your white background.
New Raster layer.
Select All.
Copy and paste a paper of choice Into Selection.
Deselect.
Apply the mask.
Merge Group.

Add your credits.

Add your name.
Apply eye candy 4000 Gradient Glow:
Change the glow width to 3.00
Change the color to the yellow of the square paper.

Resize all layers 90%.

I hope you enjoyed this tutorial.
I’d love to see your results and show it off in my gallery.
Email me!
Hugs,
Bev
Sunday, October 24, 2010

Achieve Believe Dream


Clicking on the image will allow you to enlarge for bigger view.

Supplies

1 tube of choice - I used the artwork of Barbara Jensen here
Font of Choice - I used Luna Bar here
My Template 35 here
Words which I’ve supplied here
“Hope” is a PTU tagger size scrap kit created by BabyV Dezign and can be purchased from Lollipops n Gumdrops. You can visit her blog here.
Thank you Valerie for such a beautiful kit created in support of such a worthy cause!

This tutorial was written assuming you have a working knowledge of PSP.

~♥~ Let’s get started ~♥~

Open up the template.
Shift + D.
Close out the original.
Delete the top 2 layers.
Flood fill white.

Copy and paste Frame as a new layer just above the Circle layer.
Resize 120%

Highlight Circle layer.
Click on it with your Magic Wand.
New Raster layer.
Copy and paste 4 Into Selection.
Selections/Modify/Feather:
Number of Pixels:
53
OK
Selections/Invert
Tap the delete key a couple of times.
Deselect.
Delete the template layer.

Highlight Right Rectangle layer.
Merge down.
Merge down again.
All 3 rectangles should be on the same layer.
Click on each one with your Magic Wand.
New Raster layer.
Copy and paste Paper 6 Into Selection.
Adjust/Add Remove Noise/Add Noise:
Monochrome and Gaussian checked
Noise: 50%
OK
Selections/Modify/Contract by 7
OK
Tap the delete key.
Selections/Modify/Expand by 2.
New Raster layer below the new frames you just created.
Flood fill with a gradient of your choice.
Deselect for now.

Copy and paste your tube as a new layer.
Duplicate
Resize a bit large.
Move the resized tube just below the frames.
Copy and paste stars and move behind the resized tube layer.
Highlight the gradient layer.
Click anywhere outside of it with your Magic Wand.
Highlight the resized tube layer.
Tap the delete key.
Highlight the star layer
Tap the delete key.
Deselect.
Change the Properties of the tube layer to Luminance.
Change the Properties of the Stars layer to Soft Light.

Add your embellishments. I used:
Ribbon: Resize 70%/Duplciate/Free rotate right 10 degrees/Duplicate/Mirror
Butterfly Pink: Resize 85%
Ele (wire with flowers)
Heartstone 1 & 2: Resize 25% and 80%
Words that I’ve supplied
Crop you image.

Add your credits.

Add your name.

I hope you enjoyed this tutorial.
I’d love to see your results and show it off in my gallery.
Email me!
Hugs,
Bev