Saturday, February 14, 2009

Small Packages

Photobucket
Supplies Needed

3 Tubes of choice – I'm using the artwork of Elias Chatzoudis
which you can purchase here
Font of choice - I'm using Gutenberg Nouveau here
RebelChick’s Template here
WSL Mask 254 here
Filters Unlimited 2.0 – optional
DSB Flux – Bright Noise (optional)
"Mom’s Inspiration" a PTU scrap kit by Alane’s Designs which can be found at Inspired to Dream Scraps.
Thank you so much Alane for another stunning kit!

This tutorial was written assuming you have knowledge of PSP.

~♥~ Let’s get started ~♥~

Open up the template. Shift + D. Close out the original.
Delete Raster’s 2 and 4.

Highlight the Bottom Circle layer.
Selections/Select All/Float/Defloat
Copy and paste a paper of choice. Selections/Invert. Hit the delete key. Copy and paste a tube of choice and position on the circle. Hit the delete key. Select none. You can change the properties if you like. I changed mine to Screen.

Highlight the Bottom Rectangle.
Selections/Select All/Float/Defloat
Copy and paste a paper of choice. Selections/Invert. Hit the delete key. Since I used the plain yellow paper, I then use Filter’s Unlimited on it. Paper’s Texture/Japanese Paper/Default settings.

Highlight the Top Rectangle.
Selections/Select All/Float/Defloat
Copy and paste a paper of choice. Selections/Invert. Hit the delete key.

Highlight the Left Rectangle.
Selections/Select All/Float/Defloat
Copy and paste a paper of choice. Selections/Invert. Hit the delete key. I applied Filter’s Unlimited just as I did for the large rectangle. Copy and paste a tube of choice as a new layer. Position. Hit the delete key.

Repeat the above step for the Right Rectangle, Top and Bottom Middle Rectangles.

Copy and paste Ribbon with Bow of choice as a new layer. Resize 15% and move into position near the bottom of the frame. I used my Deformation Tool to adjust the fitness just a tad more for my liking.

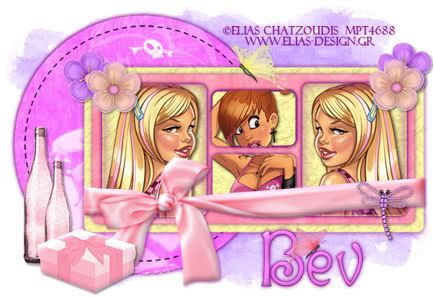
Copy and paste Pink Bottle as a new layer. Resize 15% and 50%. Duplicate. Resize 70%. Move into position. See my tag for reference. Apply DSB Flux/Bright Noise to both bottles with these settings:
Intensity 22
Mix
Ok

Copy and paste Gift Box of choice. Resize 15% and 30%. Move into position in front of the bottles. See my tag for reference.

Copy and Paste Flower 2 as a new layer. Resize 15% and 50%. Move near the top left corner of your rectangle. Duplicate/Mirror and position near the top right corner of the rectangle.

Repeat with Flower 1.

Copy and paste a butterfly of choice as a new layer. Resize 10% and move into position.

Copy and paste a Dragonfly of choice as a new layer. Resize 10%. Move into position.

Highlight your white canvas. New Rater Layer. Select All. Copy and paste a paper of choice into the selection. Deselect. Apply your mask. Merge Group.

Add your copyrights.

Add your name. I decorated mine with another butterfly.

I hope you enjoyed this tutorial.
I would love to see your results.
Email me!

Hugs,
Bev

Flutterby Moments

Photobucket
Supplies Needed

1 tube of choice –I'm using the artwork of Barbara Jensen
which you can purchase here
Font of choice - I'm using Bailey Script here
Filters Unlimited 2 (optional)
DSB Flux – Bright Noise (optional)
Mask of Choice. I used Weescotlass 84 – here
Word Art of Choice
"Butterfly Effect" PTU Scrap kit by Eclipse of which can be found at Pink Krush.
This kit is delicately beautiful. Thank you so much Eclipse!!

This tutorial was written assuming you have knowledge of PSP.

~♥~ Let’s get started ~♥~

Open a 600 X 600 transparent canvas. Flood fill white.

Copy and paste Frame 1 as a new layer. Free rotate left 90 degrees. Image/Mirror. Move to the left side of your canvas.

Use your Freehand Selection tool and outline the frame. Copy and paste a paper of choice as a new layer beneath the frame. Selections/Invert. Hit the delete key. If you’re going to use Filters Unlimited, go ahead and pick out a paper texture of choice and apply to this layer. For those who don’t have Filters Unlimited and you wish to give the paper a texture then go to Effects/Texture Effects and toy around with the many options there.

Copy and your tube as a new layer beneath the frame. Hit the delete key. Deselect. Change the properties to Luminance Legacy.

Copy and paste a Heart Brad of choice. Resize 30%. Duplicate. Free rotate one of them 15 degrees to the left. The other 15 degrees to the right. Position near the bottom right of your frame. See my tag for reference.

Copy and paste a Multi Bloom Flower of choice as a new layer. Image/Mirror. Resize 50% and move between heart brad layers. See my tag for reference.

Paste your Multi Bloom Flower as a new layer again. Resize 70%. Free rotate to the right 30 degrees. Position behind the top left corner of the frame. See my tag for reference. Once you’re happy with it, duplicate and move that layer in your layer pallet to the front of the frame. Use your selection tool to outline any parts of the flower bloom you don’t want to see in front of the frame then hit the delete button.

Copy and paste a butterfly of choice. Resize 30% and position where you like.

Highlight your white canvas. New Raster Layer. Select all. Copy and paste into selection a paper of choice. Deselect. Apply the mask. Merge Group.

Add any word art you might want to use.

Add your copyrights.

Add your name. Give it a bevel if you like and also add Bright Noise to it if you like as well.

Crop your image.

I hope you enjoyed this tutorial.
I would love to see your results.
Email me!

Hugs,
Bev

Tuesday, February 10, 2009

Pick of the Litter

Photobucket
Supplies Needed

4 - 5 Tubes of choice –I'm using the artwork of Keith Garvey
which you can purchase here
Font of choice - I'm using Aquarelle here
Mask of Choice. I used Becky Mask 22
DSB Flux (optional)
Animation Shop (optional)
"Hearts-N-Roses" FTU Scrap kit by RebelChick of which can be found here.
Please leave a Thank You when downloading. It's a small gesture for hard work given freely.
This kit is beautiful with rich colors and elements. Thank you so much RebelChick for another fabulous kit!!

This tutorial was written assuming you have knowledge of PSP.

~♥~ Let’s get started ~♥~

Open a 650 X 650 transparent canvas. Flood fill white.

Copy and paste as a new layer a Heart Frame of choice.
Use your magic wand and click inside of it. Selections/Modify by 4.

Copy and paste a paper of choice. Selections/Invert. Hit the delete key.

Copy and paste your tube a new layer beneath the heart frame layer. Hit the delete key. Change the Properties to Luminance Legacy (or another that you prefer). Close out your white canvas and merge visible. Open up your merged layer. Free Rotate right 25 degrees.

Copy and paste Heart 2 as a new layer. Resize 70%. Free rotate to the right 25 degrees. Position behind the merged heart.

Copy and paste Frame 2 as a new layer. Resize 70%. Use your Freehand Selection tool and outline the entire frame.

Copy and paste a paper of choice beneath the frame. Selections/Invert. Hit the delete key.

Copy and paste 3 tubes of choice as new layers beneath the frame layer and position each one. Highlighting each layer, hit the delete key on each. Close out the white canvas, merged heart layer, and Heart 2. Merge visible.

You should now have 4 layers:
Your white canvas
Merged heart layer
Heart 2
Frame layer.

It’s important to position everything where you want it now.
It will save you the headache of moving the rest of your layers later on should you find something isn’t where you like.

I used a 5th tube…peeking out from behind the heart. If you’re using one also, copy and paste as a new layer.

Copy and paste a bow of choice. Resize 40%. Free rotate right 20 degrees. Duplicate/Mirror.

Copy and paste Rose 2 as a new layer. Resize 40% and position at the bottom left corner of your frame. Duplicate/Mirror.

Copy and paste Rose Leaf as a new layer. Resize 25% and position beneath the rose. See my tag for reference. Duplicate/Mirror 3 more times and position all leaves.

Highlight your white canvas. New Raster Layer. Copy and paste a paper of choice Into Selection. Deselect. Apply your mask. Merge Group.

Highlight Frame 2 Layer and duplicate 2 times for a total of 3. Rename Frame 1, Frame 2, Frame 3. Close out Frame 2 & 3. Highlight Frame 1. Using your Freehand Selection tool, outline the white hearts then apply the Bright Noise:
Intensity: 33
Mix
Ok

Close out Frame 1 and highlight and open Frame 2. Apply Bright Noise but hit the mix button twice.

Close out Frame 2 and highlight and open Frame 3. Apply Bright Noice but hit the mix button three times. Close that layer out and re-open Frame 1.

Add your copyrights.

Add your name.

Time to animate!
Copy Merge and bring into Animation Shop. Edit/Paste/As New Animation. Go back into PSP. Close out Frame 1 and open Frame 2. Copy Merge. Carry into AS. Edit/Paste/After Current Frame. Go back into PSP. Close out Frame 2 and open Frame 3. Copy Merge and carry into AS. Edit/Paste/After Current Frame.

Watch your animation. If you’re happy then save and you’re done!

I Hope you enjoyed this tutorial.
I would love to see your results.
Email me!

Hugs,
Bev

Happiness is.....Kites & Flowers

Photobucket
Supplies Needed

3 tubes of choice – I'm using the artwork of Dean Yeagle
which you can purchase here
Font of choice - I'm using Flubber here
Mask of Choice – I’m using Becky Mask 22
DSB Flux – Bright Noise (Optional)
Animation Shop (optional)
"Happiness" PTU kit by Twinky Dezigns which can be found here.
This kit has the perfect name and was so much fun to use!
Thank you Twinky!

This tutorial was written assuming you have working knowledge of PSP.

~♥~ Let’s get started ~♥~

Open a 750 X 750 transparent canvas. Flood fill white.

Copy and paste Frame 1 as a new layer. Resize 70%. Duplicate 2 times for a total of 3. Close out the duplicate layers and highlight the original. Click inside with your magic wand. Selections/Modify/Expand by 4.

Copy and paste a paper of choice as a new layer. Selections/Invert. Hit the delete key.

Copy and paste you tube of choice. Hit the delete key. Close out the white canvas and the two duplicated frames. Merge visible. Re-open all layers.

Repeat the above steps with the other two frames. Once you’ve done that resize the two merged visible frames 65% and move into position. See my tag for reference.

Copy and paste a bow of choice. Resize 30%. Move into position. See my tag for reference.

Copy and paste flowers of choice. Move into position where you like.
If you intend to animate the flowers then merge visible the flower layers and duplicate 2 times for a total of 3. Rename the layers Flowers 1, Flowers 2, and Flowers 3. Close out layers 2 and 3. Highlight Flowers 1. Apply DSB Flux/Bright Noise
Intensity 33
Mix
Ok
Close out Flowers 1, open up Flowers 2. Apply Bright Noise to this layer accept hit the mix button twice. Close out Flowers 2, open up Flowers 3 and apply the Bright Noise accept hit the mix button 3 times. Close the layer out, re-open up Flowers 1.


Copy and paste a kite of choice as a new layer just above your white canvas layer. Move into position. You can also copy and paste the other kite it you choose. I did…hehehe

Copy and paste a butterfly of choice as a new layer. Resize 30%. Move into position where you like.

Highlight your white canvas. New Raster Layer. Select All. Copy and paste a paper of choice Into Selection. Deselect. Apply your mask. Merge Group.

Add your copyrights.

Add your name. If you do not want to animate your tag then resize all layers to a canvas size of your choice and save. If you want to animate your name then duplicate it 2 times for a total of 3. Rename the layers Name 1, Name 2, and Name 3. Close out layers 2 and 3. Apply the Bright Noise in the same manner as you did for the Flowers layers.

Onto the animation…we’re almost done!!

Copy Merged. Carry it into Animation Shop. Edit/Paste/As New Animation. Go back into PSP. Close out Flowers Layer 1 and open up Flowers Layer 2. Close out Name 1 and open up Name 2. Copy Merge. Carry into AS. Edit/Paste/After Current Frame. Go back into PSP. Close out Flowers Layer 2 and open up Flowers Layer 3. Close out Name 2 and open up Name 3. Copy Merge. Go back into PSP. Edit/Paste/After Current Frame. Watch your animated tag. If you like it then save.

I hope you enjoyed this tutorial.
I would really love to see your results.
Email me!!

Hugs,
Bev