Saturday, February 5, 2011

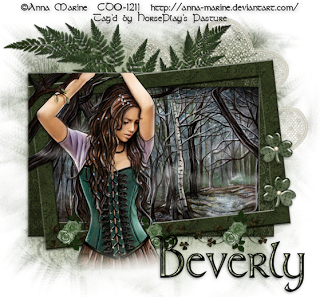
Wild Irish Rose


Clicking on the image will allow you to enlarge for bigger view.

Supplies

1 tube of choice and 1 image - I used the artwork of Anna Marine and can be purchased at CDO
Font of Choice - I used Stonehenge here
Weescotlass mask 249 here
“Wild Irish Rose” is a PTU scrap kit created by Kathi of Kissed by Cari and can be purchased from TKO Scraps. You can visit her blog here.
Kathi, thank you so very much for this extremely beautiful kit!

This tutorial was written assuming you have a working knowledge of PSP.

~♥~ Let’s get started ~♥~

Open up a 700 x 700 blank canvas.
Flood fill white.

Copy and paste Frame 1 as a new layer.
Resize 90%
Click inside of it with your Magic Wand.
Selections/Modify/Expand by 6.
Copy and paste your image below the frame.
Move into position
Selections/Invert
Tap the delete key.
Deselect.
***Tip: If you’re using the same image and tube as I did, I pasted my tube in front of the frame first, resized to my liking and moved into the exact position I wanted it. Then I pasted the image below the frame, resized it the same amount as I did the tube, and matched the tube and tube on the image up exactly.

Copy and paste your tube as a new layer in front of the frame.

Add your embellishments. I used:
Fern 2
Fern
Lace Mat 1
Border 1: Free rotate Right 90 degrees
Shamrock 1: Resize 25% and 60%

Crop your Image.

Highlight your white background.
New Raster layer.
Select All.
Copy and paste Paper 7 Into Selection.
Deselect.
Apply the Mask.
Merge Group.
Use your Pick Tool to pull the sides out a bit.

Add your credits.

Add your name.
Color pallet:
Foreground: Black
Background: Patten/Paper 7
Stroke: 2

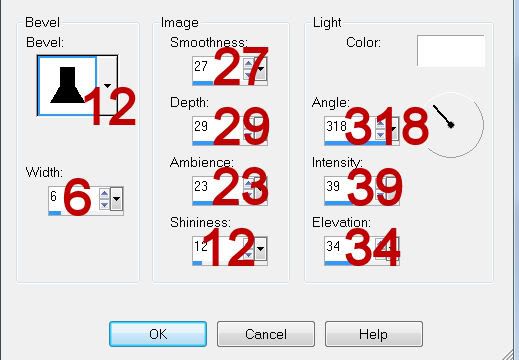
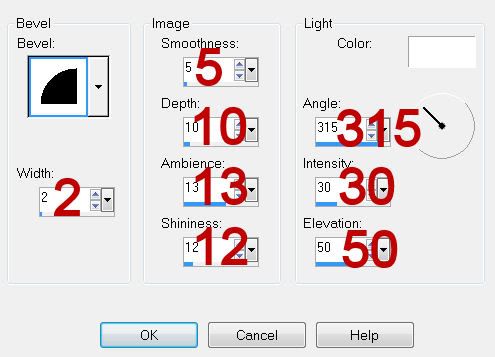
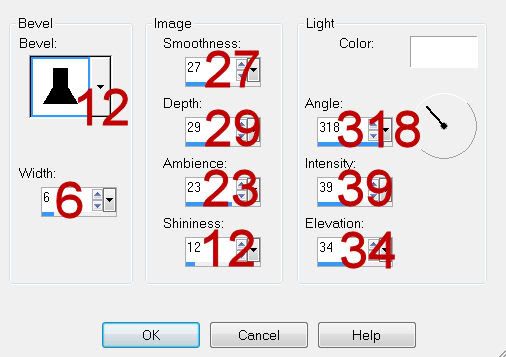
Give it a slight Inner Bevel:

Resize all layers 80%.

I hope you enjoyed this tutorial.
I’d love to see your results and show it off in my gallery.
Email me!
Hugs,
Bev

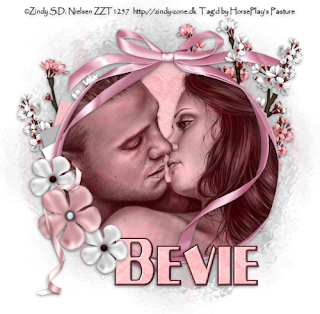
Friday, February 4, 2011

Love Letters


Clicking on the image will allow you to enlarge for bigger view.
Supplies

1 tube of choice - I used the artwork of Zindy S. D. Nielsen and can be purchased here
Font of Choice - I used Plug-NickelBlack here
My mask 32 here
Brush Strokes - Sprayed Strokes (optional)
“Cupids Love Letters” is a PTU scrap kit created by Geogirl Design and can be purchased from Butterfly Blush Designs. You can visit her blog here.
Thank you Geogirl for a very sweet kit!

This tutorial was written assuming you have a working knowledge of PSP.

~♥~ Let’s get started ~♥~

Open up a 700 x 700 blank canvas.
Flood fill white.

Copy and paste FramedRdRibn PK as a new layer.
Resize 85%
Click inside of it with your Magic Wand - be sure to click inside of all the little spaces, too.
Selections/Modify/Expand by 1.
New Raster layer below the frame.
Copy and paste Paper 9 Into Selection.
Copy and paste your tube as a new layer below the frame.
Selections/Invert
Tap the delete key.
Deselect.
Change the Properties to Luminance (Legacy)

Add your embellishments. I used:
Flower 3: Resize 40%
Flower 2: Resize 30%
RibbonCurlPk1: Resize 40%
FlowerCherryBlossomWht: Resize 60% - I erased the part that stuck up the highest/Duplicate/Mirror
FlowerCherryBlossomPk: Resize 60^ - I erased the part that stuck up the highest/Duplicate/Mirror
Love Letters: Resize 40%/Free rotate Right 30 degrees/Mirror

Highlight your white background.
New Raster layer.
Select All.
Copy and paste Paper 3 Into Selection.
Deselect.
Adjust/Blur/Gaussian blur:
Radius: 5
OK
Apply Brush Strokes - Sprayed Strokes:
Stroke Length: 12
Spray Radius: 13
OK
Apply the mask.
Merge Group.
Duplicate.
Merge Down.
Duplicate

Add your credits.

Add your name.
Give it a slight Inner Bevel:


Resize all layers 80%.

I hope you enjoyed this tutorial.
I’d love to see your results and show it off in my gallery.
Email me!
Hugs,
Bev


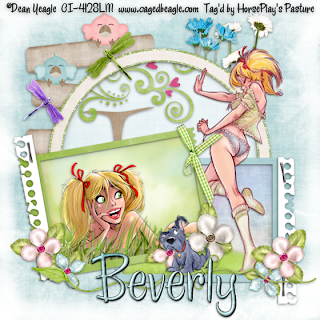
Tweet This


Clicking on the image will allow you to enlarge for bigger view.

Supplies

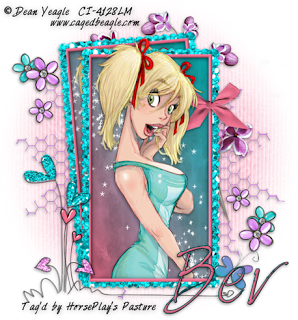
2 tubes of choice - I used the artwork of Dean Yeagle which can now be purchased at CDO
Font of Choice - I used Chicken Basket
Gem’s mask 166 here
“Tweet This” is a PTU scrap kit created by Diane of Candy’s Treats and can be purchased from Stargazer Scraps. You can visit her blog here.
Thank you Diane for such an insanely adorable kit!

This tutorial was written assuming you have a working knowledge of PSP.

~♥~ Let’s get started ~♥~

Open up a 700 x 700 blank canvas.
Flood fill white.

First we’re going to get all the frames on the canvas:
Copy and paste Circle 3 as a new layer.
Rename A
Copy and paste Frame 3 as a new layer.
Resize 70%
Free rotate Left 10 degrees
Rename B
Copy and paste Frame 4 as a new layer.
Resize 70%
Mirror
Rename C

Move all 3 frames into position - see my tag for reference.

Highlight Frame B.
Click inside of it with your Magic Wand.
Selections/Modify/Expand by 6
New Raster layer below the frame.
Copy and paste Paper 5 Into Selection.
Copy and paste your tube as a new layer above the paper.
Resize and move into position.
Selections/Invert
Tap the delete key.
Copy and paste Grass as a new layer just below the frame.
Resize 50% - move to the left of the frame.
Duplicate - move to the right of the frame.
Highlight each element layer and tap the delete key.
Deselect.

Highlight Frame C.
Click inside of it with your Magic Wand.
Selections/Modify/Expand by 6
New Raster layer below the frame.
Copy and paste Paper 5b Into Selection.
Copy and paste Grassy Knoll as a new layer below the frame.
Resize 60%
Move into position.
Selections/Invert
Tap the delete key.
Deselect.
Copy and paste your other tube as a new layer outside of the frame.

Highlight Frame A.
Click inside of it with your Magic Wand.
Selections/Modify/Expand by 6.
New Raster layer below the frame.
Copy and paste Paper 9 Into Selection.
Copy and paste Tree 3 as a new layer below the frame.
Move into position.
Selections/Invert
Tap the delete key.
Deselect.

Add your embellishments. I used:
Sign Post
Notepaper Scrap: Resize 40%/Free rotate Left 100 degrees
Notepaper Scrap again: Resize 40%/Free rotate right 90 degrees
Flower 4: Resize 50%/Free rotate Left 80 degrees
Flower 3: Resize 60%/Free rotate Left 90 degrees
Dragonfly 1: Resize 40%
Dragonfly 3: Resize 40%
Bow 5: Resize 40%
Leaves 2: Resize 35% /Duplicate/Resize 70%
Flower 3: Resize 35%
Flower 4: Resize 30%
Flower 4 again: Resize 35% and 70%
Flower 8: Resize 25%/Duplicate
String

Highlight your white background.
New Raster layer.
Select All.
Copy and paste Paper 16 Into Selection.
Deselect.
Apply the mask.
Merge Group.
Duplicate.

Add your credits.

Add your name.
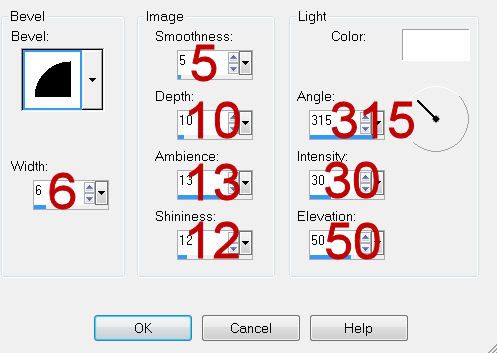
Give it a slight Inner Bevel:


Resize all layers 90%.

I hope you enjoyed this tutorial.
I’d love to see your results and show it off in my gallery.
Email me!
Hugs,
Bev
Thursday, February 3, 2011

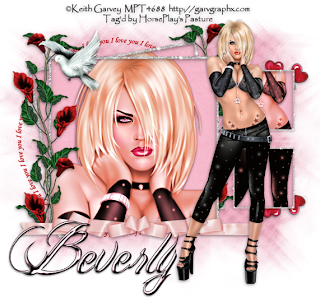
Who Needs Cupid?


Clicking on the image will allow you to enlarge for bigger view.

Supplies

1 tube of choice and 1 close up image - I used the artwork of Keith Garvey at MPT
Font of Choice - I Billy Argel here
Weescotlass mask 249 here
Brush Strokes - Sprayed Strokes - optional
“Val-Cupid-Angels” is a FTU scrap kit created by Allie of Designs by Allie and can be downloaded from her blog here. Please leave a thank you when downloading as it’s a small gesture for hard work given freely.
Thank you Allie for a super sweet kit!

This tutorial was written assuming you have a working knowledge of PSP.

~♥~ Let’s get started ~♥~

Open up a 700 x 700 blank canvas.
Flood fill white.

Copy and paste 2234 as a new layer.
Resize 70%
Paste the frame again.
Resize 25%
Duplicate/Merge Down
Duplicate

Move all 3 frame layers into position - see my tag for reference.
Highlight the large frame.
Use your Selection Tool set on rectangle and outline the frame.
New Raster layer below the frame.
Copy and paste Paper 11 Into Selection.
Copy and paste your close up image as a new layer below the frame.
Selections/Invert
Tap the delete key.
Deselect.
Change the Properties to Luminance.
Duplicate/Change the Properties to Lighten.

Close out the two small frame layers and your white background.
Merge Visible.
Reopen all layers.
Duplicate the merged layer.
Free rotate Left 10 degrees.
Move it below the merged layer.

Highlight the top small frame layer.
Use your Selection Tool and outline the frame.
New Raster layer below the frame.
Copy and paste Paper 11 Into Selection.
Deselect.

Highlight the bottom small frame layer.
Repeat the above step.

Copy and paste your tube as a new layer.
Move it into position where you want it.
Duplicate
Close out the original tube layer for now.
Move the duplicate tube layer into position below the top small frame.
Duplicate/Move this layer below the bottom small frame layer.
Highlight the paper layer below the tube.
Click anywhere outside of it with your Magic Wand.
Highlight the tube layer just above the paper.
Tap the delete key.
Deselect.

Highlight the paper layer that’s below the top small frame layer.
Click anywhere outside of it with your Magic Wand.
Highlight the tube layer just above the paper layer.
Tap the delete key.
Deselect.

To each of the tube layers:
Change the Properties to Luminance.
Duplicate/Change the Properties to Lighten.


Add your embellishments. I used:
Love Word Art
Flower 2: Resize 70%/Duplicate/Mirror
Ribbon 2: Resize 25% and 50%
Double Hearts
Dove: resize 25% and 70%

Crop your image but leave a bit of room at the top and bottom.

Highlight your white background.
New Raster layer.
Select All.
Copy and paste Paper 8 Into Selection.
Deselect.
Adjust/Blur/Gaussian Blur:
Radius: 5
OK
Apply Brush Strokes - Sprayed Strokes:
Stroke Length: 12
Spray Radius: 13
OK
Apply the mask.
Resize 110%
Use your Pick Tool to pull the sides out slightly.
Merge Group.

Add your credits.

Add your name.
Give it a slight Inner Bevel:


Resize all layers 90%.

I hope you enjoyed this tutorial.
I’d love to see your results and show it off in my gallery.
Email me!
Hugs,
Bev
Tuesday, February 1, 2011

Surprise!


Clicking on the image will allow you to enlarge for bigger view.

Supplies

1 tube of choice - I used the artwork of Dean Yeagle and can now be purchased from CDO
Font of Choice - I Harabarahand here
My mask 26 here
“I Made It!” is a FTU scrap kit created by Butterfly Kisses Scraps and can be downloaded from her blog here. Please leave a thank you when downloading as it’s a small gesture for hard work given freely.

This tutorial was written assuming you have a working knowledge of PSP.

~♥~ Let’s get started ~♥~

Open up a 700 x 700 blank canvas.
Flood fill white.

Copy and paste Frame 8 as a new layer.
Resize 80%
Click inside of it with your Magic Wand.
Selections/Modify/Expand by 6.
New Raster layer below the frame.
Copy and paste Paper 11 Into Selection.
Copy and paste your tube below the frame.
Selections/Invert
Tap the delete key.
Copy and paste Sparkle 1 as a new layer above the paper layer.
Tap the delete key.
Deselect.

Close out your white background layer.
Merge Visible.
Duplicate/Free rotate Left 5 degrees/Move below the original merged layer.
Reopen your white canvas.

Add your embellishments. I used:
Bow 3: Resize 30%
Flower Doodle: Resize 60%
Heart Flower 3: Resize 30%
Flower Stem
Butterfly Doodle 1: Resize 25%
Lil flower 2: Resize 60%
Lil Flower 1: Resize 80%/Duplicate/Resize 70%
Wire burst 1

Highlight your white background.
New Raster layer.
Select All.
Copy and paste Paper 15 Into Selection.
Deselect.
Apply the mask.
Merge Group.

Add your credits.

Add your name.

Resize all layers 80%.

I hope you enjoyed this tutorial.
I’d love to see your results and show it off in my gallery.
Email me!
Hugs,
Bev
Monday, January 31, 2011

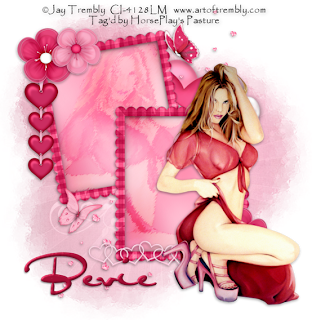
Even Now


Clicking on the image will allow you to enlarge for bigger view.

Supplies

1 tube of choice - I used the artwork of Jay Trembly at Up Your Art
Font of Choice - I used Al Sandra. I can no longer find a link for this font.
Vix Mask 452 here
Brush Strokes - Sprayed Strokes
“In Love Again” is PTU scrap kit created by Tina of Tina’s Magic Scrap World and can be purchased from Twilight Scraps. You can visit her blog here.
Thank you Tina for such a fantastic Valentine‘s kit!

This tutorial was written assuming you have a working knowledge of PSP.

~♥~ Let’s get started ~♥~

Open up a 700 x 700 blank canvas.
Flood fill white.

Copy and paste Scalloped Frame as a new layer.
Resize 60%
Free rotate Left 10 degrees.
Paste the frame as a new layer again.
Resize 60%
Move both frames into position - see my tag for reference.

Highlight the top frame.
Click inside of it with your Magic Wand.
Selections/Modify/Expand by 6.
New Raster layer below the frame.
Copy and paste Paper 22 Into Selection.
Deselect.

Repeat the above step with the other layer.

Copy and paste your tube as a new layer below the top frame.
Resize so it’s a bit large.
Duplicate/Move this tube layer below the bottom frame in your layers pallet.
Highlight the paper below the frame.
Click anywhere outside of it with your Magic Wand.
Highlight the tube layer.
Tap the delete key.
Highlight the other paper layer.
Click anywhere outside of it with your Magic Wand.
Highlight the tube layer just above the paper layer.
Tap the delete key.
Deselect.

To each tube layer apply Brush Strokes - Sprayed Strokes:
Use Default settings.

Copy and paste your tube as a new layer.
Move into position before both layers.

Add your embellishments. I used:
Heart Ribbon: Resize 50%
Organza Flower 1: Resize 35%
Organza Flower 2: Resize 30%
Hearts 5: Resize 70%/Free rotate Right 10 degrees
Hearts 7: Resize 70%
Butterfly 5: Resize 25%
Butterfly 4: Resize 25%
Hearts 4: Mirror

Highlight your white background.
New Raster layer.
Select All.
Copy and paste Paper 13 Into Selection.
Deselect.
Apply the mask.
Merge Group.

Add your credits.

Add your name.

Crop your image.
Resize all layers 85%.

I hope you enjoyed this tutorial.
I’d love to see your results and show it off in my gallery.
Email me!
Hugs,
Bev
Sunday, January 30, 2011

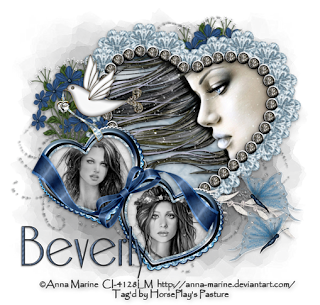
Secrets


Clicking on the image will allow you to enlarge for bigger view.

Supplies

3 tubes of choice - I used the artwork of Anna Marine at CDO
Font of Choice - I used Riesling here
My Mask 27 here
“Stargazng” is PTU scrap kit created by Angela of Bastelgalexy and can be purchased from Stargazer Scraps. You can visit her blog here.
Anglea, this kit is totally amazing! Thank you.

This tutorial was written assuming you have a working knowledge of PSP.

~♥~ Let’s get started ~♥~

Open up a 700 x 700 blank canvas.
Flood fill white.

Copy and paste Heart 04 as a new layer.
Free rotate right 5 degrees.
Click inside of it with your Magic Wand.
Selections/Modify/Expand by 6
New Raster layer below the frame.
Copy and paste Paper 12 Into Selection.
Copy and paste a tube below the frame.
Selections/Invert
Tap the delete key.
Deselect.

Close out your white canvas.
Merge Visible.
Reopen your white canvas.

Copy and paste Heart 05 as a new layer.
Click inside of each heart with your Magic Wand. Don’t forget the little gaps here and there near the ribbon and side.
Selections/Modify/Expand by 6.
New Raster layer below the frame.
Copy and paste Paper 9 Into Selection.
Deselect.

Copy and paste a tube as a new layer.
Position it below one of the hearts - it’s alright if some of the tube is seen on the other heart.
Highlight the paper layer.
Click anywhere outside of it with your Magic Wand.
Highlight the tube layer.
Tap the delete key.
Deselect.
Use your Eraser Tool to erase any of the tube that’s seen in the other heart.

Repeat the above step with the other heart using a different tube.

Close out your merged layer and your white canvas.
Merge visible.
Resize 85%
Reopen all layers.
You should now have 2 merged layers and your white canvas.
Move the merged layers into position - see my tag for reference.

Add your embellishments. I used:
Flower 8: Duplicate
Dove: Resize 70%
Butterfly 4: Resize 50%
Deco
Wingsdiamondsgold2: Move into position and erase what you don’t want seen. Duplicate as you like. I free rotated one of them Right 25 degrees.

Highlight your white background.
New Raster layer.
Select All.
Copy and paste Paper 7 Into Selection.
Deselect.
Apply the mask.
Merge Group.

Add your credits.

Add your name.

Resize all layers 80%.

I hope you enjoyed this tutorial.
I’d love to see your results and show it off in my gallery.
Email me!
Hugs,
Bev
Greet the Day


Clicking on the image will allow you to enlarge for bigger view.

Supplies

1 tube of choice - I used the artwork of Gennadiy Koufay. I am in the process of finding out where his artwork can be purchased. As soon as I find out I will let you know.
Font of Choice - I used Jellyka Castle’s Queen here
My Mask 22 here
Monti Circular Mask here
“It‘s Time 4 Love” is PTU scrap kit created by Wilma of Wilma4Ever and can be purchased from her store here. You can visit her blog here.
Thank you Wilma for a kit that screams beauty and femininity!

This tutorial was written assuming you have a working knowledge of PSP.

~♥~ Let’s get started ~♥~

Open up a 700 x 700 blank canvas.
Flood fill white.

Copy and paste EL 44 as a new layer.
Resize 85%
Free rotate right 5 degrees.
Click inside of it with your Magic Wand.
Selections/Modify/Expand by 6
New Raster layer below the frame.
Copy and paste Paper 7 Into Selection.
Deselect.

Copy and paste your tube as a new layer.

Add your embellishments. I used:
EL 35
EL40
EL45: Resize 70%/Duplicate
EL 13: Resize 50%/Duplicate/Mirror
EL14: Resize 50%/Duplicate/Mirror/Resize 70%
EL15: Resize 45%
EL: Duplicate/Mirror
EL52: Resize 40%/Duplicate/Free rotate Right 15 degrees/Apply Monti Circular mask to both EL layers.

Highlight your white background.
New Raster layer.
Select All.
Copy and paste Paper 11 Into Selection.
Deselect.
Apply the mask.
Merge Group.
Duplicate.

Add your credits.

Add your name.

Resize all layers 80%.

I hope you enjoyed this tutorial.
I’d love to see your results and show it off in my gallery.
Email me!
Hugs,
Bev
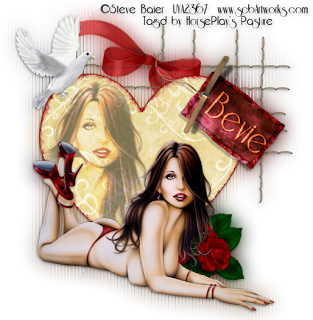
When You're In Love


Clicking on the image will allow you to enlarge for bigger view.

Supplies

1 tube of choice - I used the artwork of Steve Baier at Up Your Art
Font of Choice - I used Riesling here
Tramages - Tow the Line
“Colors of Love” is an AC Diva’s collaboration. This tutorial uses Julie of Bits N Bobs portion of it and can be purchased at Exquisite Scraps. You can visit Julie’s blog here.
Thank you Julie for such a beautiful as well as elegant kit.

This tutorial was written assuming you have a working knowledge of PSP.

~♥~ Let’s get started ~♥~

Open up a 700 x 700 blank canvas.
Flood fill white.

Copy and paste 43 as a new layer.
Resize 85%

Copy and paste your tube as a new layer.
Move into position before the heart.
Duplicate - Close out the original tube for now.
Move the duplicate into position over the left side of the heart - I resized my tube a little larger - see my tag for reference.
Highlight the heart layer.
Click anywhere outside of it with your Magic Wand.
Highlight the tube layer.
Tap the delete key.
Selections/Invert
Selections/Modify/Inside Outside Feather:
Both checked
Feather amount: 43
OK
Tap the delete key until you have the feathered look you want.
Deselect.
Change the Properties to Hard Light.
Lower the Opacity to about 46

Add your embellishments. I used:
31
44: resize 60%
42: Resize 70%/Mirror
1: Resize 60%/Flip

Close out your white background.
Merge Visible.
Duplicate
Highlight the merged layer.
Adjust/Blur/Gaussian Blur:
Radius: 20
OK
Apply Tramages - Tow the Line:
Use Default Settings

Add your credit.

Add your name.
Free rotate right 40 degrees.
Move into position over the red tag.
Change the Properties to Soft Light.
Duplicate/Change the Properties to Multiply.

Crop your Image.

I hope you enjoyed this tutorial.
I’d love to see your results and show it off in my gallery.
Email me!
Hugs,
Bev