

Supplies
1 tube of choice – I used the beautiful artwork of Paul Butvila which
can be purchased from Up Your Art. You must have
a license to use.
My Supplies here –
Elements & Papers
Plug Ins used:
DSB Flux – Bright Noise
This tutorial was written assuming you have a working knowledge of PSP.
~♥~ Let’s get started ~♥~
Open up the template.
Shift + D.
Close out the original.
Delete the credit layer.
Highlight Rec 1 layer.
Click on it with your Magic Wand.
New Raster layer.
Copy and paste Paper 1 Into Selection.
Deselect.
Delete the template layer.
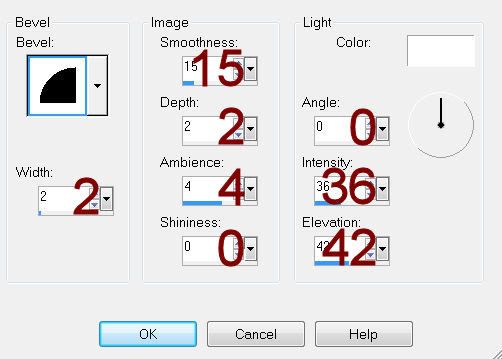
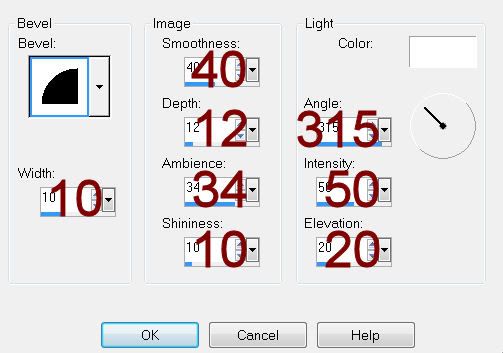
Give it a slight Inner Bevel:
Highlight Rec 2 layer.
Repeat the above step.
Color Pallet:
Foreground: #808080
Background: #861816
Highlight Rec 1 Dotted Corner layer.
Make your Color Replacer Tool active.
Hold it over the dotted line and double right click your mouse.
The line should now be red.
Highlight Rec 2 Dotted Corner layer.
Repeat the above step.
Open up the tube.
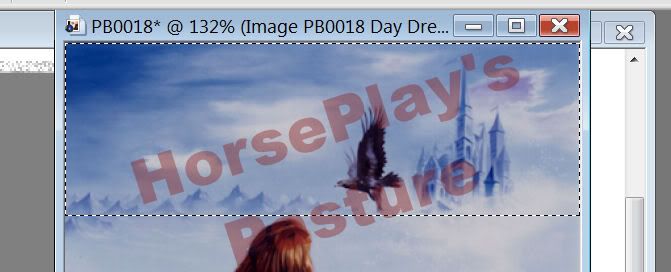
Highlight the very bottom layer- “Image PB0018 Day Dreamer”
Make your Selection Tool active set on Rectangle and section off the
top area of the image:
Copy.
Make your working canvas active.
Highlight Oval layer.
Click on it with your Magic Wand.
New Raster layer.
Paste Into Selection.
Deselect.
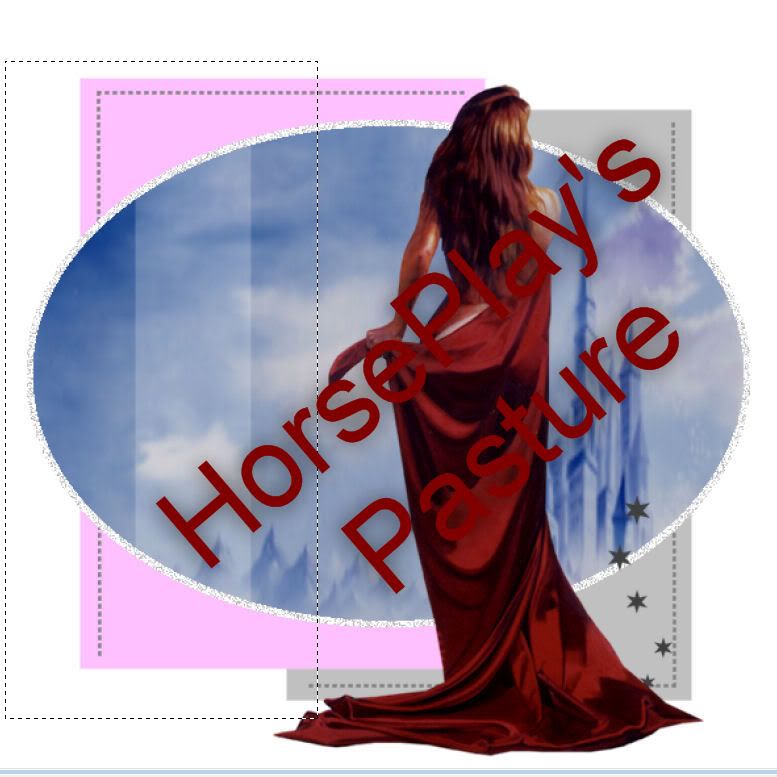
Copy and paste your tube as a new layer.
Move into position – see my tag for reference.
You want to place the tube so that it’s covering most of the disfigured
bird.
Using your Selection Tool, section off an area of the left side of the
oval:
Copy.
Deselect.
Paste as new layer.
Mirror.
Move this so that it matches exactly over the right side of the oval.
Pretty clever, huh? Lol
Highlight Strip layer.
Click anywhere outside of it with your Magic Wand.
Copy and paste your tube as a new layer over the strip.
Tap the delete key.
Deselect.
Color Pallet:
Change the foreground to #404040
Keep the background red.
Make your Color Replacer Tool active.
Highlight Stars layer and double right click over the stars.
They should now be red.
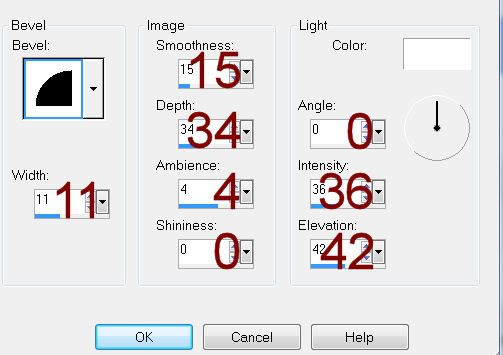
Give them a slight Inner Bevel:
Apply DSB Flux – Bright Noise:
Intensity: 55
Mix checked
OK
Add your elements. I used:
Add your elements. I used:
EL4: Duplicate
EL 3: Duplicate 3x’s
EL 2: Free rotate Right 10
degrees/Duplicate/Mirror/Flip
EL 5
EL 1
Highlight your white background.
New Raster layer.
Select All.
Copy and paste Paper 2 Into Selection.
Apply the mask.
Resize 110%
Use your Pick Tool to pull the sides out a little.
Merge Group.
Add your credits.
Add your name.
Foreground and Background: #861816
Stroke: 05
Type your name.
Apply a slight Inner Bevel:
Resize all layers 80%.
No comments:
Post a Comment