
 Clicking on the image will allow you to enlarge for bigger view.
Supplies
3 tubes of choice - I used the artwork of Dean Yeagle that can now be purchased at CDO
Font of Choice - I used Ayosmonika Bold here
Gem mask 127 here
“Love Birds” is a PTU tagger size scrap kit created by Jen of Sleek and Sassy Designz and can be purchased from her store Scrappin Dollar. You can visit her blog here.
Thank you Jenn for such an adorable kit that‘s totally packed with pretties!
This tutorial was written assuming you have a working knowledge of PSP.
~♥~ Let’s get started ~♥~
Open up a 700 x 700 blank canvas.
Flood fill white.
Copy and paste Triple Heart Frame as a new layer.
Resize 80%
Click inside of each heart with your Magic Wand.
Selections/Modify/Expand by 6.
New Raster layer below the frame.
Copy and paste Paper 18 Into Selection.
Copy and paste a tube below the frame and center it in the middle heart.
Selection/Invert
Tap the delete key.
Paste another tube as a new layer below the frame and move into position below the left heart.
Tap the delete key.
Deselect.
If any of the tubes are showing up in other hearts and you don’t want it there then highlight the tube and erase the portion that overlaps into another heart.
Close out your white canvas.
Merge Visible.
Reopen your white canvas.
Move the merged layer up just a little on your canvas.
Copy and paste Arrow as a new layer.
Move into position - see my tag for reference.
Copy and paste your tube as a new layer.
Position over the arrow.
Add your embellishments. I used:
Tree: Resize 70%/Duplicate/Mirror/Resize 70%
Pendant: Resize 40%
Bird: Resize 25% and 70%
Flower 4: Resize 25%/Duplicate/Resize 70%
Bird 6: Resize 25% and 70%
Crop your Image.
Highlight your white canvas.
New Raster layer.
Select All.
Copy and paste Paper 12 Into Selection.
Deselect.
Apply the mask.
Merge Group.
Add your copyrights.
Add your name
Foreground: #da7fb0
Background: #97e5e7
Stroke: 2
Type your name.
Convert to Raster layer.
Select All/Float/Defloat
Selections/Modify/Contract by 2
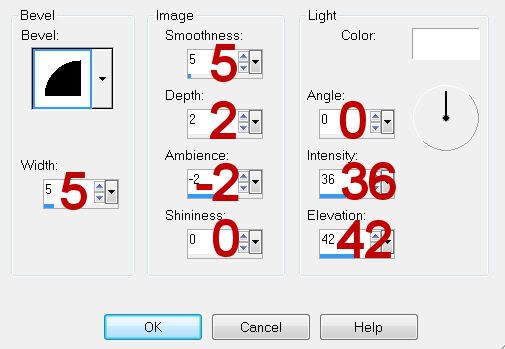
Apply a small Inner BeveL:
Adjust/Add Remove Noise/Add Noise:
Uniform checked
Noise: 35%
OK
Resize all layers 80%.
I hope you enjoyed this tutorial.
I’d love to see your results and show it off in my gallery.
Email me!
Hugs,
Bev
No comments:
Post a Comment