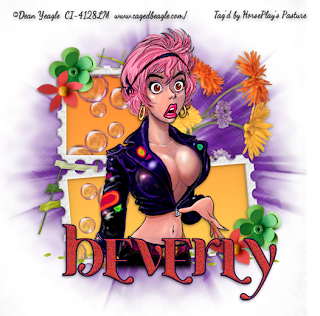
 Clicking on the image will allow you to enlarge for bigger view.
Supplies
1 tube of choice - I used the artwork of Dean Yeagle that can now be purchased at CDO
Font of Choice - I used Ayosmonika Bold here
Gem mask 71 here
Brush Strokes - Cross Hatch
“Splash of Colour” is a PTU scrap kit available in both full and tagger size created by Julie of Bits N Bobs and can be purchased from Exquisite Scraps. You can visit her blog here.
Thank you Julie for a really terrific and energetic kit!
This tutorial was written assuming you have a working knowledge of PSP.
~♥~ Let’s get started ~♥~
Open up a 700 x 700 blank canvas.
Flood fill white.
Copy and paste 46 as a new layer.
Resize 85%
Click inside of each square with your Magic Wand.
Selections/Modify/Expand by 4
New Raster layer below the frame.
Flood fill with a gradient of your choice.
Deselect.
Be sure the gradient layer is highlighted.
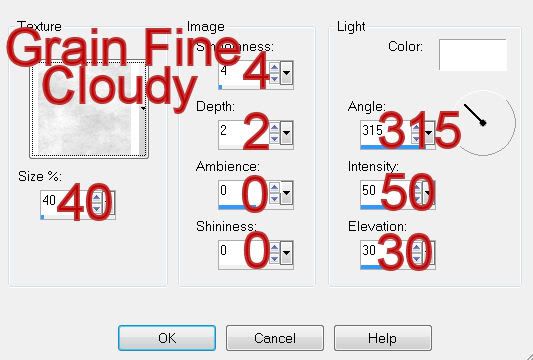
Effects/Texture Effects/Texture:

Copy and paste your tube as a new layer.
Position it before the frames.
Copy and paste 10 as a new layer above the gradient layer.
Move into position.
Highlight the gradient layer
Click anywhere outside of the gradient with your Magic Wand.
Highlight the bubbles layer.
Tap the delete key.
Deselect.
Add your embellishments. I used:
37
39
17: Resize 40%/Duplicate/Mirror
18: Resize 40%/Duplicate/Mirror
Highlight your white canvas.
New Raster layer.
Select All.
Copy and paste Paper 8 Into Selection.
Deselect.
Apply Brush Strokes - Cross Hatch:
Stroke Length: 29
Sharpness: 13
Strength: 2
OK
Apply the mask.
Merge Group.
Add your credits.
Add your name
Foreground: #bf3536
Background: #ea4845
Stroke: 2
Type your name.
Right click over your name (on the canvas)
Click on Properties.
Vector Property box will open.
Click on the color box of Stroke.
Change the color to #04001e
OK
Click OK on the Vector Property box.
In the layers pallet right click on your name.
Convert to Raster layer.
Select All/Float/Defloat
Selections/Modify/Contract by 2
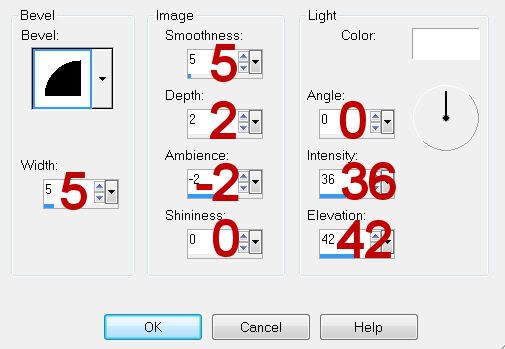
Apply a small Inner Bevel:

Adjust/Add Remove Noise/Add Noise:
Uniform checked
Noise: 35%
OK
Resize all layers 80%.
I hope you enjoyed this tutorial.
I’d love to see your results and show it off in my gallery.
Email me!
Hugs,
Bev

No comments:
Post a Comment