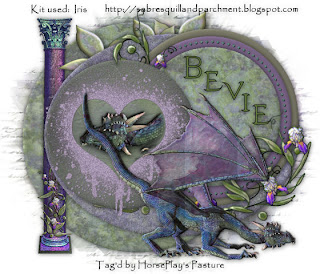
Clicking on the image will enlarge to full view.
Supplies
Font of choice - I used Evanescence Series - I'm sorry I can't find a link
Weescotlass Mask 236 here
Divine Intentionz Template 317 here
DSB Flux - Bright Noise - Optional
Xenofex 1.0 - Shower Door - Optional
“Iris” is a FTU scrap kit created by Sabre of Sabre’s Quill and Parchment and can be downloaded from here.
Please leave thank you when downloading as it‘s a small gesture for hard work given freely.
This tutorial was written assuming you have a working knowledge of PSP.
~♥~ Let’s get started ~♥~
Open up the template.
Shift + D
Close out the original.
Delete the Copyright and Word Art layers.
Image/Canvas Size
700 X 600
Flood fill the background layer white.
Highlight Circle 1 layer.
Use your Magic Wand and click on it.
New Raster layer.
Copy and paste a paper of choice Into Selection.
Deselect.
Delete the template layer.
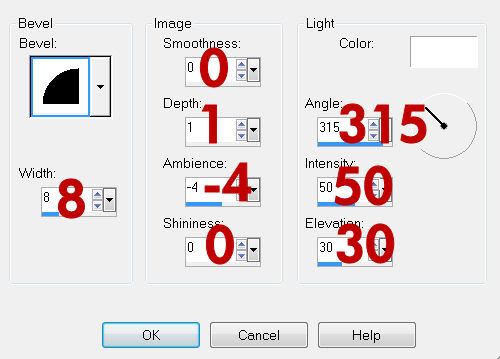
Give it a slight Inner Bevel:

Highlight the Oval layer.
Repeat the above step using a different paper.
Highlight Circle 2 layer.
Use your Magic Wand and click on it.
New Raster layer.
Flood fill with a plain color that will match the papers.
Deselect.
Delete the template layer.
Give it the same inner bevel.
Highlight Circle 3 layer.
Repeat the above step accept use a different color.
Highlight Raster 2 layer.
Select All/Float/Defloat
New Raster layer.
Flood fill with a color of choice.
Deselect.
Delete the template layer.
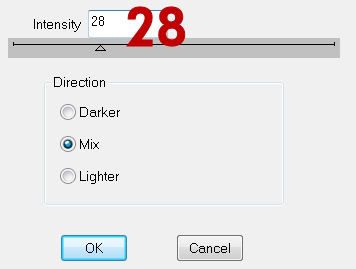
Apply DSB Flux - Bright Noise

Highlight Small Circle 1 layer.
Use your Magic Wand and click on it.
New Raster layer.
Copy and paste a paper of choice Into Selection.
Deselect.
Delete the template layer.
Give it the same slight Inner Bevel.
Highlight Small Circle 2 layer.
Repeat the above step.
Highlight Brush layer.
In your layers pallet change the foreground to a color you want the brush layer to be.
Using your Target Tool change the brush layer color.
Apply DSB Flux - Bright Noise:
Same settings.
Using your Freehand Selection tool outline the heart.
Copy and paste the Dragon as a new layer.
Resize 150%
Selections/Invert
Tap the delete key.
Selections/Modify/Feather
Number of Pixels:
23
OK
Tap the delete key a couple of times.
Deselect.
Change the Properties to Hard Light.
Copy and paste the Pillar as a new layer.
Resize 70%
Move into position over the Thin Rectangle template layer.
Delete the template layer.
Add your embellishments. I used:
Irish Swag: Resize 90%
Leaf 1: Resize 60% Duplciate/Mirror Duplicate/Resize 80%
Dragon
Highlight your white canvas.
New Raster layer.
Select All.
Copy and paste the Preview Paper Into Selection.
Deselect.
Apply Xenofex 1.0 - Shower Door:
Default Settings
If you didn’t use the filter then do this:
Adjust/Blur/Gaussian Blur:
Radius: 5
OK
Merge Group.
Add your copyrights.
Add your name.
Resize all layers 80%.
I hope you enjoyed this tutorial.
I’d love to see your results and show it off in my gallery.
Email me!
Hugs,
Bev

No comments:
Post a Comment