
 Clicking on the image will enlarge for bigger view.
Supplies
3 tubes of choice - I’m using the artwork of PinUpToons which you can purchase here
Font of Choice - I’m using Baby Kruffy here
Weescotlass Mask 219 here
My Template 35 here
Mura Meister - Copies
“Autumn’s Flame” is a PTU tagger size scrap kit created by Lynne of Baby Cakes Scraps and can be purchased at Exquisite Scraps.
Thank you Lynn for a most beautiful autumn kit!
This tutorial was written assuming you have a working knowledge of PSP.
~♥~ Let’s get started ~♥~
Open up the template.
Shift + D.
Close out the original.
Delete the credit layer.
Highlight the background layer.
Image/Canvas Size
700 X 700
Close out the Flowers layer.
Highlight Circle layer.
Select All/Float/Defloat
New Raster Layer.
Copy and paste a paper of choice Into Selection.
Deselect.
Delete the template layer.
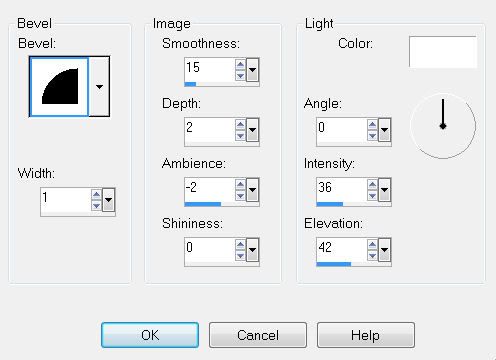
Give it a slight inner bevel:
Highlight Right Rectangle.
Merge down.
Merge down again.
All 3 rectangles should be on one layer now.
Use your Magic Wand and click on all three rectangles.
New Raster layer.
Copy and paste a paper of choice Into Selection.
Deselect.
Highlight the merged Rectangle template layer.
Use your Magic Wand and click inside the left rectangle.
Now highlight the paper rectangle layer.
Copy and paste your tube and position over the rectangle.
Selections/Invert
Tap the delete key.
Repeat the above step with the other remaining rectangles.
Once you’ve done that, delete the template layer.
Merge visible your tube layers and rectangles.
Give it the same inner bevel.
Copy and paste Daisy as a new layer.
Resize 50%
Apply Mura Meister Copies
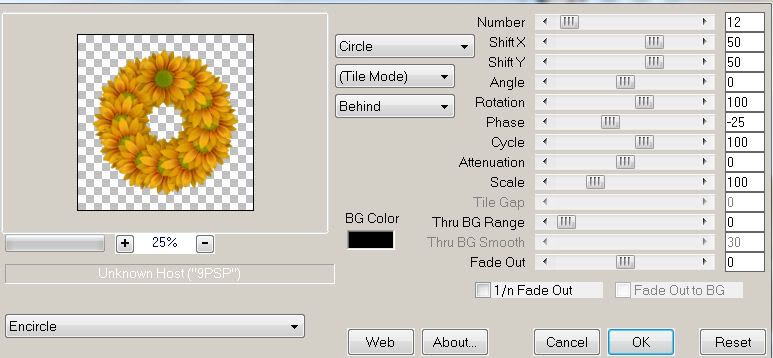
Move below the circle layer.
Copy and paste Sequins as a new layer.
Resize 25%
Line up along the top of the middle rectangle.
Erase any that overhangs on the sides.
Duplicate/Flip
Position it at the bottom of the rectangle.
Paste the sequins again.
Resize again.
Free rotate left 90%
Line it up against the side of the rectangle.
Erase any that overhangs.
Duplicate/Mirror
Position it at the right side of the rectangle.
Merge visible all sequins layers.
Duplicate.
Free rotate left 10 degrees
Position over the left rectangle.
Duplciate/Mirror
Position over the right rectangle.
Copy and paste Wrap 2 as a new layer.
Resize 25%
Free rotate left 100 degrees.
Position at the left rectangle.
Duplicate/Mirror/Flip
Free rotate right 20 degrees.
Position at the right rectangle.
Copy and paste Heart tag as a new layer.
Resize 20% and 60%
Free rotate left 20 degrees.
Open up the Flowers template layer.
Copy and paste Silk Bows of your choice as new layers.
Resize 25%
Position them over the template flowers.
I also used Silk Flower and resized 25% and 30%.
Delete the flower template layer.
Highlight your white background.
New Raster layer.
Copy and paste a paper of choice Into Selection.
Deselect.
Apply the mask.
Resize 110%
Merge Group.
New Raster layer.
Copy and paste a paper of choice Into Selection.
Deselect.
Apply the mask.
Resize 110%
Merge Group.
Add your copyrights.
Add your name.
Resize all layers 85%.
I hope you enjoyed this tutorial.
I’d love to see your results and show it off in my Show Arena.
Email me!
Hugs,
Bev
This is to tell you how uch I enjoy your tutorials. I find them quite creative and original. Except for the artwork, everything else needed to complete them are generally available easily.
ReplyDeleteI would really like you to describe in detail how you achieve the effects applied to your texts in your tutorials. That would save me a lot of trial and error time when I try to duplicate them!