Supplies Needed
1 tube of choice – I
used the wonderful artwork of Ellie Milk which can be purchased from PicsFor Design. You must generate a
license to use.
Font of choice – I
used SNF Party Script – a pay font
Plug Ins used:
Brush Strokes – Crosshatch and Sprayed Strokes
Video Rave – Tiled Glass
Xero - Porcelain
“Jersey Girl’s” are separate CU scrap kits from
the following designers; the papers are from Kara of SweetCravings Scraps, and the elements are from Jackie of Lagalerie de Jackie, and ZaZa of Scrap and Tubes. It is part of the TKO Collaboration (the CU
part) and can be purchased here. Thank you Kara, Jackie, and ZaZa for your
portion!
This tutorial was
written assuming you have working knowledge of PSP.
~♥~ Let’s get started ~♥~
Open up the template.
Shift + D.
Close out the original.
Delete the credit layer.
Image/Canvas Size:
650 x 525
OK
The background should automatically
turn white. If not, highlight the
background layer and flood fill white.
All papers in this tutorial come
from the folder “SCS_JerseyGirlsCollab” – from the tagger size folder.
Highlight Raster 1 layer.
Click on it with your Magic Wand.
New Raster layer.
Copy and paste Paper 7 Into
Selection.
Deselect.
Delete the template layer.
Apply Video Rave – Tiled Glass:
Use Default Settings.
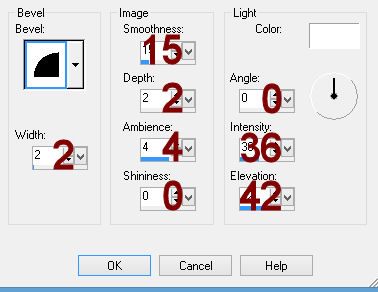
Give it a slight Inner Bevel:

Highlight Raster 2 layer.
Click on it with your Magic Wand.
New Raster layer.
Copy and paste Paper 5 Into
Selection.
Adjust/Add Remove Noise/Add Noise:
Gaussian and Monochrome checked
Noise: 30%
OK
Deselect.
Delete the template layer.
Give it the same slight Inner Bevel.
Highlight Copy (2) of Raster 3
layer.
Merge Down.
Merge Down.
All 3 squares should be on one
layer.
Click on each one with your Magic
Wand.
Selections/Modify/Expand by 5.
New Raster layer below the template
layer.
Copy and paste Paper 5 Into
Selection.
Give it the same slight Inner Bevel.
Selections/Modify/Contract by 5.
New Raster layer above the template
layer.
Copy and paste Paper 6 Into
Selection.
Apply Brush Strokes – Crosshatch:
Stroke: 9
Sharpness: 6
Strength: 1
OK
Copy and paste your tube as a new
layer over the paper layer.
Move into position
Selections/Invert
Tap the delete key.
Deselect.
Apply Xero – Porcelain to the tube
layer:
Use Default Settings.
Highlight Raster 4 layer.
Click on it with your Magic Wand.
New Raster layer.
Copy and paste Paper 4 Into
Selection.
Adjust/Add Remove Noise/Add Noise:
Gaussian and Monochrome checked
Noise: 30%
OK
Deselect.
Delete the template layer.
Give the paper the same slight Inner
Bevel.
Highlight Promoted Section layer.
Click anywhere outside of it with
your Magic Wand.
Selections/Invert
New Raster layer.
Copy and paste Paper 6 Into
Selection.
Apply Brush Strokes – Crosshatch –
Use default settings.
Deselect.
Delete the template layer.
Copy and paste your tube as a new
layer.
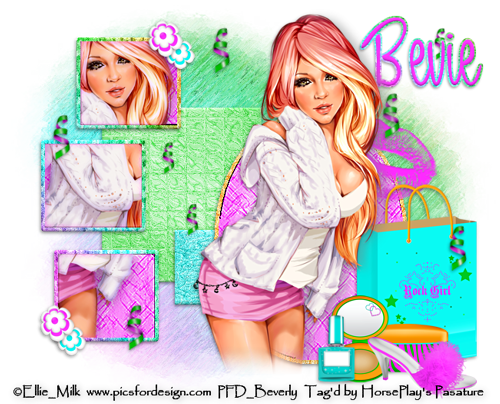
Position in front of the oval shapes
– see my tag for reference.
Add your elements. I used:
From the folder “GJ_CUTKOCollabJerseygirl”
1:
Resize 12%
10:
Resize 5% and 60%
11:
Resize 5% and 50%
15:
Resize 5% and 50%
18:
Resize 5% and 30%/Free rotate Right 75 degrees/Duplicate as many times
as you like. Duplicate a couple of them
and resize 70%
From the folder “ZaZa_Jersey
Girls_TKO Collab” from the tagger size folder:
10:
Resize 45%/Free rotate right 15 degrees
11:
Resize 50%/Mirror
8:
Resize 40%
9:
Resize 30%
Highlight your white background.
Select All.
Copy and paste Paper 3 Into
Selection.
Deselect.
Adjust/Blur/Gaussian Blur:
Radius: 4
OK
Apply the Brush Stroke – Sprayed
Strokes:
Use same Settings.
Apply the mask.
Merge Group.
Add your copyrights.
Add your name:
Color Pallet:
Foreground and Background: #f938fa
Stroke 1
Type your name.
Convert to Raster layer.
Select All/Float/Defloat
Selections/Modify/Expand by 2.
New Raster layer below the name.
Copy and paste Paper 3 Into
Selection.
Deselect.
Highlight the Pink name layer.
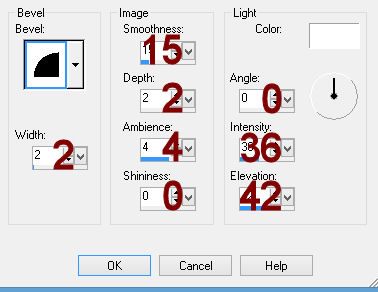
Give it a slight Inner Bevel:

Merge Visible both name layers.
Resize all layers 80%.
I’d love to see your results.
Hugs,
Bev

No comments:
Post a Comment